Team Render Server
General
The Team Render Server is similar to the previous NET Render.
- A remote web interface is used to set up render jobs (Scenes to be rendered) and upload them to the Team Render Server. The Team Render Server will then distribute these render jobs to the render clients, collect the results as they are finished and will make them available for download.
- The Team Render Server gives you feedback regarding the status of current renders (e.g., error messages, progress, etc.).
- Various users can be set up that have permission to upload render jobs. Users can change the priority of their own jobs and users with admin rights can change the priority of all render jobs.
How to render a Scene using the Team Render Server.
-
Start Team Render Server (when starting for the first time, you have to sign in to your Maxon user account or a license server; see also License Manager).
-
Double-click on the left column. Enter the IP number or Hostname of the respective render clients - the local server listed here is not a render client - that are already running (see also
 Add Machine...):
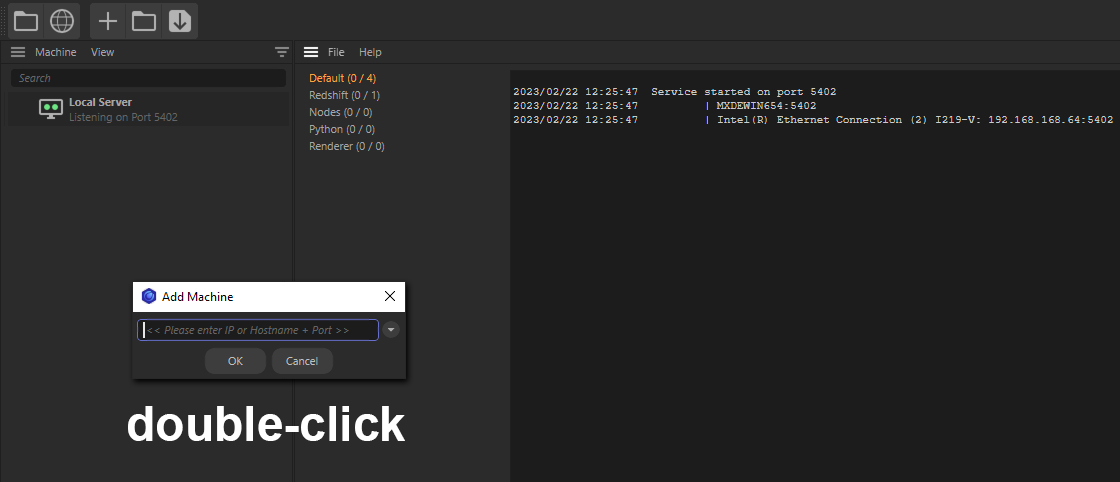
-
Confirm by clicking on OK and then enter the render client's or Cinema 4D instance's Security Token (from the Preferences menu's Render / Team Render menu) and pressing Enter to confirm. The default Security Token for each render client is 12345. The render client will be added to the list: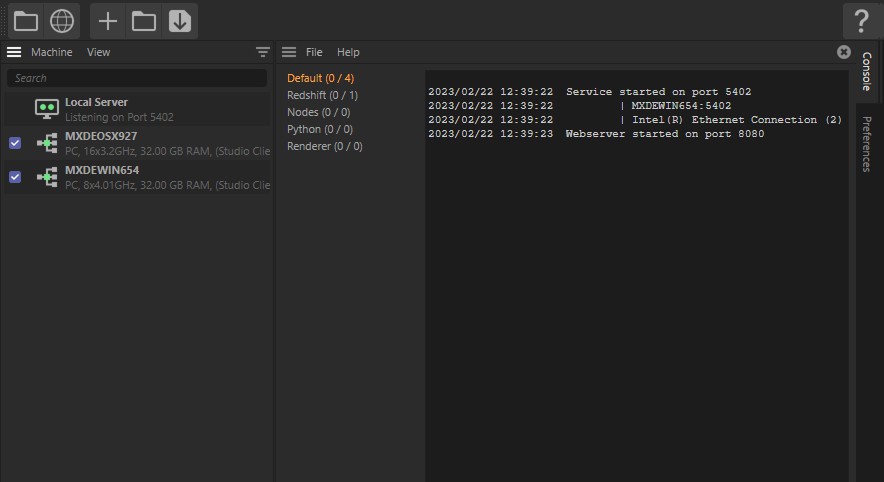
Repeat this process with all machines you want to include in the render process. -
Click on the globe icon at the top:
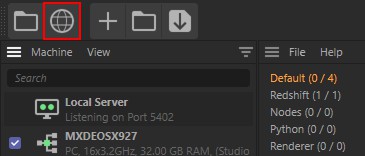
The Team Render Server browser interface will open.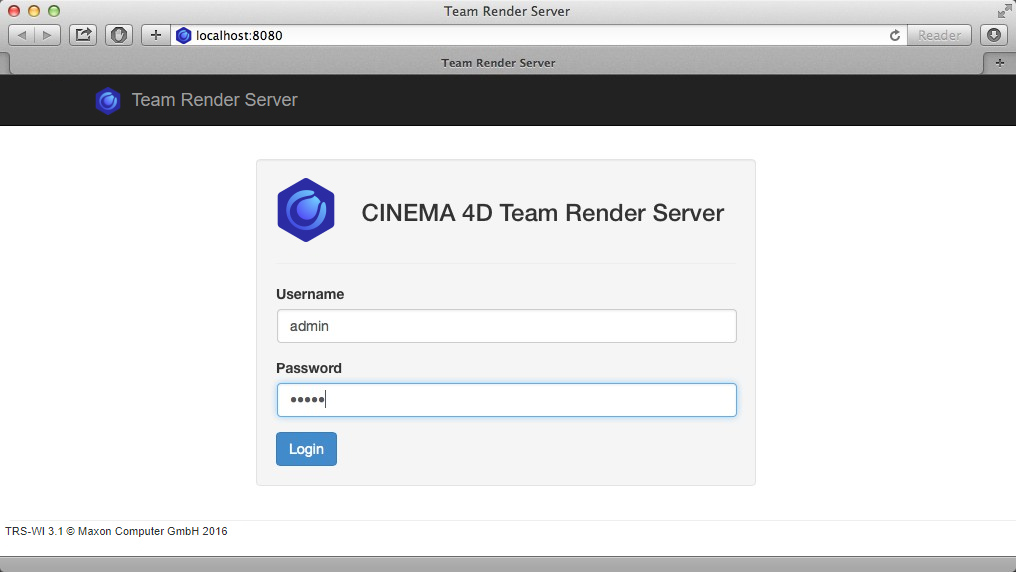
Enter admin for your Username and Password. -
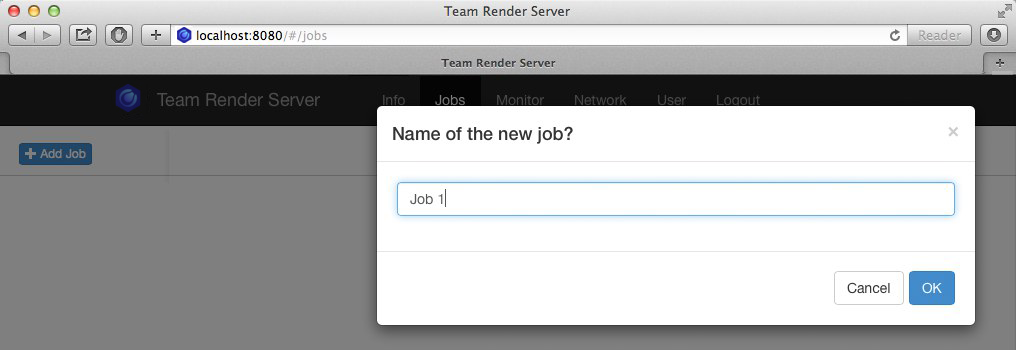
On the Jobs page, click on Add Job and enter a name for the job (the characters a-z, A-Z, 0-9 and spaces are allowed).
-
Click on the Add File … button and select the Scene file, including all its assets (textures, XRefs, etc.) that you want to render.
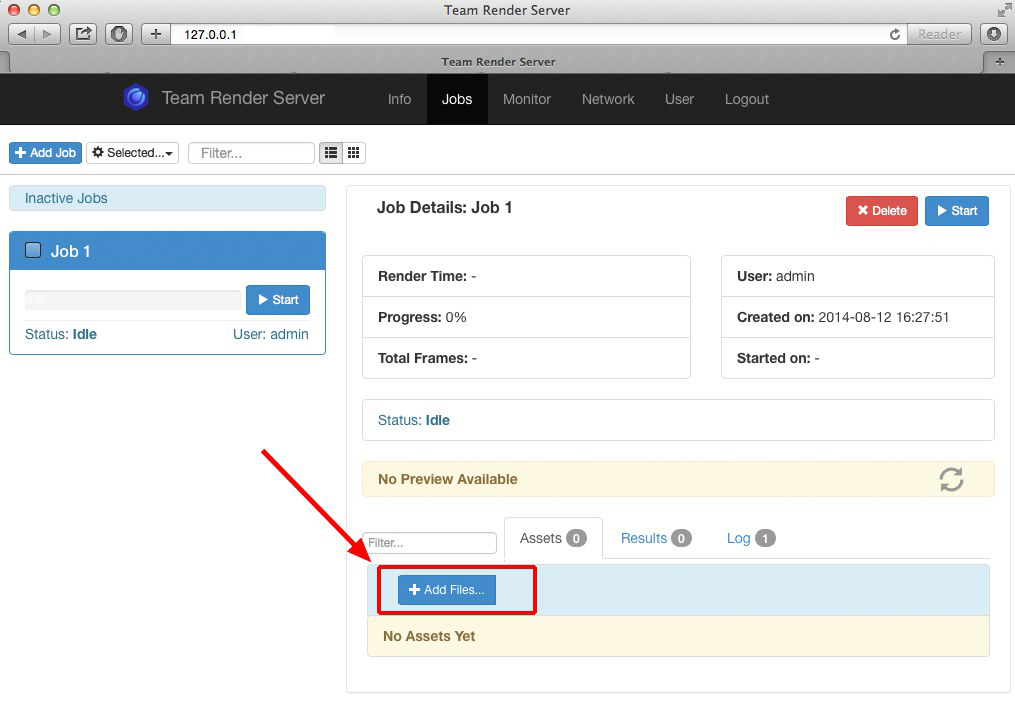
Alternatively, you can select a ZIP file (up to 4GB) that contains the Scene file, including all corresponding assets (the scene must first be saved using the Save Project with Assets... function and zipped). Click on the Upload button. The files that were uploaded to the Team Render Server will be displayed at the bottom of the window.
 -
Now you can start the render job by clicking on one of the Start buttons and clicking on OK to confirm.
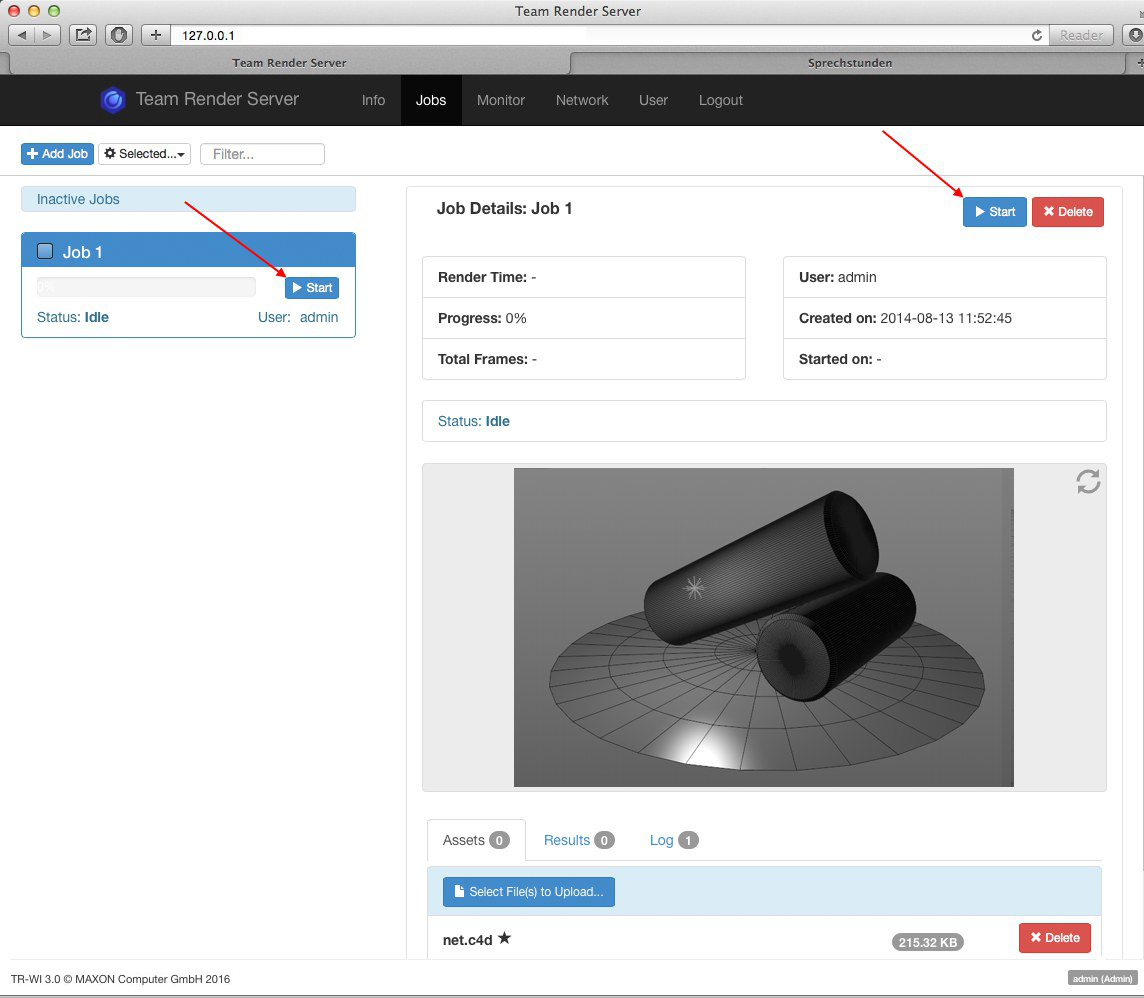
- After rendering has been completed, go to the Results tab where you can download the rendered images or videos (zipped together, if desired).

Click on the top-left icon. This opens a folder in the User directory in the Windows explorer / Mac finder. Copy the Scene folder into one of the Team Render Server user folders (an admin folder is always present; others must be added via the browser interface).
Note also the following in conjunction with this:
- Do not rename these Scene file folders (if they must be renamed, do so before copying them to the user folder).
- If you want to delete jobs via the browser interface, make sure that no job folders or files are open in other applications. This can lead to problems. In some cases it can help to simply log off and log back on.
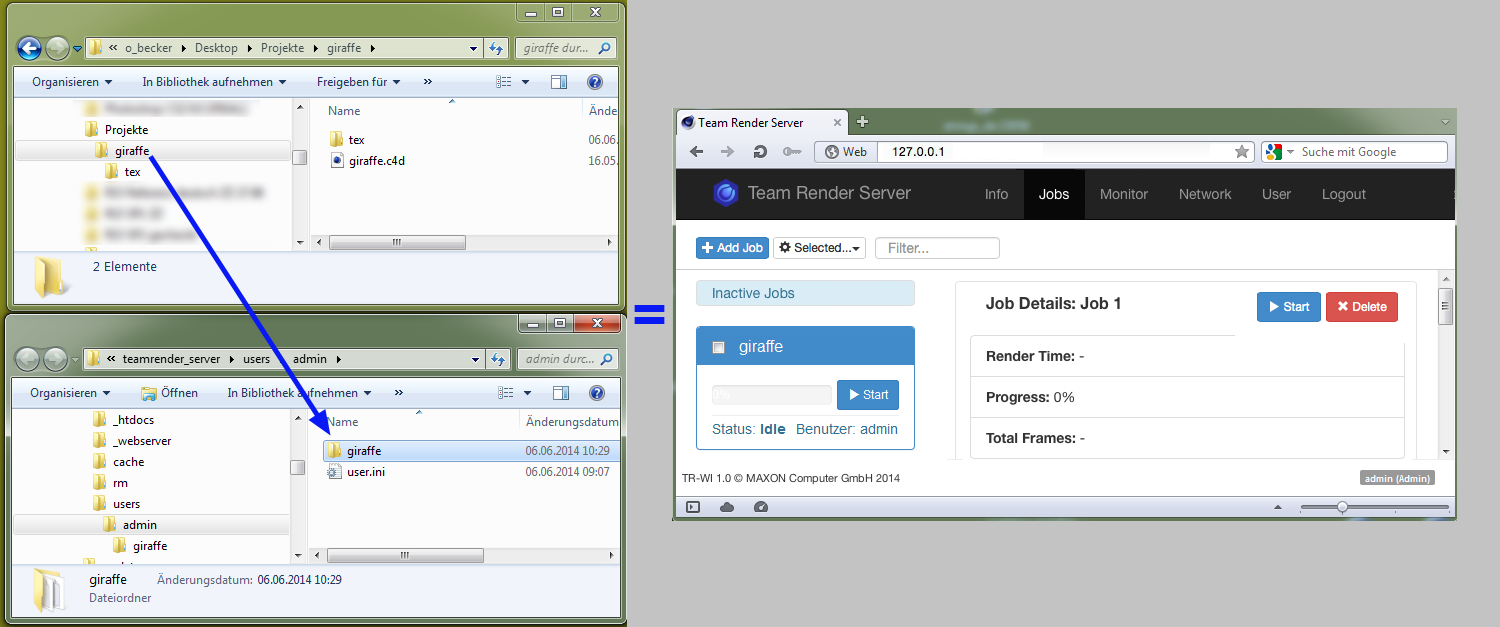
Team Render Server monitors these directories and will save jobs (named according to the Scene file folder) here.
After rendering has been successfully completed, the results will be saved to a folder named results in the respective job directory.
For Material Assets, please note this tip.
- For individual images (stills), the server will require about as much RAM as Cinema 4D would require when rendering to the Picture Viewer (depending on the Scene and render settings, this can exceed 16 GB).
- Great demands will also be placed on the CPU if very many render clients are connected to the server. The Team Render Server must process all incoming render results (in particular if these arrive in quick succession)
The Team Render Server window
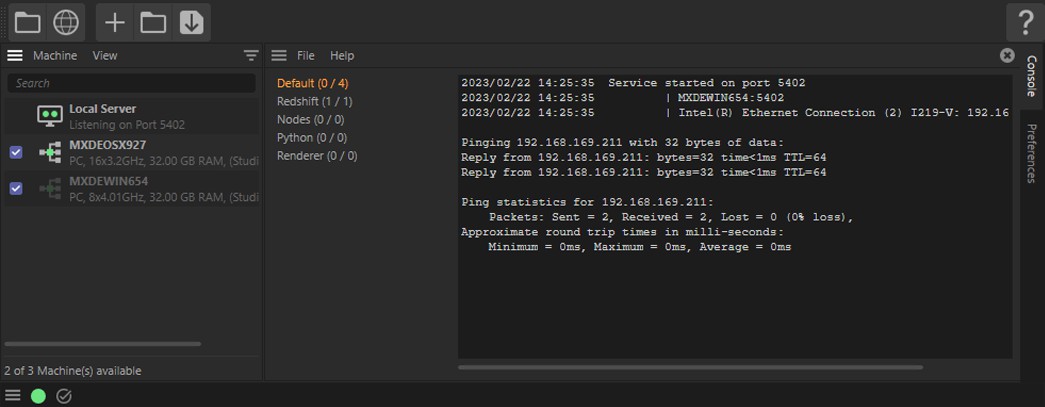
The Team Render Server consists of a list of render jobs (see also The Team Render Machine List), the console (see below) and a handful of settings/commands such as preferences, Bubble Help, updates, etc. These functions should already be familiar to you from Cinema 4D.
The Python field at the bottom of the window have no special Team Render function but are a general access point for the Python API (details regarding Python can be found at http://developers.maxon.net).
In the console, information will be displayed that is of little interest to you as a user. However, this information is very useful for localizing bugs. For example, information pertaining to the dynamic creation of the browser interface, time stamps for render jobs that were started, etc. will be displayed. This information will also be displayed in the logs in the Network / Local Server directory. Note that information will, for the most part, be in English (and in some cases in the language of the operating system you're running, e.g., for error messages).
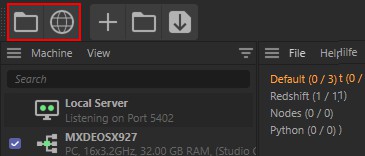
The icons at the top left of the window are specific to Team Render Server (the menu items should already be familiar to you, they are the ![]() Add Machine...,
Add Machine..., ![]() Load Machines... and
Load Machines... and ![]() Save Machines... commands):
Save Machines... commands):
Of the ,local server’ is displayed together with red dots, this is an indication that the web server is having problems getting started. Details can be found in the console.
Open Repository
Clicking on this icon will open a special user folder, in your system user folder (this path can be redirected via the local save path). In this folder (or to be more precise, in the Team Render Server user folder created by the browser interface) you can in turn copy other folders with Scene files and assets. This avoids having to upload and later download (the results) files via the browser interface (see also here).
The render process is started via the browser interface, which is opened using the command described below:
Open Web Interface
Clicking on this icon will open the browser interface in your system's default browser with which you can remotely control the Team Render Server.
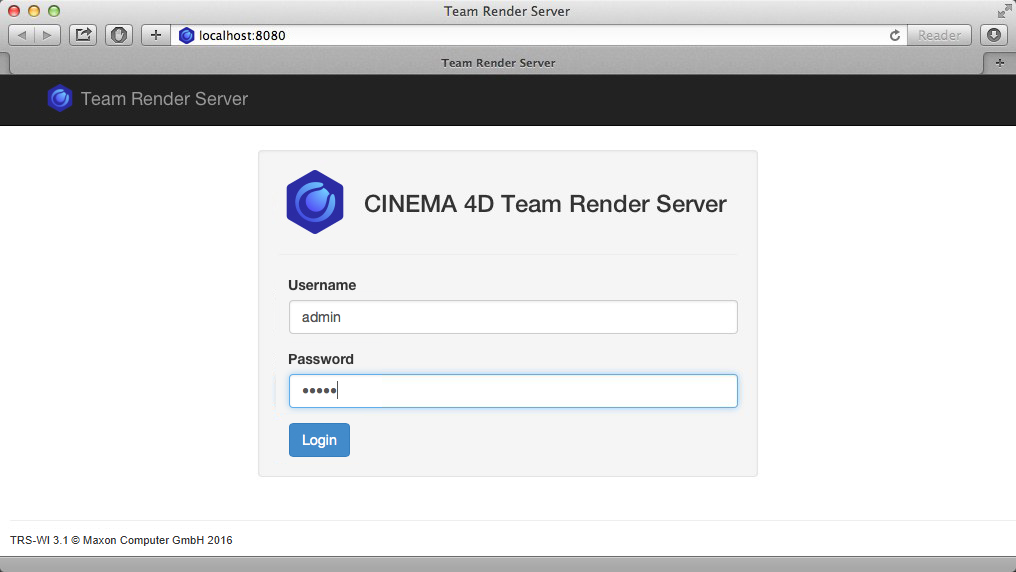
If you want to access the Team Render Server remotely, enter the IP (or Hostename) as well as the port number (which can be modified in the Preferences menu) 8080, separated by a colon. Here is an example:
192.168.0.34:8080.
The Team Render Server login page will open. Enter the default admin for the Username and Password (the password can be changed in the User menu).
The description of the individual browser pages can be found under The Browser Interface.