Diffuse
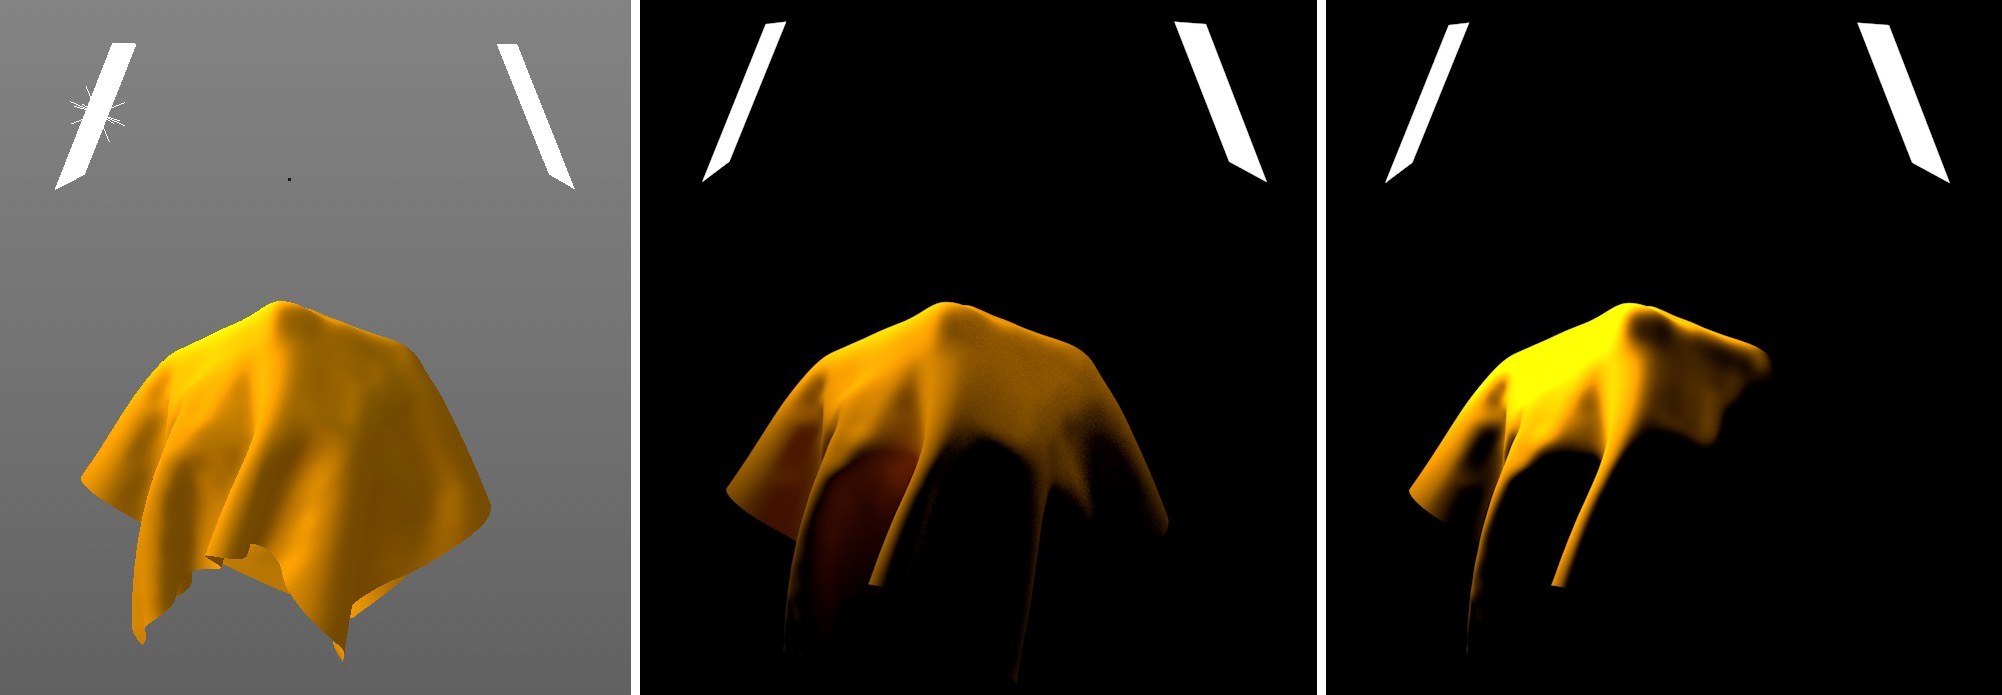
The Diffuse surface property defines the surface shading that is created by incoming light. By default, this includes the shading via diffuse light, i.e., light emitted or reflected by other surfaces. An experiments makes this clear. At the left is a basic setup in which a cloth is illuminated from the left by a physical light. A simple polygon is on the right to which a Uber material with activated Emission properties was assigned. At the center you can see that both sides of the cloth are illuminated when rendered. If the Color Channel option is enabled for the Node Material in the Preferences menu, shading can only created by direct illumination or Global Illumination. This can be seen at the right side of the image.
In this material channel you can define the surface properties that arise via the interaction of the environment with the surface color. This not only includes light sources but all surrounding surfaces. The effect reflects that of a diffuse Reflection channel in the standard or physical materials and can therefore also make the use of Global Illumination as a post effect unnecessary if only materials based on the BSDF render model are used throughout the project.
If you don’t want to use this surface that was rendered as a diffuse reflection, the diffuse material property can also be rendered as a normal shaded surface that only reacts to the illumination via light sources and Global Illumination. To do so , open the Project Settings menu in the Cinema 4D Edit menu and activate the Use Color Channel for Node Material option. This option will then affect all Node Materials throughout the project.
Here you can define the color that should interact with the illumination and diffuse reflection of the surface. Use the Node connector icon if a pattern or texture should be used instead of a homogenous color value.
Here the brightness of the selected color can be multiplied. Note that the physical properties of the surface can be adulterated with values in excess of 100%. The surface may then appear brighter than it actually should with the shading.
The Diffuse channel’s shading model, which itself is already diffuse, can also be affected by the Roughness value. If set to 0%, the shaded areas will reflect the diffuse Lambert shading model, which creates a high-contrast transition between the perpendicular and flat illuminated areas. The higher the Roughness value, the correspondingly lower the contrast will be and therefore more matte and homogenous. Roughness values greater than 0% will lead to use of the Oren-Nayer shading model. In addition to the percent value, textures or Nodes that produce grayscales can be used to control the effect.
This is the diffuse intensity of the surface property. Here you can either control the intensity of the diffuse shading via percent or, for example, use Nodes to define the opacity using a grayscale texture. The effect reflects the Brightness setting in the standard material’s Diffuse channel. A reduction of opacity will therefore darken the surface color.
An alternate behavior can be enabled if the Layer Opacity option is disabled in the material’s Opacity channel. This can even then be done if the Opacity channel is disabled. The Opacity in the Diffuse channel will then affect the color like an alpha channel or like a layer opacity in an image editing program.
A Uber material’s shading can be affected by surface Normals. Normally, only the Normal directions generated by the Normal or Phong tags will be used. By using Bump or Normal material properties, the orientation of these Normals can be modified. The orientation of the Normals can be edited separately for different material channels. You will find identical settings for using or modifying the Normal orientation in the material’s Diffuse, Reflection and Coating channels.
The intensity of the bump or Normal effect can be influenced by the Strength setting. Note that a bump or Normal effect does not modify an object’s shape and only manipulates its shading. Extreme modifications to Normals will therefore look unnatural or artificial if the actual shape of the surface loses its relation to the shading. Therefore, limit your use of a bump or Normal texture to the simulation of finer structures such as skin pores, wood grain or scratches.
If the Bump and Normal channels should automatically also affect the Diffuse channel, set Normal Mode to Global. This reflects the default setting.
Use this setting if you want to use a custom bump map for the shading manipulation in this material channel.
The effect of the linked texture or Node can be amplified or inverted (negative values) using this setting.
Use this setting to define the size of the sample area for textures and two-dimensional structures. The smaller the value, the softer and weaker the bump effect will be.
This setting’s function is comparable to UV Epsilon but only affects the sampling of three-dimensional bump structures. Smaller values will lead to a blurring and subduing of intensity.
This mode is primarily designed for use with a Normal texture.
Using this input, a Normal texture or corresponding Material Node can be linked. If a Relief Map Node is used, grayscales can also be used as a Normal Map. Compared to the Bump Map, the Normal Map offers many more details since it works with color values instead of simple gray values. This also makes it possible to control the subtleties in the shading.
Normal Strength [-∞00..+∞00%]
Presets
This menu can be used to select presets for the evaluation of a linked Normal Map. If a coding of the Normals is present in the object system, select C4D Space: Object. The options for Flip X, Flip Y, Flip Z and Swap Y&Z will be configured according to the selection made in the Space menu. The same applies to the Presets C4D Space: Tangent and C4D Space World.
Flip X
Flip Y
Flip Z
Swap Y and Z
Since norms don’t necessarily exist for the creation of Normal textures, many programs play according to their own rules. Some use the green color component and some blue for the Y direction. To ensure maximum compatibility, you can switch each color here. For the most commonly used Space, tangent, the following rule of thumb applies:
- If the Normal texture is mostly light green, enable Swap Y&Z
- If the Normal texture is mostly light blue, disable Swap Y&Z
The direction of the Normals can be described in different directions, which can be selected using the Space menu.
- Object: Here the object coordinate system is used for coding the Normal orientation. Such textures emit rainbow colors in basically all directions. This mode is well-suited for objects that won’t be distorted.
- World: Here the world coordinate system is used for coding the Normal direction. This is only suited for static, inflexible objects. These textures will also all have rainbow colors.
- Tangent: The most commonly-used method. Here the Normal direction is defined in relation to the underlying surface. This is the ideal method for distorting objects (character animation). These textures can be recognized by their primarily light blue or light green coloring. These are areas whose Normals lie perpendicular to the surface.
In this mode, the direction of the Normals can be freely defined.
Here you can link Material Nodes with which the Normal direction can be calculated individually.