MoGraph
Welcome to the virtually limitless MoGraph!
MoGraph offers the following exciting functionalities:
- Various ways in which to clone objects.
- Extensive control of clones via Effectors and Fields.
- Several special shaders for texturing and controlling clones.
- A special Text Object with individual controls for lines of text words and letters.
- The paths of movement of vertices / particles can be displayed as splines using the Tracer.
- 2 special Deformation Objects that can be used to deform objects using splines (Spline Wrap) or textures (Displace Deformer).
- Growing, squiggly, flower-like Splines can be generated using the MoSpline Object as a Spline generator.
- The PolyFX Object object interprets object polygons and spline segments as Clones, which in turn can be affected by Effectors.
- Effectors that can also be used as deformation objects.
- Spline Mask, a boole object for splines.
- A MoExtrude Object that can be used to extrude polygons of parametric objects. Each extrusion will be seen internally as a clone and can thus be controlled using Effectors.
- The Voronoi Fracture object, which fractures objects.
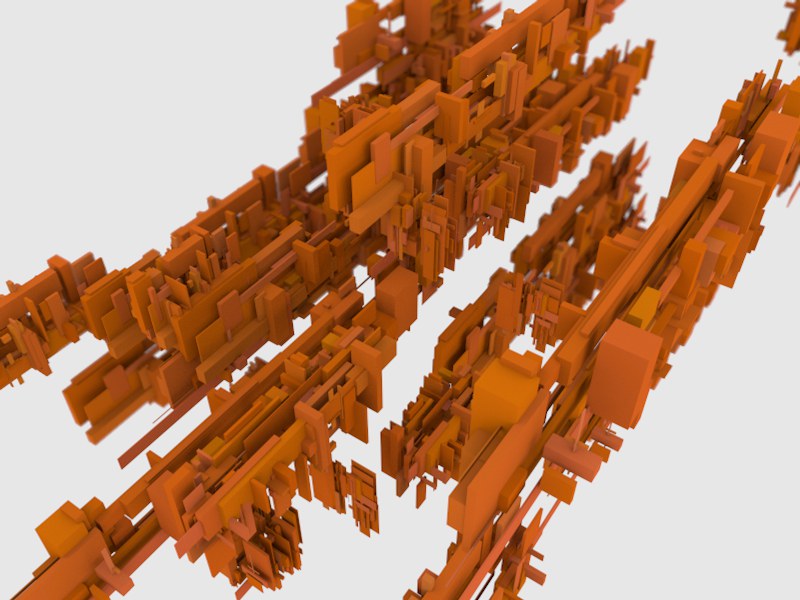
Almost any element can be combined within MoGraph, which offers you endless creative possibilities. So take time out to experiment as much as you can with MoGraph - no matter how crazy you think an animation may be! Creating spectacular effects and animations using simple Primitives is as easy as 1-2-3 using MoGraph.
 Spectacular motion graphics using simple primitives!
The next scene consists of only three parametric cubes that were cloned, made to intersect and positioned, colored and scaled randomly using the Random Effector. Add a little depth-of-field and HDRI lighting and you too can create the following image:
 3 cloned parametric cubes.
Imagine adding a Sound Effector to make the clones scale, move, rotate and even change their texture to the beat of music. This is only a small sample of what great-looking effects MoGraph lets you create with relatively little effort.
How are clones arranged onto other objects?
The following mini-tutorial demonstrates a randomly chosen example of how clones can be arranged onto an object.
Goal: Clones should be arranged to form a particular word.
-
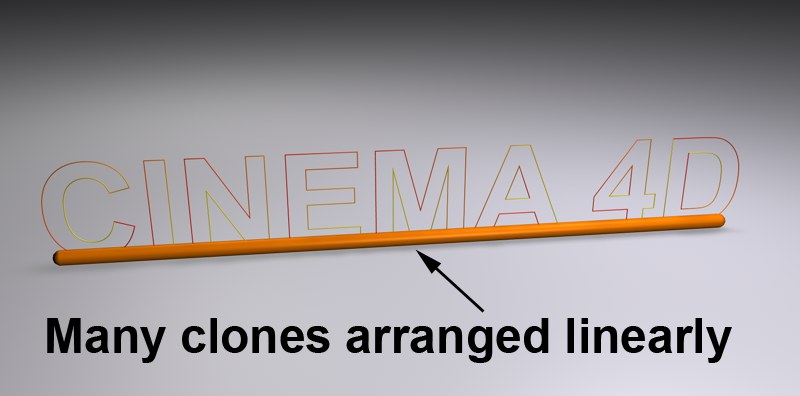
First, the necessary clones have to be generated that will later be arranged onto a text spline. Create a sphere, a text spline and a Cloner Object (main menu / MoGraph/Cloner Object). Reduce the sphere’s radius to 10m and type any word into the text spline setting’s Text field.
-
Make the sphere a child of the Cloner Object and switch to the Cloner Object’s settings. Define the number of clones in it’s Count setting (e.g., 500) and set P.Y to 0 and P.X to, for example, 2. The result should look similar to what’s shown in the image below. The arrangement of clones can be adjusted to the text length by moving the Cloner Object itself and varying the P.Ysetting:
 The text spline was placed into a Sweep object in order to make it more visible.
 -
In order to arrange the clones onto the spline, a Spline Effector is needed. To add a Spline Effector, select the Cloner Object in the Object Manager and add a Spline Effector form the main menu. The Spline Effector will automatically be assigned to the Cloner Object (it will be located in the Cloner Object’s Effector field, located in it’s Effector tab). Switch to the Spline Effector’s settings and drag the text spline from the Object Manager into the Spline Effector’s Spline field. Subsequently, set Segment Mode to Even Spacing.
Your scene should now look like this: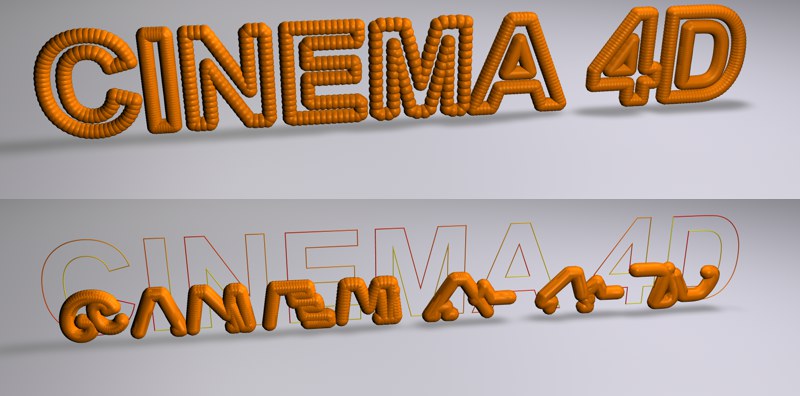 Spline Effector strength settings: 100% at top, 40% at bottom.
If you now vary the Spline Effector’s Strength setting (Effector tab) you can transition the clones smoothly between a linear and a spline arrangement. But this is relatively unspectacular. Thus.. -
Switch to the Spline Effector settings and click on the button at the bottom left of the Falloff tab and select Linear Field.
So, what have we just done? The Falloff settings can be used to limit an Effector’s effect. The Linear Field setting makes the effect of the Field work along its positive Z axis. It will have no effect in the negative direction of the Z axis. The effect of the Effector will work smoothly within the Preview plane. If the Field is now moved or animated along the length of the clones, the clones will be arranged onto the text spline accordingly.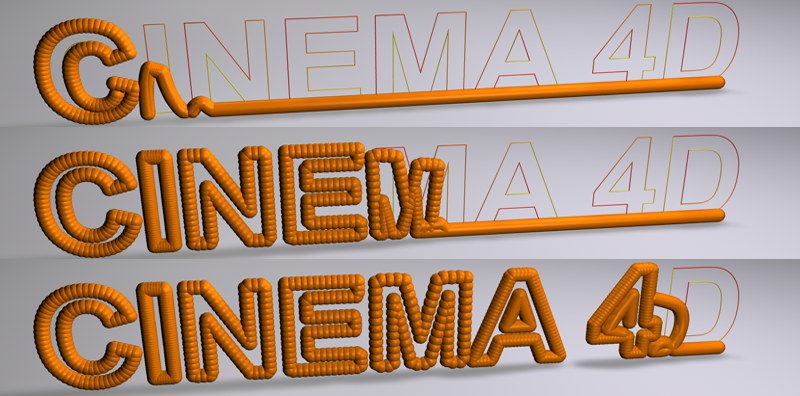 The Linear Field moves from left to right.
Now change some of the settings, e.g., set the Linear Field to a Spherical Field or play around with some of the other settings and see what happens. The settings are described in detail in the following chapters.
Object order in the Object Manager
Cinema 4D has a strict hierarchy (sequence and order in the Object Manager) that defines exactly which object should be executed when. In some instances, a hierarchy in MoGraph, can also be important. Each time other objects are affected by a Target Object, the Target Object should be placed in front of those objects in the Object Manager. This helps avoid unexpected effects such as incorrect depiction in the editor view, strange rendering effects, etc.
The following could be important factors:
- A Cloner Object in Object clone mode that has arranged its clones onto the vertices of a target object (even a target object that is deformed using a deformation object).
- Effectors that use a target object, e.g., a Spline Effector (target: spline), Inheritance Effector (target: any object) or Target Effector (target: any object).
Where can I find MoGraph components?
- Most MoGraph objects and tools are located in the main MoGraph menu.
- The four MoGraph-specific shaders can be found anywhere where shaders can be selected, in the Motion Graphics menu.
- The MoGraph tags can be found in the Object Manager under Tags / MoGraph tags.
- Fields, Field Layers and Modifier Layers can be created in the Effector’s Fields tab. The first two can also be found in the menu.
Working with a very high number of clones that also have a high subdivision can slow the Viewport speed dramatically. This command swaps Cloner objects with Matrix objects and back (any Effectors already assigned will automatically be maintained). Matrix objects display the Cloner objects as simple cubes, which increases Viewport speed dramatically. Selecting the command again will swap the Matrix object with the Cloner object again (which should be done before rendering).
At least one MoGraph Selection tag must be selected to use this feature. A Plain Effector will be generated, which will affect all respective clone-generating objects and hide all selected clones using the Visibility command.