Editor
The settings in this tab serve the following purposes:
- First, how the hair and guides will appear in the editor view (if at all) is defined here.
- You can also use hair to generate splines that will, for example, work in conjunction with Sweep object.
If a given Hair object is active, the guides will be visible, regardless of the settings in the Editor tab.
![]() Preview
Preview
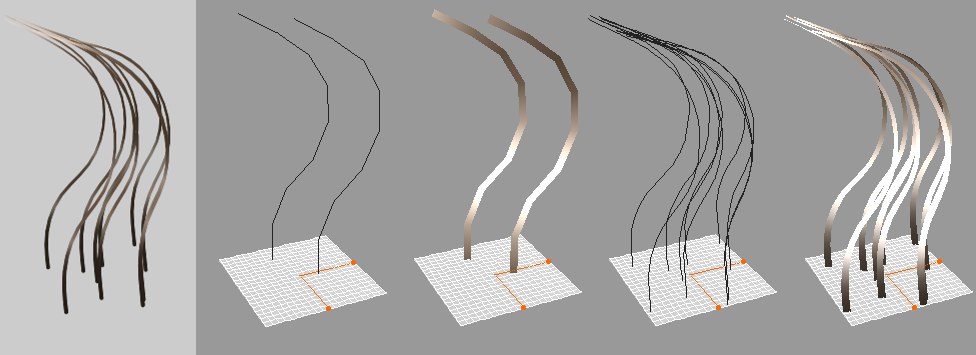 From left to right: Rendered hair; guide lines; guide polygons; hair lines; hair polygons.
Use the Display setting to define how guides should be displayed in the editor view:
Guides will only be displayed when the corresponding object is active.
Guides will always be displayed (in blue) when the corresponding object is not active.
Guides will be displayed as shaded polygon stripes.
Guides will be displayed as blue lines, in accordance with the Detail setting. In this mode, hair will be displayed in the editor view just like Hair Polygons, with Material channels applied. You will be able to see in the editor view almost exactly how the hair will look with regard to shape and volume when rendered.
Guides will be displayed as shaded polygon stripes, in accordance with the Detail setting.
Activating this setting will speed up the editor display (with regard to hair). This will also use more memory.
Deactivate this option to hide guides or hair that do not point in the direction of the angle of view. This will speed up the editor display.
RELEASE 22
This setting is used to color the hair. In the Hair material channel Color, a color gradient can be defined from the hair root to the tip.
To display the color in the Viewport, the color is sampled at certain points along the hair and interpolated. Accurate CPU Material defines if this color should be sampled at every hair point (enabled) or only at the root and tip (disabled). For the latter, only the start and end color from a multi-colored gradient will remain (between which the interpolation will take place), which can be calculated faster. Difference in the speed with which the calculation takes place are only noticeable when very high settings are used, e.g., much hair and many hair segments.
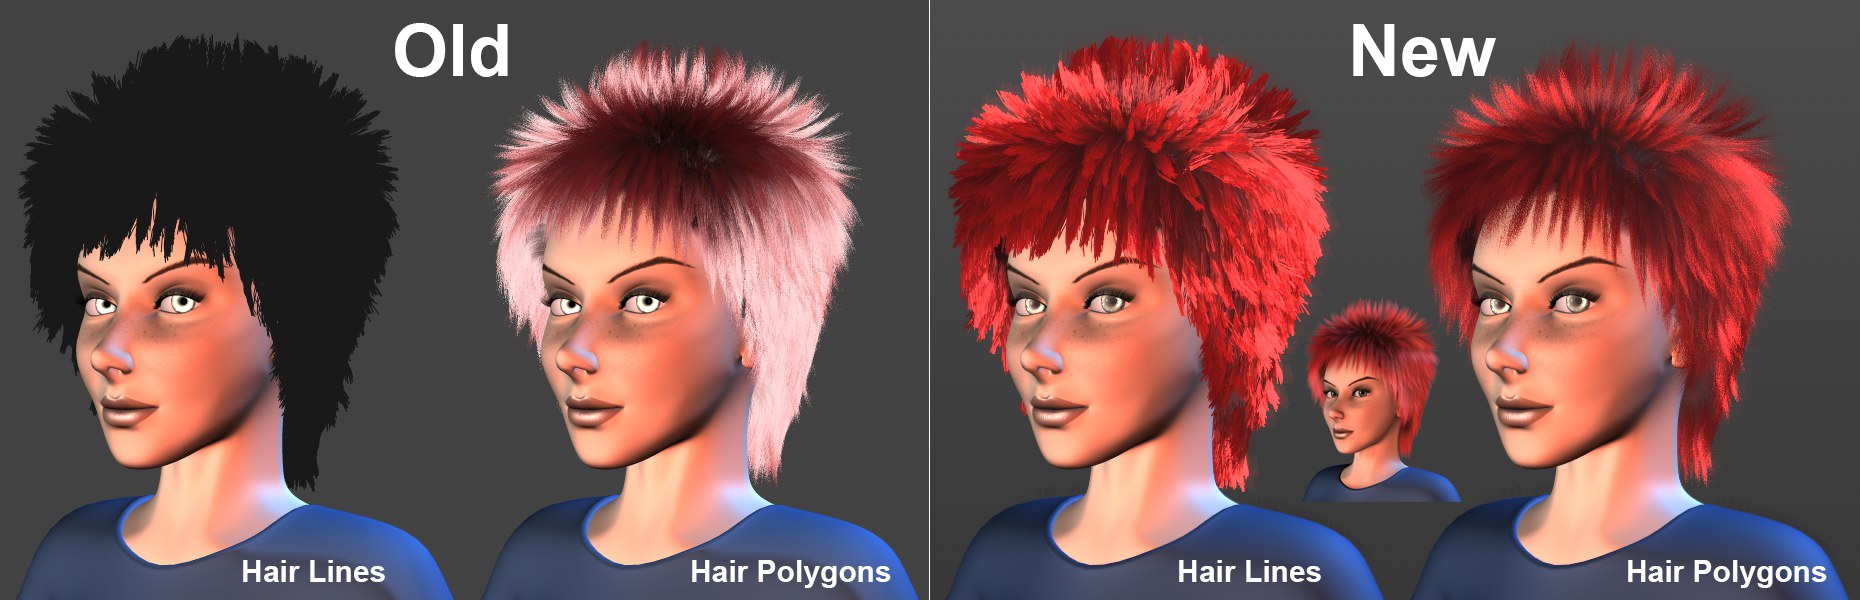 Improved Hair quality in the Viewport with the introduction of Cinema 4D S22. Rendered hair at center right.
A simplified, faster Hair Shading model was integrated especially for the Viewport (and therewith also for the Viewport Renderer, which is primarily controlled using the two settings described further below. Improved quality is now available for both Display modes Hair Lines and Hair Polygons (among other things, the Viewport Hair render in accordance with the anti-aliasing settings in the Preferences menu).
Internally, this model uses a non-modifiable light source, i.e., it doesn’t react to changing light.
Enhanced Viewport Shading Specular [0..100%]
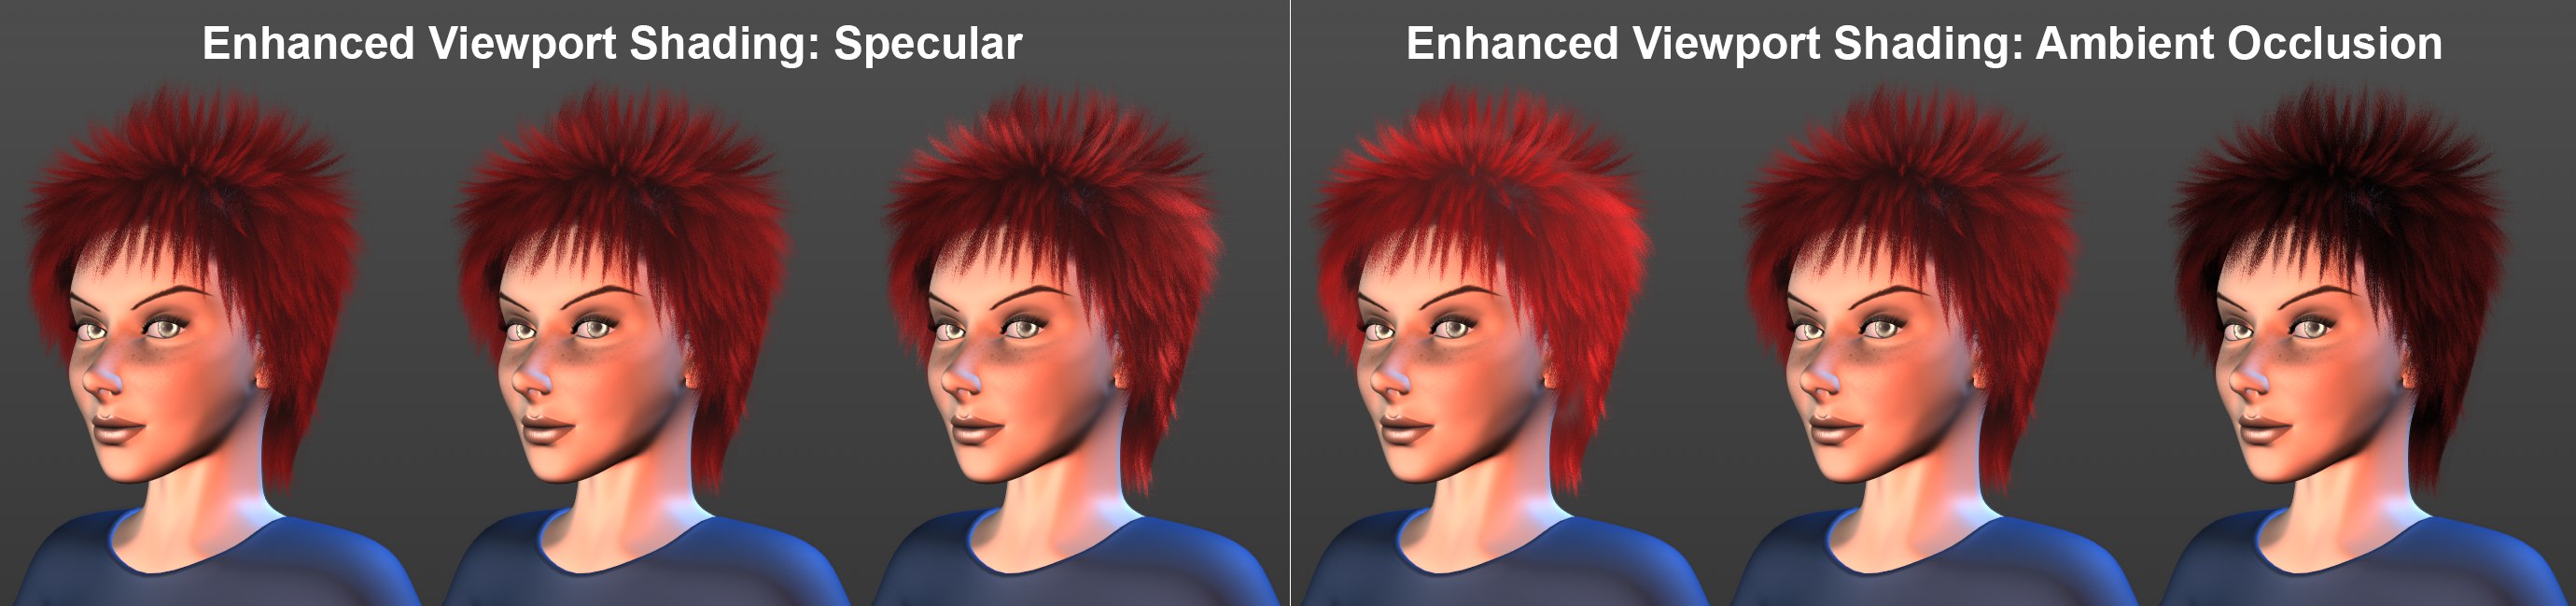 Increasing values for the respective settings from left to right.
Use this setting to define the hair’s specular highlights. Lower values will make the hair correspondingly more dull, higher values will add shine.
Enhanced Viewport Shading Ambient Occlusion [0..100%]
Larger values will darken the hair accordingly, which can make it look like it has more volume.
The level of detail of the hair lines or hair polygons can be adjusted to speed up the editor view. A value of 100% will display all hair, including most Hair material channel effects.
![]() Generate
Generate
Use this setting to define how hair should be displayed in the editor view:
- None: Nothing will be generated.
- As Render: What will be displayed will be based on the option selected in the Type menu of the Generate tab.
- Flat: The hair will be displayed in the editor as flat polygon bands.
- Tri: The hair will be displayed in the editor as polygons with a triangular cross-section.
- Box: The hair will be displayed in the editor as polygons with a square cross-section.
Use this setting to define how the Cinema 4D level of detail (e.g., editor view: Display / Level of Detail or in Project Settings) should affect how hair is displayed:
- None: Ignores all defined levels of detail.
- All: Level of detail will affect hair roots and hair segments.
- Count: Level of detail will only affect the number of hairs.
- Segments: Level of detail will only work on hair segments.
If this option is active, the Count and Segments settings below will be assigned the same values as the settings of the same name located in the Hairs tab.
Count [1..2147483647]
Segments [1..2147483647]
Deactivate the As Render option if you want to use the Count and Segments settings to manipulate the splines / polygon hair in the editor, as you wish.