Hairs
The settings in this tab define the physical properties of the hair that will actually be rendered.
These properties can, for example, also be made invisible by corresponding Hair material settings or by the settings in the Culling tab.
These hairs, which far outnumber the guides, will be interpolated between the guides.
This setting defines the actual number of hairs. The more individual hairs you use, the more realistic the hair will look, and the longer it will take to render. Using fewer individual hairs can be compensated for, to a certain degree, by increasing their thickness using the Thickness channel in the Hair material.
For comparison: On a real human head are between 100,000 and 150,000 hairs, an amount that can still be rendered within realistic render times (assuming not too many light sources are used to cast shadows on the hair – this dramatically increases render times).
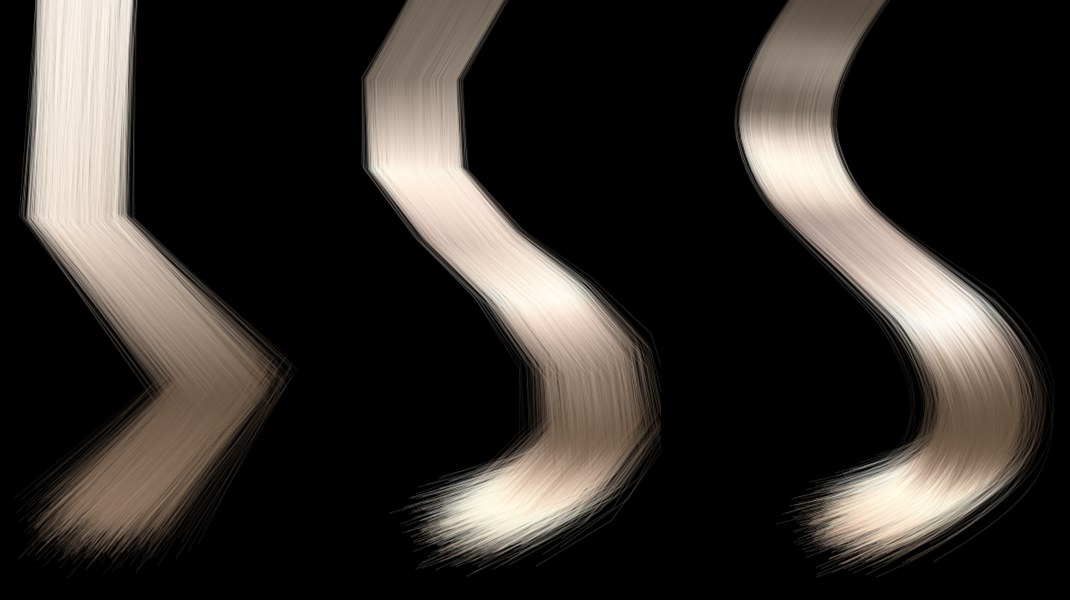 From left to right: 3, 8, 48 segments, respectively.
As you already know, there is also a Segments setting for guides. The Segments setting here performs the same function, only for the hair. Higher values cause the hair to be more flowing. Higher values also cause render times and processing requirements to increase accordingly.
The quality of rendered and lit hair containing few segments can be improved (render time will increase accordingly) by selecting the Pixel option in the Render Settings … / Effects / Hair Render menu.
Guides and hair do not have to have an equal number of segments. The more segments each have, the longer the render time will be. An increased number of segments will also improve the precision of the hair when rendered and when affected by dynamics.
In the example below, a comparison of hair and guides containing different numbers of segments is made.
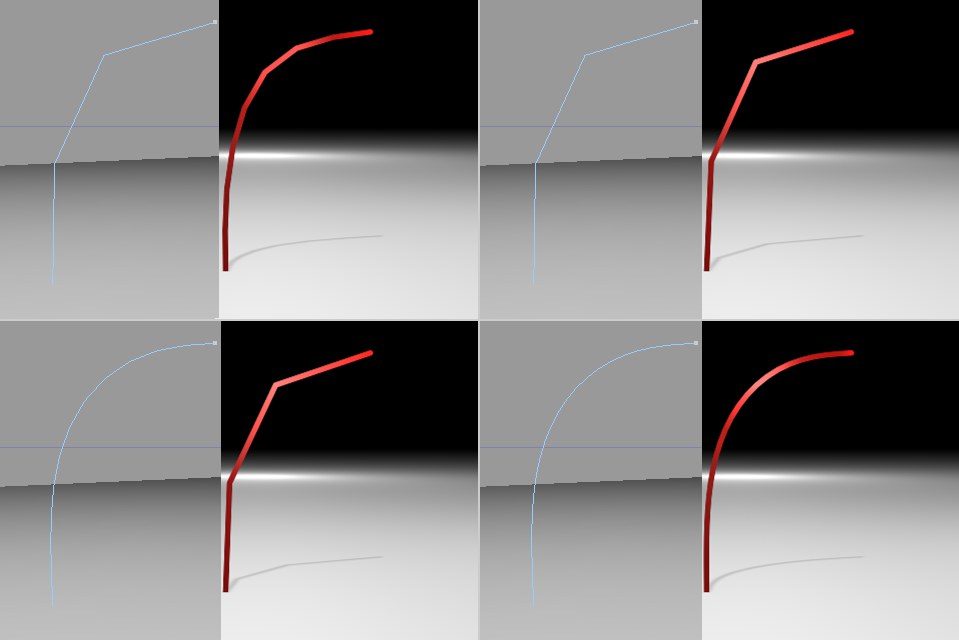 Clockwise from top left: Guide = 3 segments, hair = 8 segments; both = 3 segments; Guide = 24 segments, hair = 3 segments; both = 24 segments.
In the image above, a single hair was used for demonstration purposes only. Even if 238,594 hairs had been used, all would look just like the lonely hair shown.
![]() Roots
Roots
Use this setting to define where the hair should be positioned on the underlying object. The same applies here as was described for the Root setting here, the only difference being that a disproportionately high number of hair roots to hair will be positioned.
If your hair-covered object lies within a Subdivision Surface object, the following will apply (depending on what was placed in the Links field): The roots will be located either on the smoothed object (the Subdivision Surface object itself lies in the Links field) or on the non-smooth object.
The following two options are also available:
- Auto: Depending on what settings you have applied to the guides, Auto will be commensurate with one of the following options: If new guides are created on a polygon object using hair, Auto will be commensurate with the Polygon Area option; if guides have been distributed onto new Hair objects using the Split Guides tool, Auto will be commensurate with the As Guides setting (the same occurs with Add Guides). If you want to be sure, exactly how the hair will be distributed, you should select one of the other options.
- Polygon Vertex: A maximum of one hair will grow on each object point (and nowhere else).
- As Guides: Each guide will be rendered as exactly one guide. The Hair material will still have an affect on the hair! This option will automatically be used if, for example, you want to add guides or (indirectly) hair using the Add Guides tool.
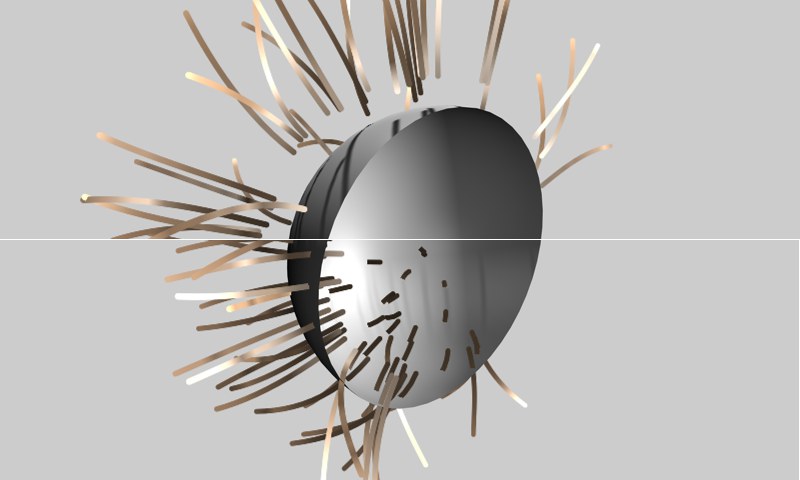
Activating this setting will ensure the hair root segments are oriented in the direction of the surface Normals, regardless of what was defined for the guides.
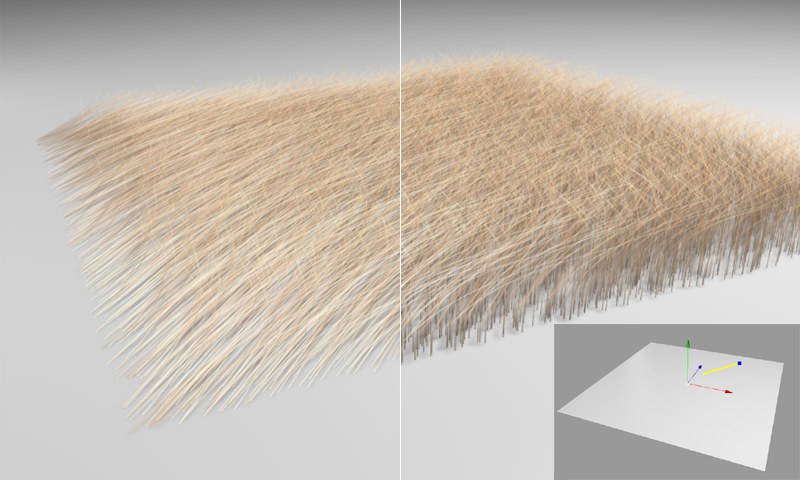 Left: As Normal not active. Right: As Normal active. Both examples use the flat guide shown in the inset.
 U Spacing [0..100%]
V Spacing [0..100%]
U Variation [0..100%]
V Variation [0..100%]
See UV Grid (Guides Tab).
 Top: Positive Offset value. Bottom: Negative Offset value.
Use this setting to offset the hair in the direction of the surface Normals. A value of 0 means the hair roots will lay directly on the hair-covered surface.
Offset can be used for special effects, such as a cartoon figure’s eyelashes, or if certain Hair materials (e.g., the Include Root option in the Hair material’s Displace channel) no longer function in conjunction with displacement. This can then be adjusted manually using Offset.
Activating this setting will simply extend the hair root segment into the hair-covered surface, in the direction of the hair root segment. The remaining hair will remain unchanged. This can be effective in solving problems you may encounter with Subdivision Surfaces, e.g., if the hair roots seem to be floating freely.
![]() Growth
Growth
The Growth menu’s settings can be used to define the placement of hair. For example, a minimum distance between hairs can be defined. Since the hairs are positioned using an interative process it can occur that several of the rules (Min Spacing, Density, etc.) cannot be adhered to and hair will nevertheless be rendered at these locations. This can be prevented by enabling the Remove Invalid option.
If hair is distributed randomly, as is the case with most root types, some hair may be positioned very close together. This can be avoided by defining a minimum spacing between hairs.
A texture can be placed into this field, with which the density of the hair can be defined using that texture’s grayscale values (object-based). A similar Density channel is located in the Hair material settings, which regulates the density of the hair via the material (material-based).
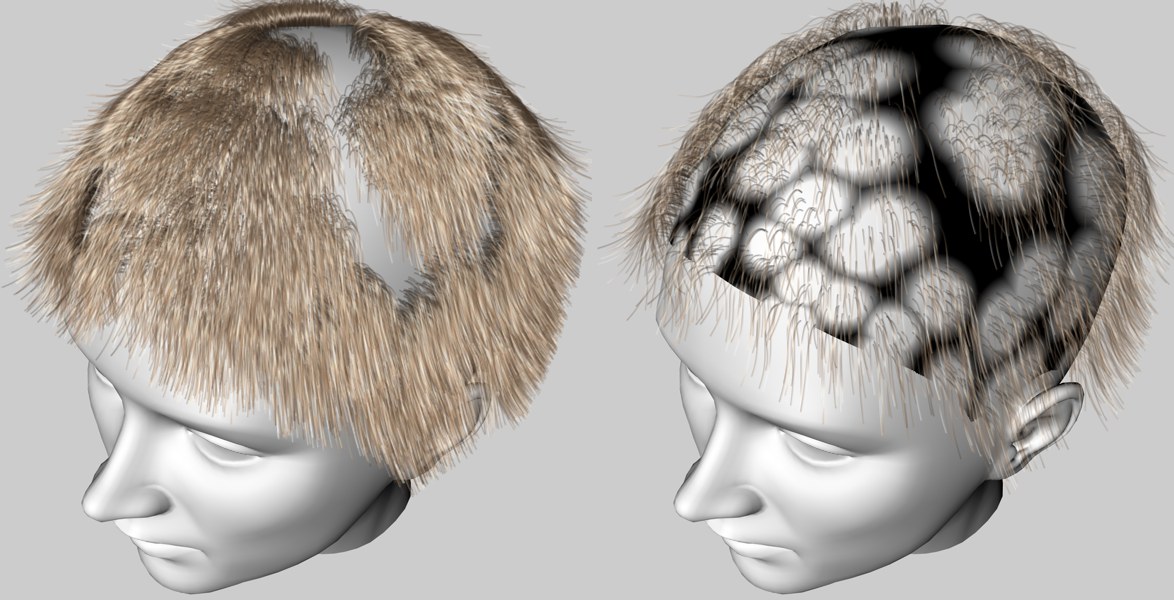 Partial hair loss. Right, the texture (a Voronoi noise shader) was projected onto the head. Hair was thinned to make texture visible.
The projection is done using the UVW Tag, which was placed into the UV Tag field in the Advanced tab.
This setting quantizes (internally) a loaded texture according to its grayscale values. Levels defines the number of gray tones that can be used. The lower the value, the rougher the steps will be, the higher the value, the more precise the steps will be.
Restrict to Guides
Distance [0..+∞m]
Guides [1..100]
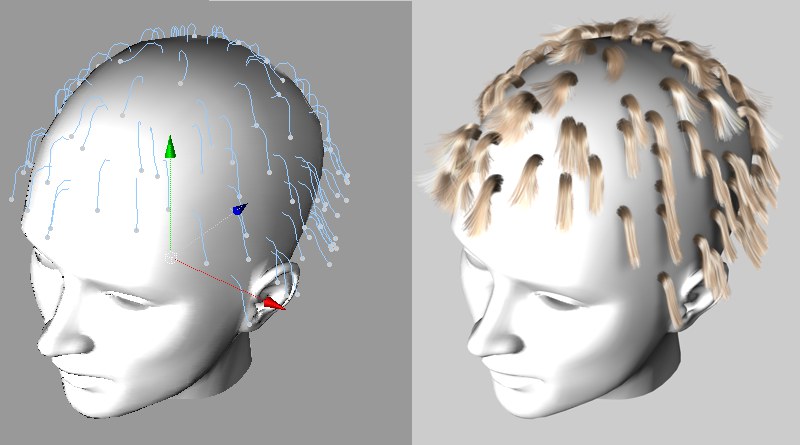
The guides on the left were used to create the clumps on the right with the Restrict to Guides setting.
Activate the Restrict to Guides setting if you want the hair to be arranged only in a specific radius around the guides. The Distance setting defines the size of this radius.
The Guides setting defines the number of guides that should positioned within the Distance setting, so the hair can be rendered. What you are essentially doing is controlling the distribution of hair based on guide density.
![]() Cloning
Cloning
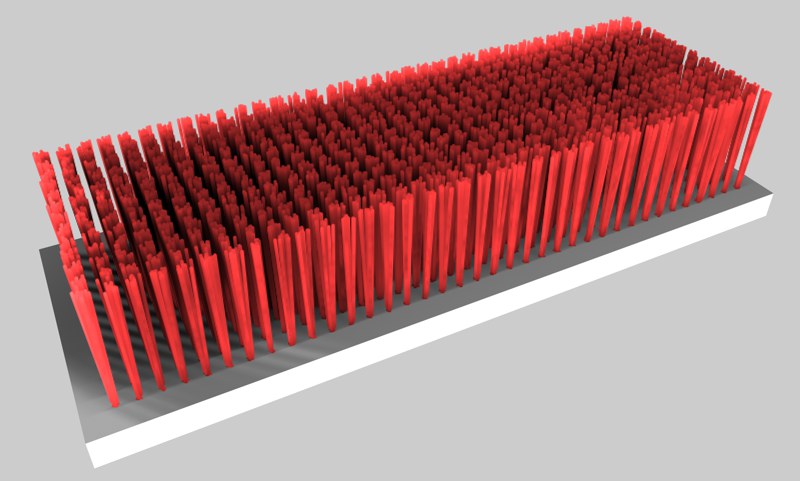 A brush or broom. Each bristle consists of a single hair, which was cloned 10 times using the Clone setting.
The Clone setting will create a specific number of clones for each hair. Hair that has been cloned can be positioned separately at the root and tip. Cloning hair will dramatically increase the number of hairs to be rendered, which will also increase render times and required processing power accordingly.
Cloned hair that was created at rendering is not rooted, and therefore is not directly linked to the underlying geometry. The hair will not be affected by displacements. If Set Roots is activated, though, displacement effects such as Sub-Polygon Displacement will affect the hair.
Use these settings to define the distance the root and tip (each separately) of the cloned hair may diverge from the original position of the hair on the X- and Z -axes. In the example above, the tips of the bristles were varied more than were the roots. This resulted in the final bristles spreading at the tip.
Scale [0..+∞%]
Variation [0..+∞%]
Use the Scale setting to define how much larger or smaller the cloned hair should be compared to the original hair. The Variation setting randomly varies the cloned hair within the Scale setting.
Use this curve to adjust the random divergences set in Root and Tip, over the length of the hair.
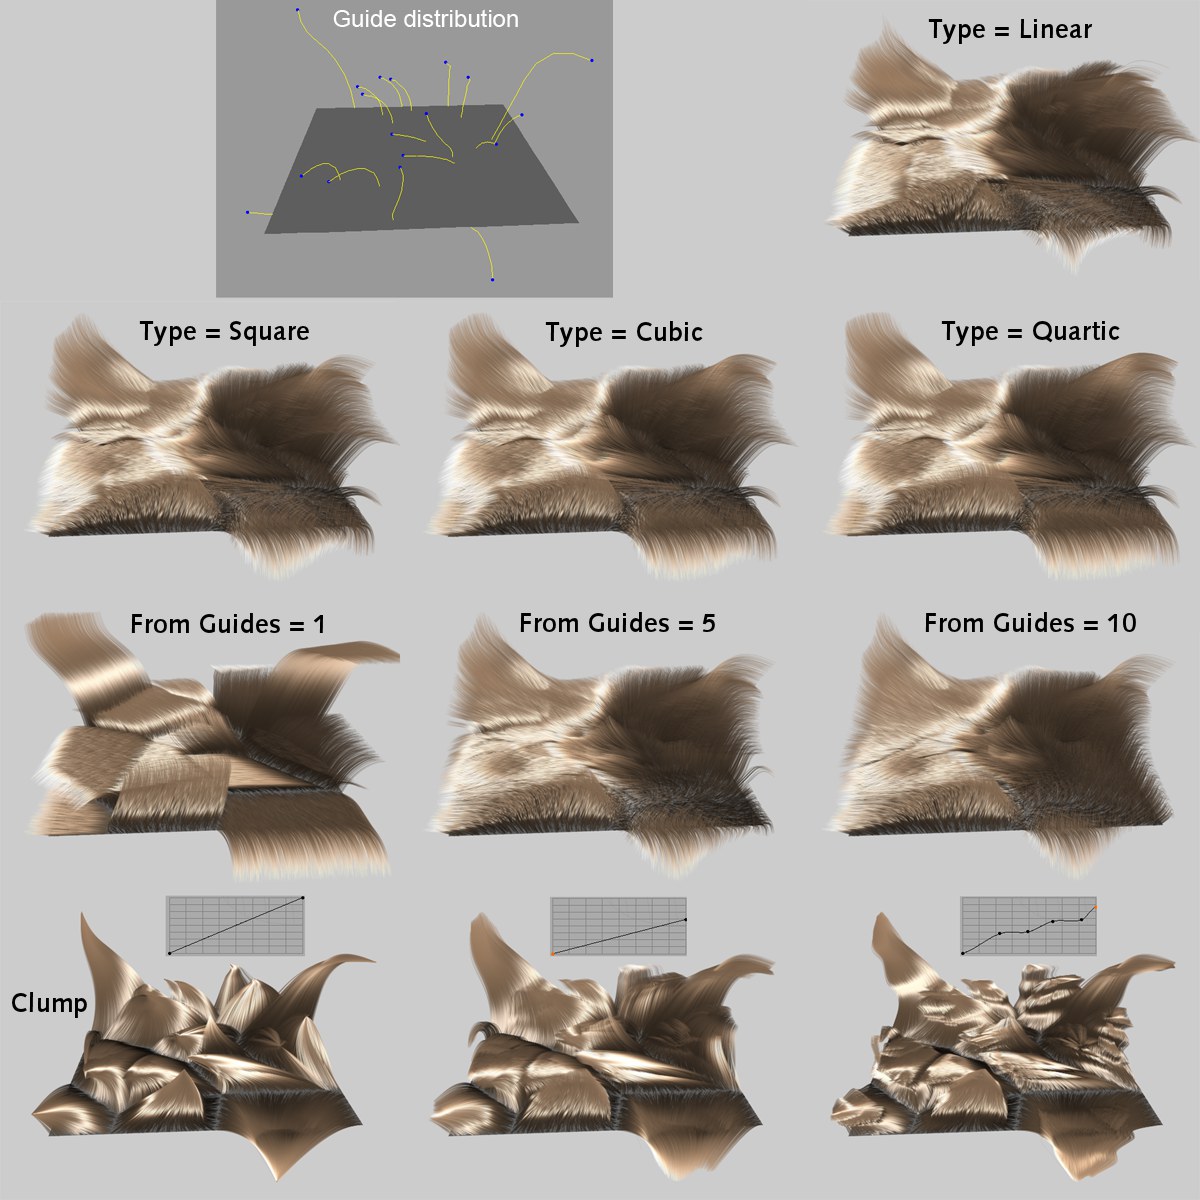
Example Cloned hairs can also be used to render cloth in close-up shots. The key lies in the way in which the splines are modeled (individual loops were created using a Since it would be impossible to style hair one hair at a time, guides (far fewer in number than the actual hair) are used to roughly indicate the hairstyle. A great number of hairs will be interpolated between these guides. The closer a given hair is to a guide, the more it will conform to the shape of that guide (the effects of any Hair material settings will subsequently take effect). The Interpolation setting defines how the hair should conform to the shapes of the guides. A depiction of the different interpolation options is shown below. Each type of interpolation applies its own particular falloff to each individual guide. This effect is illustrated in the image above, where hair was interpolated between a very short and a much longer guide. Simply imagine any of these interpolations on an entire surface and you will have a good idea of how each interpolation works. Interpolated hair searches for the guides nearest to it and will conform accordingly. From Guides defines the degree to which individual hairs will be influenced by the guides (hair located closer to the guides will be influenced to a greater degree). The larger the value entered for From Guides, the more flowing and homogeneous the interpolation between guides will be. Use the Variation setting to randomly vary the interpolation of individual hairs, causing the hair to look less uniform and more realistic. Activating this setting will basically turn off free interpolation between guides, and attract the hair to the nearest guide, letting you easily create clumps of hair. A similar function, which offers greater control, is available in the Clump channel of the Hair material. Use this curve to define the strength of clump creation over the length of each hair. Various Interpolation Settings and Their Resulting Effects. At the top left of the image below, the distribution of guides is shown, as used for each of the examples. The following variations were then applied: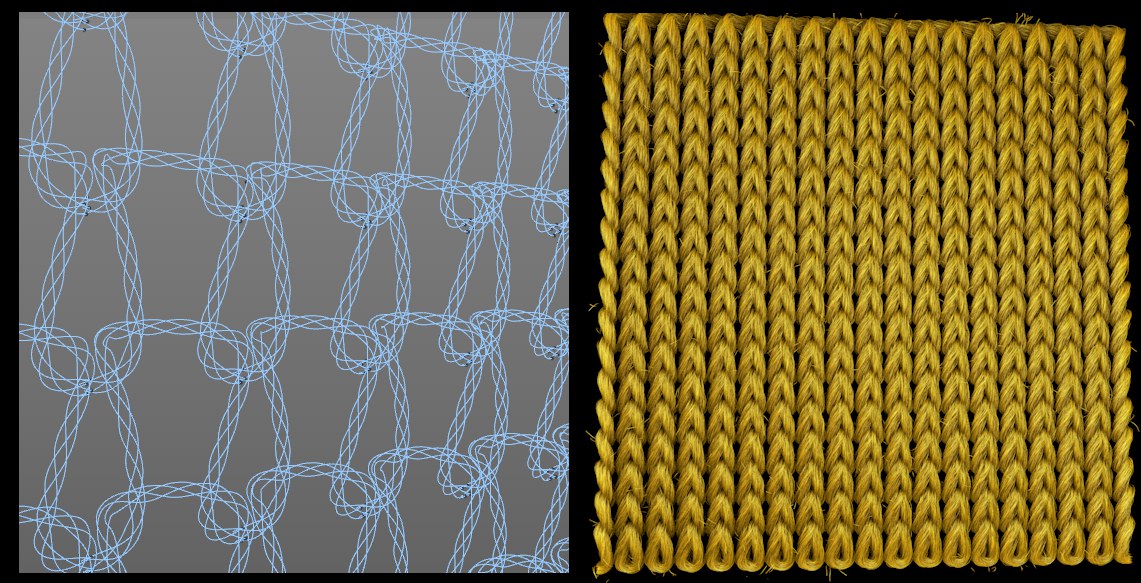 Weaved cloth can also be created (thanks to Pingo van der Brinkloev for this idea!)
![]() Spline Wrap
Spline Wrap![]() Helix
Helix![]() Cloner
Cloner![]() Connect
Connect![]() Interpolation
Interpolation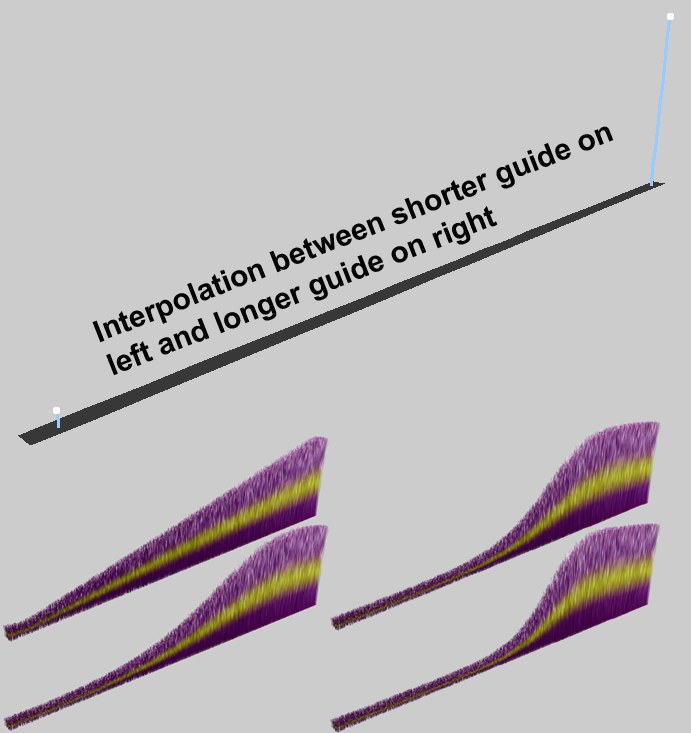 Linear, Square, Cubic and Quartic interpolation.