Age
PyroCluster generates its effects based on the lifetime of individual particles. It is very important that the methods behind and functionality of particle lifespans are thoroughly understood.
Refer to Working with PyroCluster, to get a better understanding of lifespan and mixing colors in PyroCluster.
Enable this option to switch on the age effects.
For details on using gradients, look up Using gradients in the index.
In the Age Radius gradient, white creates the radius set on the Shape page, while a black or a dark color creates a zero or small volume radius respectively. So, on the left, particles start small and grow evenly over their lifetime while, on the right, the particles are larger to start with, shrink a little and then grow to their full size
The Radius gradient controls the puff’s radius over the particle’s lifetime; each grayscale represents a radius value.
On the Shape page you can set the basic volume radius for the selected PyroCluster material; without any other effects turned on, PyroCluster will use this radius to render the cloud or smoke effects. However, if you enable Age Effects, it’s different.
A plain white color in the Age Radius gradient represents the radius defined on the Shape page and a plain black color represents a radius of 0 (i.e. a dot). The left and right edges of the Age Radius gradient correspond to the time of the particle’s birth and death respectively.
A white color on the gradient means the puffs will stay the same size or luminosity. A black color means zero radius or no luminosity, while gray values are intermediate values. High variation in the gradient will create random volume sizes.
Activate the preview mode under Shape in order to view particles in real-time.
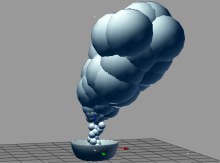 The result as seen in the editor view…
 … and the corresponding gradient
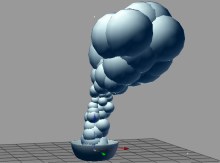 The result as seen in the editor view…
 … and the corresponding gradient
As you can see in the image above, a pure white results in the radius defined under Shape is used. Black will result in the radius being set to 0.
The age effect lies in direct correlation to the lifespan of the particles.
An almost random radial dispersion can be achieved by setting several keyframes with different grayscales (different from the examples above which use linear color gradients).
The Luminosity gradient controls the amount of additive pixel blending over the particle’s lifetime. A white color gives the luminosity value you defined on the Globals page; a black color returns no luminosity effect at all; and grays give intermediate values.
The left and right edges of the gradient correspond to the time of the particle’s birth and death respectively.
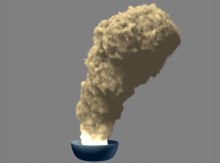
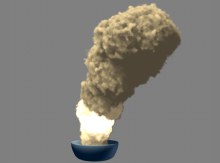
The following examples demonstrate the effect the luminosity gradient has. At top is the gradient used, at bottom the result it produces.
 |  |
 |  |
 | 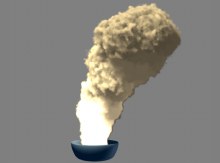 |
As you can see in the examples above, the glow (100% additive) moves analog to the white area in the luminance gradient. This function can be used to, for example, create rocket boosts or any type of fire effect.
At this point, looking upUsing Gradients would be a good idea.
This gradient controls the color mixing, over the particle’s lifetime, between the puff color set on the Globals page and the color calculated by the Age Color gradient.
So it is the combination of the Globals Color, Age Color and Age Color Mix gradients that gives the result. Each gray value represents a mixing amount between the base color (set on the Globals page) and the color generated by the Age Color gradient. A pure black means that 100% of the base color set on the Globals page is used to draw the puffs; none of the Age Color is mixed into the particle color. A pure white will color the puff with 100% of the Age Color gradient; the base color set on the Globals page is not mixed into the Age Color at all. All intermediate gray values will create a mixing of both color values.
For the Color gradient, the left edge of the gradient controls the color at the puff’s birth, while the right edge controls the color of the puff when it dies.
A pure black uses the original color, as defined on the globals page, will be used to 100% and the lifetime color will not be added.
A pure white uses the lifetime gradient color to 100% and the original color defined on globals page will not be added. All intermediate gray values will create a mixing of both color values.
Let’s say you want to create a fire using a particle system. The puff’s initial color, as defined on the global page, is bright yellow (inner color) to dark red or black (outer color). At the end of the particles’ lifetime, dark, black smoke should billow. The initial color must then be mixed with the lifetime gradient. For a realistic look, the transition from light to dark must be made irregular. The color mix gradient can be used to switch back and forth between the particles’ initial color and the lifetime color.
The particle’s lifetime gradient controls the change of color over time. There is a direct correlation between a particle’s lifetime and the color of a puff. Depending on the color mix value (gray value) and the color of the lifetime gradient the puffs will be calculated either with or without the mix color. The color at the left of the gradient defines when the puff will be born. The color at the right end of the gradient defines the color of the puff at its death.
The lifetime gradient defines the color change for each puff from its birth to its death. Don’t let it bother you if the result of the calculations differs from what you expected. Many particle systems allow for variation over the particles’ lifetime which can mix up the gradients. When rendering your results, don’t forget that each particle has its own life expectancy. This gradient has no correlation to the number of frames your scene contains!

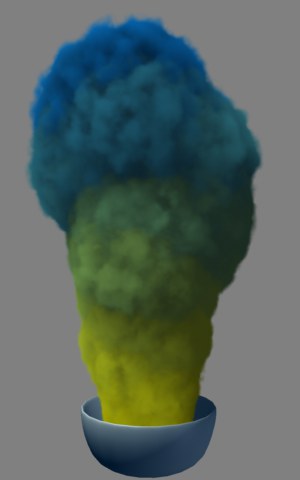 As you can see in the example above, the lifetime gradient also controls the transparency (density) over a particle’s lifetime.
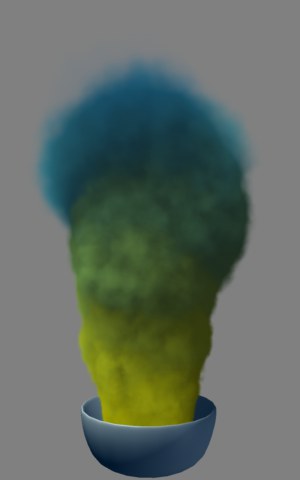 For example, oily, fatty billowing smoke can be transformed into transparent steam.