Tips, Tricks & Extras
This page collects three Maxon Studio techniques that might otherwise go overlooked: retiming a transition capsule's crossover point, replacing capsule placeholders with your own footage, and using Apply Options for fluid, creative orientation mixing. Maxon Studio delivers an exceptional amount of functionality and convenience from a fairly simple interface. Most of the Studio experience is straightforward and intuitive to even moderately experienced AE users. Still, some Studio aspects might go overlooked or benefit from additional discussion. Hence, we offer the following mini-dives.
Transitions
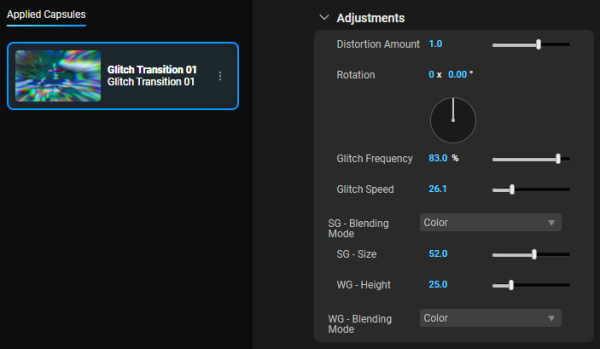
Studio includes an entire Transitions category loaded with cool capsules that help your project move from A to B clips with drama and flare. As with other capsules, you can customize key controls via the Edit Page, as we show here for the Glitch Transition 01 capsule.
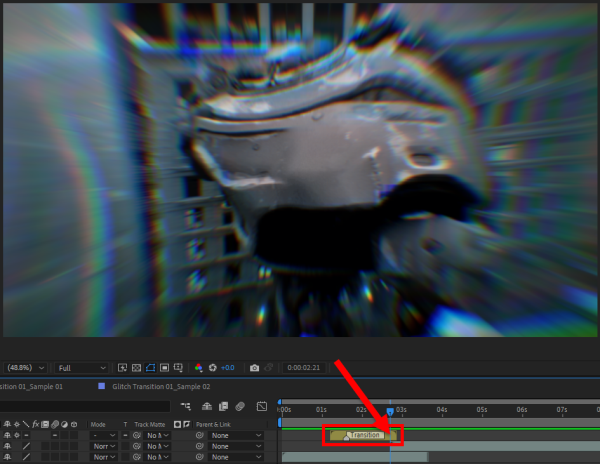
However! One thing you can't control via this capsule's controls is the timing of where that A/B crossover happens. Consider the following comp and timeline, which reflects all of the capsule's defaults when applied to our two-track project.
See that little gray marker within the AE transition track (below)?

That marker pinpoints where the capsule creators located the transition's crossover. But that doesn't limit you from exercising a little extra creative liberty. You can reposition the transition on the timeline to modify your effect.
For example, say we wanted to have more glitching on our trio of weapon-wielding aliens and then a quick cut to the walking robot with just a bit of chromatic aberration. We'd slide the transition like so:
This process only takes an extra few seconds, but it can make a big difference in your transition's feel and impact.
Placeholders
As you work through Maxon Studio, you may find that some capsules include placeholders. Depending on when and how your capsule was created, it may include the Add Footage tool we covered on this guide's Edit page. If your placeholder-equipped preset does not have Add Footage, this user guide tidbit will help.
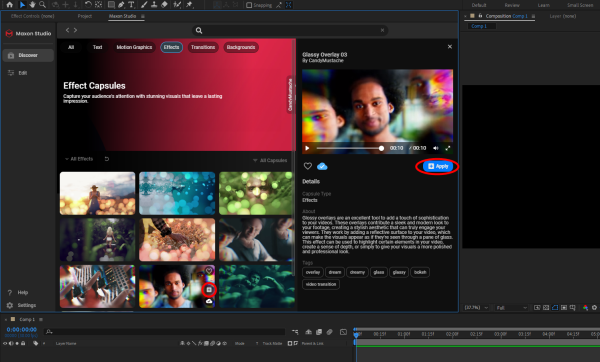
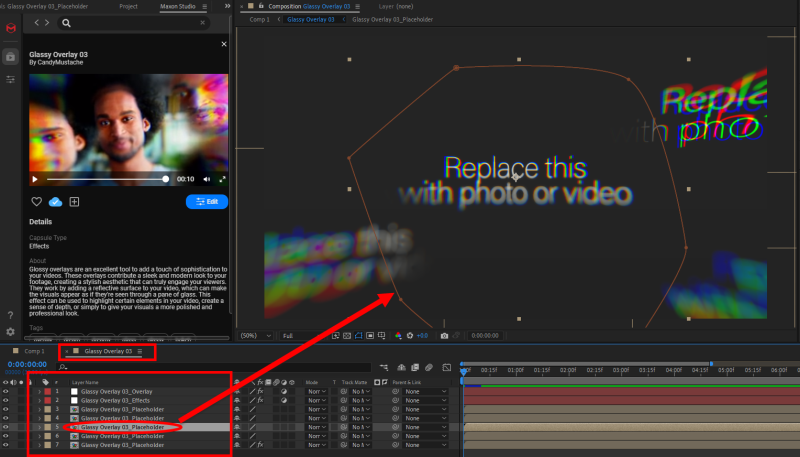
We start with a blank project and apply a capsule that contains placeholders, such as Glassy Overlay 03 (which lacks Add Footage as of this writing). As shown above, you can apply the capsule from the Capsules Page's preview gallery or the Profile Panel.
Once applied, expect to see your UI look something like the following image. Again, if you apply the capsule with content already on your timeline, the capsule will become the top visible layer, thereby hiding everything under it by default.
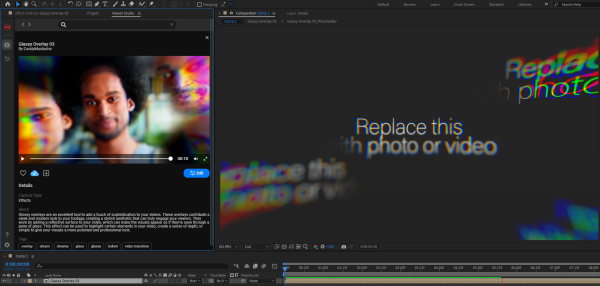
Check out the preview window above. Obviously, those "Replace this" placeholders weren't in the capsule preview, so what's going on? Where are those elements coming from? To find out, we double-click the capsule layer in Comp 1 (on the timeline). Doing so reveals this:
The capsule contains multiple precomposition layers, each with its own attributes. In this case, clicking on our layer 5 shows the outline of the precomp's effect area. Double-clicking that layer yields this:
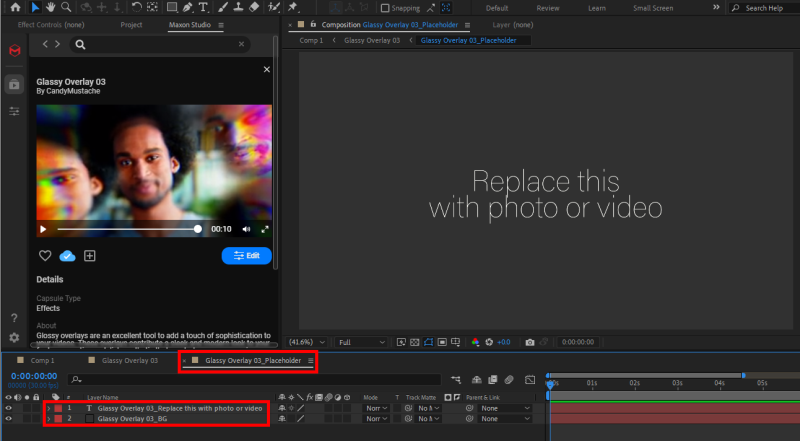
This precomp contains two layers, one for text and the other for background color. As the text suggests, we drag a video clip onto the timeline, like so:
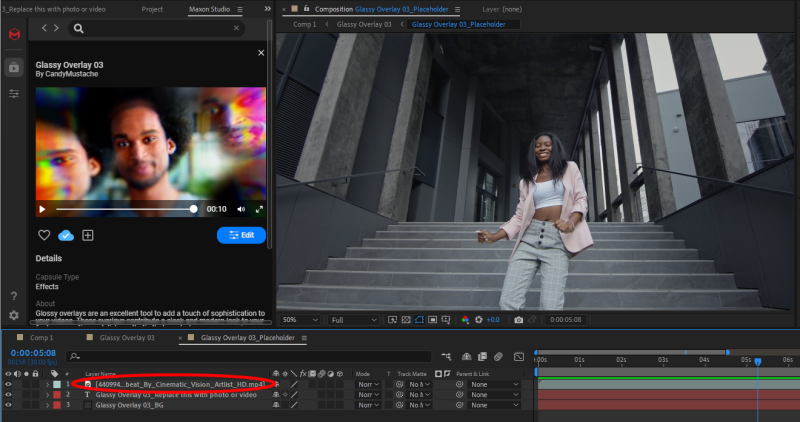
With that in place, we then delete the "Replace this" placeholder layer. Backing out to the precomp's overview tab now reveals this change:
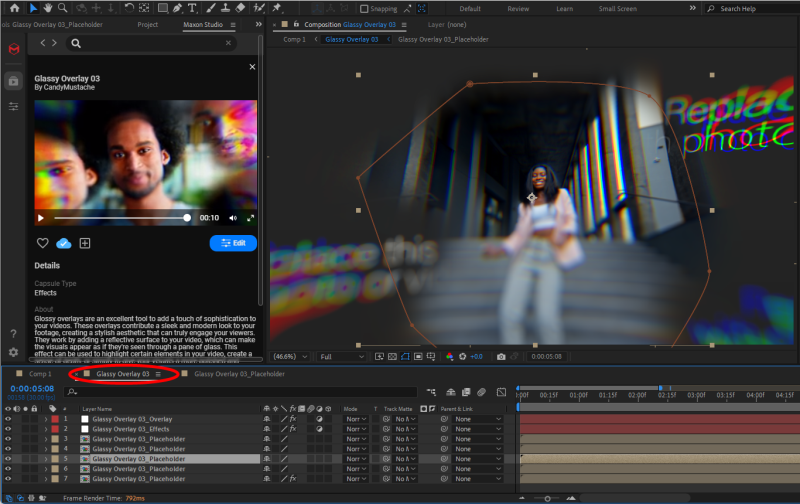
Easy, yes? Now, let's wrap this up by replacing a couple other placeholders with another clip from the same model series so you get a better sense of the final effect.
Fluid Orientation
Studio's Apply Options function lets you select whether a capsule applies to the comp according to its default parameter values (Original Size) or by filling the comp's width, height, or both. Let's take a closer look at how these operations typically operate and then how you might use them for less-obvious benefit.
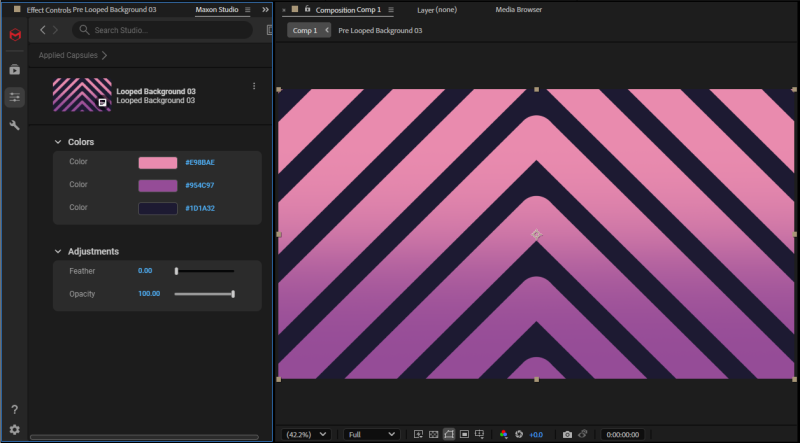
If we begin with a blank 1920 x 1080 comp, select Apply Options: Original Size, and then apply the Looped Background 03, we get the following, where the capsule perfectly fits the comp.
Now, if we select a vertical capsule, such as Flower, and apply it to the same 1920 x 1080 comp, we get this:
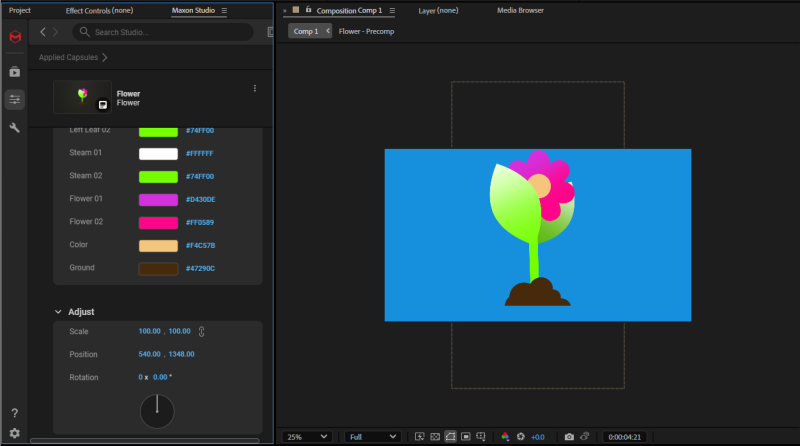
Exactly what you'd expect, right? You're putting a landscape image in a portrait frame, which seems sub-optimal. But...is there a more creative way of using this mismatch to your advantage?
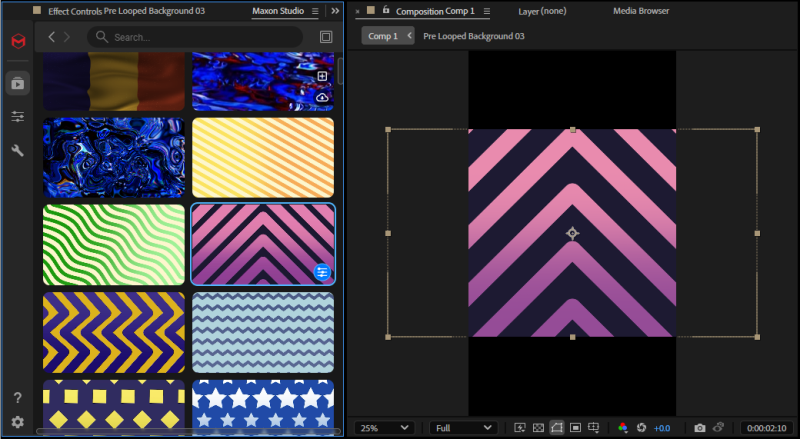
Let's say you find a background capsule that's perfect for your needs, but it only comes in landscape orientation. Maybe it's our old friend, Looped Background 03. A quick Apply in Original Size yields this:
When played, the looping background appears to shift those pink chevrons from the bottom to top of the effect endlessly. But what if inspiration strikes and you realize, "Wait, I don't want a chevron shape in my background, just those alternating, angled pink and black lines"? You'd start by dragging the effect so that only half of it appears in the vertical comp.
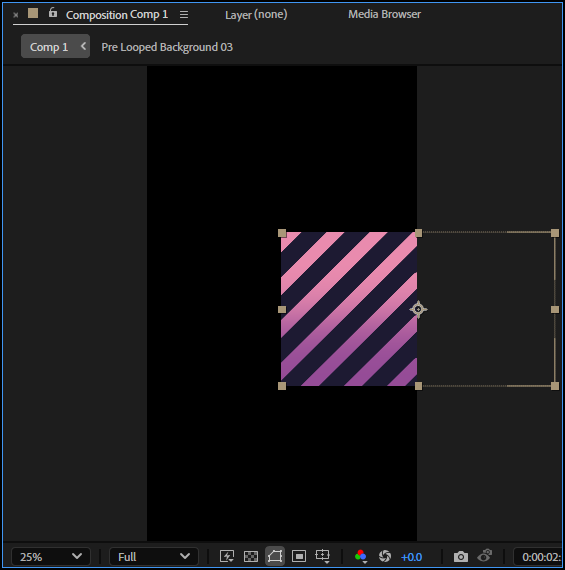
From there, it's just a matter of increasing the background's scale and tweaking its position to taste. In only a moment or two, you have this:
Frequently Asked Questions
How do I change when a Studio transition capsule's crossover happens?
You can't change the crossover point from the Edit Page controls, but you can slide the transition capsule earlier or later on the After Effects timeline. The little gray marker in the transition track shows where the capsule creator placed the crossover; repositioning the transition layer shifts how much of each clip plays before and after the effect.
How do I replace a "Replace this" placeholder in a Studio capsule?
Double-click the capsule layer in your timeline to reveal its precomposition layers, then double-click the precomp containing the placeholder. Drag your video clip into that precomp's timeline and delete the "Replace this" placeholder layer. The replaced footage appears in the comp automatically.
What if my capsule doesn't have the Add Footage tool?
Older or differently-authored capsules may not include the Add Footage tool covered on the Edit Page. For those, use the manual precomp replacement workflow: Double-click into the capsule's precomp layers, drag your footage into the precomp, and delete the placeholder layer.
Can I use a landscape capsule in a portrait comp (or vice versa)?
Yes, and it can be a creative advantage. Apply the capsule at Original Size, then drag it so only the portion you want is visible in the comp, then scale and reposition to taste. The trick works for turning landscape backgrounds into abstract portrait backgrounds by cropping out recognizable shapes.
What are Studio's Apply Options again?
Apply Options determine how a capsule scales when applied: Original Size uses the capsule's default parameters, while Fill Frame, Fit to Width, and Fit to Height stretch or scale the capsule to match the comp's dimensions. See Studio Core Concepts for the full breakdown.