The Object List
When you are in Maxon Redshift's Stage layout, you can access an Objects manager, which is activated on the right-hand side by clicking on the Scene button (see Figure 1). There you will find an overview of all elements of the project. Other categories include Environment for defining sky rendering and natural outdoor lighting, and Materials for editing material settings and getting an overview of the materials used in your project.

The Object List provides you with a complete overview of all loaded elements in the project. Native Redshift Objects are always found at the top of that list.
You can double-click on the names of these elements in the list to edit the individual names directly in Redshift. In addition, right-clicking on individual entries also gives you access to common commands such as Cut/Copy/Paste, Rename, or Delete. You can also Search for the name of a specific element using the search field at the top of the list.
If a string is entered there, only those elements that contain this sequence of letters in their name will be listed from then on. Clicking on the X symbol on the right-hand side of the Search field deletes the entered term and makes all elements of the scene visible in the list again.
Selecting Objects
You can select an object by clicking on it, for example, with the Navigation Tool or the Move Tool in the viewport or by clicking directly on it in the Object List. It will then be highlighted in color (see 1 in Figure 1). If you have enabled the Auto-Scroll to Selection in Object List option in Redshift's Preferences, selecting an object in the viewport will automatically scroll the Object List so that the entry for the selected element is visible.
You can also select multiple objects at the same time. To do this, hold down the ctrl (Windows) or cmd key (macOS) while clicking on the entries in the Object List. Entries selected by mistake can be removed from the selection by ctrl/cmd-clicking on them again.
If all the objects to be selected are located directly one after another in the list, simply left-click on the first element and Shift-click on the last element of the objects to be selected. All objects in the Object List between these clicks will be automatically selected.
Parametric Objects
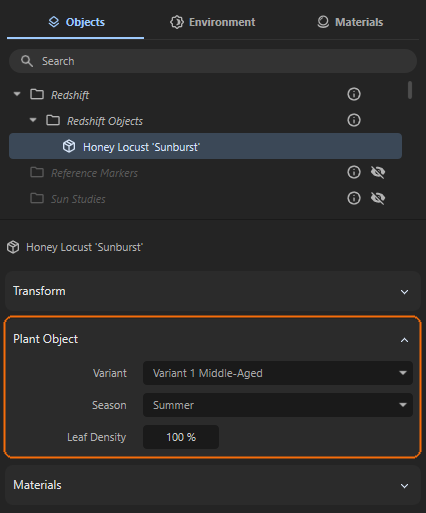
Maxon Redshift also supports parametric objects, such as the specialized Plant Objects, which can be added to the scene via the Library Browser, among other methods. When a Plant Object is selected, it offers configuration options for editing its appearance. These include the desired Season, various age and growth Variants, and Leaf Density (see Figure 2).
Additional Info
You will notice some entries in the list that display additional icons. The Info Icon (see 2 in Figure 1) reveals additional information about the element when you place the mouse pointer over it. For example, all objects imported from Vectorworks are usually fixed and therefore cannot be edited in Redshift in terms of position, rotation, or size. This must be done in Vectorworks if necessary. Only assets added from the Library Browser, for example, can be freely manipulated.
The crossed-out Eye Icon (see icon column 3 in Figure 1) also indicates an element that is currently hidden. This eye icon is not displayed for visible elements. It only appears when the mouse pointer is placed over the corresponding list entry (see 3) and then allows you to switch the open eye icon to make an element invisible.
As shown in 4 in Figure 1, the name of the selected element is also displayed below the Object List, followed by the transformation values for this element. If it is a fixed element (see information from its Info Icon), only the position, rotation, and size multipliers for this object can be read here, but not edited. If it is an asset from the Library Browser, however, numerically exact changes can be made to the position, orientation, and size here.
All necessary info about how to use these values is discussed in the context of the transformation tools, such as here for the Move Tool
Finally, existing material assignments to the selected objects are displayed at the bottom of the page (see 5 in Figure 1). Info Icons may also indicate unchangeable materials there. However, some of these can be overwritten with new assignments.
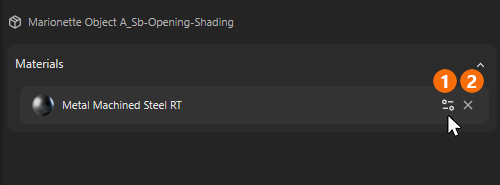
Other materials added manually, e.g., via the Library Browser, display additional icons when the mouse pointer is moved over them (see Figure 3).
The Slider Icon (see 1 in Figure 3) automatically switches to the Materials tab, where you can edit this material. The X icon removes the material from the selected object (see 2 in Figure 3). This does not delete the material; it can be reassigned.
General explanations on how to create, edit, and assign materials can be found on this Material page of the documentation.
Specialized tools for transferring materials are also available, such as the Material Sampler Tool.