Table Of Contents
- Progressive Rendering
- Unified Sampling
- Sample Filtering
- AOV Processing
- Sampling Overrides
- Motion Blur
- Denoise
- Gamma
- Environment
- Lens
- Photometric Units
- Quantize to 8-bit and Dither
Progressive Rendering

Progressive rendering refers to Redshift's interactive rendering mode. It renders the framebuffer in multiple passes which usually start up noisy and get progressively cleaner. It is useful in getting fast feedback when shaders, meshes or lights are edited.
When progressive rendering is enabled, certain renderer features and options have no effect. These are:
- All unified sampling settings (including filtering)
- Point-based subsurface scattering. If you're using point-based SSS, ray-traced SSS (with equivalent settings) will be used instead when doing progressive rendering.
- Photon mapping (including caustics). Redshift's photon mapping implementation is computed as a separate pass so it's only available to production (non-progressive) renders
- Irradiance cache, irradiance point cloud. These are not needed because progressive rendering computes GI in a brute-force way.
- All parameters that have to do with "number of samples". Examples include the number of samples for Depth-Of-Field, number of samples for glossy reflections or refractions, number of area light samples, etc.
Bucket mode is always recommended instead of progressive mode for final renders.
Some AOVs are not computed in progressive mode.
Unified Sampling
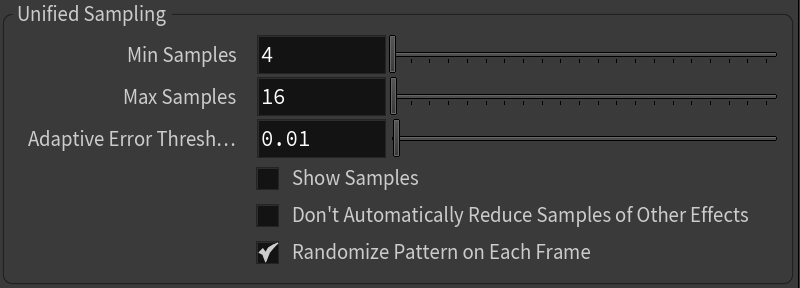
For information on unified sampling, please refer to the unified sampling page.
Sample Filtering
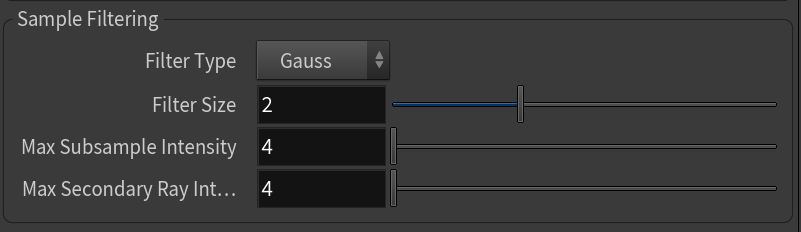
Filter Type and Size
Sample filtering defines how the per-pixel samples will be combined together to produce the final pixel color. There are plenty of options here: Box, Triangle, Gauss, Mitchell and Lanczos. The first filter type ("Box") is the blurriest of all and the last filter ("Lanczos") is the sharpest. The most "neutral" is the Gaussian filter, which is also our default.
You can control the final 'blurriness' of the filter using the "Filter Size" parameter. A thing to remember here is that, the sharper the filter type, the larger the filter size typically needs to be. For example, Gaussian filters work fine with values like 2.0, 2.5 and 3.0 while Mitchell typically works best with values like 3.0, 4.0 or 5.0.
A sharpening filter such as Mitchell or Lanczos in conjunction with a small filter size (like 2.0) will accentuate pixel 'jaggies' as well as noise!
On some renderers 'filter size' refers to the filter radius. On Redshift, 'filter size' refers to the filter's diameter! For this reason, if you're porting a scene from a different renderer, you might have to double the filter size value in order to get similar results.
Choosing a filter type and filter size highly depends on what you are rendering. For example, still images can often get away with sharpening filters such as Mitchell or Lanczos. Animations, on the other hand, usually work best with blurrier filters, like Gauss. The reason is that 'jaggies' are particularly visible on animations!
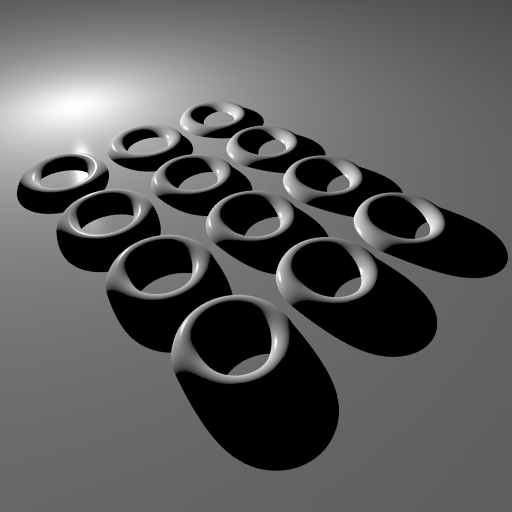
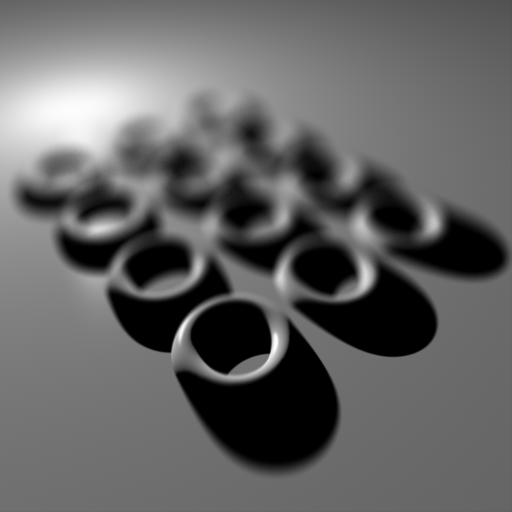
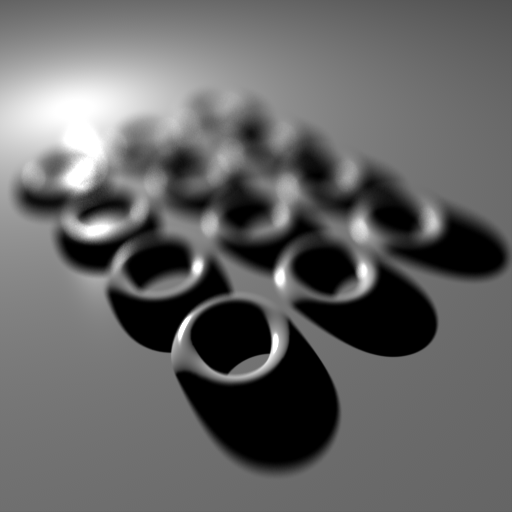
The images below were all rendered with min 4 samples and max 16 samples.
 |
 |
|
| Gauss, Size 2.0. A bit too sharp around the rings | Gauss, Size 3.0. Ok | |
 |
 |
 |
| Mitchell, Size 2.0. Very sharp features.
Almost as if antialiasing is disabled. Mitchell filters require larger sizes! |
Mitchell, Size 3.0. Still a bit aliased but looking better. | Mitchell, Size 4.0. Sharp and relatively smooth.
The Mitchell filter typically works best with sizes like 4.0 and 5.0 |
Max Subsample Intensity
Usually monitors can show colors ranging from black (0.0, 0.0, 0.0) to white (1.0, 1.0, 1.0). Any color that is brighter than white (like 10.0, for example) will still be rendered as white. But the internal workings of a renderer do care about these "overbright" colors.
Scenes containing very bright lighting and/or strong emissive materials can be very hard to antialias. The reason has to do with sample filtering: say a pixel was rendered with 64 samples. If most of these samples are mid-gray (0.5, 0.5, 0.5) but there is a single sample that is extremely bright (100.0, 100.0, 100.0), that sample will 'dominate' the final pixel color.
The issue can be addressed by limiting the intensities of individual samples. For example, ensure that no sample is brighter than 2.0. The 'Max Subsample Intensity' control allows the user to adjust that limit. The higher the 'Max Subsample Intensity', the harder for the renderer will be to antialias the image.
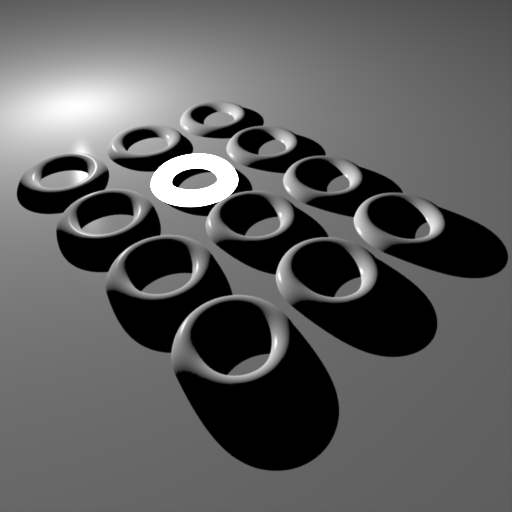
The image below contains a self-illuminating torus with intensity 100.0. The AA settings are min 4 samples per pixel, max 16 samples per pixel.
 |
 |
 |
|
Max Subsample Intensity set to 128. |
Max Subsample Intensity set to 4.0. |
Max Subsample Intensity set to 1.0. |
There are a couple of important drawbacks to using 'Max Subsample Intensity':
- If you are generating an HDR image, bright pixels will be clamped to that value. If you were hoping to apply bloom effects as a post-process that could limit your ability to do so.
- Clamping the per-sample values means that "light energy" is lost. The effect is especially apparent with high antialiasing settings (i.e. many samples per pixel). The lost energy appears as a darkening effect, especially in a blurry effect like Depth-Of-Field.
The only current solution for both cases is raising the 'Max Subsample Intensity' which, unfortunately, will re-introduce harsh edges on strongly illuminated objects.
The images below demonstrate the "energy loss" with an aggressive 'Max Subsample Intensity' setting.
 |
 |
|
Max Subsample Intensity set to 1.0. |
Max Subsample Intensity set to 4.0. |
Max Secondary Ray Intensity
Just like 'max subsample intensity' limits the intensity of primary rays for antialiasing, depth of field and motion blur, 'max secondary ray intensity' does the same for glossy and GI rays. This feature is useful for reducing fire-flies that may appear in glossy reflections or refractions, which can occur when a small percentage of rays are unlucky enough to sample extremely hot light sources, when most of the rays do not. The ideal solution would be to use as many rays as it takes to clean up the noise caused by fire-flies, but often this is not practical since many thousand, if not infinite, ray samples would be required. Clamping glossy samples is a simple (though not physically correct) solution, which helps ensure that hot samples are no brighter than a specified max amount.
See the section on noise for examples.
AOV Processing
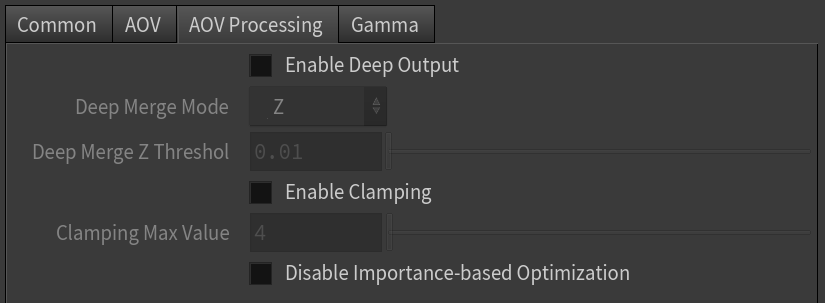
This option allows you to apply a 'clamp' (intensity limit) to the AOV color and AO channels. For colors, the clamp will be applied to each color channel (RGB). Clamping occurs prior to any AOV filtering. For examples of how and when these settings should be used, please refer to the AOV tutorial page.
Enable Deep Output
When this option is checked, Redshift can render deep images. For more information regarding deep rendering and deep EXRs, please refer to this page.
Enable Clamping / Max Value
When 'Enable Clamping' is checked, the maximum value allowed for each color channel or AO is defined by 'Max Value'
Use with caution. Note that this clamping will only be applied to AOV channel buffers, not during the beauty pass, so final composited results may not yield the same results as the beauty pass.
Disable Importance-based Optimizations
By default, Redshift adjusts the numbers of samples of different effects like glossy reflections and refractions, area lighting and brute-force GI based on the visual importance of the pixel. For example, darker reflections can get away with fewer glossy reflection samples. However, doing so, can produce noisy AOV and negatively affect the final comp.
This option disables these optimizations and guarantees that the required number of samples will be used, irrespective of whether the reflection/refraction/lighting is dark for a pixel.
Sampling Overrides
The Overrides are only available if Automatic Sampling is disabled in the Unified Sampling settings!

Override Samples
Checking this will enable the global samples override for the given ray category. Once checked, you will be presented with the following override options:
- Replace Samples – replaces the samples for the given ray category
- Scale Samples – scales the samples for the given ray category
Samples / Samples Scale
The override value for the number of samples.
Motion Blur
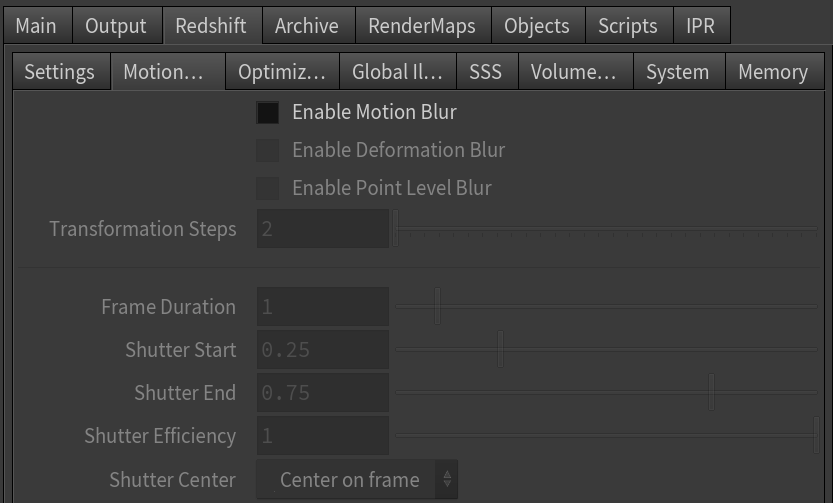
Motion blur options are described on their own page. Please click here for more info.
Denoise
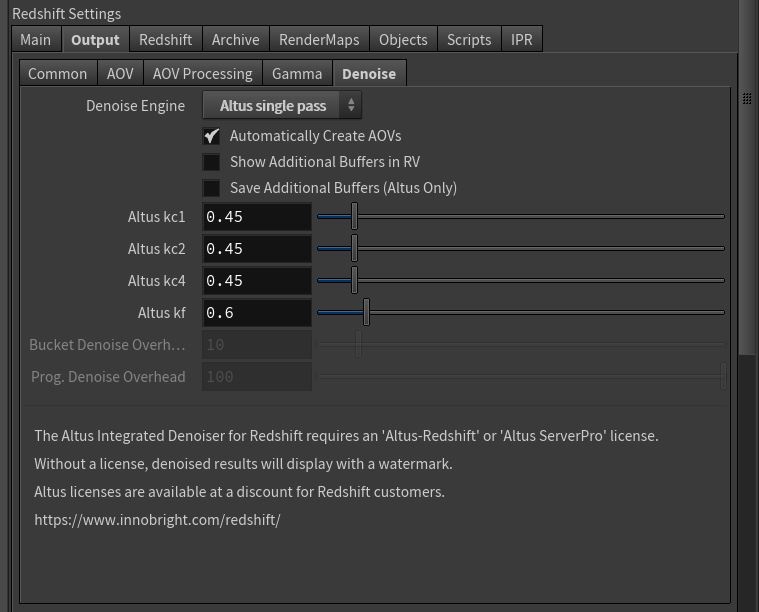
Redshift supports two separate denoising engines: Innobright's Altus denoiser and NVidia's OptiX AI denoiser.
For more information on denoising, please see this document.
Gamma
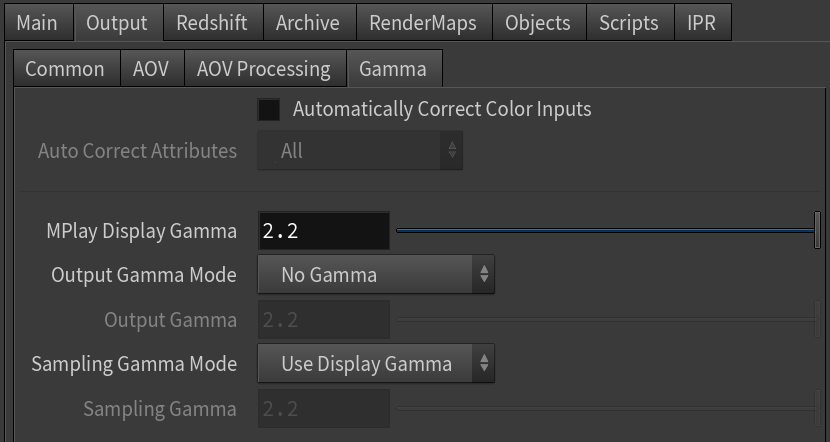
The gamma options (and gamma correction in general) are described on their own page. Please click here for more info. Also read more about general Color Management in Redshift here.
Environment
Houdini does not have this section. Please see the physical sun and sky, volumetric scattering or environment shader pages for more information.
Lens
Houdini does not have this section. Please see the photographic exposure, bokeh, and distortion pages for more information.
Photometric Units
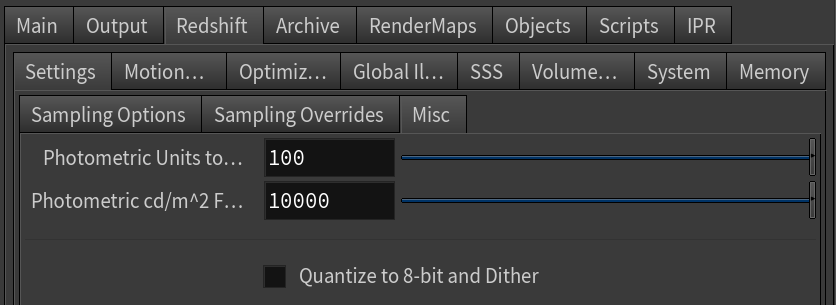
Certain features of Redshift such as photographic exposure, physical sun/sky and IES light support require knowledge of the "units to meter" and "candela to square meter" settings. It's important to set these values correctly, otherwise lighting coming from physical light sources might appear too dim or too bright.
If you're working with centimeters (i.e. 1 world unit is 1 centimeter), the units to meter scale should be set to 100. That's because, in this case, 100 world units means 100cm, which means 1 meter. If you're working with meters, then it should be set to 1, because 1 world unit means 1 meter.
Additionally, photographic exposure, IES lights and the physical sky/sun use the "candela to square meter" setting. Please make sure to attach a photographic exposure lens shader when using IES lights and physical sun/sky, otherwise your lighting will appear too bright or too dim.
Quantize to 8-bit and Dither
Most computer displays are able to show up to 256 shades of gray even if you are viewing an HDR image. Depending on the monitor capabilities and calibration, there's the possibility of "banding" artifacts on slow-changing gradients.
Dithering can help with that!
In Redshift, dithering only works on 8-bit images, i.e. non-HDR images. So, assuming you don't care about HDR output, you can enable the "quantize to 8-bit and dither " option and get rid of any banding artifacts.
The left image shows the banding near the bottom. Please note that, depending on your monitor calibration, the effect might not be very noticeable.
 |  |
| No Dithering | Quantization and dithering enabled |
Because this option quantizes to 8-bits per color channel, the final image will lose color precision in the dark tones. Additionally, any pixel that's overbright will have its intensity clamped to a value of 1.0. For these reasons, if you do care about HDR you should keep this option disabled and, instead, apply dithering or other kinds of processing on an external image editing program.