Thickness
This channel lets you define the thickness of the hair along its shaft. Usually, the narrower the hair, the more realistic it will look when rendered. The number of hairs rendered will have to be increased accordingly (Hair object: Hair Tab), which also increases render times. A good balance between the two will have to be found to achieve the best results.
Thick hairs serve well for such things grass or weeds, or even for simulating fiberglass.
These settings let you set the thickness of the hair root or hair tip. The thickness of the hair along its length will then be interpolated linearly between these two values. You can also use the function graph below to set your own interpolation between the two values.
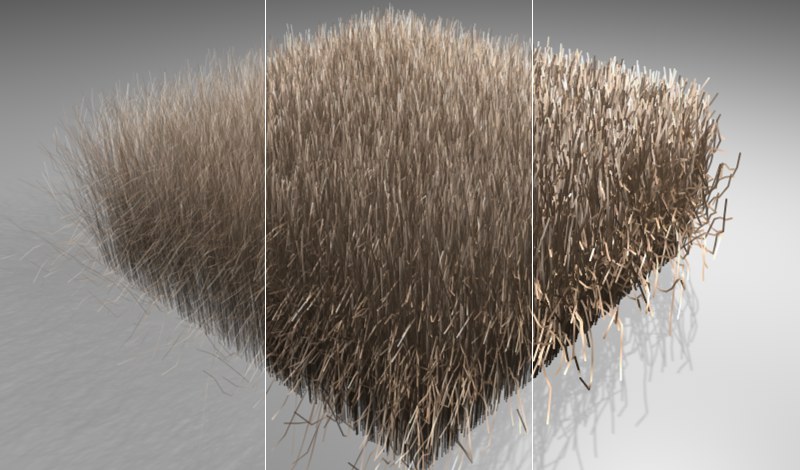 From left to right: Increasing Root and Tip values.
Very thick hairs are ideal for creating fiberglass light strands:

This setting varies the thickness of the hair root and tip by randomly adding to or subtracting from the values entered for Root and Tip.
This function graph lets you define the shape of the hair along its entire length. This does not make much sense when creating normal hair, but can be used to create interesting effects, such as the one shown below:
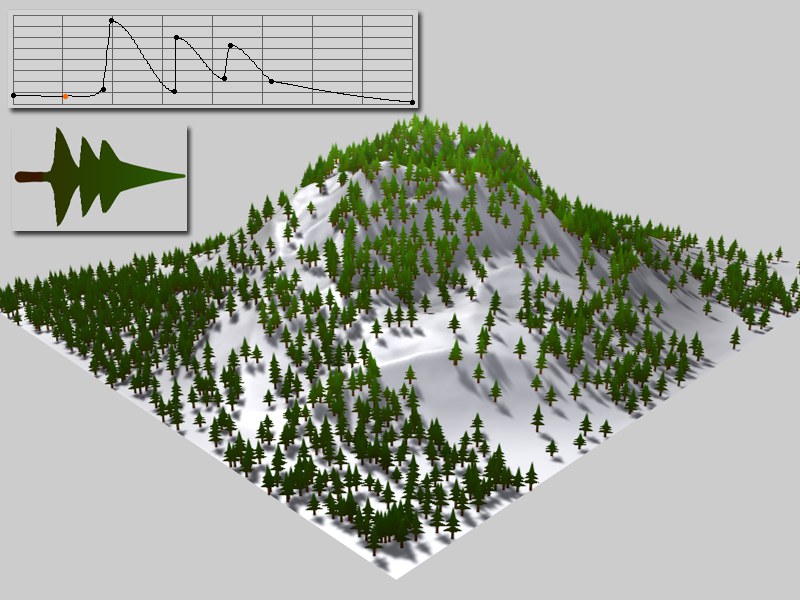 Curve lets you precisely define the shape of the hair.
In the example above, Root and Tip values were each set to 12m. To create complex shapes as the one above (and have them look good) thicker Root and Tip values are recommended. Also, the more complex the shape, the more hair segments that will be required (Hair object: Hair tab / Segments) in order for the curve to be able to accurately create the shape.
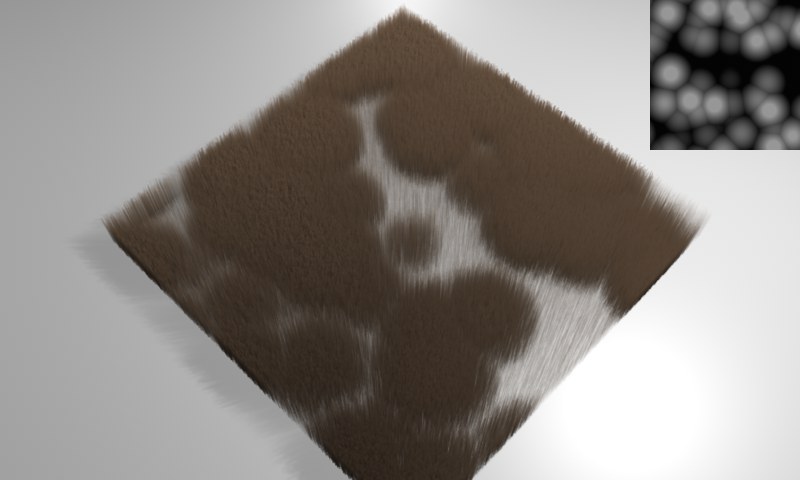 In the example above, a Voronoi shader was used to define the thickness of the hair.
If you want Thickness to affect an entire surface using a grayscale texture, simply load your texture here.