Color
 The gradient (insert) was applied to the strand of hair.
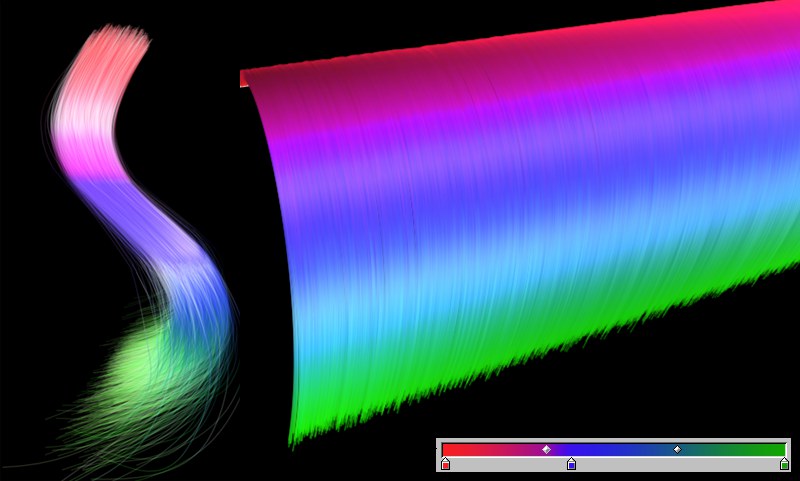
This gradient defines the color of the hair along the entire length of the hair. The left end of the gradient represents the hair root, the right the tip.
Use this setting to adjust the overall brightness. A value of 0 results in black hair. As is the case with many other parameters, Brightness can be manually set to a value greater than the maximum of 100% set by the slider.
Load the texture here that you want projected onto each individual hair. You can find more details regarding this here.
If you want to texture hairs using a texture you have loaded, use this setting to define how the texture color will be blended with the hair color. All blend modes are described later in this chapter, under Blend Modes. This particular menu is available in many channels into which textures can be loaded and mixed with existing colors.
Use this setting to define the degree to which a texture that has been loaded should be mixed with the hair color. This particular menu is available in many channels into which textures can be loaded, and mixed with existing colors.
Var:
H [0..100%]
S [0..100%]
V [0..100%]
Use this setting to vary the hair’s H/S/V values. This prevents the overall color of the hair from being too uniform and results in a more realistic look. Even real hair does not have a uniform color.
![]() Roots
Roots
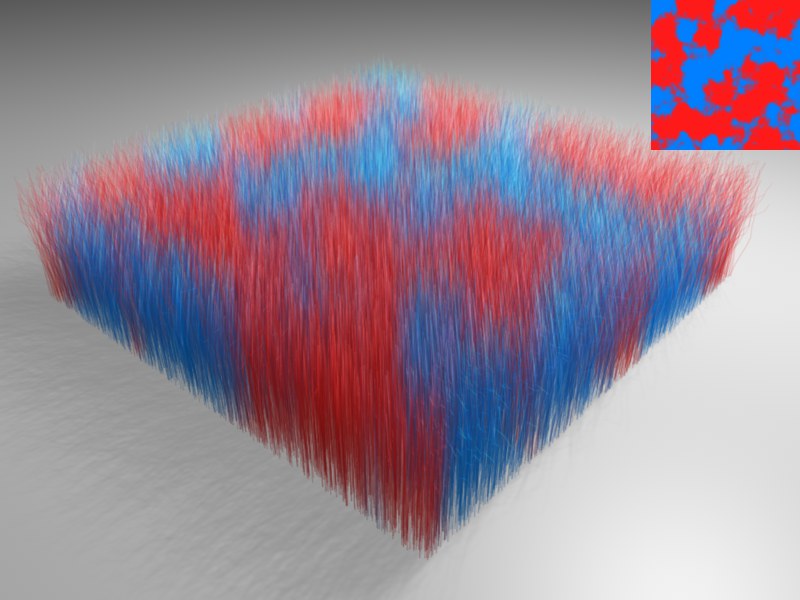 The texture at the top right, was loaded into the Roots channel’s Texture field.
Use the Roots channel to define how color(s) should be distributed over a given area. The tips will assume the color of the roots. This can, though, be changed using the Tips channel, which is explained next.
See Blend Modes.
See Blend Modes.
![]() Tips
Tips
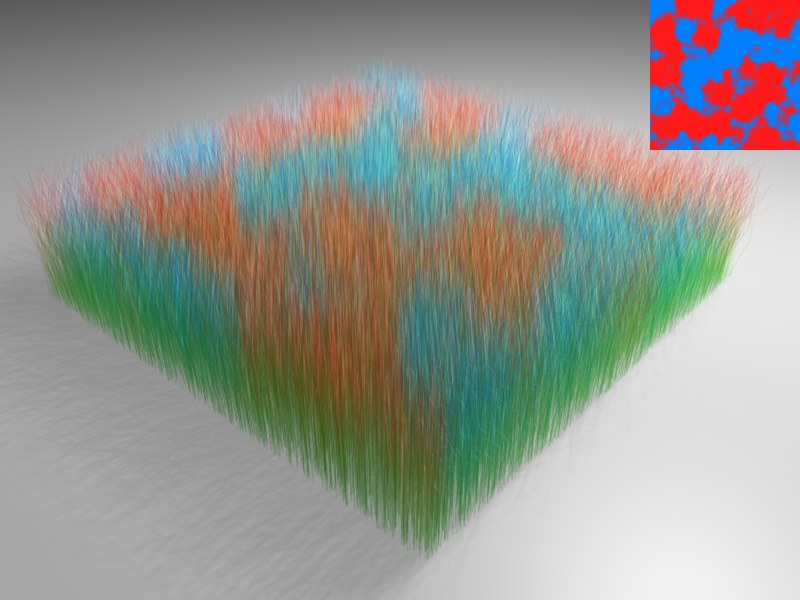 The texture at the top right, was loaded into the Tips channel’s Texture field.
If the As Roots option is active, the tips of the hair will assume the color of the roots.
If you want to use a different texture for the tips, deactivate this option and load the desired texture into the Tips channel. The color(s) between the root and tip will then be interpolated along the length of the hair.
See Blend Modes.
See Blend Modes.
![]() Tint
Tint
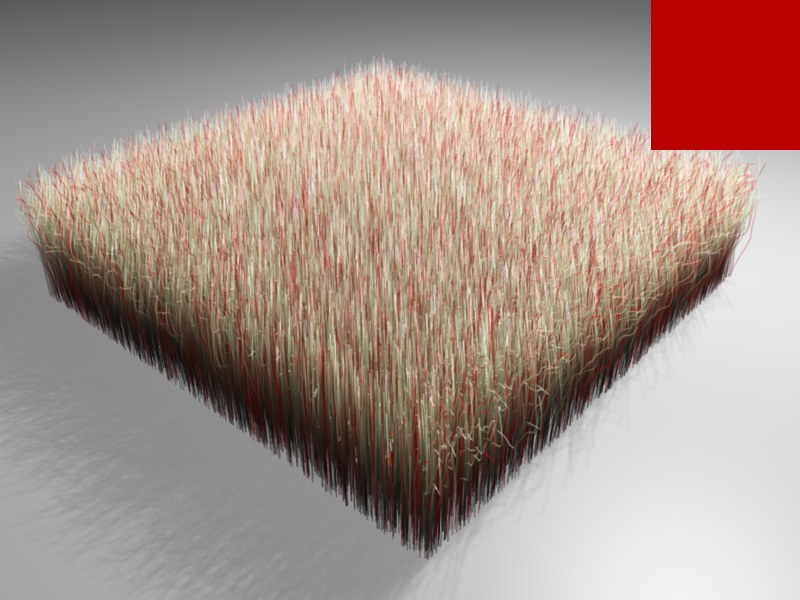 The texture at the top right (in this case a single color) was loaded into the Tint channel’s Texture field.
Tint can also be used to give hair a uniform color, e.g., gray, to simulate aged hair.
If a texture is loaded into the Tint channel, it will define the color of the mixed in hair across the hair-covered surface.
The Hairs setting in the Tint channel can be used to assign a different color to only a selected area of the hair. In the example above, Hairs was set to 20%, resulting in every fifth hair being colored red. Tint colors the hair uniformly from the root to the tip.
See Blend Modes.
See Blend Modes.
![]() Surface
Surface
The Surface settings are specially designed for rendering fur. Surface uses hair color, illumination and, if applicable, cast shadows to generate a fitting color for the fur. These settings (described below) will then be blended with the existing hair color.
The Additive blend mode will blend the least.
Activate this setting if you want the object’s surface to assume the color of the hair.
If the object surface is made up of quads and an Ambient Occlusion shader is applied to it, unwanted hair coloration can occur (primarily darkening). In this case, slightly increasing the Offset value can help (optionally, non-planar quads can be triangluated - but this is generally not desireable).
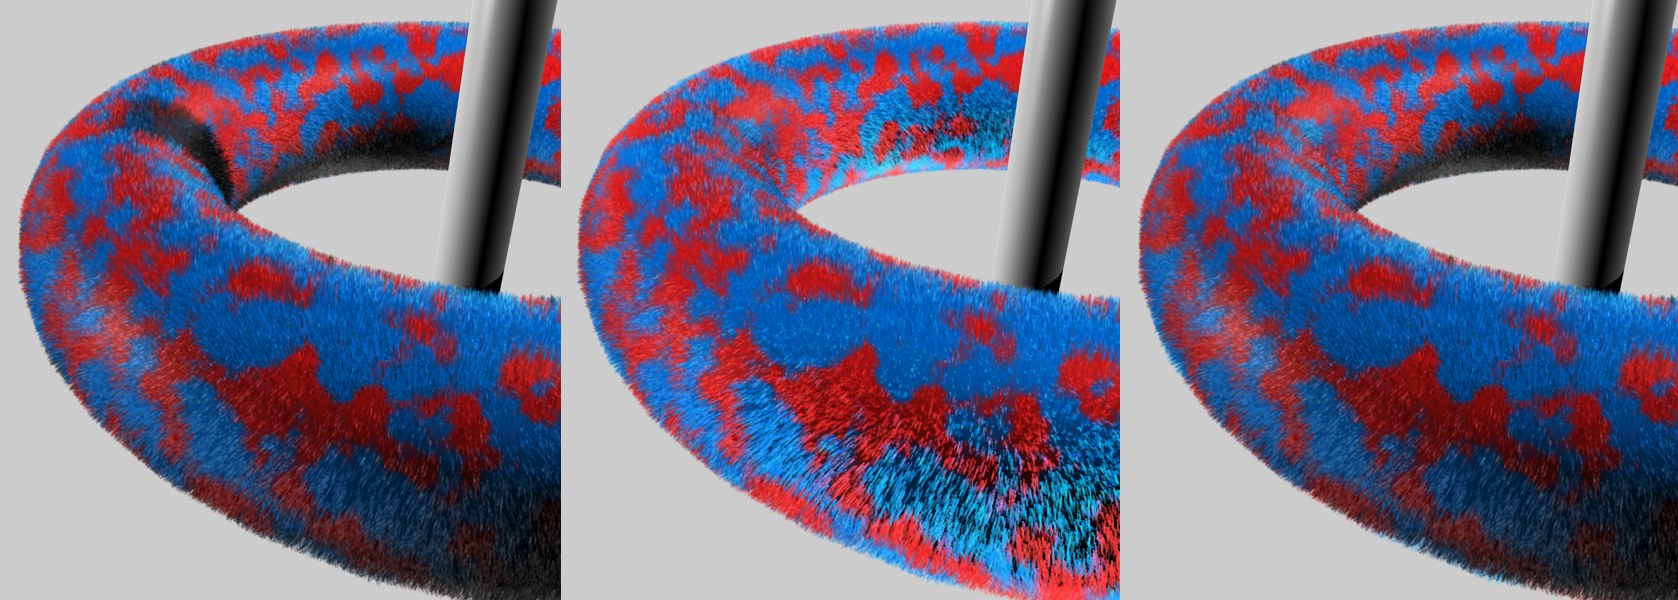 Left: Color, Illumination and Shadows active. Center: Illumination deactivated. Right: Only Shadow deactivated. Blend mode for all three was set to Normal and 100%.
If this setting is active, the color of the object will be assumed. If this setting has been deactivated, the fur will be combined with the color defined, thereby taking the mix mode into account.
Here you can define if the color should be affected by the scene lighting.
Deactivate this setting if you do not want to include any cast shadows (see example above, image at right).
See Blend Modes.
See Blend Modes.