Time and Location
 Various times of day have completely different lighting moods.
Since the position of the stars (as well as your position on the earth’s surface) lies in direct correlation to time zones, you select a set time and date for your simulation. Of course both of these properties can be animated, although there are some specifics you should be aware of (see below).
Note that shadows cast by a sun light source are only a simulation of real-world conditions, i.e., they can differ from real-world shadows and are not suited for precise simulations.
Sky’s internal sun will change color according to the time of day.
This is where you enter the time and date of your Sky simulation. Click on Now or Today to set your scene to the actual date and time on your computer.
The mouse scroll wheel can be used to scroll through the days in the calendar. Simultaneously pressing the
You can change the time minute by minute by placing the cursor over the clock face and scrolling with the mouse wheel or by clicking and dragging the mouse up or down. Simultaneously pressing the
Numbers can be entered manually into the (time)data entry fields:
- Date (minimized display): "19311" will produce dd/mm/yy (19 March, 2011)
- Time: "1920" will produce 19h:20m:00s (7:20pm) You can also include separators such as, . / . This applies to all date / time data entry fields in Cinema 4D.
If the Time setting’s sub-channels can be displayed, the time of day and day will be displayed numerically. Days will be displayed as continuous number (start at 0=01/01/1970), time will be displayed as a float comma between 0 (= midnight) and 1(= noon the foillowing day).
When active, this option will set the scene to the current time.
If this option is active, the current date will always be used. The same applies here as with Current Time; the time and date at which the file was originally saved will not be saved with the file. When the file is opened again, the current time and date, in this case today, will be assumed.
If neither option is active, no interpolation between time keys will take place.
Let's say you have two time keys, the first with a value of 22.07 08:54, the second with a value of 26.09 18:54. If you were to interpolate these two values it would be impossible to estimate how long this interpolation would take.
This is why both options have the following function, respectively:
- Animate Date: The time remains constant, only the day will change. You can, for example, animate the sun’s position at 12:00 noon over a 2-month period (Animate Time must be deactivated).
- Animate Time: Time will actually be interpolated between 2 keys. If the animation runs over a period longer than 3 days, and Animate Date has been deactivated, the animation’s time will run over three days, but the date will not change. 3*24 hours will be animated, which is tantamount to a triple loop.
City [-2147483648..2147483647]
Click here to access the list of available cities, organized according to country and continent. Select a city that lies near the location of the city where you want your simulation to take place. Once a city has been selected, all Location parameters will be set accordingly.
Latitude [-90..90°]
Longitude [-180..180°]
Enter the latitudinal and longitudinal coordinates of the location from which your simulation should take place. The ’ and ’’ fields represent the interim values for latitude and longitude, also known as the arc minute and arcsec. Don’t hesitate to enter 0 for each value if you don’t know the exact position, or if a sextant is not readily available. If 0 is entered, expect slight deviations in a constellation’s position. This also applies if you simply select the name of a city in the vicinity of the location where your simulation should take place from the drop-down menu.
A comprehensive online listing of global coordinates can be found online.
Leave Time set to Custom. If OS is selected, your computer’s operating system’s current date and time will be used. This can lead to unwanted results. For example, a scene that was saved for London, high noon, will be pitch black (night) when opened in Sydney with the OS option on.
Only if Time is set to Custom will the following three options be made available: Daylight Savings, Time Zone and DS Time Zone.
This is where you enter the Daylight Saving Time of your present location or the location where your simulation will take place. For, among others, the United States/Canada, for example, you would select First April Sunday to Last Oct. Sunday or the second Sunday in March to the first Sunday in November. The two lower Daylight Saving Times apply to the southern hemisphere. You can find more information on Daylight Saving Time at
www.worldtimezone.com/daylight.html.
If your animation must run through the date on which Daylight Saving Time takes place, you should turn Daylight Saving to Off, otherwise your animation will jump during the time change.
Time Zone Diff. [-∞..+∞]
DS Time Zone [-∞..+∞]
Use Time Zone to enter the difference in hours to GMT (Greenwich Mean Time – 0° longitudinal). DS Time Zone must take into account Daylight Saving Time, i.e., the United States East Coast’s Time Zone would be -5, and its DS Time Zone would be -4.
You can find the difference for each region of the world at www.worldtimezone.com.
Note that the regions to the West of GMT have a negative value.
Example: Let’s assume Chicago is not on the list of cities provided by Cinema 4D, but you want to render a skyscraper in Chicago using the current position of the sun. The GMT in the State of Illinois is -6; simply set Time Zone to -6.
Since Daylight Saving Time jumps forward 1 hour, Illinois’s DS Time Zone would then be -5.
- Enter the corresponding longitude, latitude, Daylight Saving time zone, Time Zone, and DS Time Zone for your city.
- Click on the small button to the far right of the City slider
 and select New City from the menu that appears. The following window will open:
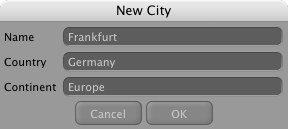
Enter the city’s name, the country, and continent (the latter two preferably in English) and click on OK.
The new city and location will be saved and will be available right away in the same menu you used to create the new city. All corresponding parameters will be set in the Location tab.
Lets you delete the currently selected city.
This command can also be accessed by clicking on the small button to the right of the City slider.