Sky
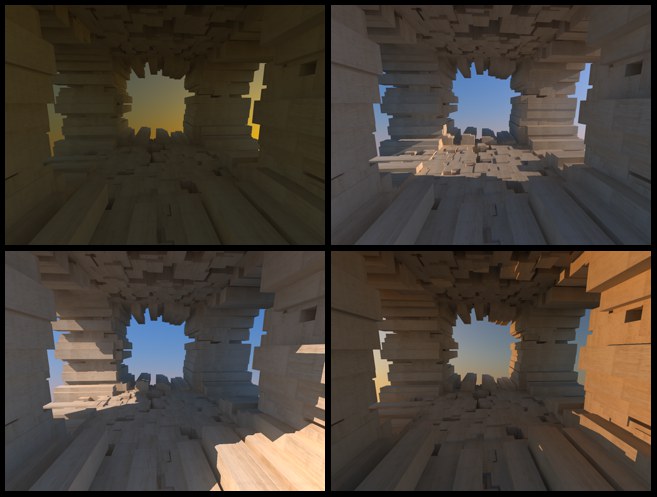 Various moods at various times of day.
Well, it’s really nothing more than an accurate simulation of the sun’s and sky’s natural color and brightness with regard to their current location and the time of day. Internally, the Physical Sky shader uses exact spectral colors that are interpreted by adjustable Color Warmth settings for output to RGB - Use Warm Colors and Use Chroma Color Map.
Furthermore, an atmospheric perspective effect can be created using the parameters in the Atmosphere tab.
If enabled, the sky will be clipped at the bottom at the horizon line, where it will be colored black. Otherwise the southern hemisphere will be given the color (and brightness) of the horizon.
The Physical Sky works internally with spectral colors that have to be converted to RGB colors for rendering. The Color Warmth setting can be used to adjust the appearance. Generally speaking, the larger the value the warmer the sky’s color will be (i.e., less turquoise in a blue sky and more brown in a morning or evening sky).
Defines the intensity of the sky’s brightness. This affects the light used by the sky for GI calculation and the direct (most often blue) illumination of objects. The Intensity only regulates the visible intensity (without the influence of GI).
Night Intensity Ratio [0..10000%]
Defines the brightness with which the night sky is rendered as well as the brightness of the light it emits. This parameter is dependent on the Intensity parameter, i.e., if this value is increased the Night Intensity Ratio will increase accordingly, without the value itself being increased.
Saturation Correction [0..200%]
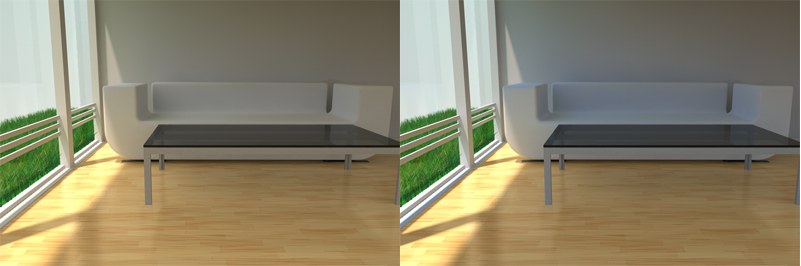 Left a lower, right a higher Saturation Correction value. Note how the sky’s blue color at the right is much more intense on the walls and the sofa.
Defines the sky’s saturation. If, for example, the sky is too blue, simply lower the Saturation Correction value. A value of 0 will result in a grayscale sky.
This parameter can be used to create extraterrestrial sky colors. The entire color spectrum is available for you to use.
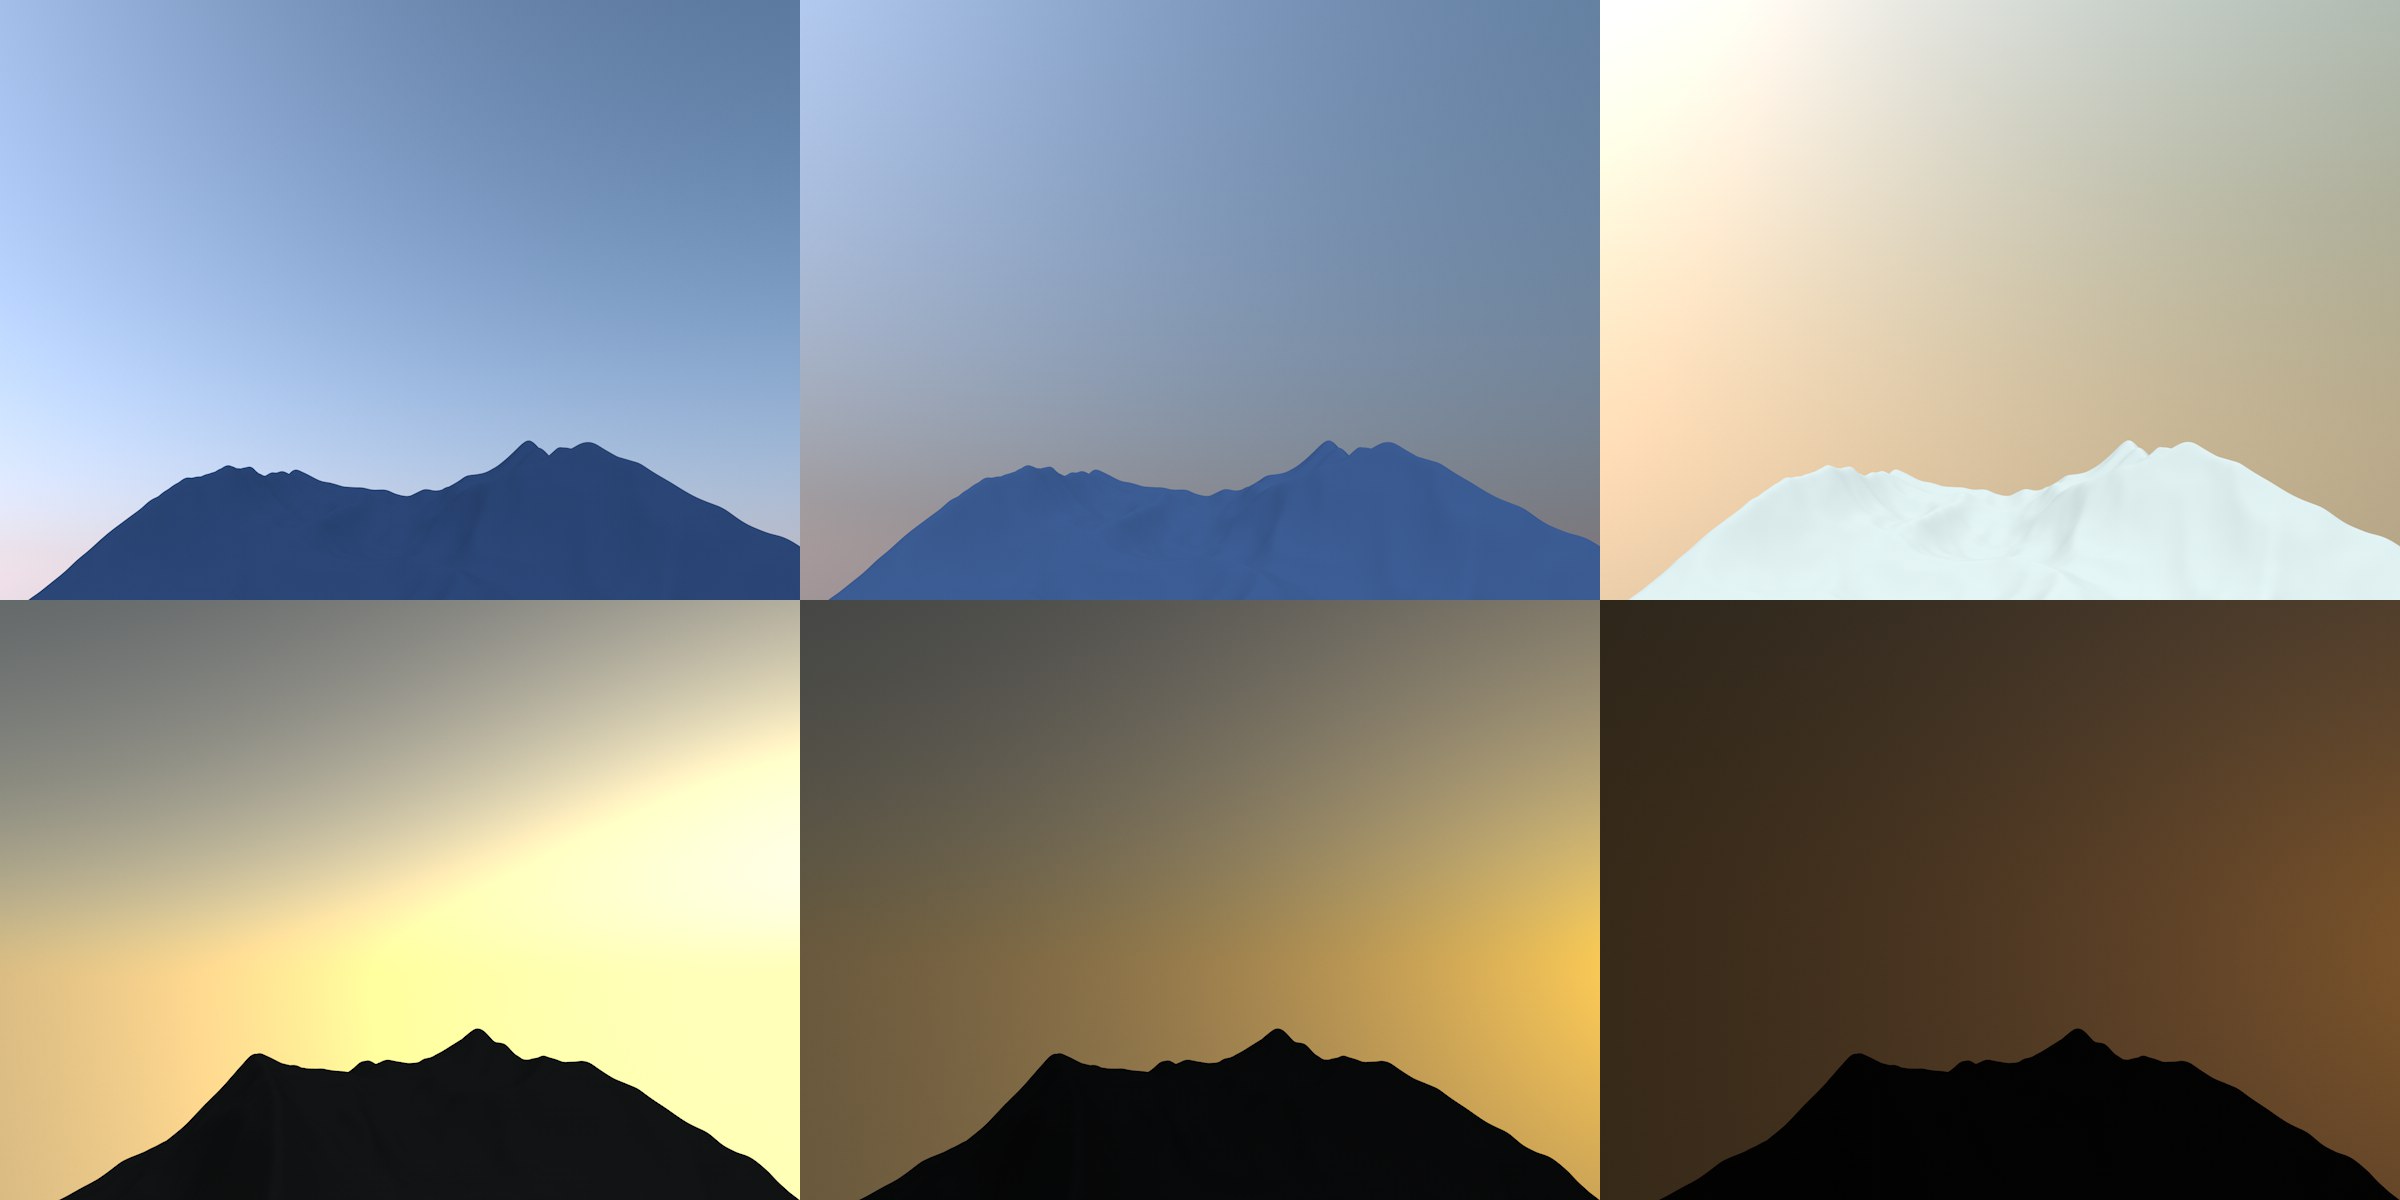
 Increasing gamma values from left to right.
The internal brightness range for the sky is much larger than can be displayed on your monitor. Use the Gamma Correction value to define the brightness range from brightest to darkest values.
Defines the brightness of the rendered, visible sky only (also dependent on the Intensity parameter). The GI calculation will not be affected!
If color banding (sudden color transition) appears when the sky is rendered, this value can be increased to add a slight noise to the sky’s gradient, which will hide such banding.
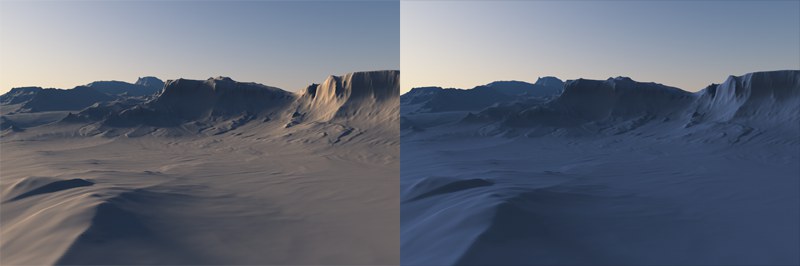
 Various Turbidity settings (2, 3 and 10). Top midday; bottom, evening.
Many natural color phenomena in the sky are caused by various combinations of light and water or other particles in the atmosphere. In Cinema 4D, the expression used to describe particles in the air is "Turbidity".
The smaller the value, the more clear the atmosphere will be. Higher values will result in correspondingly in more foggy or smoky, as well as more colorful, effects. Depending on the Atmosphere Strength value, effects can result that cannot be modified linearly. As always, trial and error is the best way to get to know this effect.
In case the sky is too bright or too dark, the Turbidity and Atmosphere Strength (see below) parameters will have the greatest influence in rectifying this.
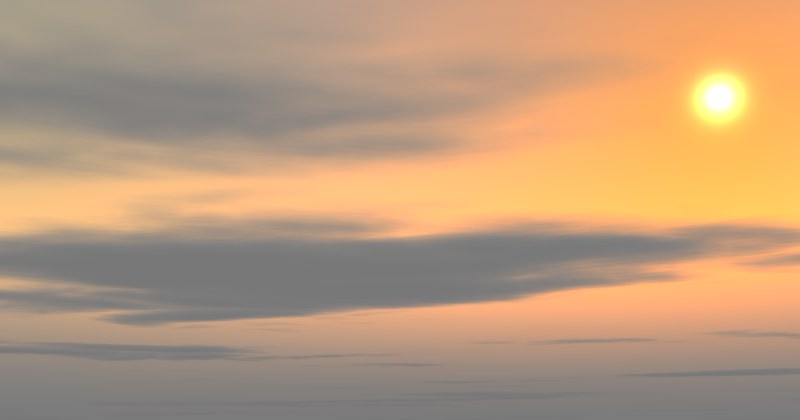
 Left lower, right higher Ozone value. Scene © Eric Smit.
In the real world, ozone filters ultra violet sunlight. In visual terms, it filters yellow and red sunlight (i.e., the Sun option must also be enabled). Therefore, the higher the Ozone value the more bluish the sunlight will appear (in the real world, this takes place at dusk and dawn). The color of the sky itself remains unaffected.
Enabling this option lets you define a custom color gradient for the sky.
The first half of the gradient will be projected to the value defined here (or to the altitude of the sun, whichever value is smaller). The second half will run to the Zenith. Larger Maximum Height values can result in parts of the gradient being cut off at the right.
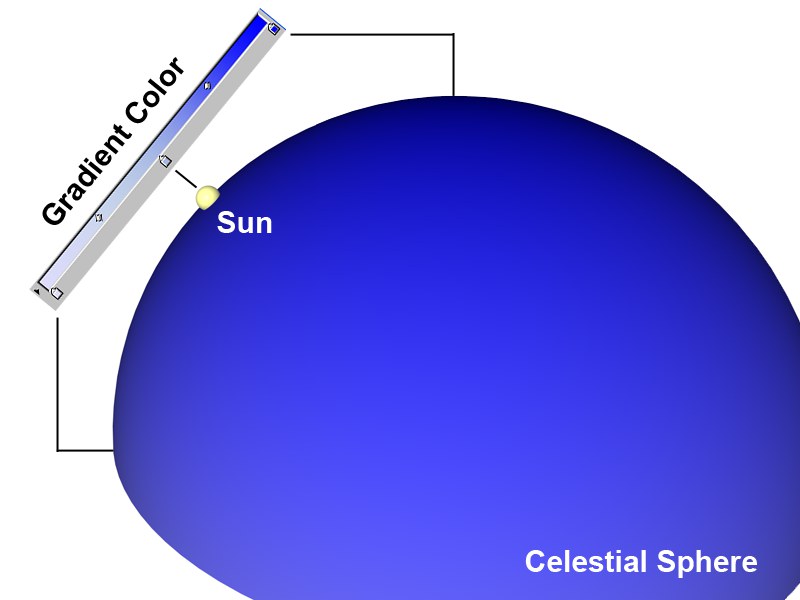
Defines the gradient that is projected onto the sky hemisphere in one of the following ways:
- Left: Near the horizon
- Center: At the altitude of the sun (also Max. Height)
- Right: Near the Zenith
The atmospheric strength affects the brightness of the atmosphere, i.e., the same effect as the previously described Turbidity parameter has. Lower values will cause the atmosphere to fade to black; larger values will fade to white (if the Turbidity value is high enough).
If you want to animate a camera flight from the earth’s surface to outer space, animating the Atmosphere Strength parameter to 0 would be a good idea.
Nice evening moods can be achieved by reducing the Atmosphere Strength value to 50%.
Several sky effects such as rainbows or sunbeams are dependent on Turbidity. When the Physical Sky was introduced to Cinema 4D a few versions ago it was given its own Turbidity setting for technical reasons. The Effects Turbidity setting has now been added to ensure that the aforementioned effects (and of course the turbidity of the NON-Physical Sky itself) continue to work correctly in relation to turbidity.
Varies the height of the horizon. If, for example, you have a scene in which you do not have an endlessly large Floor element it can occur that you can see under the horizon. If this happens, enter a negative Horizon Start value and the sky color will be stretched or compressed accordingly.
Defines the dispersion of volumetric clouds with regard to their altitude. The volumetric clouds will be arranged concentrically on a hemisphere in accordance to the curvature of the earth (if Adjust Altitude is enabled in the Volumetric Clouds tab.
The smaller the Earth Radius value, the more spherical the volumetric clouds will be dispersed.