Details
Defines whether or not the moon should be shown. Note that the internal moon light source will also be affected accordingly.
Here you can vary the size of the moon. If you are not content with the default moon, switch to the Scene Objects tab and define your own moon object. This new object will have to be lit separately, though (e.g., with a light source that only lights the moon object, or using a material with a texture in the luminance channel).
The earth’s radius is scalable. The height and dispersion of volumetric clouds is determined by this scale factor. If Adjust Altitude in the Volumetric tab is active, volumetric clouds will be arranged on a concentric sphere to reflect the curvature of the earth.
The smaller the earth’s curvature, the more spherical the volumetric clouds will become.
Bright Intensity [0..100%]
Dark Intensity [0..100%]
Use these settings to define bright side of the moon (side lit by the sun) and the dark side of the moon (side not lit by the sun). If you want a full moon, set both settings to 100%.
If you encounter problems with the light sources integrated into the sun or moon (e.g., if they are not being displayed in the editor or if lens flare or lens glow are displayed incorrectly), simply reduce their distance using this setting.
This is the correct option if you want to create custom light sources for your moon. Simply drag a light source from the Object Manager into the Sun field.
You can also use normal objects that will then assume the position of the moon based on their own position. An additional internal light source will then be added for illumination.
Enable or disable the display of the stars.
The Magnitude value represents the apparent brightness of stars on a firmament. Use this slider to determine the stars’ minimum magnitude at which they should be visible. The following rules apply:
- Low value: Only the brightest stars will be projected
- Maximum value: All stars in the internal database will be projected.
Separate settings apply to the sun, moon, and other planets in our solar system. These settings can be found in the Astro tab (see below).
Depending on the magnitude (brightness) of the stars, individual stars will be scaled, thus adding even more realism. If this option is not active, all stars will have the same size.
Use this slider to adjust the brightness of the projected stars: The higher the value, the brighter the stars.
Are the stars too small? No problem. Simply increase their radius. Careful, high values can lead to psychedelic results …
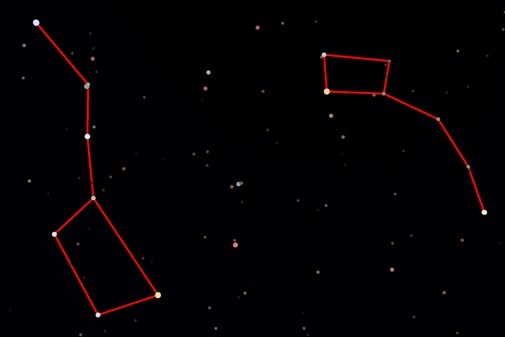
 Option Show Constellations active with Color set to red.
Constellations can be displayed in any color. If you set anti-aliasing to Best in the Render Settings … menu, the constellations (as well as the Grid, which is mentioned below) will be smoothed when rendered.
Grid Width [0..180°]
Grid Color
The celestial sphere is similar to the earth being divided along longitudinal and latitudinal lines, though here they are referred to as azimuth and height. The grid can be made visible by setting Grid Width to 10°, for example. Azimuth and height will then be represented by a line every 10°. Grid Color defines – you guessed it – the color of the grid.
Enable or disable the display of our solar system’s planets (Mercury, Mars, etc.).
In addition to the sun (which itself is a "normal" internal light source) an area light source that is (almost always) blue exists that simulates the bluish light emitted by the atmosphere. This light can now be disabled (this bluish light is sometimes not desirable for scenes rendered without GI).
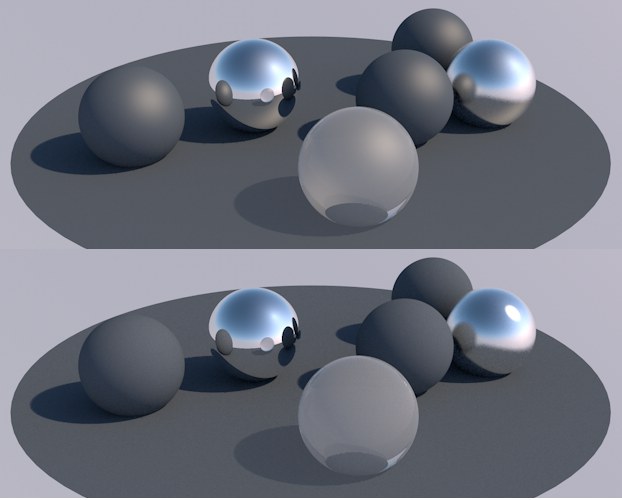
The Physical Sky’s sun is basically nothing more than a Cinema 4D light. If the Merge Sky and Sun option is enabled, this light will no longer be seen internally as such but rather as part of the sky. The sky will behave internally like a HDRI texture with all corresponding advantages and disadvantages.
 Option disabled at top, enabled at bottom. Note the fading specular light (that depends on real light sources).
The advantages include that the physically correct internal model
- includes the sun in reflections,
- ignores specular lights (these should be generated physically correct from the Reflectance channel,
- avoids the additional light reflection from the sky due to illuminated surfaces (from the sun light source) that occurred when GI was calculated (option disabled),
- can calculate GI Caustics
Note that all other Cinema 4D functions that require a real light source will then react differently.
This parameter should already be familiar to you from the "normal" Cinema 4D material settings (see Illuminationmaterial channel).
Note: The GI emitted pertains only to the sky and no other elements, i.e.Fog, Rainbow, etc.
Defines the strength of the generated GI (see Illuminationmaterial channel).
Defines the amount of saturation of the light emitted by the sky, i.e., how blue (or orange for early evening scenes) the scene should be rendered.
Defines the degree to which the 2D Cloud color should affect the GI. A value of 0% means that the cloud color will be ignored entirely and only the sky itself will be used.
This sets the priority of the internal Sky expression. You can find more information regarding this here: here.
Example: You have placed your own light source to serve as the sun, but the light source’s color is overwritten by the internal Sky expression. Since XPresso tags receive a higher priority than Sky, you can use an XPresso tag to assign a color to your light source, thereby overriding Sky.
See Editor material channel.
Here you can get a good impression of how accurate the editor’s preview is.

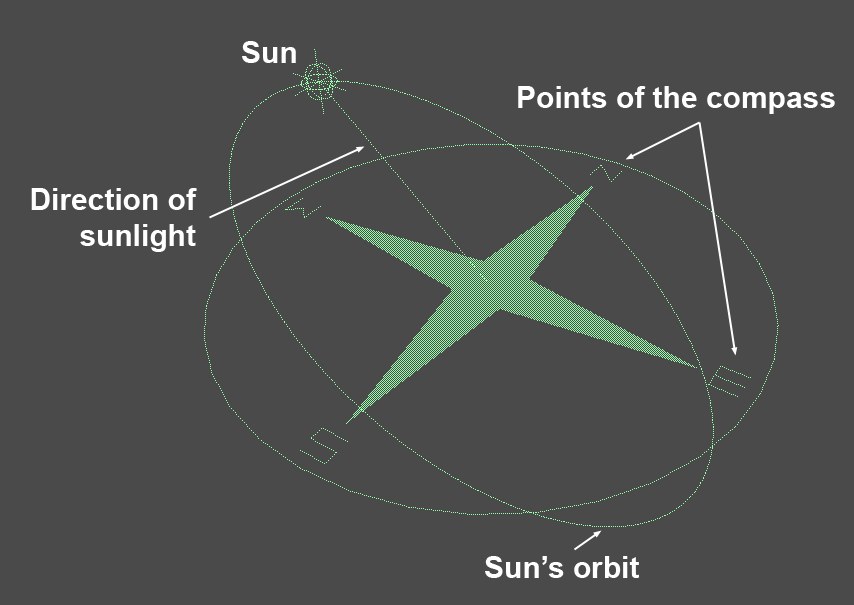
If enabled, a compass rose, including a stylized sun symbol and its orbital path will be displayed. This lets you quickly determine where the points of the compass are and the position of the sun (very important for determining where the sun will cast shadows).
If enabled, all changes you make to parameters will be displayed in the Viewport and preview windows.