Rainbow
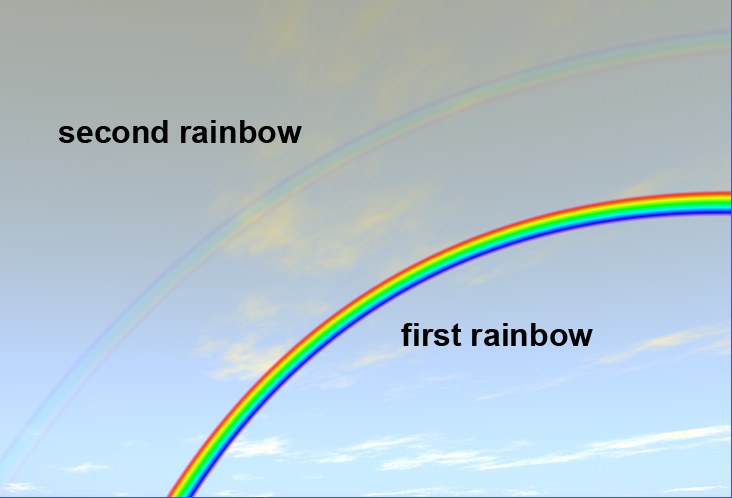 Just as in reality, two types of rainbows are available (here, for demonstration purposes, with a high Max. Strength value).
Every sky needs a rainbow (a rainbow is created by light refracting through raindrops). A rainbow’s position, in Cinema 4D as in reality, is dependent upon the position of the sun. To that end, remember the following rules:
- A rainbow’s apex always lies exactly opposite the sun.
- The lower the sun’s position, the higher a rainbow’s apex will lie.
As in reality, there always exists (even if not always visible) a second, less visible mirrored (in color) rainbow with a larger radius.
Spatially, a rainbow will always be arranged in front of all Sky objects (even clouds).
Use this slider to adjust the rainbow’s transparency. The second rainbow will be created according to the properties of the first. The lower the value, the more transparent the rainbows will be rendered.
We suggest you use unobtrusive, transparent rainbows – less is more.
In reality, if there’s no rain (or moisture in the air), there’s no rainbow. Physical Sky regulates the density of the moisture in the air via Effects Turbidity (in the Sky tab). So, if you want to link your rainbow to this setting, activate this option in the Rainbow tab. If Effects Turbidity is set to 0, for example, no rainbow will be created.
By default, Effects Turbidity is deactivated in the Rainbow tab, which lets you optimize turbidity and your rainbow independent of one another.
If you activate Turbidity in the Rainbow tab, the following options will be made available:
Min. Turbidity Threshold [0..100%]
Max. Turbidity Threshold [0..100%]
Use these sliders to adjust the rainbow’s turbidity.
Example: You set the first slider to 9 and the second to 50. This means no rainbow will be visible as long as Turbidity is less than 10. If Turbidity is greater than 50, the rainbow will be rendered to full strength. Between 9 and 50, the rainbow will be rendered in correlation with the strength of Turbidity.
First Rainbow Inner Angle [0..180°]
First Rainbow Outer Angle [0..180°]
Secondary Rainbow Inner Angle [0..180°]
Secondary Rainbow Outer Angle [0..180°]
We will not rack your brains with the precise definition of rainbow angles (the angle between the direction in which the sun is shining and the rainbow’s apex as viewed form a specific location). Simply view the difference of both angles as the measure for each rainbow’s width.
If you think rainbows are too narrow, try entering inner and outer values of 30° and 50°, respectively, for the first rainbow.
Start Clipping [-∞..+∞m]
End Clipping [-∞..+∞m]
Imagine an animated airplane approaching from the distance out of the rainbow. In the distance, the airplane is behind the rainbow; as it approaches it will eventually cover the rainbow. Such effects are possible using these settings.
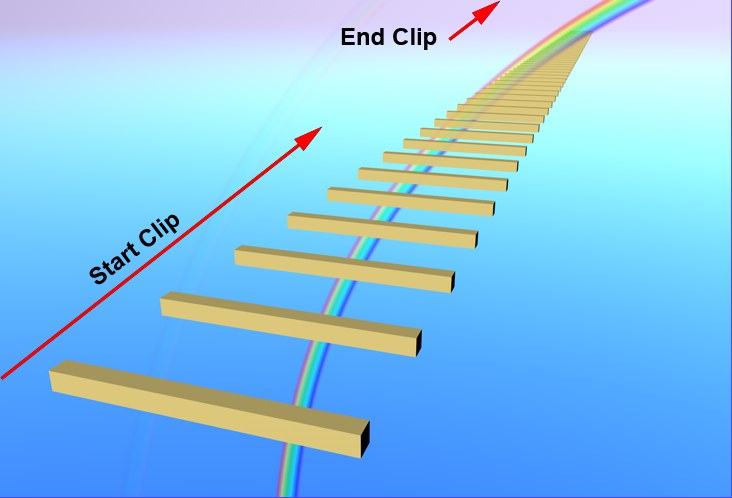 Objects lie in front of the rainbow up to the Start Clip point; starting at the End Clip point, the objects lie behind the rainbow.
The following applies to the visibility of polygon objects in the respective zones (always calculated from the camera’s point of origin):
- Camera’s point of origin to Start Clip: All polygon objects within this range will cover the rainbow.
- Start Clip to End Clip: The rainbow has a transparency transition that is applied to all polygon objects between these two points.
- End Clip to infinity: The rainbow lies in front of all polygon objects within this range.