Fog
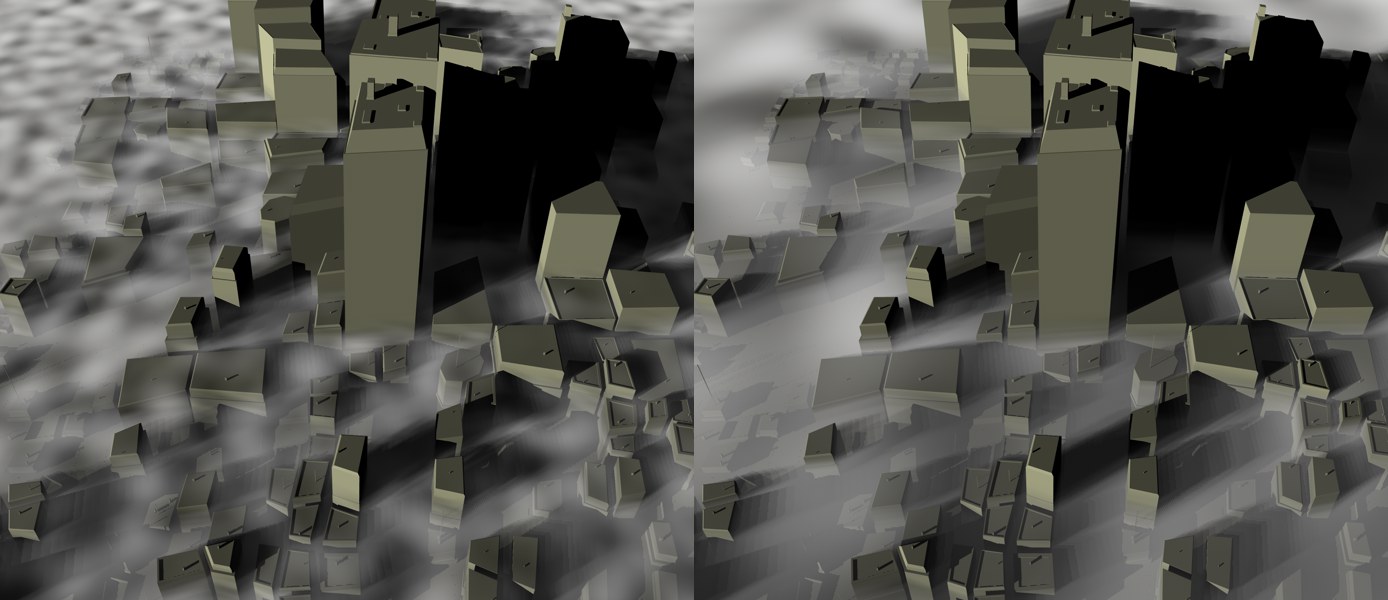
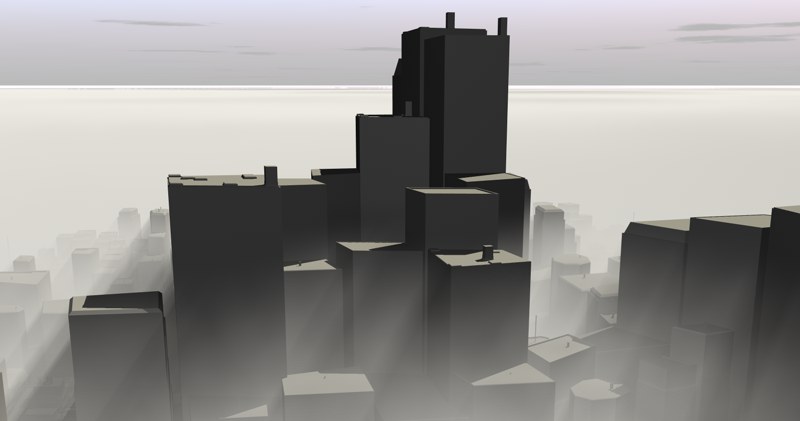 Friedrichsdorf, Germany in a fog bank. Thanks to Paul Everett for his City Gen plugin.
Now what would a sky simulation be without fog? Right, only half the rent. That’s why a fog system has been integrated into Physical Sky. This is real volumetric fog, based on diverse types of Noise shaders (see Noise 2D/3D in Channel Shaders) that render less homogeneously and therefore more realistically.
The fog stretches infinitely in a vertically adjustable fog bank.
This is the color the fog should assume. This color will not be affected by other colored light sources, although the sun’s color can be multiplied with the fog’s color (if the Illumination Intensity setting described below is set to greater than 0).
Start Height [-∞..+∞m]
End Height [-∞..+∞m]
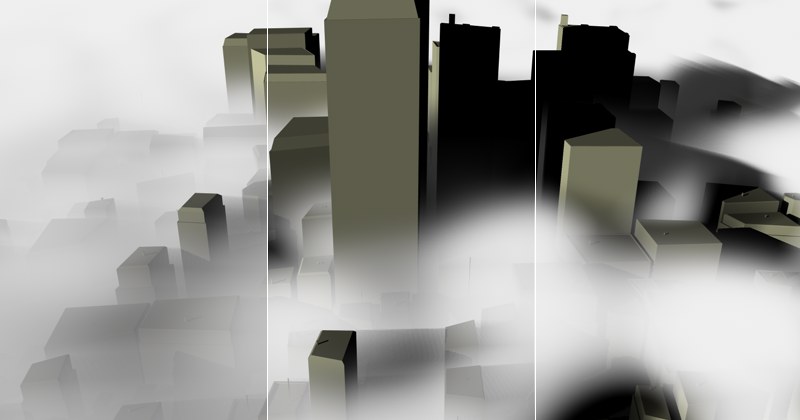
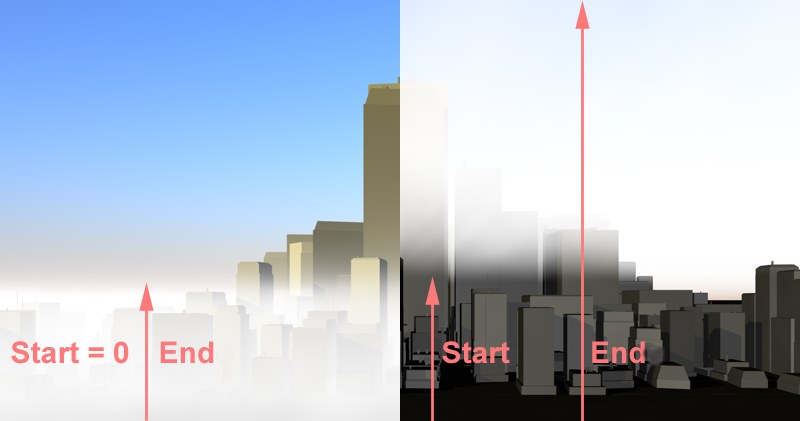 Side view left: Start Height = 0 (fog begins at the ground); right: Start Height / 0. Each example contains strong reduction in Density Distribution.
The fog bank, which extends infinitely on the X- and Z-axes, must at least be limited in its vertical extension. Otherwise you would not be able to see anything in the resulting soupy fog.
The Start Height and End Height settings determine where the fog should begin and end (starting from the ground, Y=0).
You can determine how quickly density is lost between the Start Height and End Height settings by adjusting the Density Distribution graph.
Use this setting to optimize render times. Roughly speaking, this distance is calculated from the camera’s point of origin, looking into the scene (to be more precise: from the point where the environment object’s raytrace ray hits a transparent object).
Only the fog that lies within this range will be calculated. Assuming the camera is positioned just above the ground and is pointed towards the horizon: It would not make sense to calculate the fog at a distance of 100,000 m when it would already cover all objects lying beyond 10,000 m. In such a case, reduce this setting’s value.
Density is the measure of the fog’s density, i.e., the higher the value, the more opaque the fog.
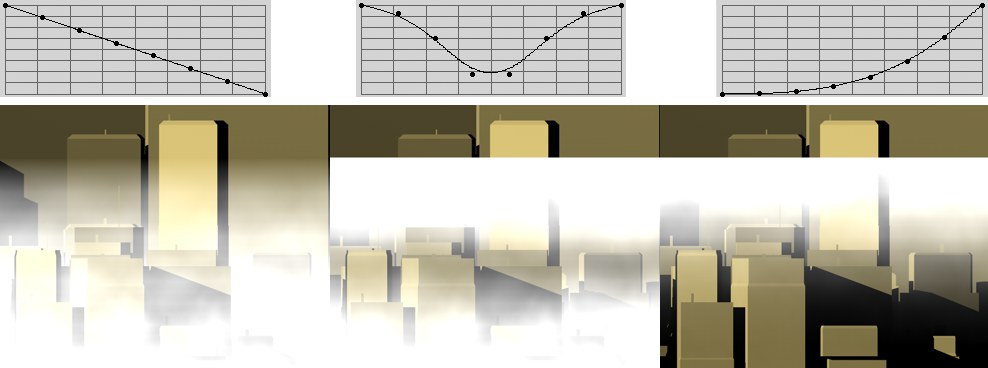 Imagine the graph rotated counter-clockwise by 90°.
This graph regulates the density between the Start and End settings. You can read more on how to use this graph in Function Graphs.
The left end of the graph represents the Start value, the right the End value. In order to be able to imagine how the density distribution works, imagine the graph rotated counter-clockwise by 90° and projected into the scene.
 Noise type Noise (scaled to 3500, 200, 3500).
Here you can select a noise shader from the list of numerous shaders available (see Noise 2D/3D in Channel Shaders). You can also click on the small button to the far right and select a shader from the preview images that appear. Since all of these noises are volumetric, they will be applied with their respective densities. This avoids applying the shaders too homogeneously and results in a more varied look. Take a good look at the following Scale settings, with which you can fine-tune the size of the noise’s (fog’s) structure.
 Left, a low Scale value; right, a higher Scale value.
Use these settings to scale the noise’s structure along the X-, Y-, and Z-axes. Higher values result in more realistic fog banks, even intermittently creating holes.
Use this setting to move the fog along the X, Y or Z axis. The structure of the noise will not be affected.
Similar to the Sample Distance of the sunbeams (see Sunbeams tab), lower values will result in more precise but longer renderings. Higher values will result in artefacting.
This setting refers to the structure of the noise – NOT the position of the fog! The higher the value, the more the fog will billow. A value of 0 retains the fog’s structure.
 Increasing noise strength from left to right.
The noise strength can pretty much be compared to a contrast slider – the higher you set the noise strength, the more dense the fog will become in already dense areas, and the more transparent it will become in less-dense areas. A value of 0 will result in a homogenous, even fog with no noise.
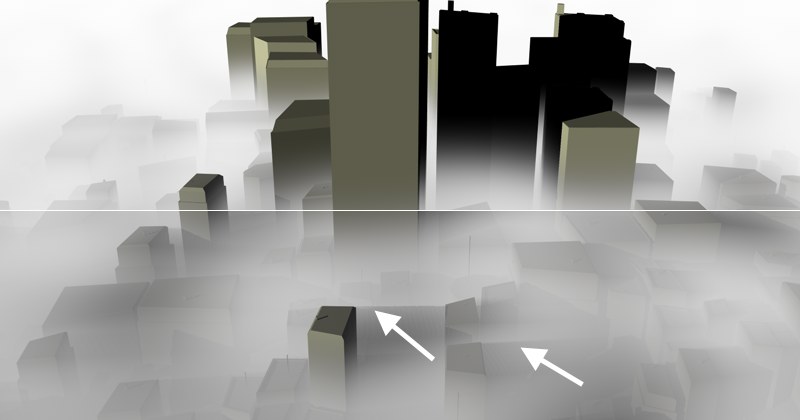 Top: Shadow Intensity set to 0; Bottom: 80%. Note the shadows cast by the sun, positioned to the left, on the right-hand edges of the buildings.
As in reality, fog is influenced by cast shadows. If you wish to take cast shadows into account, set a value greater than 0 (0=off).
You can define how strong shadows should be cast by adjusting Shadow Intensity.
Careful! Render times increase with each increase in shadow strength!
Illumination Intensity [0..100%]
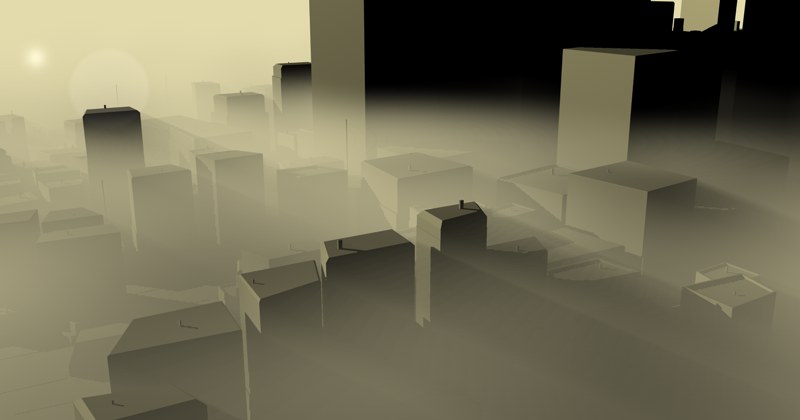 A sandstorm: White fog is colored yellow by the sun.
Incrementally increase the value to greater than 0 if you want the color of the sun to combine with that of the fog. To be exact, a color value between 1 and the color of the sun will be ascertained and multiplied by the fog’s color.
A value of 0 will disregard the sun’s color and will color the fog as defined in the Color setting.