Clouds
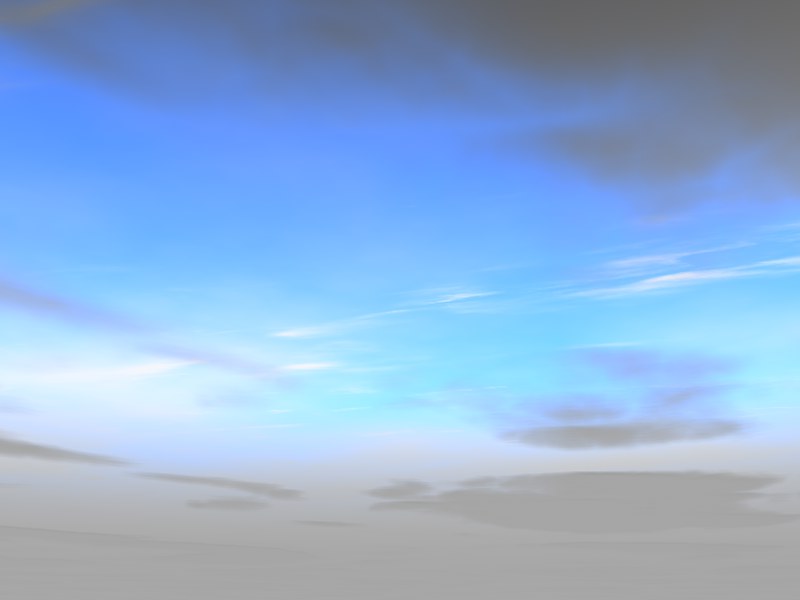 Only 2D clouds are shown here.
In the Clouds tab you can edit the look of your 2D clouds (3D clouds can be edited in the Volumetric Clouds tab).
A special method is used to project 2D clouds onto the celestial sphere to give a realistic impression of cloud cover that stretches across the entire firmament. Each cloud layer is created from the already well-known Noise types (see Noise 2D/3D under Channel Shaders). Here you will find a depiction of all types of Noise).
You can create up to six layers of clouds, each of which can be edited individually. Each level (internally) can have its own altitude. This makes it possible to layer clouds over each other, even letting shadows be cast onto volumetric clouds or other scene objects.
2D clouds render much faster than 3D volumetric clouds. Since 2D clouds offer such a large number of settings, you can use them in place of 3D clouds in many cases. Your render farm will thank you and spit out rendered images in no time.
Of course the position and noise structure of 2D clouds can be animated so you can create passing cloud formations and even animate clouds forming (Anim. Speed / 0).
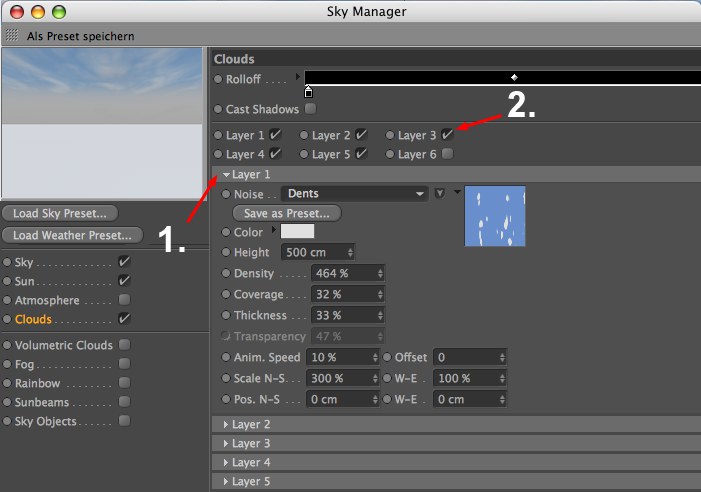 1. Open / close level. 2. Make level visible / invisible
Here you can see the settings for level 1. Each layer (each offers the same settings) can be opened by clicking on the arrow to the left of the eye icon. The levels can be turned on or off via the Levels 1-6 options.
You can copy a layer’s entire settings to another layer by simply dragging its preview image onto the preview image of the layer onto which you want to copy the settings.
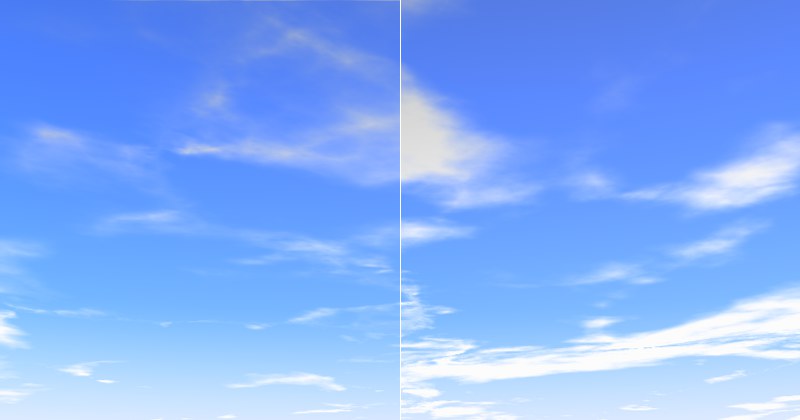
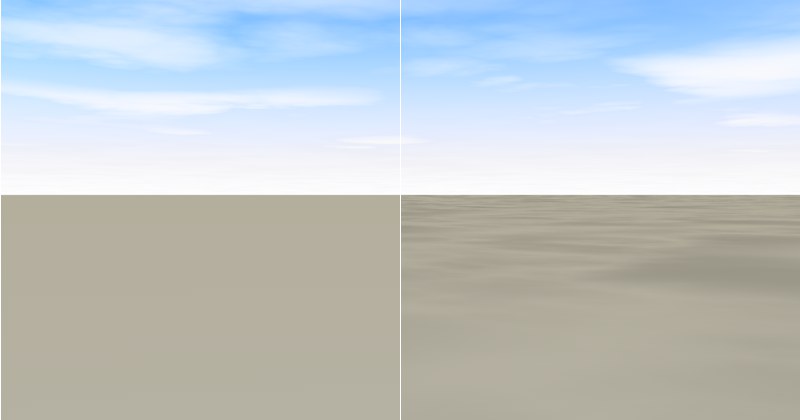
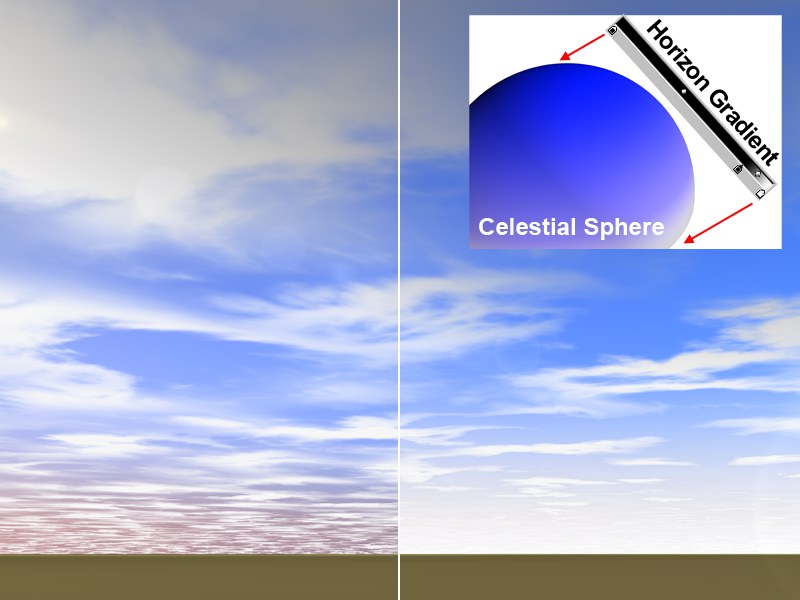 Left, Rolloff deactivated (black gradient); right, Rolloff default settings.
This grayscale gradient causes the sky to fade to the cloud color near the horizon, thus giving the cloud cover a realistic look as it approaches the horizon.
The left side of the gradient represents the zenith, the right side of the horizon.
Black=transparency; white=color of the clouds.
Defines whether or not 2D Clouds should cast shadows.
Internally, a layer will be created at a height of 10,000 units. Shadows will be calculated correctly to this height. Objects that lie above this height will not receive shadows.
Layer 1
Layer 2
Layer 3
Layer 4
Layer 5
Layer 6
2D Clouds can be made up of up to six cloud layers, each of which can be turned on or off separately. Each layer has its own set of parameters that are displayed in the Enable field.
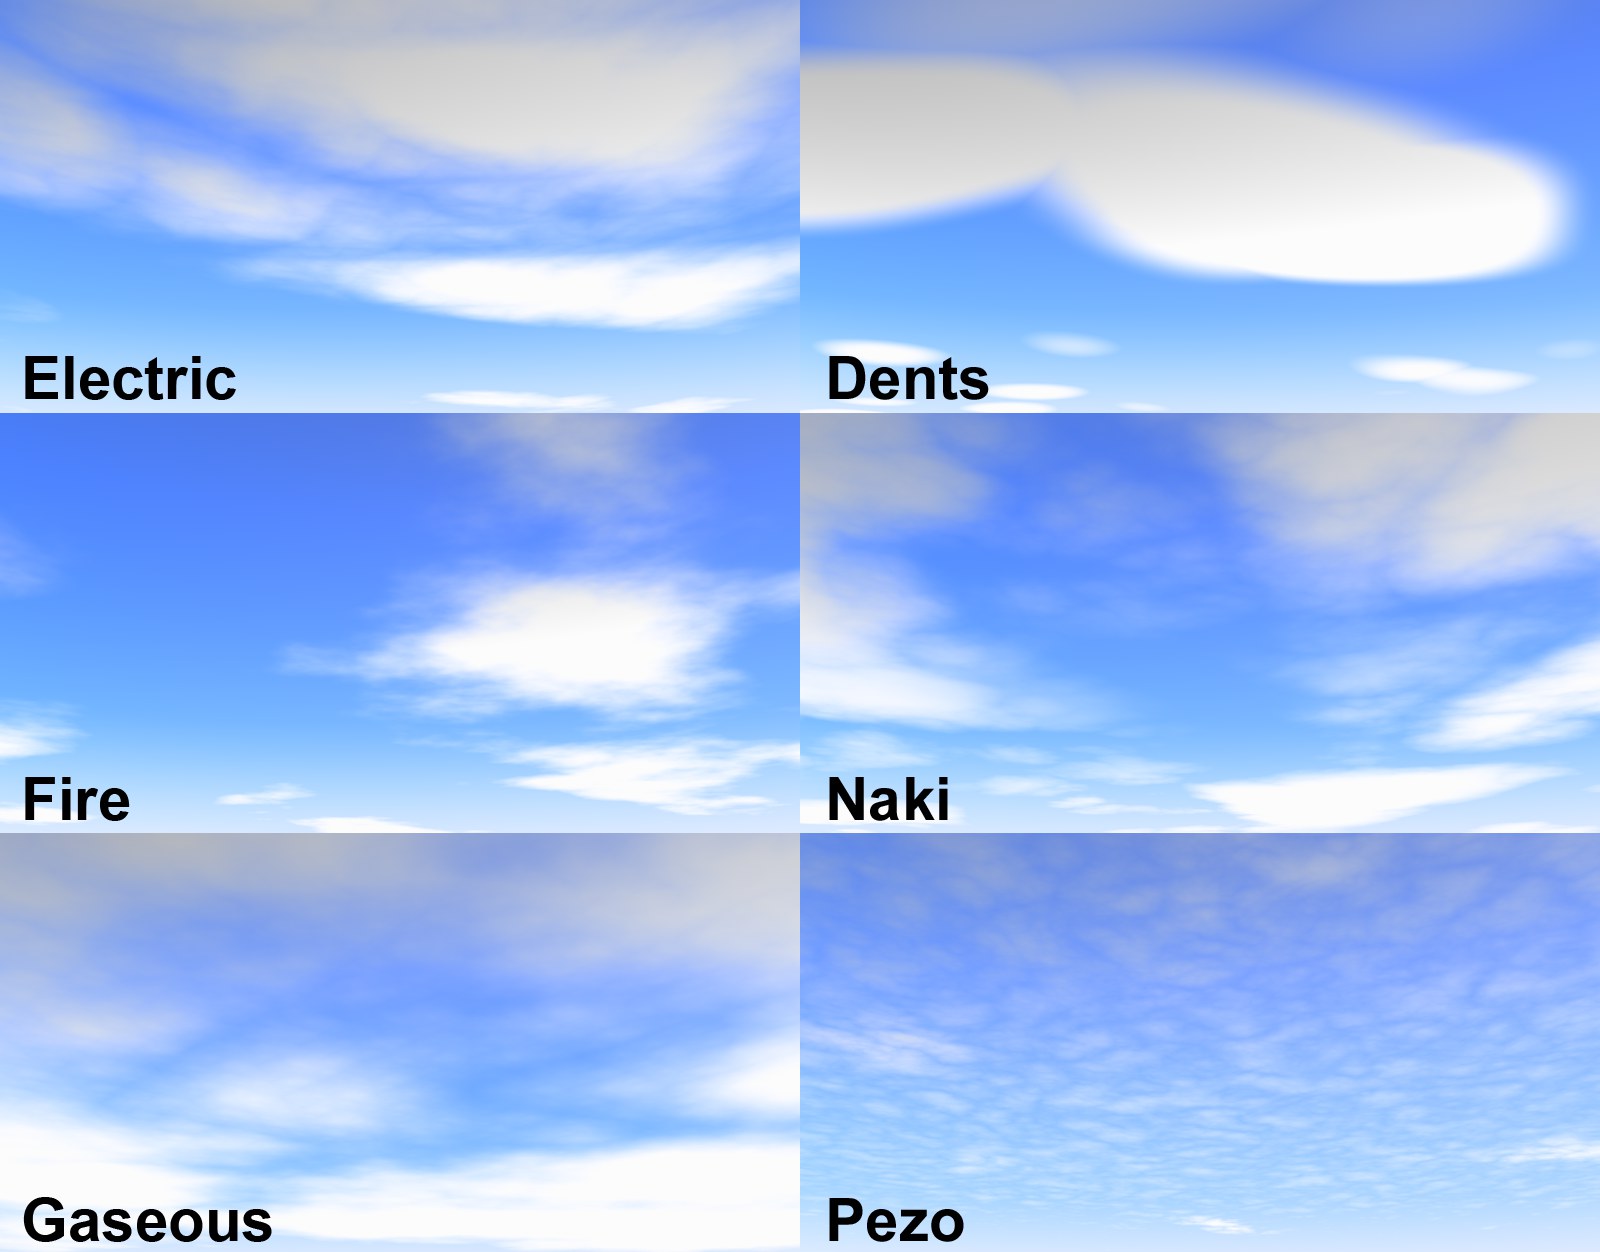 A small selection of Noise types.
Here you can select the type of noise with which your 2D clouds should be created. By clicking on the button with the arrow on it (to the right of the noise name) you can open a window in which the different noise types can be viewed and selected. To the right of this button is the image preview for the cloud layer. By clicking on this preview image with the right mouse button, a menu with the following options will open:
- Animate: The preview will render only in accordance with the Anim Speed setting (see also Material Preview).
- Default, Small, Medium, Large, Huge: These only affect the noise preview. Default uses the Cinema 4D render presets (see Material Preview).
You can deactivate the preview image by clicking on the small arrow to the left of the image.
Click on this button to save the current cloud layer as a preset. The following window will open:
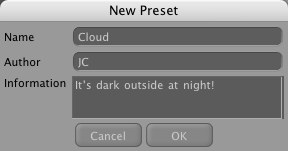
Use this window to enter detailed information regarding your cloud layer. This info will then be visible in the Content Browser. You can find the presets here: Open Sky Presets … Presets/User/ Sky / Cloud Layers.
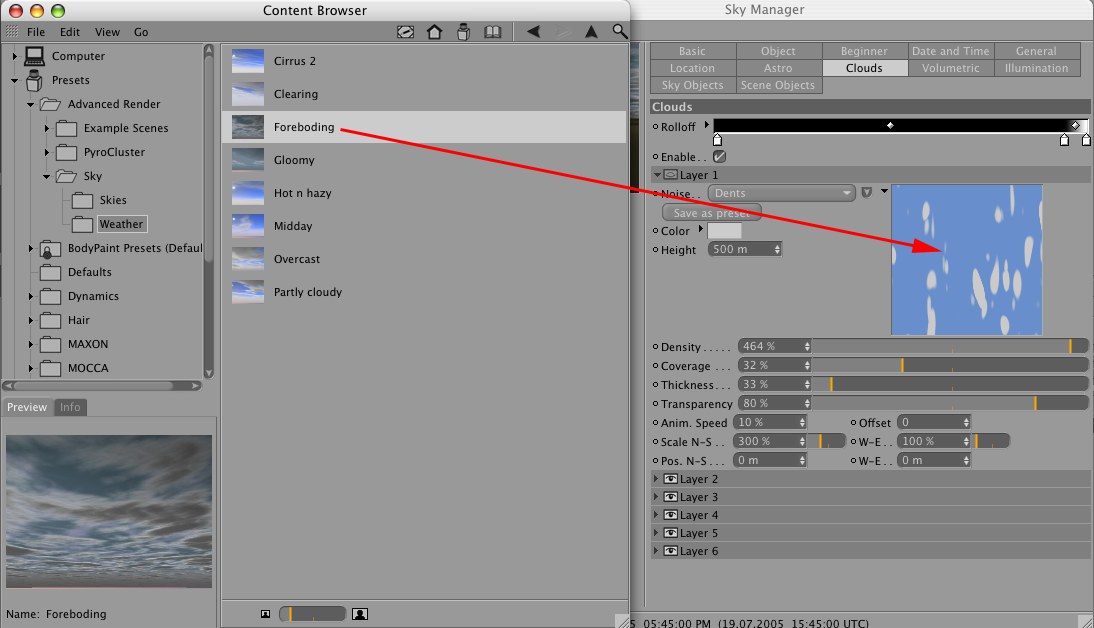
To later load a cloud preset, simply drag it onto the cloud preview image in the Sky Manager.
Define the color of your cloud here; its color will be independent of the sun’s color or that of other sources of light. Only the cloud’s brightness will be adjusted to match the sun.
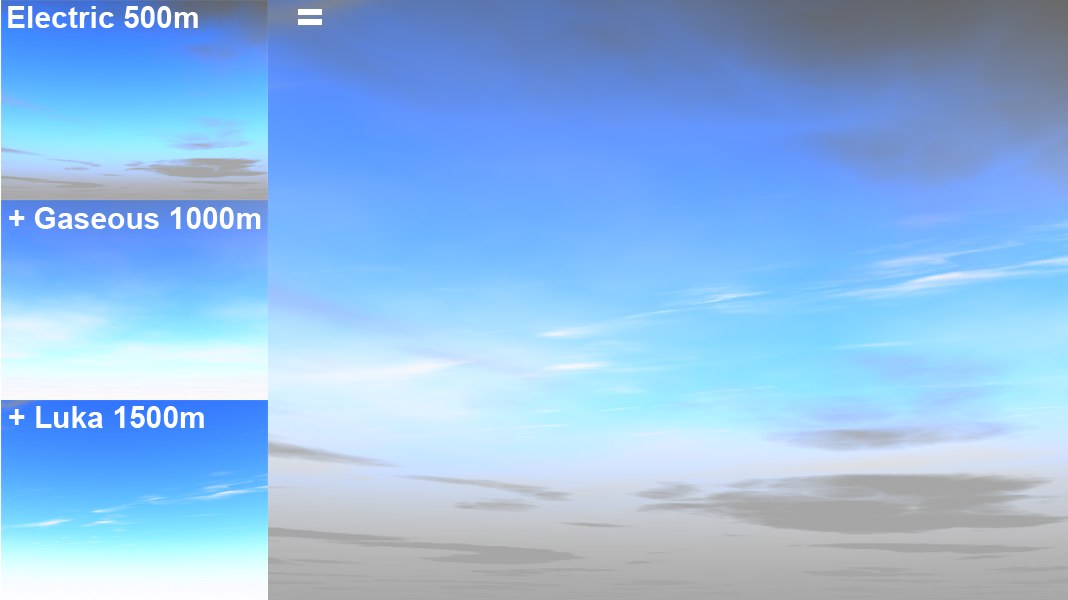 Three different types of noise at different altitudes.
Set the height of each cloud layer. If you take a look out of the window you will notice that clouds often consist of several layers. Officially, clouds are classified by the World Meteorological Organization as; high cloud type, medium cloud type, and low cloud type. All of these clouds can be created in a scene using several cloud layers and varying types of noise.
Cirrus clouds can, for example, be placed on a layer that is higher (since they reach great heights in reality as well), and clouds that are darker, rain-filled, and more foreboding can be placed on a lower layer.
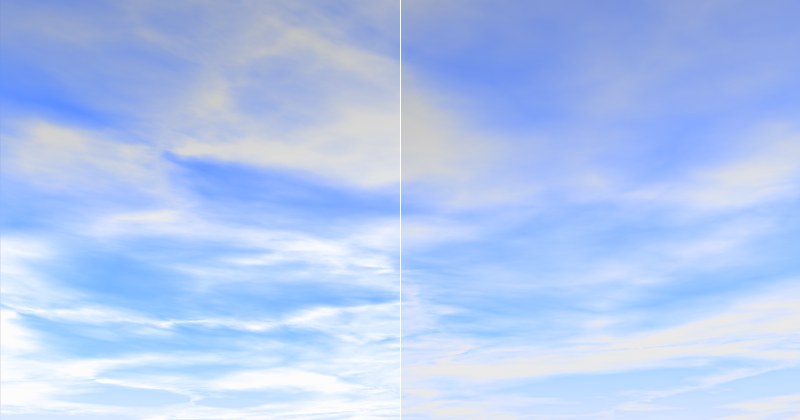
 Left, low Density value; right, higher Density value.
Simply put, Density defines the contrast of the clouds. If a low value is used, the clouds will be very transparent, especially towards the edges. The higher the value, the more planar and homogeneous the clouds will be.
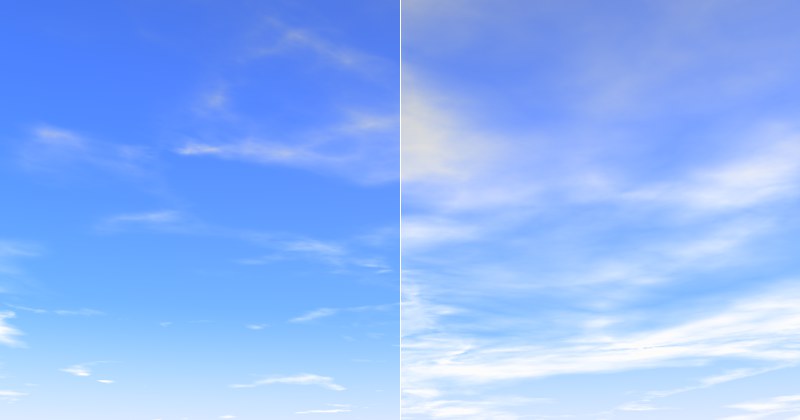 Left, low Coverage value; right, higher Coverage value.
This is the most important cloud setting. With it you define the degree of cloud coverage. Very low values result in no cloud coverage; very high values result in a completely overcast sky.
 Left, low Thickness value; right, higher Thickness value.
Thickness is the measure of the degree to which the sunlight will be dispersed or absorbed. This can be equated with the lighting of the clouds by the sun. Lower values result in the clouds being brightened more by the sunlight, higher values result in darker clouds.
 Left, high Transparency value; right, low Transparency value.
Transparency regulates the degree to which 2D clouds cast shadows onto volumetric clouds and/or other objects in the scene. Enter a value of 100% if no shadows should be cast.
The animation speed defined here relates to the noise structure – not the position of the clouds! The higher the value, the more the clouds will billow. You have probably seen slow motion clips of billowing clouds literally being created out of the blue; this setting lets you create a similar effect. If you also animate the cloud position (use the Pos. N-S and Pos. W-E settings), the result will be very realistic.
This setting lets you define a different starting point for the billowing defined in Anim. Speed. Let’s assume you have animated a cloud formation. Unfortunately, a part of the cloud formation will cover the sun at the very start of the animation. To remedy this, simply enter a different Offset value to alter the start of the animation.
Scale N-S [1..+∞%]
W-E [1..+∞%]
 Clouds scaled in one direction only.
These settings let you scale the noise pattern in the North-South (N-S) or West-East (W-E) directions. If your cloud formations are too small or too large, simply scale them by scaling these settings equally. You can easily create long, thin, stretched cloud formations by scaling them in one direction only.
Pos. N-S [-∞..+∞m]
W-E [-∞..+∞m]
Use these settings to move your clouds in the North-South (N-S) or West-East (W-E) directions. Animate these settings if you want your clouds to move across the sky. If you also want the clouds to change their structure as they move, set Anim. Speed to a value greater than 0.
A small selection of Noise types.Here you can select the type of noise with which your 2D clouds should be created. By clicking on the button with the arrow on it (to the right of the noise name) you can open a window in which the different noise types can be viewed and selected. To the right of this button is the image preview for the cloud layer. By clicking on this preview image with the right mouse button, a menu with the following options will open:
- Animate: The preview will render only in accordance with the Anim Speed setting (see also Material Preview).
- Default, Small, Medium, Large, Huge: These only affect the noise preview. Default uses the Cinema 4D render presets (see Material Preview).
You can deactivate the preview image by clicking on the small arrow to the left of the image.
Click on this button to save the current cloud layer as a preset. The following window will open:
Use this window to enter detailed information regarding your cloud layer. This info will then be visible in the Content Browser. You can find the presets here: Open Sky Presets … Presets/User/ Sky / Cloud Layers.
To later load a cloud preset, simply drag it onto the cloud preview image in the Sky Manager.
Define the color of your cloud here; its color will be independent of the sun’s color or that of other sources of light. Only the cloud’s brightness will be adjusted to match the sun.
Three different types of noise at different altitudes.Set the height of each cloud layer. If you take a look out of the window you will notice that clouds often consist of several layers. Officially, clouds are classified by the World Meteorological Organization as; high cloud type, medium cloud type, and low cloud type. All of these clouds can be created in a scene using several cloud layers and varying types of noise.
Cirrus clouds can, for example, be placed on a layer that is higher (since they reach great heights in reality as well), and clouds that are darker, rain-filled, and more foreboding can be placed on a lower layer.
Left, low Density value; right, higher Density value.Simply put, Density defines the contrast of the clouds. If a low value is used, the clouds will be very transparent, especially towards the edges. The higher the value, the more planar and homogeneous the clouds will be.
Left, low Coverage value; right, higher Coverage value.This is the most important cloud setting. With it you define the degree of cloud coverage. Very low values result in no cloud coverage; very high values result in a completely overcast sky.
Left, low Thickness value; right, higher Thickness value.Thickness is the measure of the degree to which the sunlight will be dispersed or absorbed. This can be equated with the lighting of the clouds by the sun. Lower values result in the clouds being brightened more by the sunlight, higher values result in darker clouds.
Left, high Transparency value; right, low Transparency value.Transparency regulates the degree to which 2D clouds cast shadows onto volumetric clouds and/or other objects in the scene. Enter a value of 100% if no shadows should be cast.
The animation speed defined here relates to the noise structure – not the position of the clouds! The higher the value, the more the clouds will billow. You have probably seen slow motion clips of billowing clouds literally being created out of the blue; this setting lets you create a similar effect. If you also animate the cloud position (use the Pos. N-S and Pos. W-E settings), the result will be very realistic.
This setting lets you define a different starting point for the billowing defined in Anim. Speed. Let’s assume you have animated a cloud formation. Unfortunately, a part of the cloud formation will cover the sun at the very start of the animation. To remedy this, simply enter a different Offset value to alter the start of the animation.
Scale N-S [1..+∞%]
W-E [1..+∞%]
Clouds scaled in one direction only.These settings let you scale the noise pattern in the North-South (N-S) or West-East (W-E) directions. If your cloud formations are too small or too large, simply scale them by scaling these settings equally. You can easily create long, thin, stretched cloud formations by scaling them in one direction only.
Pos. N-S [-∞..+∞m]
W-E [-∞..+∞m]
Use these settings to move your clouds in the North-South (N-S) or West-East (W-E) directions. Animate these settings if you want your clouds to move across the sky. If you also want the clouds to change their structure as they move, set Anim. Speed to a value greater than 0.