
Fur
Overview
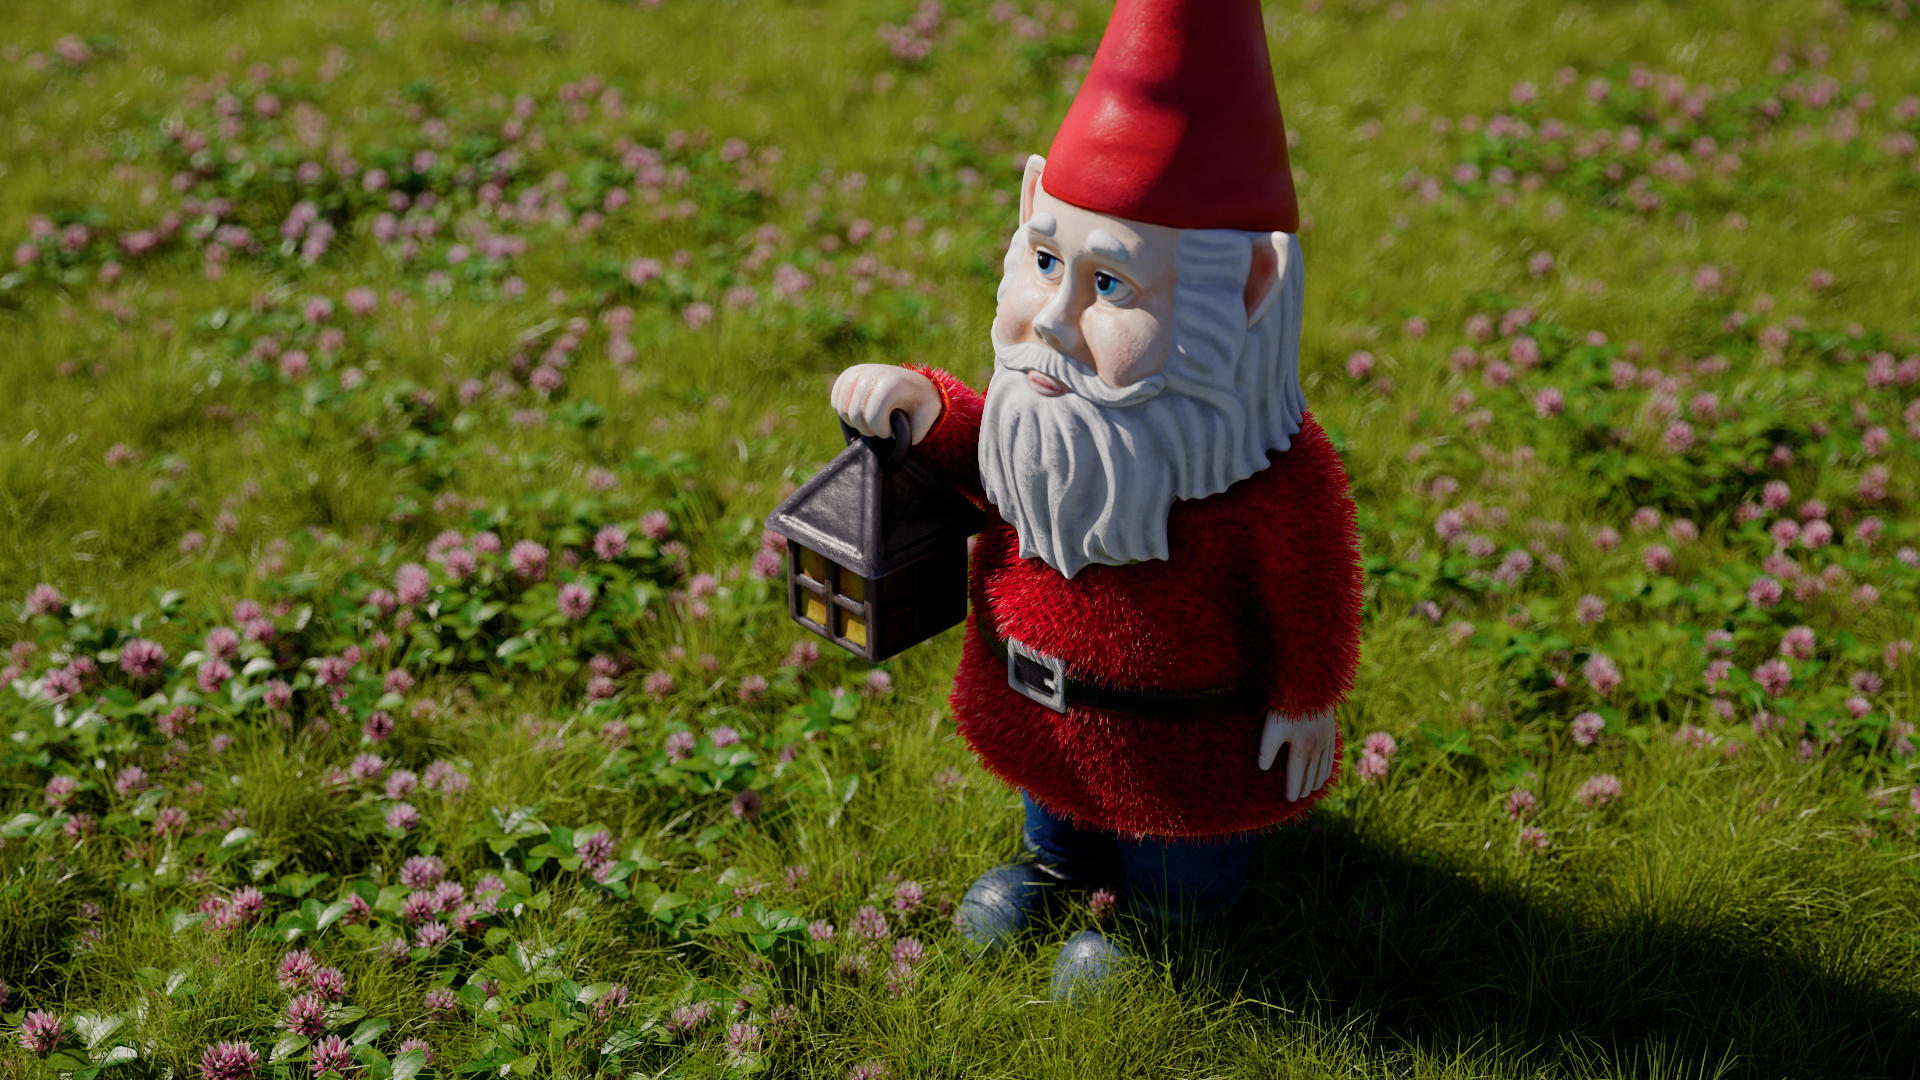
|
| Gnome model from PolyHaven, Scene by Saul Espinosa |
Fur can be used to procedurally generate dense, natural-looking fur and fuzz directly from a surface without manually authoring individual strands. It's easy to adjust density, length, thickness, bend, and curl with the ability to use texture maps or the built-in variation sliders for additional realism. Great for furry creatures, fuzzy carpet, or even a field a grass. Fur's render-time procedural nature helps ensure that it remains interactive and renders efficiently.
Creating Fur
Create Fur by using the fur icon in the Redshift shelf or the "Fur" button found in the Redshift tab of the Create menu. If you have a mesh selected when creating Fur from the shelf it will automatically parent the fur to the mesh, set the mesh as the Fur's Source Object, and assign a new Principled Hair material to the fur.
Material setup
Controlling materials on a fur object is the same as other meshes with UVs, procedural textures and image based textures can be layered with hair specific shaders like the Hair Random Color or Principled Hair material.
Parameters
General
Source Object
Connect an object here to generate fur strands across the surface of the mesh.
The Source Object must have UV coordinates to control things like density and thickness with a texture. More information can be found in the Maps section below.
Surface Offset
Moves the fur strand away from the surface of the source object along the face normal.
|
Surface Offset: -1 to +1 |
Enable Instancing
When checked, the fur mesh can be used with instances. This should be used to save memory when the same fur object appears multiple times in the scene.
Density
Sets the number of fur strands per square unit across the surface of the mesh. Higher values produce more fur. Since density is based on the area the strand count scales naturally across differently sized meshes, producing consistent results.
|
Density: 0 - 100 |
Length
Controls the base length of each strand in scene units.
|
Length: 0 - 2 |
Thickness
Controls the base thickness (radius) of each strand in scene units.
|
Thickness: 0 - 0.2 |
Taper
Controls how much the fur strand thins at its tip. Each strand starts off with a set thickness at the root and higher Taper values shrink the thickness at the tip.
At the highest value the tip shrinks all the way down to a thickness of 0, when the Taper is set half way the tip shrinks the strand down to half the base thickness, and a Taper of 0 results in a uniformly thick strand with no taper. The taper is linearly transitioned along the full length of the strand.
|
Taper: 0 - 100 |
Auto Segments
When enabled, the number of segments per-strand is controlled by the Bend and Curl values. This lets you adjust the Bend and Curl without having to adjust the number of segments each time, making it easier to use.
When disabled, the number of segments is controlled directly by the Curve Segments parameter.
|
Auto Segments: Enabled |
Disabled 6 0 - 2 |
Curve Segments
Auto Segments must be disabled.
Controls the number of segments per-strand curve. Higher segments result in smoother and more rounded arcs on fur that is bent or curled. Find a balance between enough segments that the bend and curl can be adequately seen without going overboard. Segments increase render time and this compounds with extremely dense fur so you want to keep this value as low as possible without sacrificing the look.
|
Curve Segments: 1 - 12 |
Bend
Gravity must be greater than 0.
Controls how much the fur bends due to gravity. A value of 0 results in fur that is completely rigid with no effect by gravity while higher values make the fur more flexible and droop farther due to gravity. Extremely high Bend values can stretch out fur in an unrealistic manner.
Since bend is based on gravity the fur bends differently based on its angle on the surface and the gravity direction.
Bend requires some segments but is less demanding than Curl.
|
0 - 5 |
Curl
Controls the amount of coiling around the strand axis. Positive values curl the fur clockwise while negative values curl the fur counter-clockwise, the farther the value is from 0 the more curly the fur.
Curls requires many segments to render properly, too low of a value may result in fur that doesn't look curly at all.
|
Curl: 0 - 2 |
Gravity
Controls the intensity of gravity which in turn controls how much the fur bends when the Bend value is greater than 0. Most of the time you can just leave it at the default 9.81 for realistic results, lower values bend the fur less.
|
Gravity: 0 - 10 |
Variation
Density Variation
Varies the density of fur across the surface in patches. Higher values result in increased contrast between the patches of fur, a value of 0 results in uniformly dense fur.
Density variation is varied per triangle, the higher the mesh density the more detailed the density variation can be. On low poly objects the density variation may become apparent by revealing the low res nature of the object.
|
Density Variation: 0 - 100 |
Density Variation Scale
Density Variation must be greater than 0.
Controls the size of the fur patches used for density variation in scene units.
|
Density Variation Scale: 0 - 3 |
Length Variation
Varies the length per-strand. Higher values vary the length of each strand by making them shorter or longer than the base length. A value of 0 results in all strands having the same length.
|
Length Variation: 0 - 100 |
Thickness Variation
Varies the thickness per-strand. Higher values vary the thickness of each strand by making them thinner or thicker than the base thickness. A value of 0 results in all strands having the same thickness.
|
Thickness Variation: 0 - 100 |
Direction Variation
Varies the how far each strand grows away from the growth direction. Higher values result in fur that grows in more random directions while a value of 0 results in fur that only grows out directly in line with the growth direction.
Overall growth direction is controlled by several things.
- By default a strand grows out along the surface normal.
- A Comb Direction Map can override the default direction by setting the initial growth direction.
- A Bend Direction Map can change the direction fur bends after the initial growth direction.
|
Direction Variation: 0 - 100 |
Bend Variation
Bend must be greater than 0.
Randomizes the bend amount per-strand. Higher values produce more bend variation across the fur while a value of 0 results in each strand having the same bend amount.
|
Bend Variation: 0 - 100 |
Curl Variation
Curl must be greater than 0.
Randomizes the curl amount per-strand. Higher values produce more curl variation across the fur while a value of 0 results in each strand having the same curl amount.
|
Curl Variation: 0 - 100 |
Level of Detail
Enable LOD
Enable Instancing must be disabled.
When enabled, the density of the fur is optimized based on distance from the camera.
- Density is reduced in distant fur to lower the total number of strands generated
- Thickness is increased in distant fur to maintain the same visual density
This level of detail (LOD) effect can be balanced for visual impact while reducing the total number of strands generated and optimizing render time.
When disabled, all strands render at full detail.
Since LOD is based on camera distance, be mindful of the effect this can have with animations.
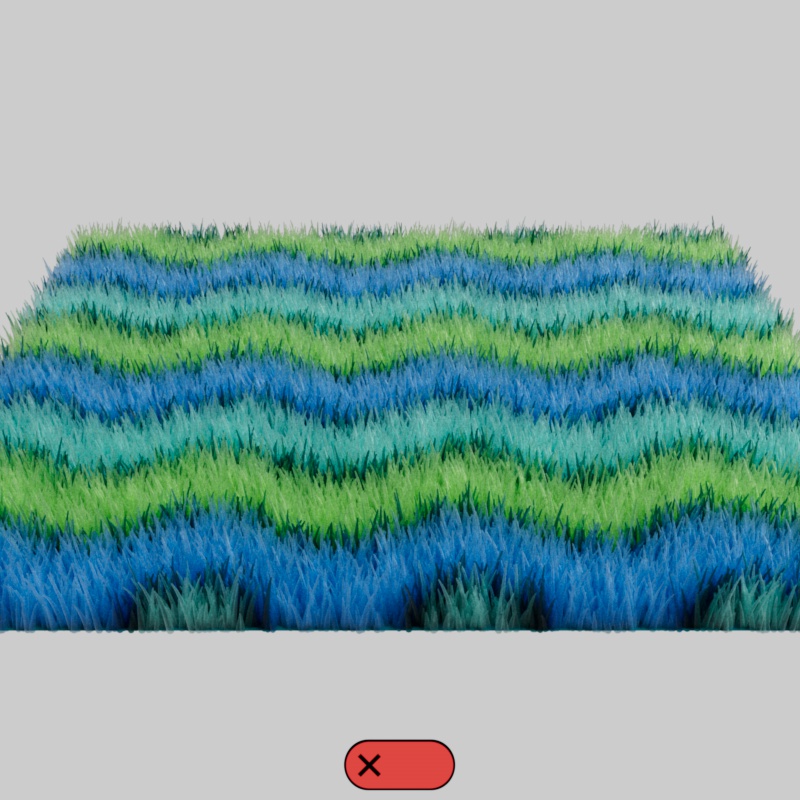
|
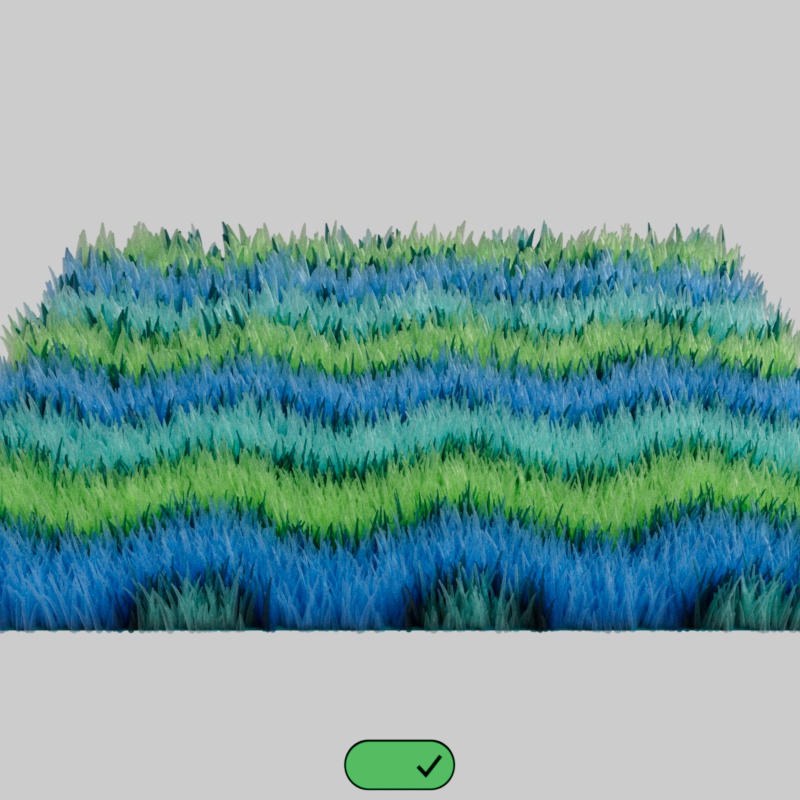
|
|
Enable LOD: Disabled (default) |
Enabled |
Start Distance
Sets the distance in scene units from the camera where the LOD effects begin. Fur closer than the distance is rendered at full quality while fur beyond this distance is rendered at reduced quality.
Set the distance to something that works well for your scene scale.
In the example below, note how the fur closest to the camera always renders at full quality when the Start Distance is adjusted.
|
Start Distance: 30 - 40 |
Distant Quality
Controls how the fur beyond the Start Distance is rendered. Higher values increase the density of the distant fur while lower values decrease the density by culling more of the fur strands.
Values that are too low will reveal bald patches in the fur.
In the example below, note how the fur beyond a certain distance (the Start Distance) changes in density and thickness as the Distant Quality is adjusted.
|
Distant Quality: 1 - 50 |
Maps
Source Objects must have UV coordinates for texture maps to work.
Surface Offset Map
Multiplies the surface offset using a grayscale texture map. Useful for matching objects that require displacement.
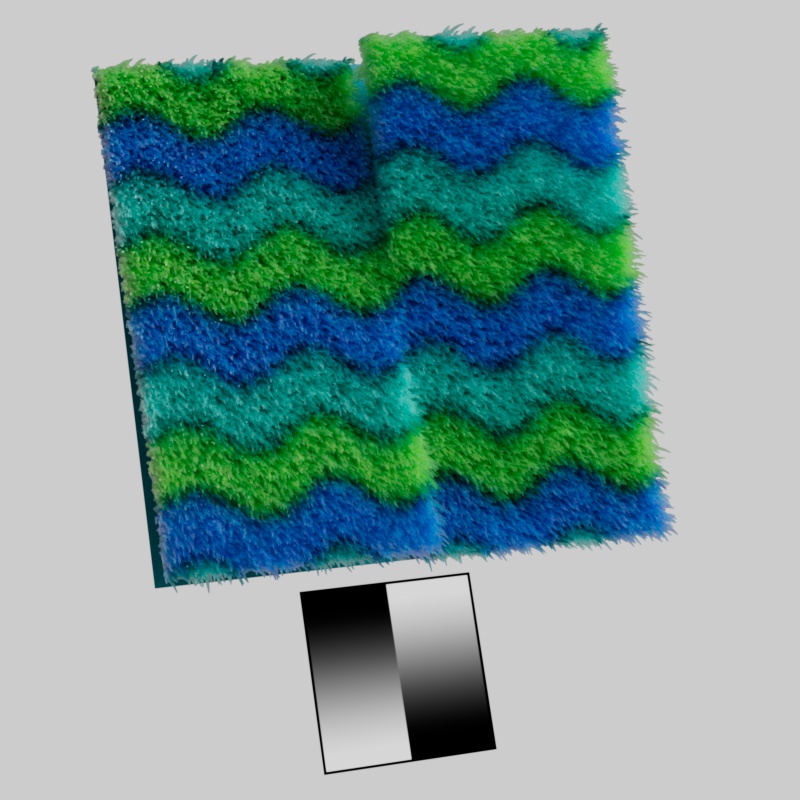
|
|
Surface Offset Map: Linear Gradient |
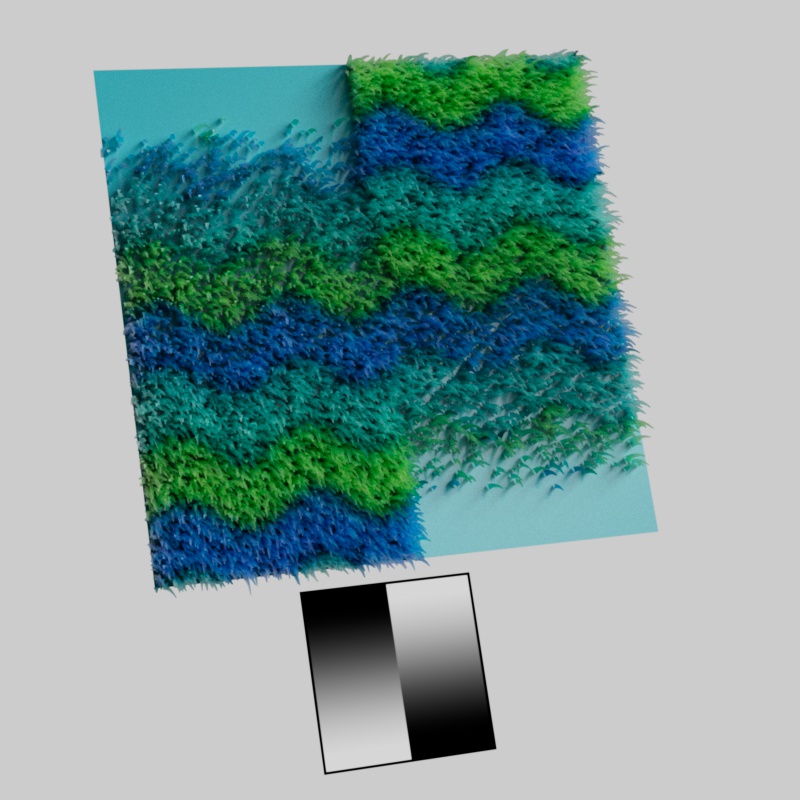
Density Map
Multiplies the density using a grayscale texture map, this can be used to vary the density based on a texture. Black completely masks away fur, grey areas reduce the density, and white results in full density.
|
|
Density Map: Linear Gradient |
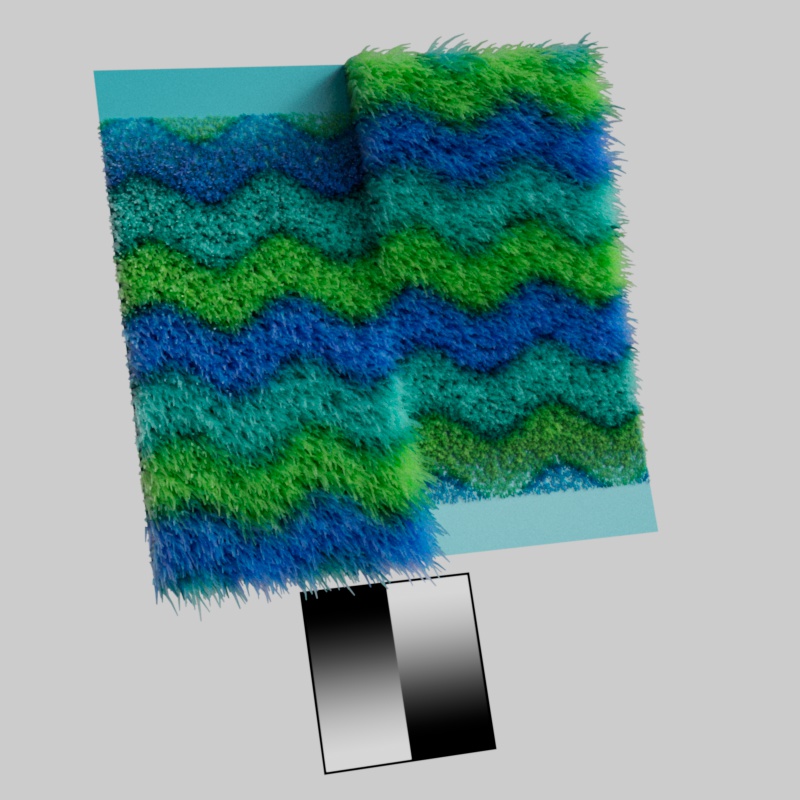
Length Map
Multiplies the length using a grayscale texture map. Black completely masks away fur by giving it a strand length of 0, grey areas reduce the length, and white results in full strand length.
|
|
Length Map: Linear Gradient |
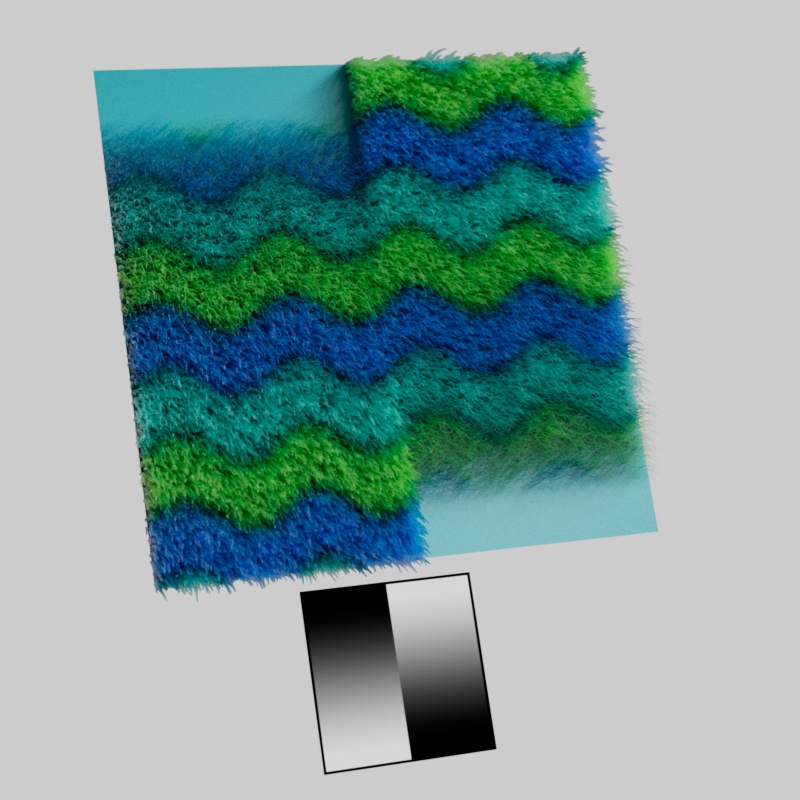
Thickness Map
Multiplies the thickness using a grayscale texture map. Black completely masks away fur by giving it a strand thickness of 0, grey areas reduce the thickness, and white results in full strand thickness.
|
|
Thickness Map: Linear Gradient |
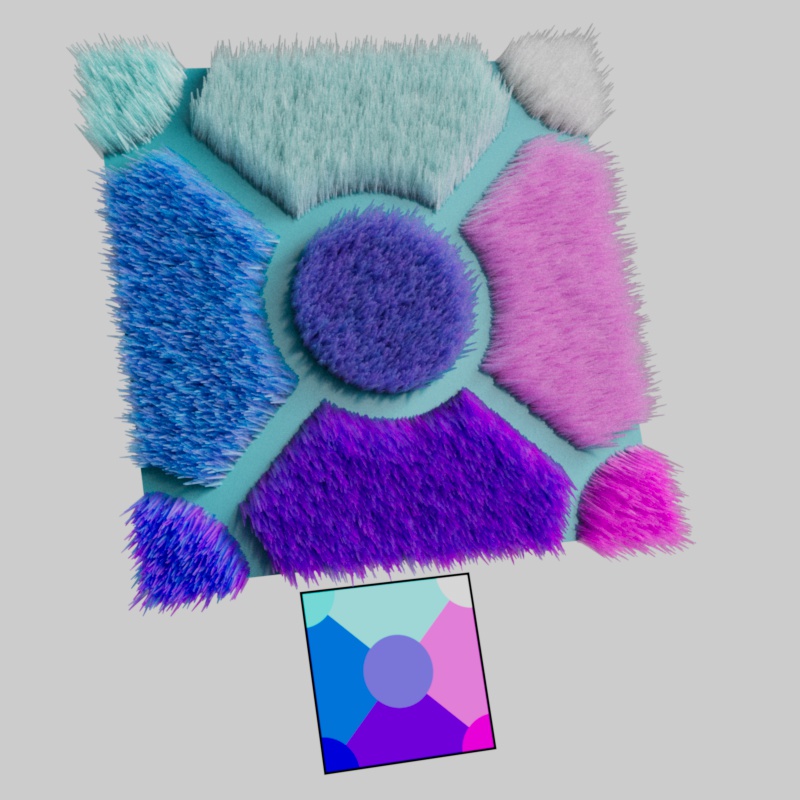
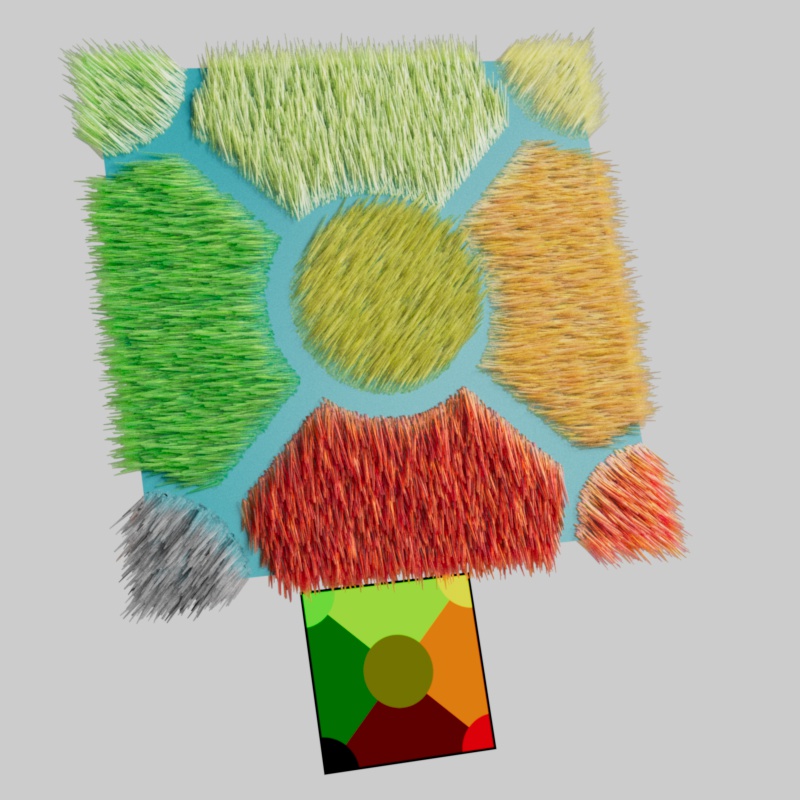
Comb Direction Map
Overrides the initial growth direction for each strand using a color texture. By default a strand grows out along the surface normal but this map overrides that by setting the growth direction explicitly.
Each color channel of the texture controls a different aspect of the growth direction, exactly like a normal map. A color value of (0.5, 0.5, 1) results in the default direction straight out along the surface normal.
- The Red channel controls the direction along the mesh's U-tangent direction.
- 0 = fully negative, 0.5 = neutral, 1 = fully positive
- The Green channel controls the direction along the mesh's V-bitangent direction.
- 0 = fully negative, 0.5 = neutral, 1 = fully positive
- The Blue channel controls the direction along the mesh's surface normal in a binary way.
- 0 = strand grows along the surface (laying down)
- 1 = strand grows straight out of the surface
|
|
|
Comb Direction Map: Multi-Angle (along normals) |
Multi-Angle (along surface) |
Bend Map
A Bend Direction Map must be used.
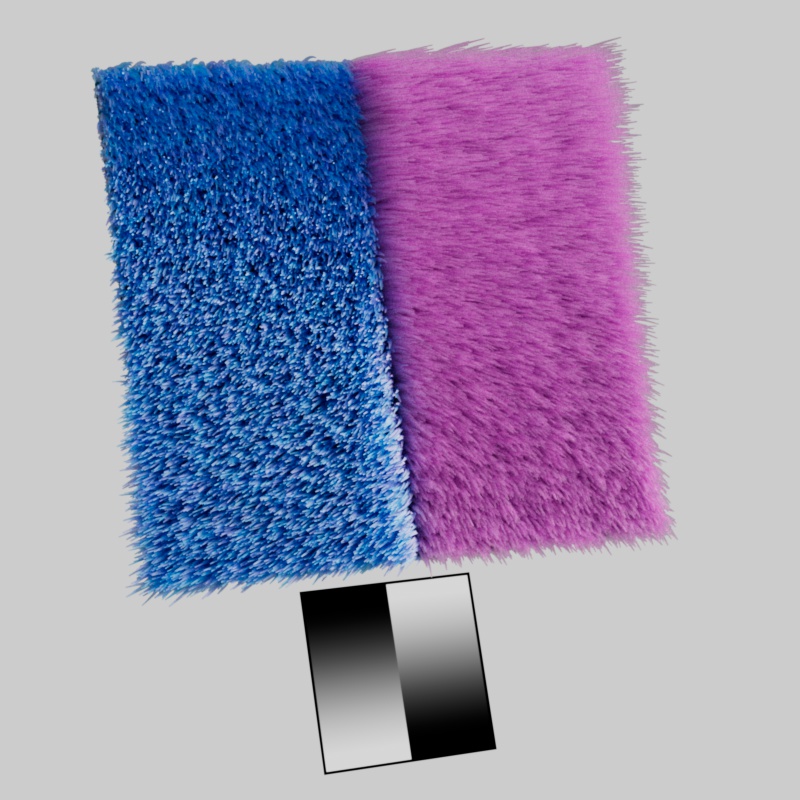
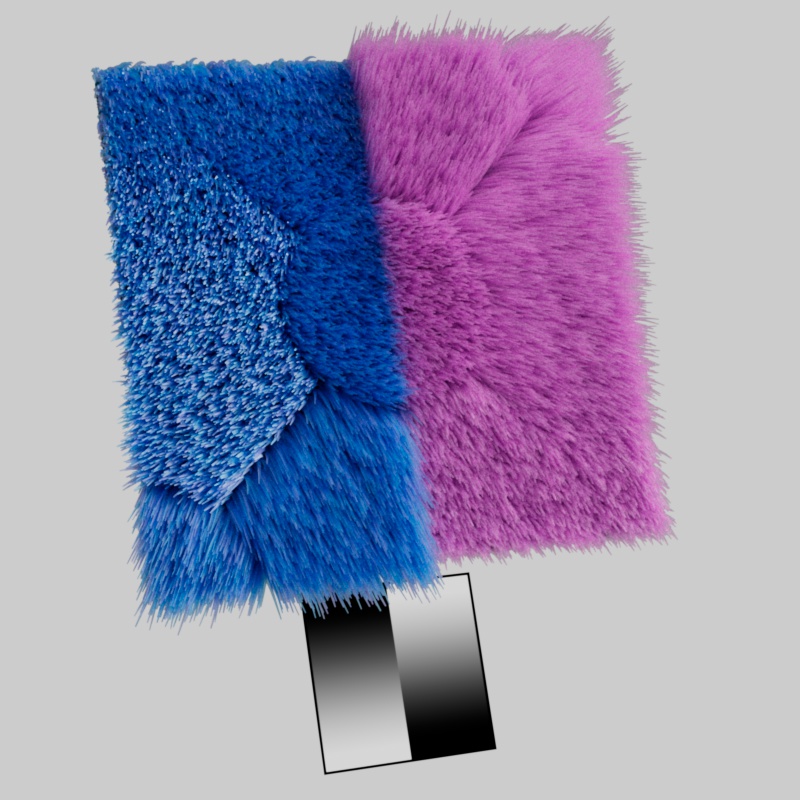
Controls how much strands bend along the Bend Direction Map using a grayscale texture map to control . Black removes the bend direction effect entirely, grey areas reduce the bend direction, and white results in full bend strength.
In the examples below, note how in the areas where the Bend Map is black the Bend Direction has no effect and the strands are only affected by the normal bend due to gravity. In the areas where the Bend Map is lighter the Bend Direction can take effect.
|
|
|
Bend Map: Linear Gradient |
Linear Gradient |
Bend Direction Map
When used without a Bend Map, the Bend Direction Map uses a maximum bend strength.
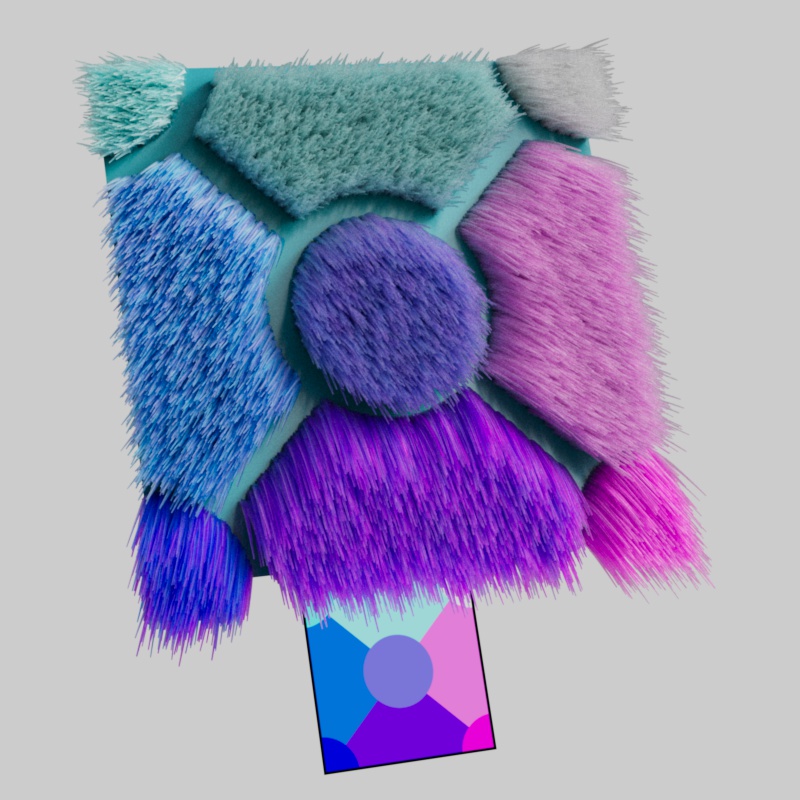
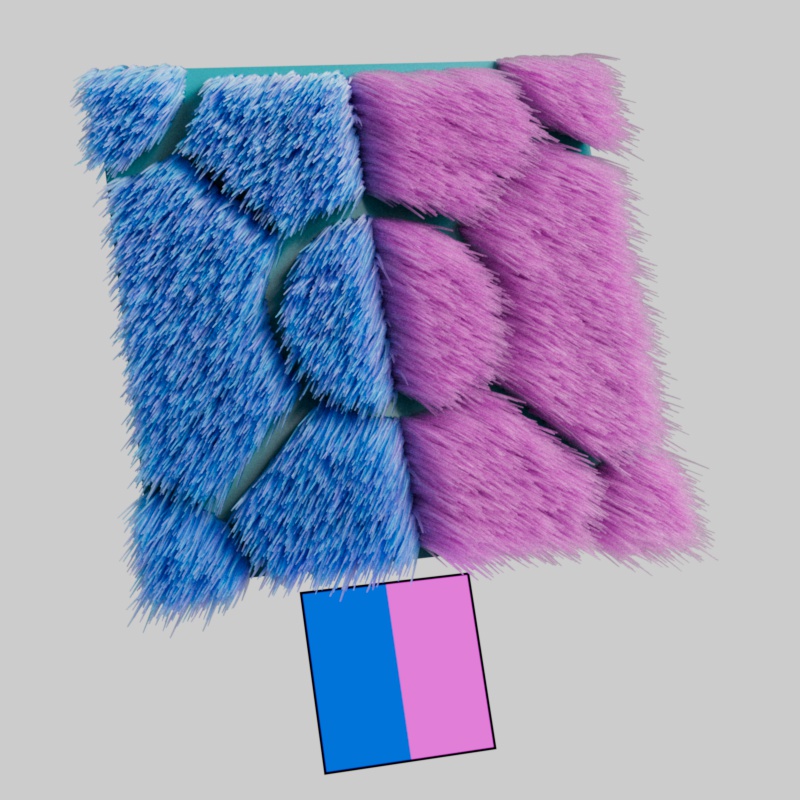
Overrides the direction each strand bends using a color texture. By default a strand bends along the surface normal but this map overrides that by setting the bend direction explicitly.
Each color channel of the texture controls a different aspect of the growth direction, exactly like a normal map. A color value of (0.5, 0.5, 1) results in the default direction straight out along the surface normal.
- The Red channel controls the direction along the mesh's U-tangent direction.
- 0 = fully negative, 0.5 = neutral, 1 = fully positive
- The Green channel controls the direction along the mesh's V-bitangent direction.
- 0 = fully negative, 0.5 = neutral, 1 = fully positive
- The Blue channel controls the direction along the mesh's surface normal in a binary way.
- 0 = strand grows along the surface (laying down)
- 1 = strand grows straight out of the surface
|
|
|
Bend Direction Map: Multi-Angle |
Split angle |
Curl Map
Curl must be greater than 0.
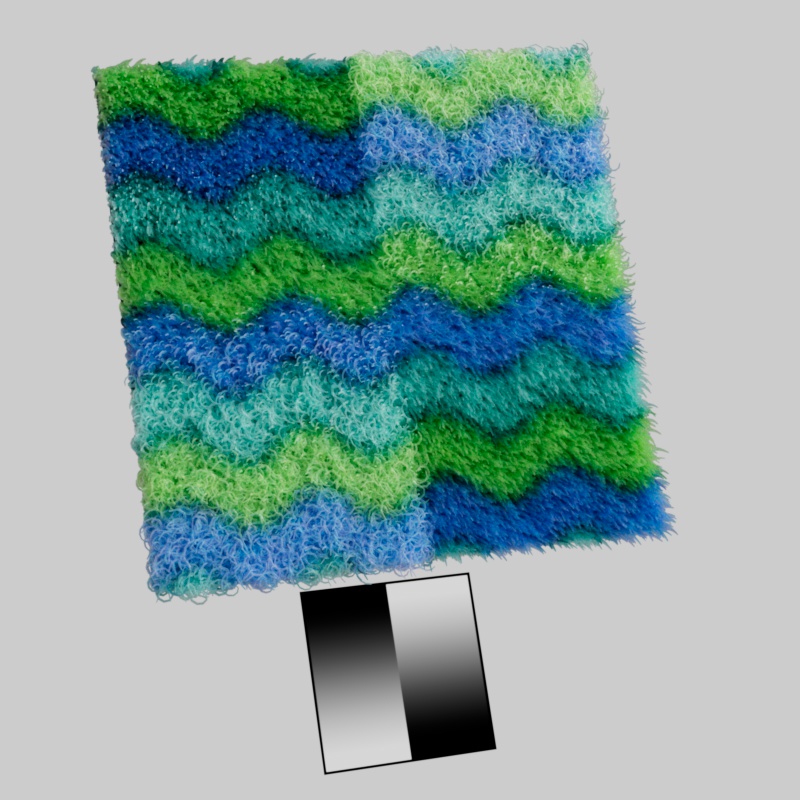
Multiplies the curl amount using a grayscale texture map. Black removes the curl effect entirely, grey areas reduces the curl, and white results in full curl strength.
|
|
Curl Map: Linear Gradient |
Gravity Map
Bend must be greater than 0.
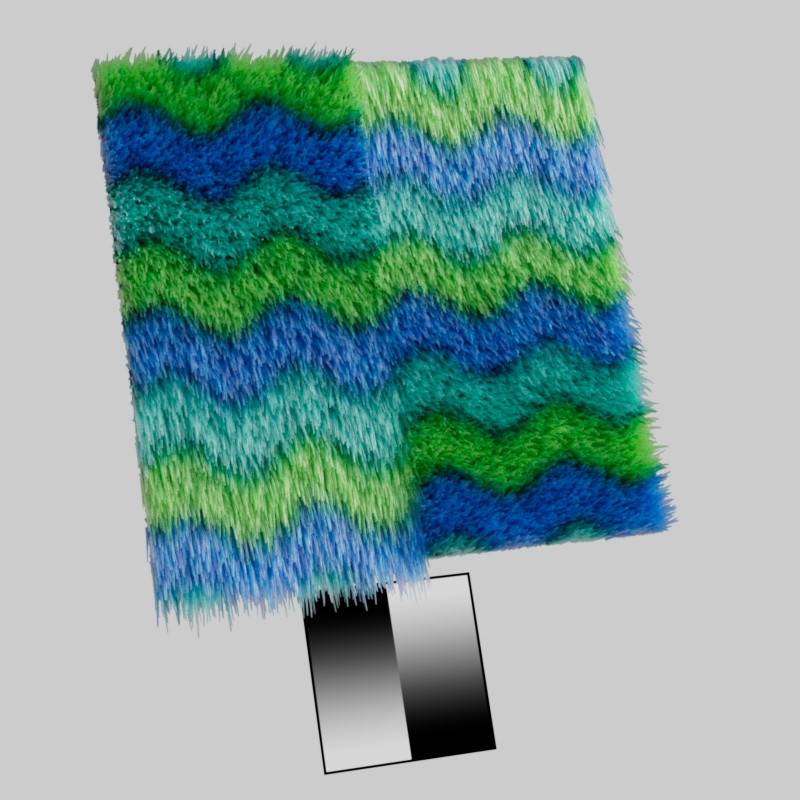
Multiplies the gravity strength using a grayscale texture map. Black removes the gravity effect entirely, grey areas reduces gravity, and white results in full gravity strength.
|
|
Gravity Map: Linear Gradient |