
Adding Layers
A layer is the basic element that makes up a composition, which is based on the concept of a stack. When you unfold a layer, you have access to all of its composing elements as well as the functionalities that allow you to move it, resize it, animate it, change its timing, or control the way it's merged with other elements.
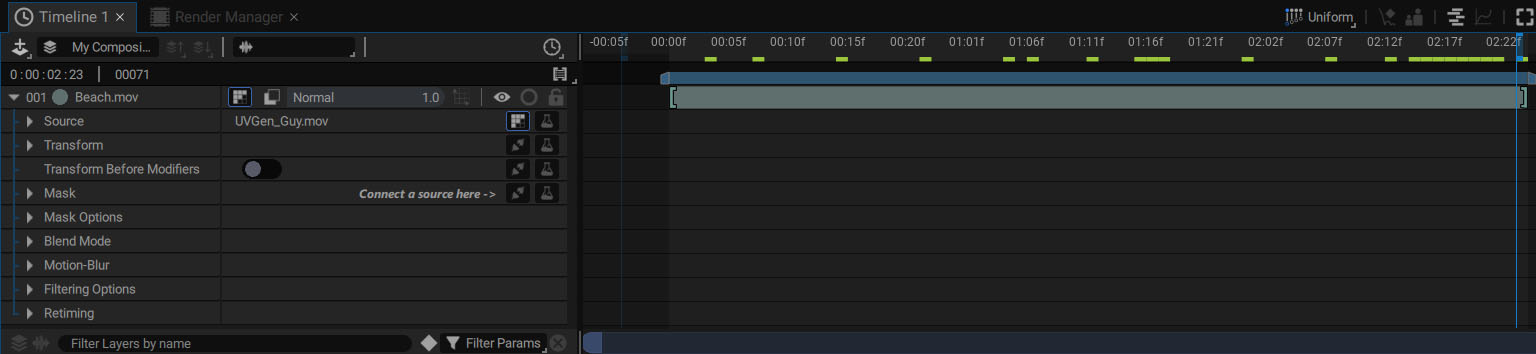
In order to be displayed in the composition, a layer needs a source. Without a source, a layer can contain information but it won't be applied to anything. Is this useful? Actually, it is. Imagine a layer as a box. If you put something in the box, you can move it and its content will move as well. If the box is empty, you can still move it. Later, when you add something inside the box, its content will immediately be positioned at the right spot because the position information is held by the box and not by the object inside of it.
The same can be applied to layers. You can add and position an empty layer in the composition, then add or even replace its source later. This distinction is really important as it allows us to split the layer into different concepts:
- Where it is: defined by transform
- What it is: what does it look like? Defined by the source
- What it’s going through: what effects are applied? Defined by modifiers
Other concepts will be described later, such as when it appears, defined by visibility keys and the time offset.
A layer with no source has a different name, depending on which software you use: transform, empty or null. Since the latter is the most used in the world of 2D, Autograph also uses the name null.
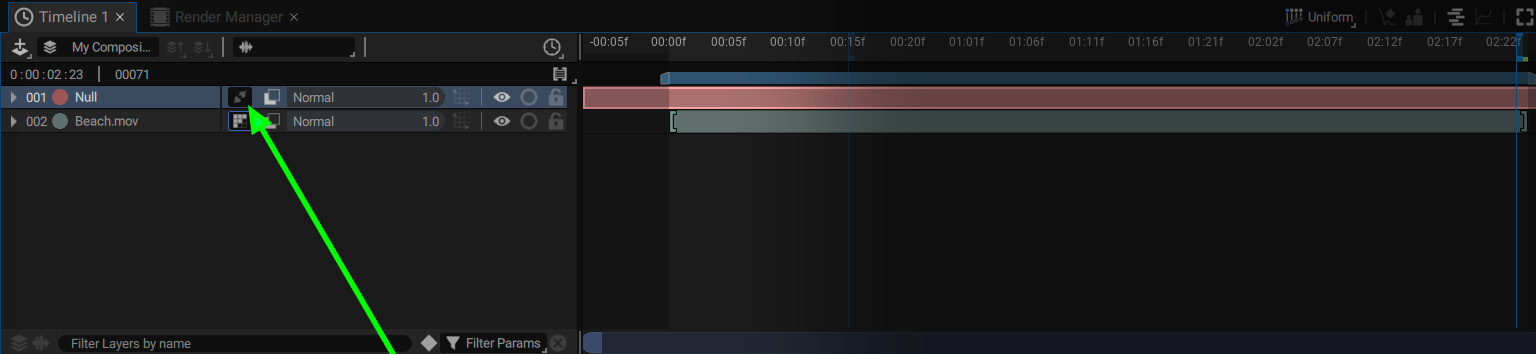
A null layer can also be really useful when you want to attach another layer to it, thanks to the concept of parenting. Through parenting, you can animate only one layer in the stack, and drive many.
In this section we will be focusing solely on 2D and 3D layers. Other types of layers can contain information about 3D cameras and objects, lighting or materials.
Layer Baseline
A layer is the basic element that allows you to populate a composition. It makes up one of the elements of the layer stack.

Glossary and content:
The triangle on the left of the layer baseline provides access to the layer parameters described in the following sections.
For now, we will focus on the contents of the main line of the layer (from left to right):
-
Index: the number of the layer position in the stack, starting from the top and beginning with 001.
-
Color label: sets the color of the block in the Dope Sheet (right side of the Timeline). Clicking on this label allows you to choose another color.
-
Name: defines the layer name. Pressing the f2 of enter key after selecting it allows you to rename it. Naming layers accordingly is key for optimal organization.
-
Quick source connection slot: this slot displays the icon of the item currently connected to the Layer source. You can also click on it to disconnect this source or replace it with another connection to another item or generator. This slot is a shortcut that allows you to quickly choose the layer source without having to unfold the Source parameter.
-
Blending Mode and Opacity: here again, you have quick access to two parameters that are also available when unfolding a layer. By clicking on the icon on the left of this controller, you can change the layer's blend mode. The right part is dedicated to the layer’s opacity. Note that this quick access controller does not allow you to animate these two parameters. To do so, you must unfold the layer in order to have access to the animation controllers. Also note that if an animation is added to one of these parameters, this "meta-controller" will be partially or completely grayed-out, in order to avoid adding animation keys by mistake, by handling the slider for example.
-
2D/3D toggle: allows you to change a 2D layer into 3D mode and vice versa, switching the Transform section to Transform 3D and adding new parameters.
-
Visibility: represented by an eye, it allows the layer to be completely hidden, by visually excluding it from the render displayed in the Viewer. The layer always exists in the stack and can be used by other elements, through parenting or referencing by external sources (the Layer Image generator for example). This parameter cannot be animated, but it can be used in correlation with the visibility keys.
-
Solo: allows you to only display the layer(s) that have this option enabled in the stack. This allows you to inspect one or more layers (usually temporarily) to better examine their contribution to the stack. It's possible to render a composition that only takes into account the layers defined in Solo mode.
-
Lock: prevents the layer from being selected, either in the stack or in the Viewer. In the Viewer, the click selection passes through the locked layers, as if they were not visually present. Since locked layers cannot be selected, they also cannot be moved.
To change the state of Visibility, Solo mode or Lock on several layers, click and drag the mouse, moving it vertically:
This way of changing the state of several layers also works for Shapes, especially Paths and Path Groups.
Adding Layer to a Composition
Adding a layer to the stack can be done in different ways, depending on whether it is a layer based on an imported source in the Project panel, a Generator, or if it’s simply a null layer.
Adding a null layer to the stack:
Adding a null layer to the stack is the simplest case because it's not based on a source; you can't drag anything from the Project panel to generate it.
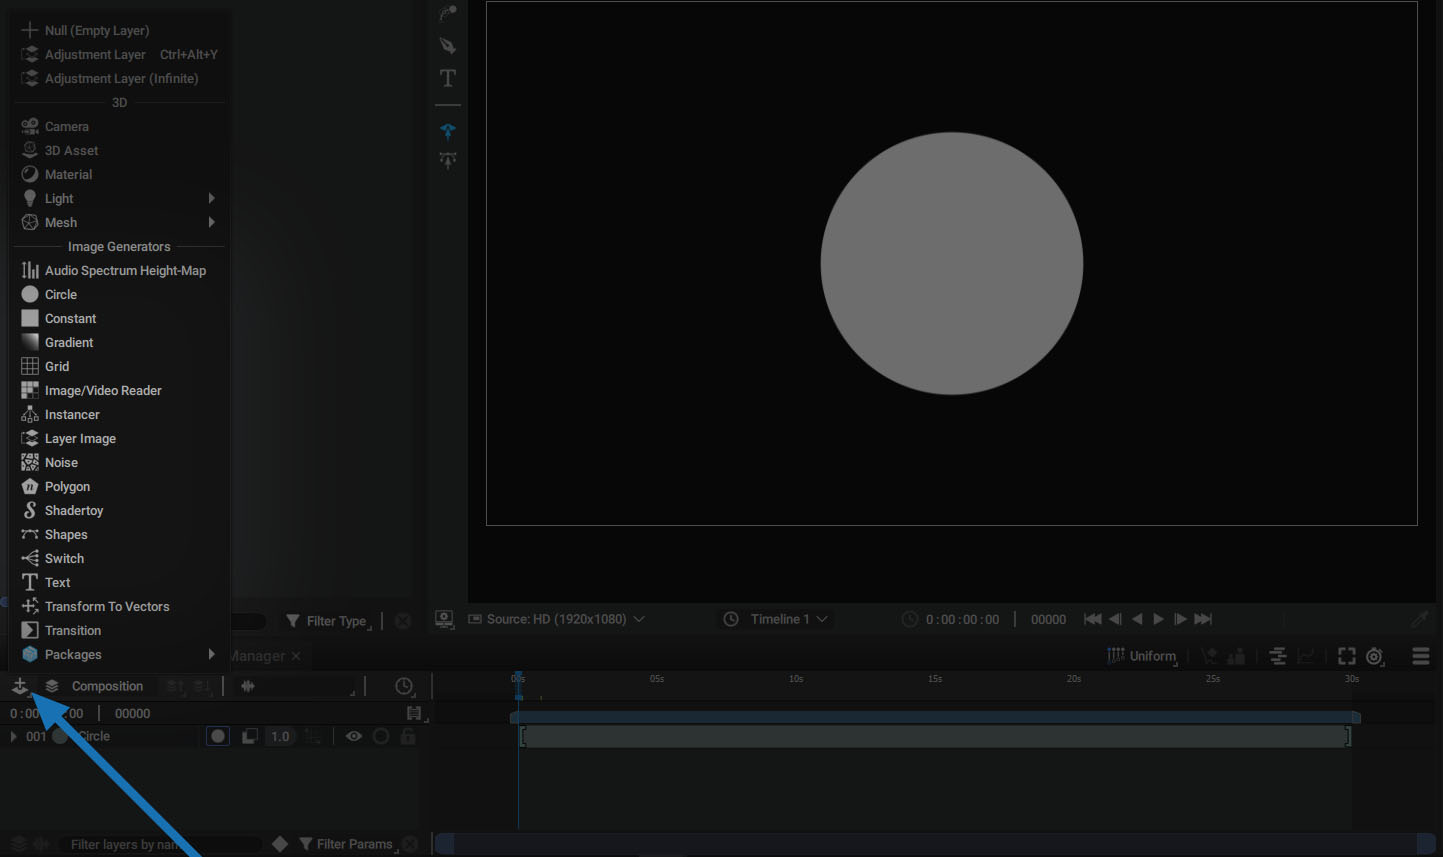
After creating a new composition, click on the + button at the top of the stack, and select Null (Empty Layer). A new layer named Null will appear. If nothing is selected in the stack, this new layer will be added at the top. If you select one or more layers, the new layer will be added above the topmost layer in this selection. So, when you have a very large stack, you can select one layer to define the position of the new one.
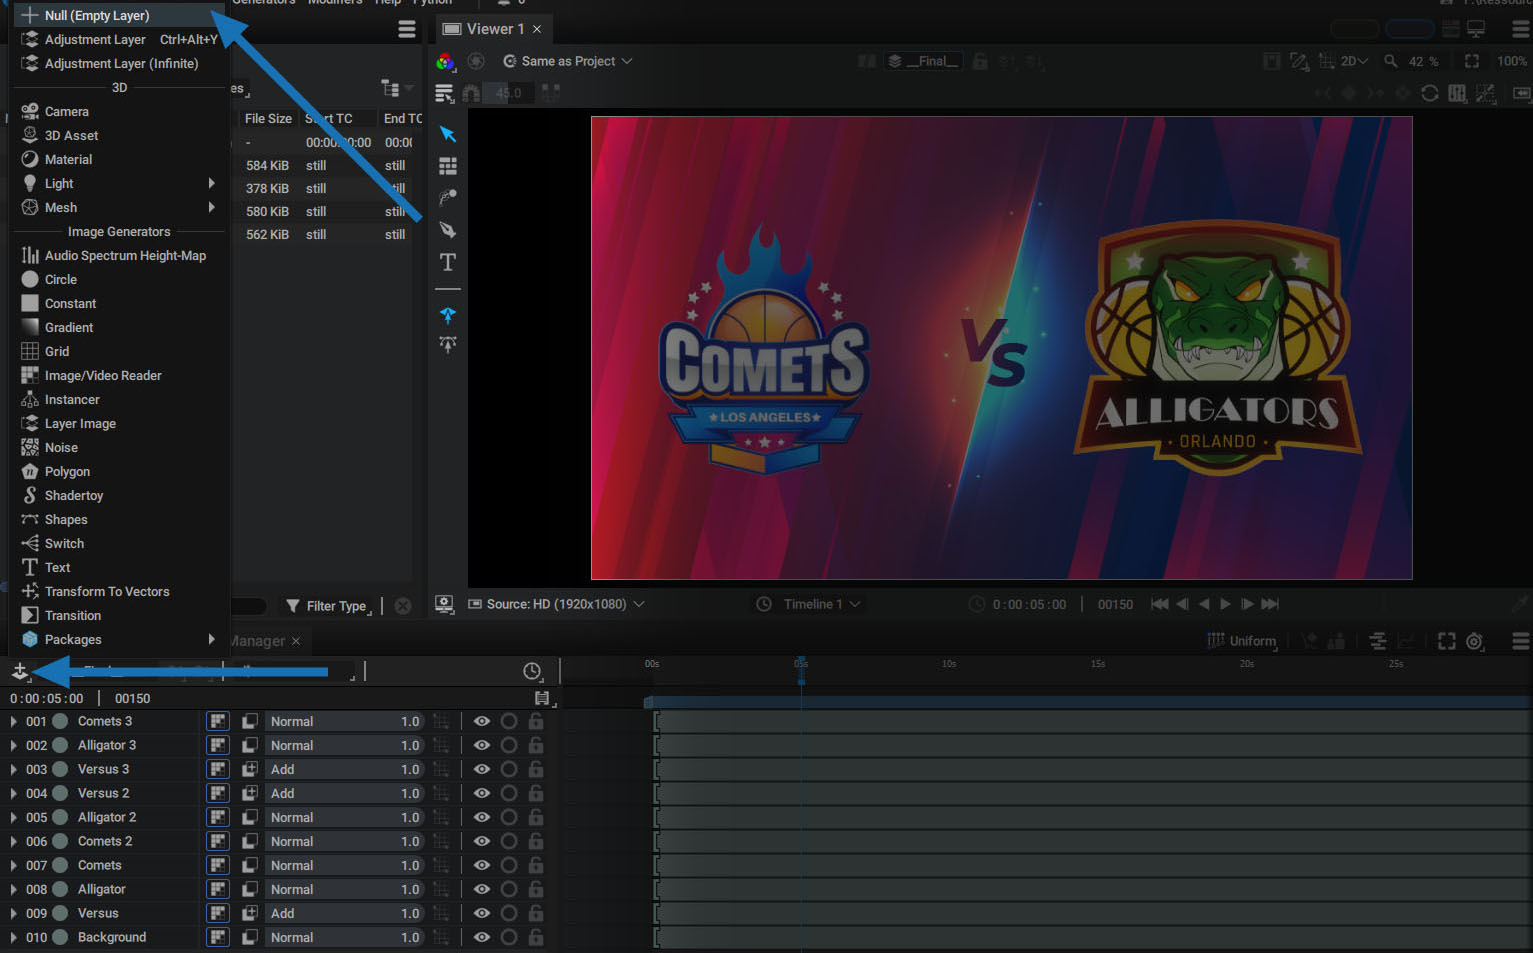
Quick access menu to speed up your worklow:
The Quick Access Menu allows to quickly add a new Generator right inside the viewer.
Just place your mouse cursor over the viewer and create a new layer:
- By pressing q key with no layer selected
- By pressing shift + q key when a layer is selected (pressing q key with a selected layer shows the Modifiers menu)
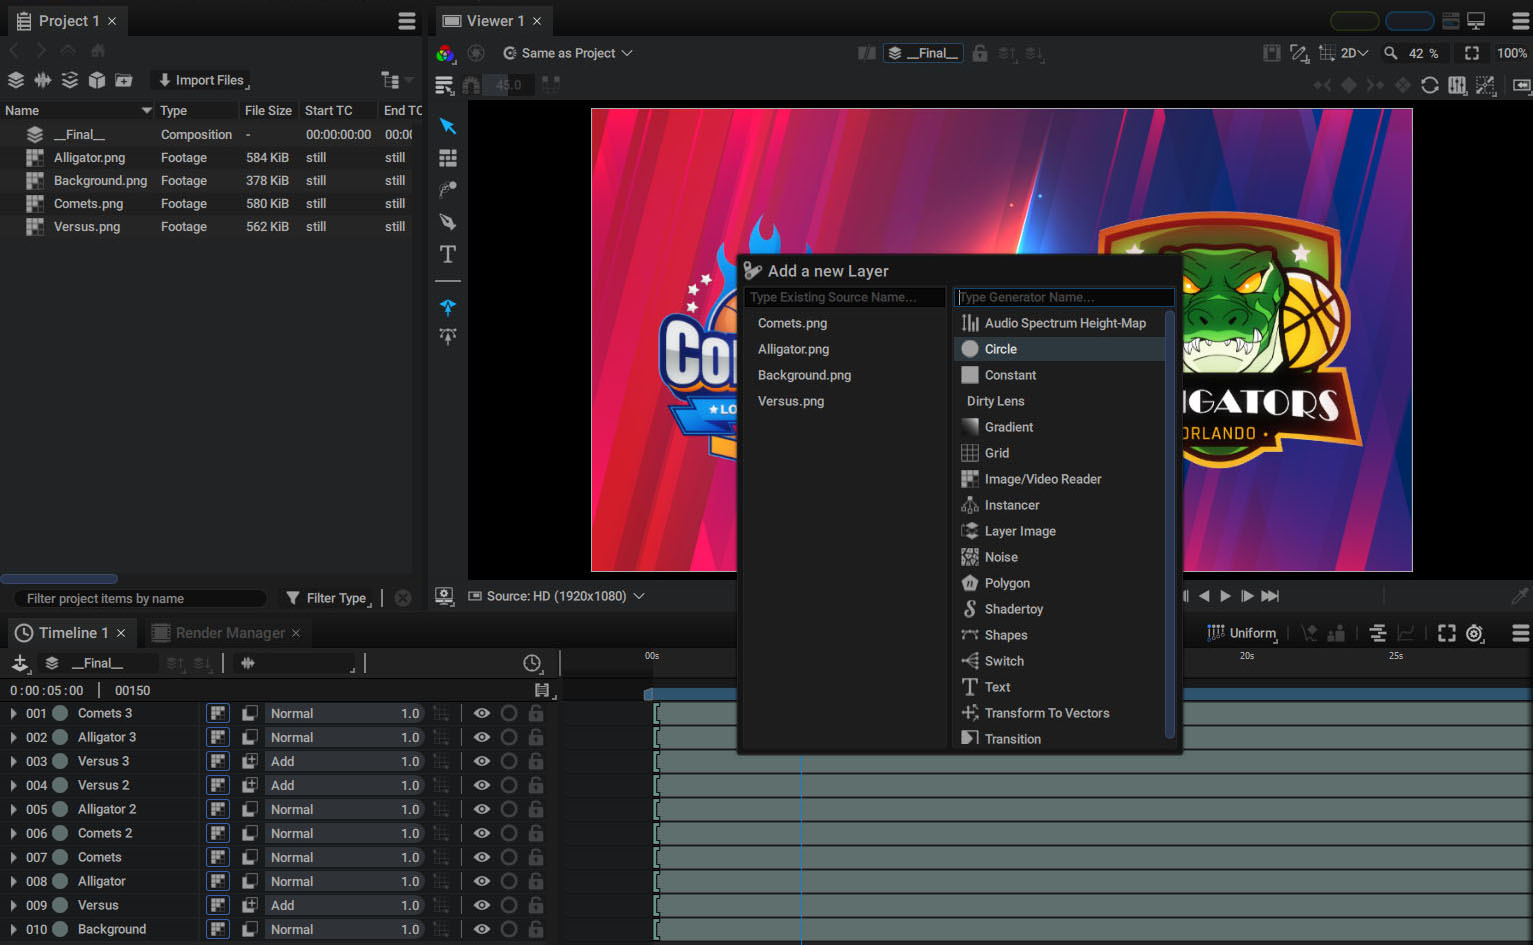
This popup panel is splitted in two parts:
- Left: all items available in the Project Panel (Readers and Compositions)
- Right: all procedural Generators
When you click on one of these items, a new layer is created, using it as a source.
Dragging a source from the Project Panel:
Select one or more sources in the Project Panel then drag and drop them into the Timeline. New layers will be added, and the corresponding sources will be connected to each layer. The order of the source selection will define the layer order in the stack, from bottom to top.
If you drag a movie or image sequence into an empty composition, you will be asked if you want to adapt the composition to the source that has just been dragged in terms of FPS.
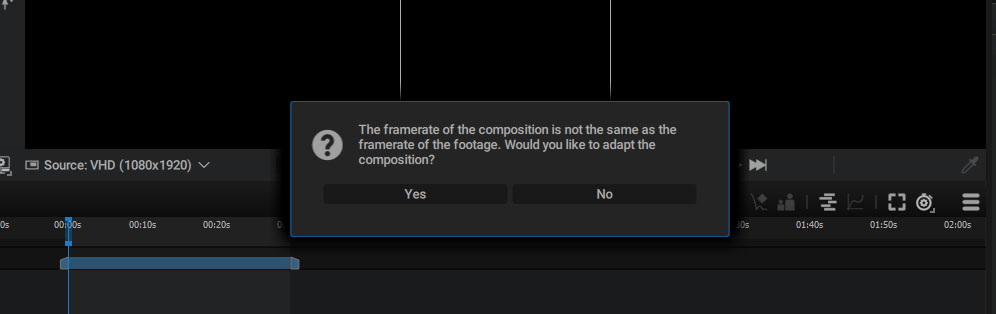
Adding a new Generator to the stack:
Images Generators, which are procedurally generated by Autograph, can be used as a layer source. You can access a list of image generators by clicking the + button on the top of the stack. Just like with the drag and drop from the Project panel, a new layer will be added and the Generator will be used as the source.
Create a composition from Footage:
- Right-click on a reader in the Project Panel to Create a Composition from a Footage. A new composition will be created, of the same name, size, duration and FPS as the footage.
- If a Timeline is not connected to any composition, you can also drag the reader into this empty Timeline to create a new composition and layer.
The video below shows both methods:
Opacity
Layer opacity, defined between 0.0 and 1.0, is used as a merge factor when it has to be blended with another image.
In a layer-based compositing software like Autograph, this secondary image is usually the result of the stack underneath, and this factor is used by blend modes operations to define layer weight in blending. Opacity acts as a multiplier of the layer’s existing Alpha channel. The two are combined before the merge operation.
There are four ways to modify a layer's opacity:
- On the layer’s main line, with the Blend mode / Opacity dual controller
- In the Selection Overview of the Inspector
- By unfolding the layer parameters in the stack and more precisely the Composition Options group
- By doing the same in Properties Section of the Inspector
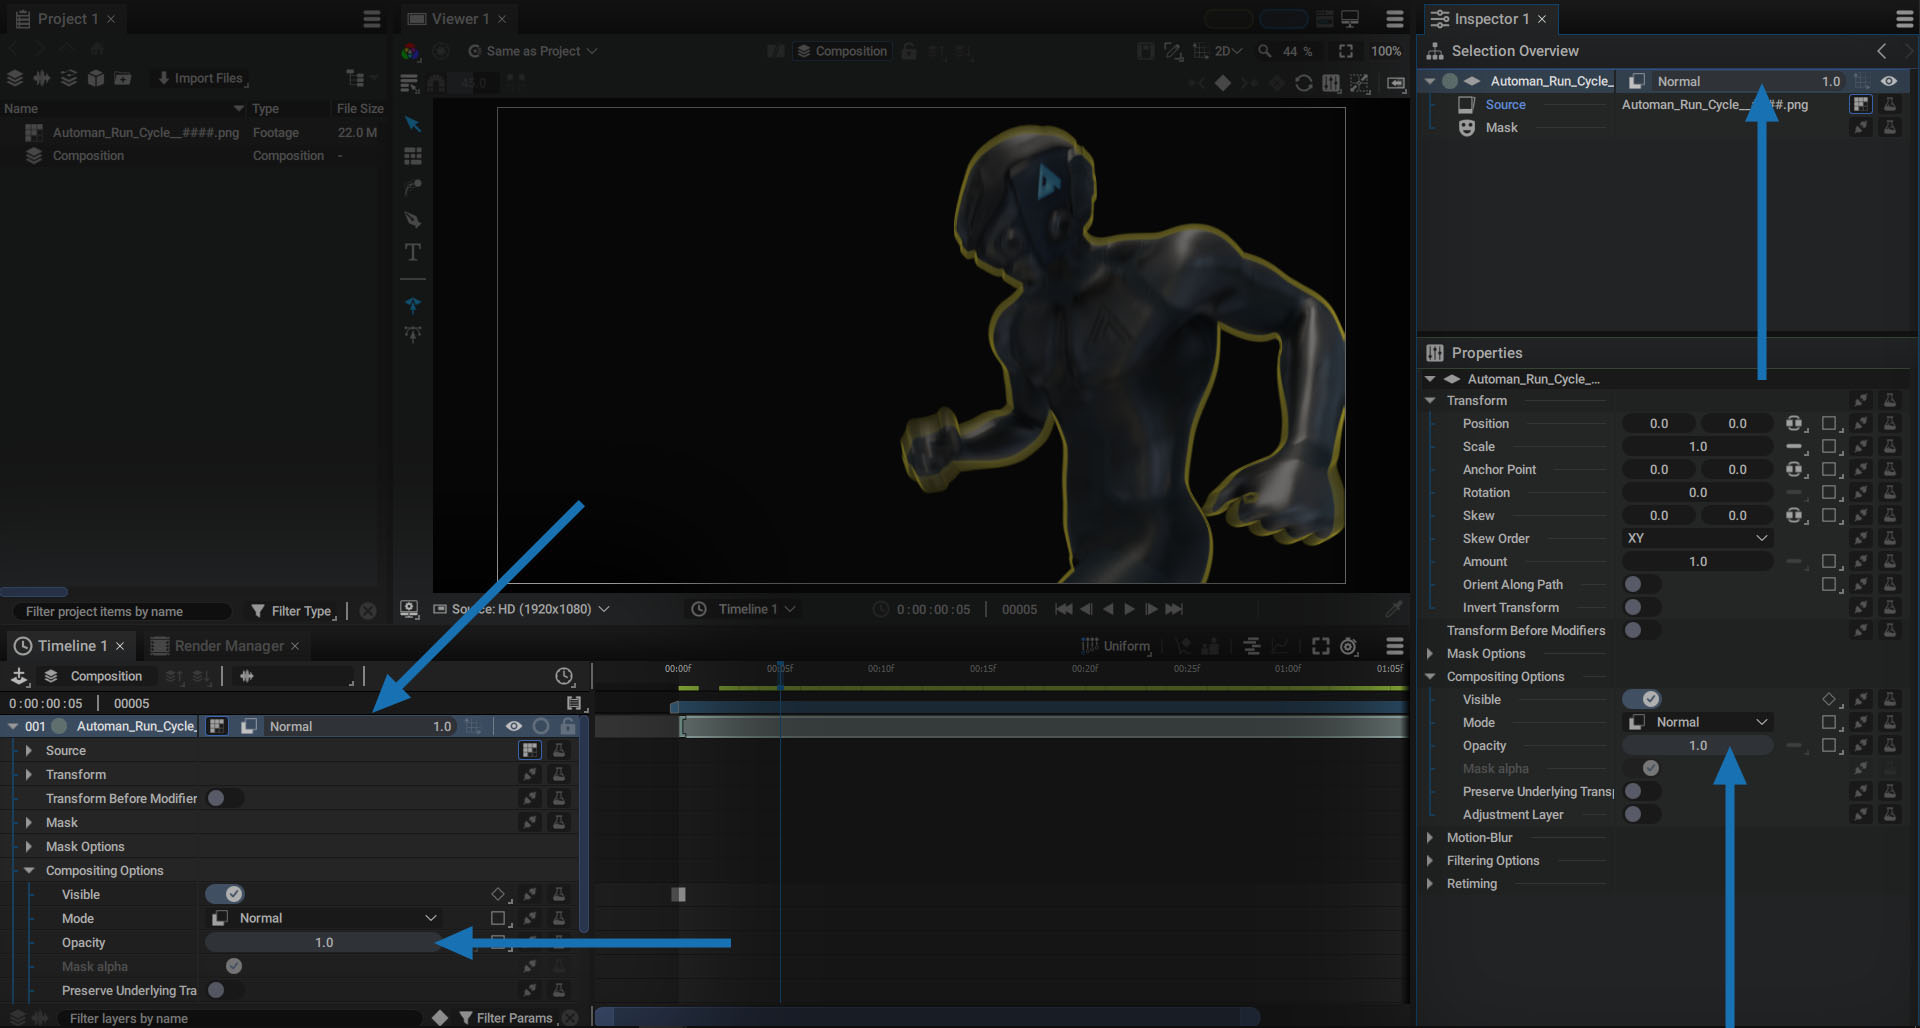
Opacity can only be animated in the stack or the Properties Section using Keyframes, or by adding a Generator to this parameter.
A layer's main line just offers quick access to this value, by replicating it to quickly set the transparency without unfolding the layer.
- If layer opacity is animated with a Generator, the main line controller will be grayed out.
- If it is animated using keyframes, it will still be accessible. So, be careful to avoid accidentally adding animation keys by manipulating the slider.