
Symbol Mapper: Grid Settings Group
Symbol Mapper reconstructs an underlying source image into a grid of characters and/or symbols. Factors that affect this grid appear in the Grid Settings group.
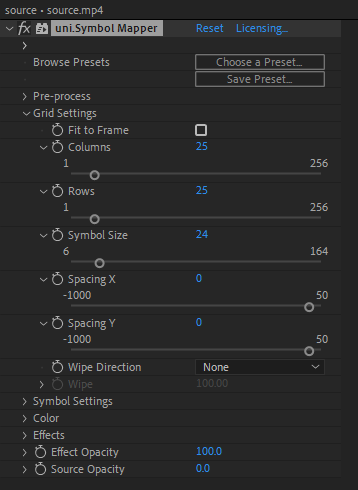
The Fit to Frame checkbox, when enabled will expand the grid to fill the preview frame using the current settings. When Fit to Frame is unchecked, Symbol Mapper defaults to a 25 x 25 grid, with the Columns and Rows controls enabled for your adjustment. Keep in mind that while Symbol Mapper lets you have up to 256 rows and/or columns, the size of your comp and symbols may mean that some or even most of your columns/rows display beyond the field of view.
Symbol Size sets the size of each symbol space in pixels and will, especially in combination with other controls, affect the density of your character grid. The below animation illustrates this. Note how the characters change as the average brightness of the underlying image area they cover scales higher. Conversely, you could create a cool effect by starting at a high Symbol Size value, then lowering this value over time until a dense grid is achieved in which the underlying image becomes clear. The racecar animation near the start of this user guide shows how this approach might look.
For a different idea of how Symbol Size affects image representation, see the strip below. The left image shows the source clip, then applies Symbol Mapper with (from left to right) Symbol Size of 6, 20, and 35.

Spacing X/Y controls the space (measured in pixels) between columns and rows. The triptych below hints at some of the possible ways in which you can play with these values. We kept Symbol Size constant at 17. The left image shows Spacing X/Y with values of 0. The center image keeps Spacing Y at 0 but lowers Spacing X to -450, resulting in columns being crammed more tightly together. Notice how the underlying image seems to “come through” more. The right image raises Spacing Y to 500, resulting in wide gaps between rows, but lowers Spacing X to -350.

Wipe Direction offers a pull-down menu with four options: None, Left to right, Right to left, and Random. If None is selected, the subsequent Wipe control will be disabled. If Left to right is selected, a Wipe value of 0 will mean that no columns are displayed while a value of 100 displays all columns. Use keyframing to progress over time from a black screen to a character-filled comp — or vice versa.
The Random option is illustrated below, progressing from 0 (all black) to 100 (all character spaces filled).