
Particular
Emitter Group
The Emitter is where particles are born and given their initial velocity and direction. These parameters control characteristics, such as the emitter's shape, style, and position.
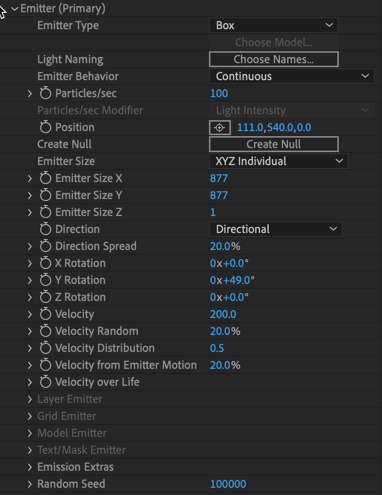
Emitter Type
Sets the shape and functionality of the Emitter. There are eight types (see Emitter Types).
Conditional Controls
Depending upon the Emitter Type selected, you may see a different set of controls.
Choose Model: Brings up a menu of models when you select 3D Model as the Emitter Type. You can also import your own 3D model using the Add New Model… button in the top-right of the 3D Models window. Imported models will appear in a “Custom” folder at the window's bottom. Model file types can be .obj or .c4d files or sequences.
Right-click on a model’s thumbnail image to either:
- Show in Finder , where the model is located on your system.
- Remove the model.
|
Note for Cinema 4D files : Files can export directly from Cinema 4D by clicking File > Save Project for Cineware . To Save Polygons or Animation in your Cineware file, you can toggle these options under:
Animations typically have the best results when:
|
Light Naming (Primary only):
Light Naming brings up a dialogue box to specify the name(s) of lights to be utilized by Particular for either Light Emitters or Shadowlets.
Parent System (available when Emit from Parent System is the chosen Emitter Type):
If emitting from a parent system, this option lets you choose any system above the selected one. Primary is the default.
Emitter Behavior
The Behavior drop-down menu contains five options: Continuous, Explode, From Emitter Speed, Dynamic Form, and Classic Form.
- Continuous is the standard default behavior. It continuously emits particles.
- Explode automates creating "explosion"-style behaviors. In previous Particular versions, you had to do this with keyframes. Try setting a keyframe for Particles/sec with a high number at the beginning of your timeline and one immediately after that at 0.
- From Emitter Speed
adjusts the Particles/sec depending on the speed at which your emitter's position changes. If the emitter isn't moving, its speed is zero, so no particles emit. As the emitter's position animates, particles emit proportionally to the speed, with the Particles/sec value working as a percentage.
- Note that in the Designer, Emitter speed is not accessible, so particles are only visible when dragging the emitter in the preview window.
- Dynamic Form makes particles immortal. They remain static and no longer have controls for Velocity, Over Life, Direction, or Life Span. Dynamic Form allows form behavior particles to be affected by physics. All properties under the Environment and Physics blocks are available along with some properties from the Displace and Fields sections. Pro tip: Dynamic Form behaviors don't lend themselves well to animation. Any property that affects the translation of the particle won't work.
- Classic Form, like Dynamic Form, stops objects from emitting particles. Again, they have no controls for Velocity, Over Life, Direction, or Life Span. The particles are immortal. Unlike Dynamic Form, though, Classic Form does not allow you to use any Physics blocks. The Environment and Simulations blocks will be unavailable, but you can adjust certain properties under the Displace blocks, including Disperse and Twist, Fields, and Kaleidospace options.
Emitter from Parent Behavior (available for a secondary system when Emit from Parent System is the chosen Emitter Type):
The Behavior drop-down menu contains four options: Continuous, Emit on Parent Bounce, From Parent Speed, and At Parent End of Life.
- Continuous is the standard default behavior. It continuously emits particles.
- Emit on Parent Bounce will emit particles when the parent particle has a Bounce event (see Physics Simulations > Bounce ).
- From Parent Speed will use the Speed of the parent particle to determine how many particles are emitted. The speed is used as a percentage of the Particles/sec set for this system. If the parent particle is not moving, no particles emit. As it speeds up, more particles emit from the parent.
- At Parent End of Life holds off on emitting any particles from the parent until the parent reaches the end of its lifespan. This is very useful for effects that need to spawn particles when they die off.
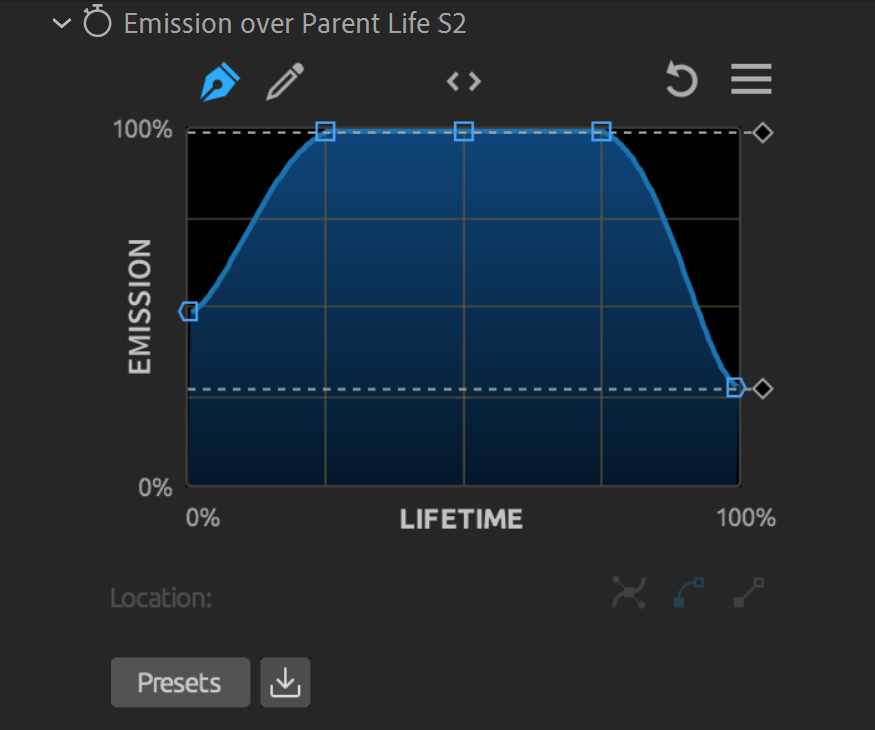
Emission over Parent Life (available when Emit from Parent System is the chosen Emitter Type):
For more control over when the particles emit from the parent, use the Emission over Parent Life curve. The horizontal axis represents the parent particle lifetime, and the vertical axis offers this secondary system's Emission rate. With an Emission rate of 100, it will emit whatever value you have set in the Particles/sec parameter below.
Particles/sec and Particles
Particles/sec determines the number of particles born each second. Low values mean sparse particles and are normally fast to render. High values make lots of particles and can be slow to render. This value can be keyframed so particle emission varies over time. When the Emitter Behavior is set to Explode, Dynamic Form, or Classic Form, Particles/sec becomes Particles and allows you to specify the total number of particles displayed for that system.
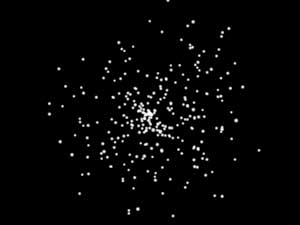
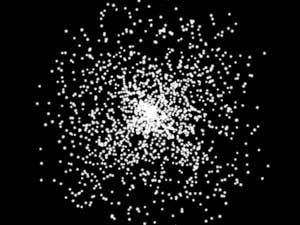
Particles/sec at 100 (left) and 600 (right).
Particles/sec Modifier
This control (available when Light(s) is the chosen Emitter Type) allows you to use light properties to modify particle emission. Read more about it in
Light Emitters.
Particles/sec are % of Primary (additional systems only)
When enabled, the Particles/sec parameter for this system becomes a percentage of the Primary Systems' Particles/sec value. This is disabled by default.
Position
The XYZ position in 3D world-space is where particles are born. These values can be keyframed over time to create trails and similar effects.
- Set Position X to move left or right around the x axis.
- Set Position Y to move upwards or downwards around the y axis.
- Set Position Z to move closer or further to the camera around the z axis.
Position Relative to Primary (additional systems only)
This toggle allows you to set the system's position relative to the primary system. When enabled, the secondary system’s position links to the parent’s position. You may still adjust this system's position, but the coordinates are relative to the parent’s position. To decouple the system from its parent and control its position on the comp scale, simply uncheck this box.
Enabling this will alter your Position coordinates above into Relative Position coordinates which use the primary system as its reference point, rather than the center of your layer.
Create Null
Clicking this button will add a null to your composition automatically linked to your emitter's position, scale, rotation, and opacity values. This provides on-screen controls allowing you to manipulate your emitter directly in the composition window. You can link the null to a layer via the Linked Null drop-down menu.
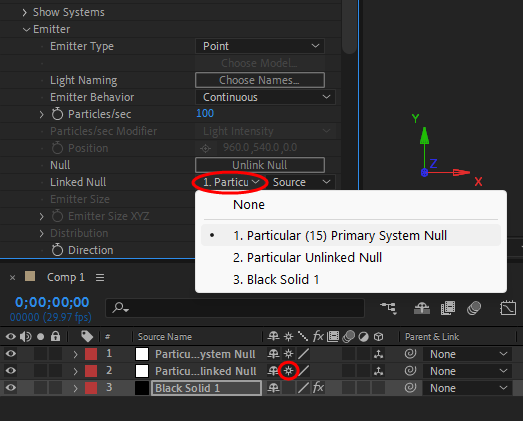
Linking via a layer selector improves performance compared to the previous expression method. This also has the added benefit of allowing you to link your emitter to any 3D layer in your composition. Be sure that Collapse Transformations is enabled for the layer (shown in the image above) so changes in transform data are relayed to Particular. This enabling is done automatically when you click the Create Null button.
Emitter Size
This control sets the size of the emission area for most Emitter Types. For Point emitters, this control is disabled. Layer, Layer Grid, and Text/Mask emitters only use the Z parameter as X and Y size is controlled by the size of the layer.
Emitter Size is set to XYZ Linked by default, but you can change this to XYZ Individual to get control of each on its own.
Direction
This pop-up controls the direction in which particles move initially. There are six settings.
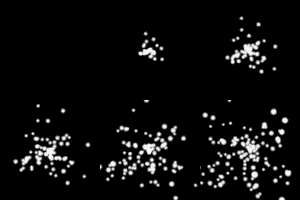
Uniform radiates uniformly from a central emitter point. This is the default setting.
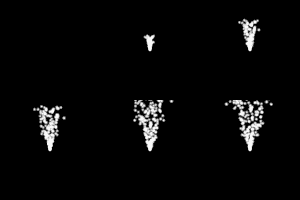
Directional emits in a specific direction. Use Direction Spread and X/Y/Z Rotation to control the beam.
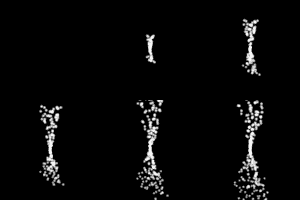
Bi-Directional emits in two opposed directions at the same time. Use Direction Spread and X/Y/Z Rotation to control the beams.
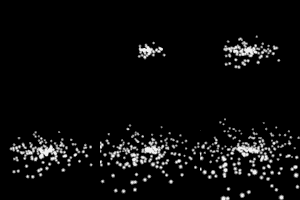
Disc emits in a plane, so particles form a disc over time.
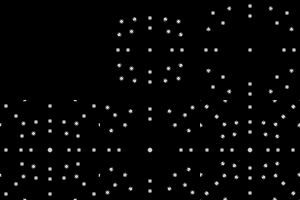
Outwards emits outwards from the center of the Emitter. For a Point Emitter, this is the same as Uniform, therefore the Grid Emitter displays here. This feature works well with Models and Text emitters.
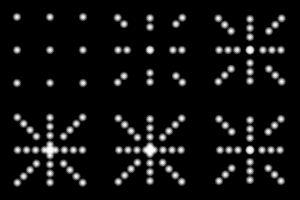
Inwards emits inwards toward the Emitter's center. For a Point Emitter, this is the same as Uniform, therefore the Grid Emitter displays here. This feature works well with Models and Text emitters.
Direction Spread
This function controls the particle beam spread for most Direction Types.
- Disabled for Uniform emitters.
- Disabled for Light Emitters ( read more about Light Emitters).
- Disabled for Form behaviors.
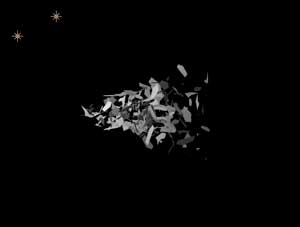
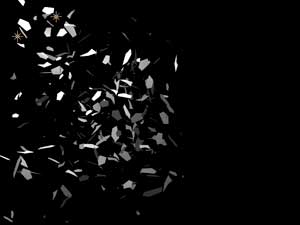
Direction Spread set low (left) and high (right). Direction is set to Directional.
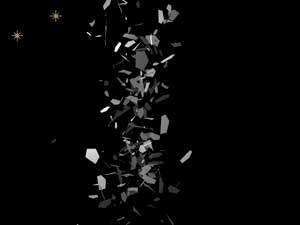

Direction Spread set low (left) and high (right). Direction is set to Disc.
X/Y/Z Rotation
This function rotates the Emitter around the x, y, and z axes.
- Set X Rotation to rotate forward or backwards around the x axis.
- Set Y Rotation to rotate to the left or right around the y axis.
- Set Z Rotation to rotate around the z axis.
Velocity
Velocity sets the initial velocity of newborn particles. Higher values make particles move fast. Lower values make particles move slow. When set to 0, no particles emit. Trapcode Particular documentation sometimes refers to this parameter as "Initial Velocity."
Velocity Random
This control adds randomness to the initial velocity of newborn particles, meaning that particles are born with varying initial velocity. Higher values give more randomness to Velocity. This parameter is affected by Random Seed.
Velocity Distribution
This control determines the distribution of random particles toward the higher or lower end of the allowed velocity above and below the initial velocity. Lower values result in particles below the initial velocity, while a higher value will give more particles above the initial velocity.
Velocity from Emitter Motion
This function allows particles to "inherit" Velocity from the Emitter. For this parameter to have any effect, the Emitter must be in motion.
- Negative values give a "jet" spray feel. The particles spray opposite to how the Emitter moves, and they appear to push the Emitter forward.
- Positive values give the effect of something that is letting off particles as it moves, like stars from a magic wand.
- Positive values also give a look of particles getting caught in the draft of the moving Emitter.
- A value of 0 means Emitter motion has no effect on particles' initial Velocity.
Velocity over Life
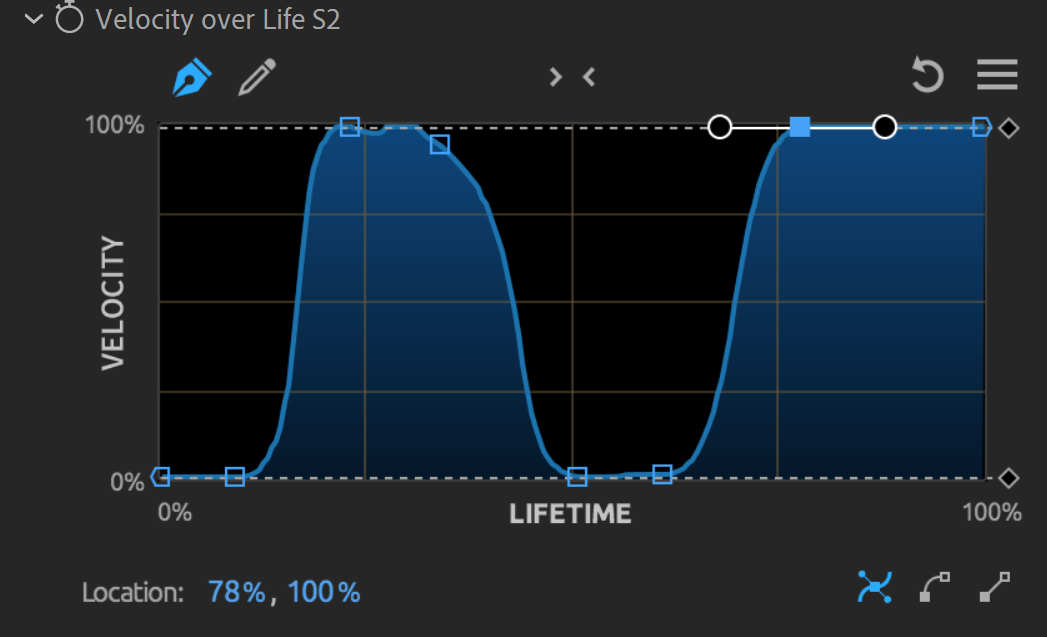
Control the Velocity of your particles throughout their lifetime using the Velocity over Life graph. Let your particles sit in place for a while, then burst into action, or vary velocity along the way so they speed up and slow down as needed.
A text layer using the following Velocity over Life graph:
Emitter Type Groups
These groups enable depending on the Emitter Type chosen.
Layer Emitter group
(enabled for Layer and Layer Grid Emitter type)
This parameter group lets you emit particles from layers. See
Layer Emitter group
page for details.
Model Emitter group
(enabled for 3D Model Emitter type)
This parameter group lets you emit particles from a 3D model. See
3D Model Emitter Group
for details.
Text/Mask Emitter Group
(enabled for Text/Mask Emitter type)
This parameter group lets you emit particles from a Text layer or Layer with Masks applied. See
Text/Mask Emitter Group
for details.
Emission Extras
Periodicity Random
This control emits particles at random intervals. It is only useful when using a directional emitter with Direction Spread at 0.
Lights Unique Seeds
When using two or more Lights as Emitters, this control lets you use a unique random seed for each light to create variation in your scene. Unique Light Seeds also affects Streaklet random seed, so different lights get a different Streaklet appearance.
NOTE: The Random Seed needs to be set to 65536 or higher for this to work.
Random Seed
The Random Seed controls all random parameters (e.g., Velocity Random) in the effect. It is useful when duplicating the effect and you want a slight variation of particle positions. It can also help when the animation just doesn't look good, since this value can be changed for varying looks.