Real Lens Flares
Core Projections
We pointed out earlier that core projections are the building blocks of lens flares. You’ve already seen how these projection types can exist on the projection strip and comprise the layers within a preset. Before we progress further under the hood with presets, it’s important to have a thorough understanding of each core projection type.
Light Ball
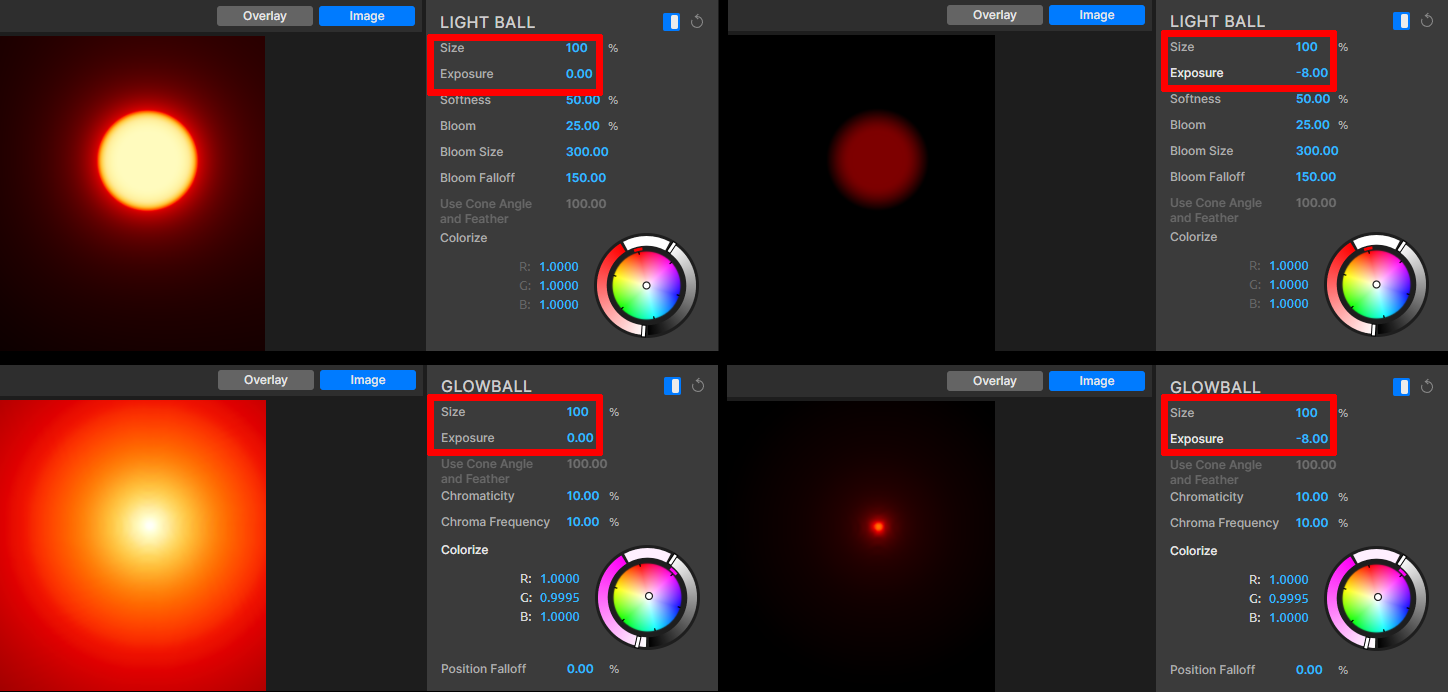
Light Ball is the odd duck in this group. It is the only core projection that only simulates a light source and not the artifacts generated within a lens by a light source. In the images below, we show both core projections on the left at 100% exposure. On the right, we turned the exposure way down. You can see how the light ball holds its shape, because there's a "real" thing there. The glow ball, on the other hand, gradually diminishes into nothing as exposure reduces.
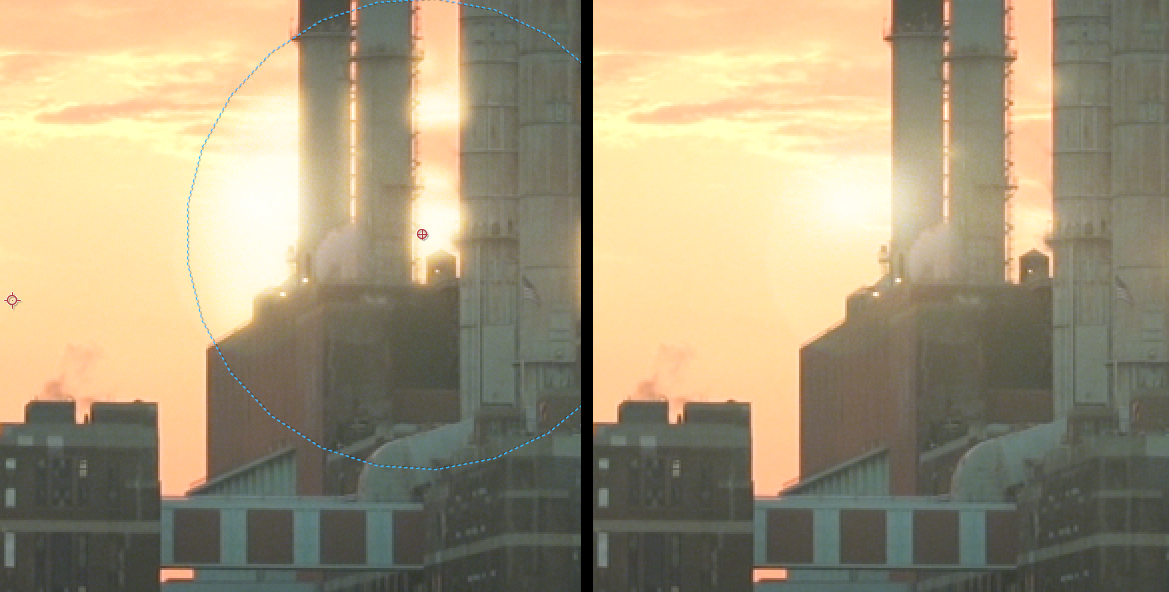
We took a project setup from our ECP page section on Obscuration and used it to compare light ball vs. glow ball interactions in a real scene. In the following example, you can see how the glow ball (left) bleeds around those factory stacks differently than the same-sized glow ball (right). We worked to make the two effects as similar as possible, but it's clear how differently they behave when confronted with real-world physics. In fact, close analysis would reveal that the light ball, broken up by the foreground objects, creates multiple lens flares. Glow balls will not do this.
The Light Ball core projection offers a few controls in the inspector pane.
- Size values range from 0 to 100 percent. Note that the light ball size value is a percentage of the flare's size. It maintains its size relative to the flare even if the flare's size increases or decreases.
- Exposure values span from -20 to 20, although your light ball may be too dim to discern under -10 or so. Note the interplay between Size and Exposure illustrated below. On the left, we have a small Size of 10%, but Exposure is maxed at 20. The right image uses a larger Size but reduces Exposure to just over 5. The net results look similar from a distance. Zoom in, though, and you'll notice that the first image is hazier while the second has a much more defined source. You might use such qualities to make your light look more like a distant sun than a nearby light bulb — or vice versa.

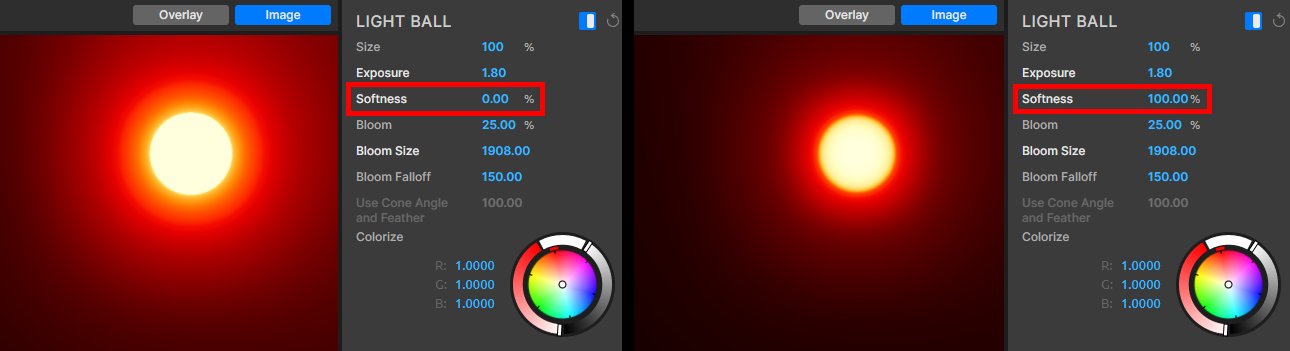
- Softnessaffects the shape's feathering. A 100% value (right image, below) creates maximum feathering of the core shape rather than its surroundings. Softness also impacts the amount of bloom generated, as the source is "softer."
- Bloom. It's tempting to think of Bloom as being synonymous with a glow, but Glow is an additive operation. Bloom, on the other hand, spreads and blurs the light ball shape.
- Bloom Size sets the distance your bloom travels from the source. Below, we show Bloom Size of 100 (left) and 500 (right).
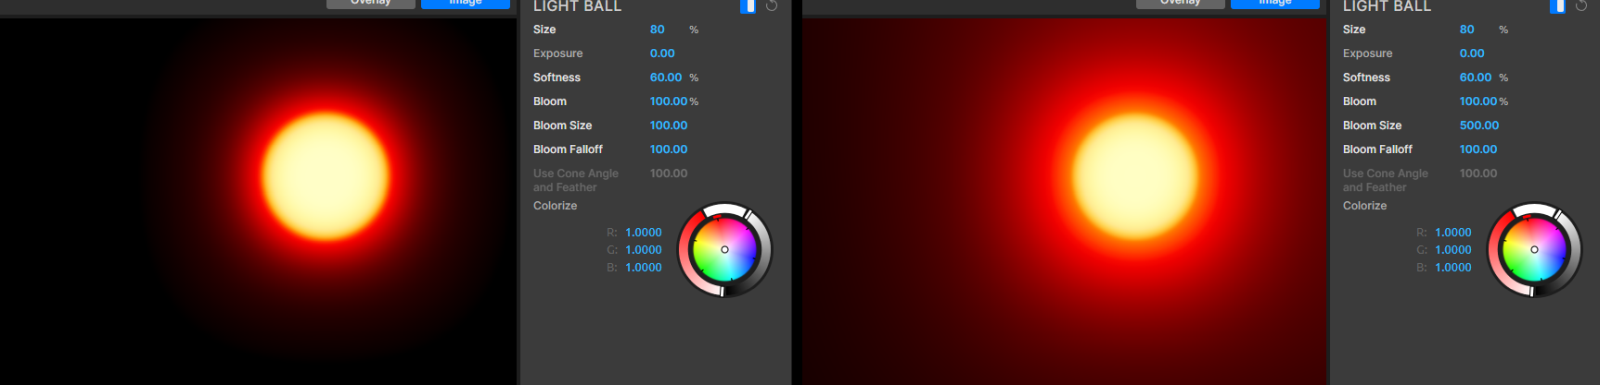
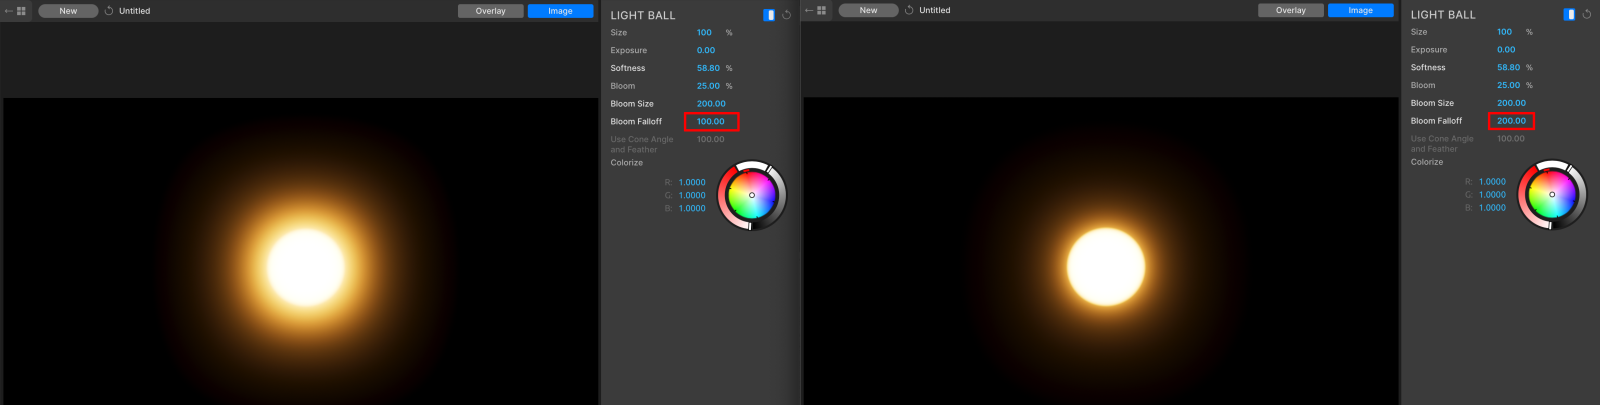
- Bloom Falloff values span from 100 to 200. The higher the value, the greater the amount of falloff you experience from the light source outward.
- Use Cone Angle and Feather only affects your flare when using a spot light as the source. Spot lights in AE have cone angle and feather controls, so this parameter allows you to determine how much of an effect those adjustments have on the light ball.
- Colorize provides the ability to control the light ball's tint independently from the rest of the flare. Functionally, it’s equivalent to the tint controls in other VFX tools.
Starburst
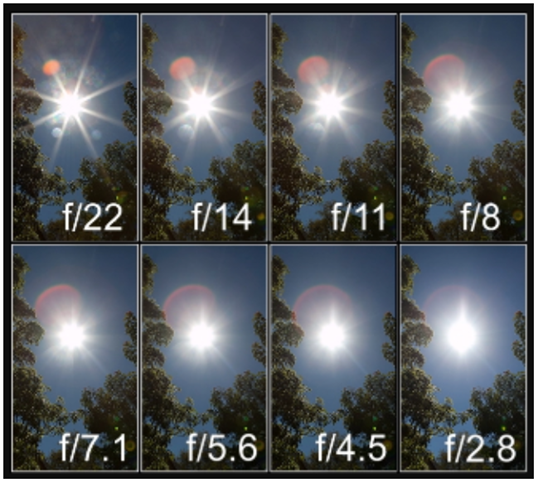
The starburst accompanied by a lens reflection is probably the “look” most people associate with the term lens flare. However, starbursts are inherently tied to aperture. The graphic below illustrates how aperture size can reshape overall flare appearance.
And here’s a fun fact: The number of blades in an aperture determines the number of spikes/points in the starburst. An even number of aperture blades yields the same number of spikes, but an odd number of blades will yield double the number of spikes.
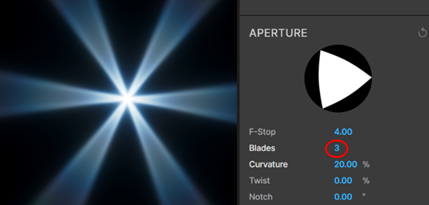
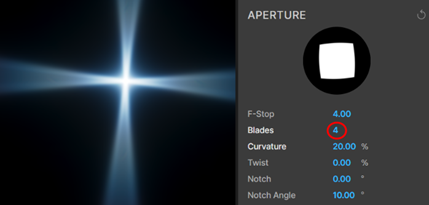
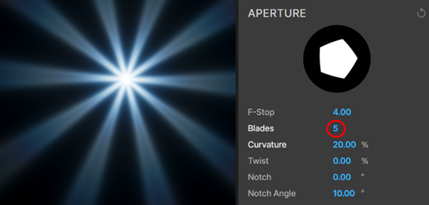
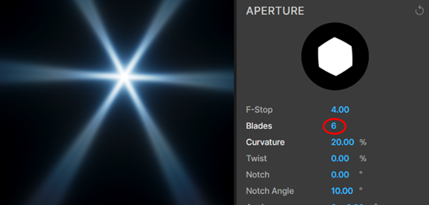
Notice how, despite having the same number of points, the spikes for the aperture settings of 3 and 6 have different appearances.
This relationship between starburst and aperture is why the starburst, unlike any other core projection type, has two inspector pane sections: a starburst control set (shown below) and a detailed aperture control set (discussed in this User Guide’s lens pane section).
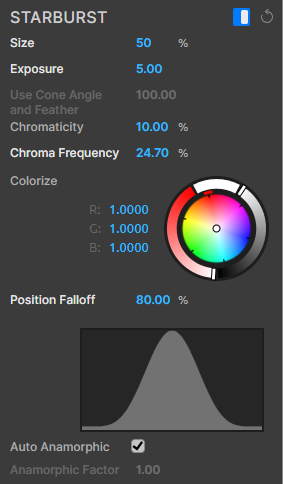
The starburst control set should look familiar if you read about the inspector pane’s light source group. Here, you have five attributes/features to control:
- Size. Starburst size can be set from 0% to 5000 percent. The default is 100 percent.
- Exposure. Exposure can range from -20.00 to 20.00. The default is 0.00.
- Chromaticity. Starbursts sometimes produce rainbow-like effects in their spikes. Chromaticity is a measure of “how much rainbow?” Values can range from 0% to 100%, but default values vary according to the individual starburst preset.
- Chroma Frequency. This feature produces rainbow banding along starburst spikes. See illustrations of 10% (left) and 100% below.
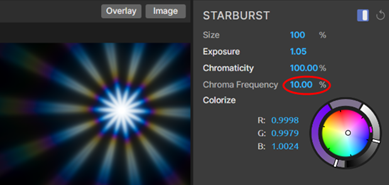
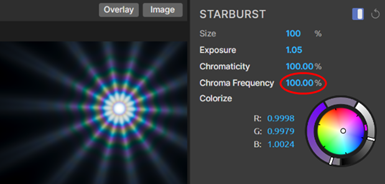
- Colorize. This replaces the temperature control used in the Light Source control set. Functionally, it’s equivalent to the tint controls in other VFX tools.
- Position Falloff. This feature creates a visibility curve wherein positive values result in decreasing opacity of the core projection from comp's center toward the edge. Negative values produce the inverse result. This makes more sense when you see the effect in action with the extreme -100 (left, below) and 100 (right) values. Note how the starburst core projection thumbnail shows a "black hole" appearance at the effect's center when the parameter is at -100.
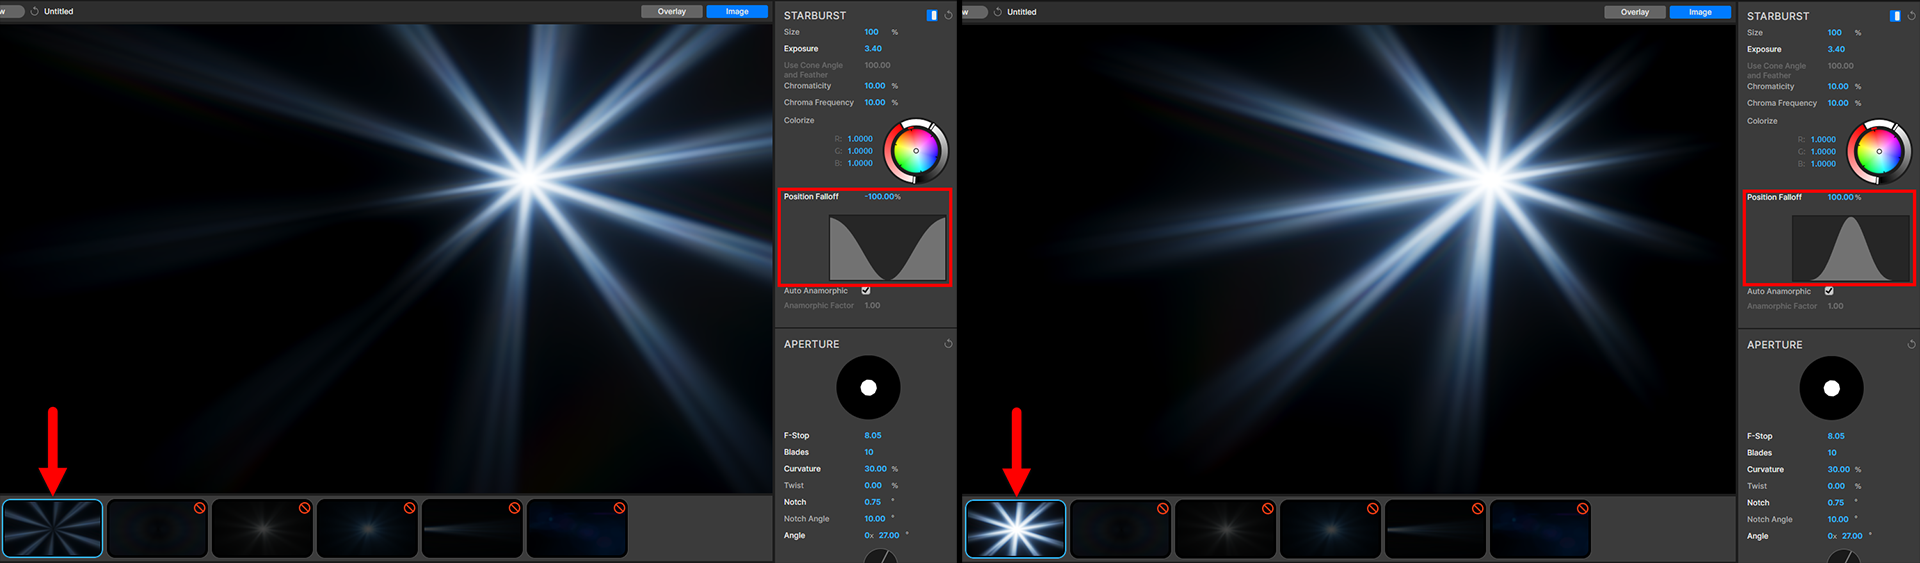
- Auto Anamorphic. VFX Real Lens Flares lets you apply an anamorphic factor correction to your core projections. To learn more about anamorphic lens simulations and how to control them, see this guide's Anamorphic Core Projections section.
Glow Ball
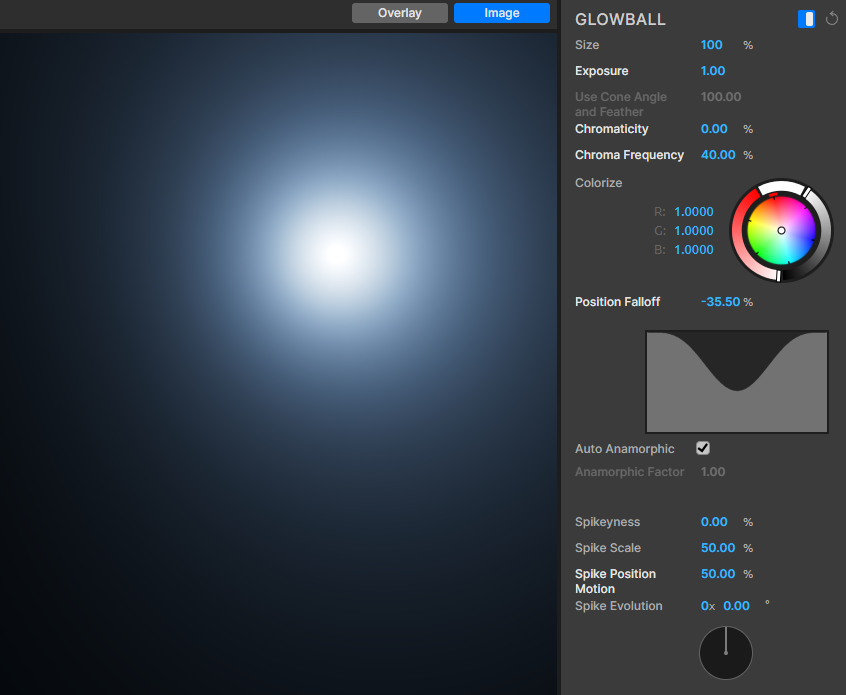
As you see in the above image, the parameters in the Glow Ball control set largely match those of the Starburst control set. That leaves four new variables to explore:
- Spikeyness. Variations in the edge of the seed circle create spikes. More variations create more spikes. Values here range from 0% (left, below) to 100% (right), with 0% being the default.
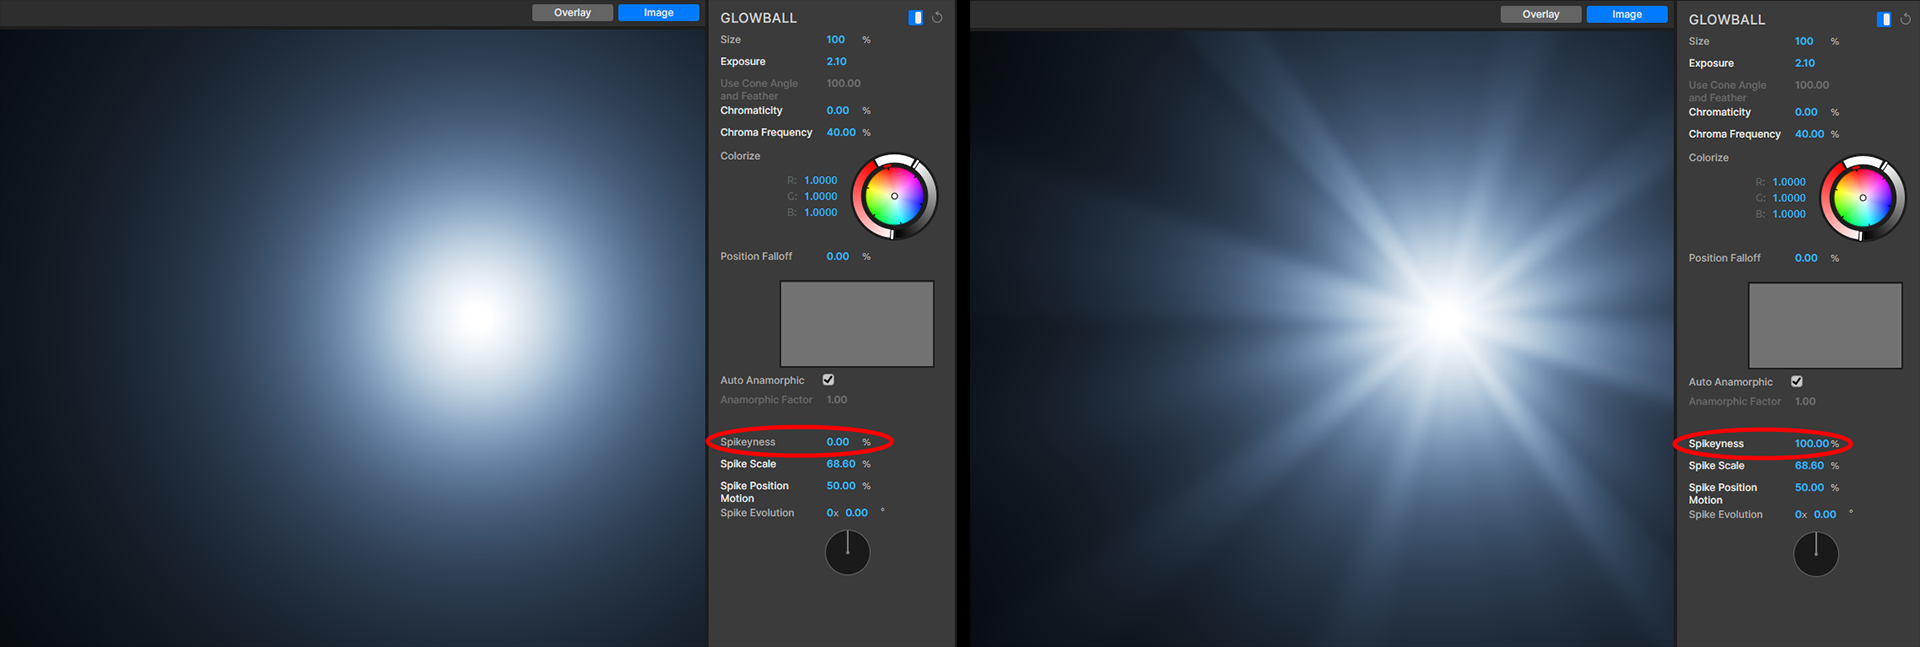
- Spike scale. This is a fun setting to experiment with. Values range from 0% to 100%, with 50% being the default, but you may see more dramatic chromatic effects with lower percentages. Sliding all the way to 100% will smooth out all spikiness and revert the projection to being a spikeless glowball.
- Spike position motion. As the name implies, this setting introduces some degree of variance in spike positions. Changing this value (from 0% to 100%) over time can create a cool “twinkling” effect.
- Spike evolution. Like with starbursts, spike evolution controls the disposition of Perlin noise in spikes.
Halo
You know how smearing grease, fingerprint oil, or some similar substance on a lens can create a hazy “halo” effect in lens flares? Sometimes, tiny scratches on the lens create a similar effect. VFX Real Lens Flares faithfully produces these artifacts with the halo projection.
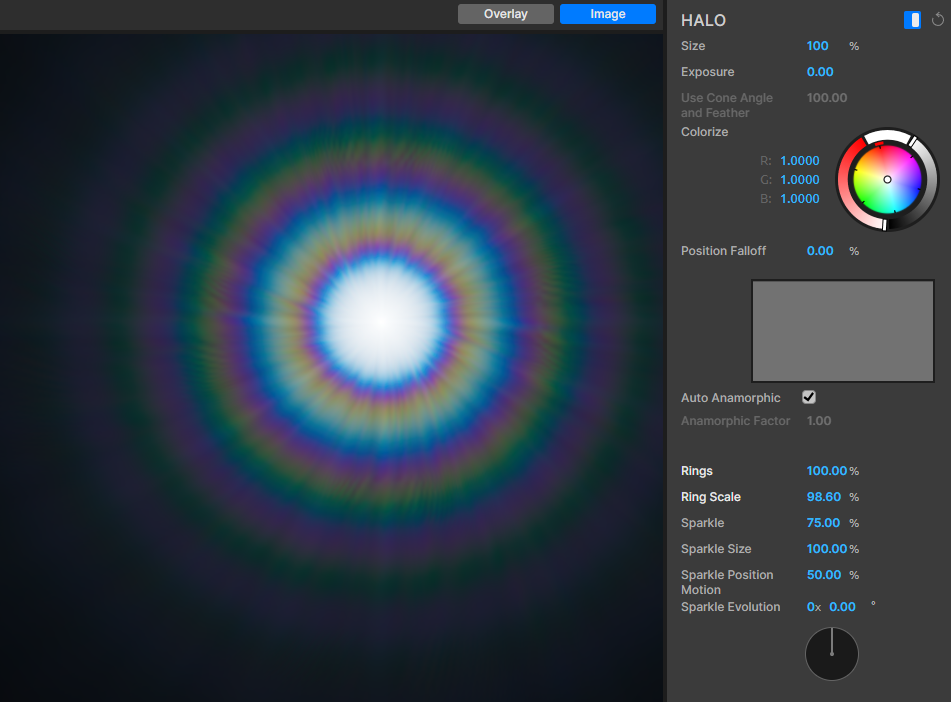
Whereas glowballs are produced from circular seeds, halos derive from rings. And just as glowballs produce fascinating chromatic effects in their spikes, halos create beautiful rainbows in their rings.
After the usual settings found in prior projections, the halo control set has several unique options:
- Rings. By controlling the base seed shape’s blur, you can introduce frequencies that create rings in the halo. Values range from 0% to 100%, with 100% being the default for presets.
- Ring scale. Values range from %0 to 100 percent. Preset default values vary.
- Sparkle. Sparkle affects how halo projections modulate as they move. At the maximum of 100% (right, below), sparkle creates a curious effect resembling the patterns of human irisis.
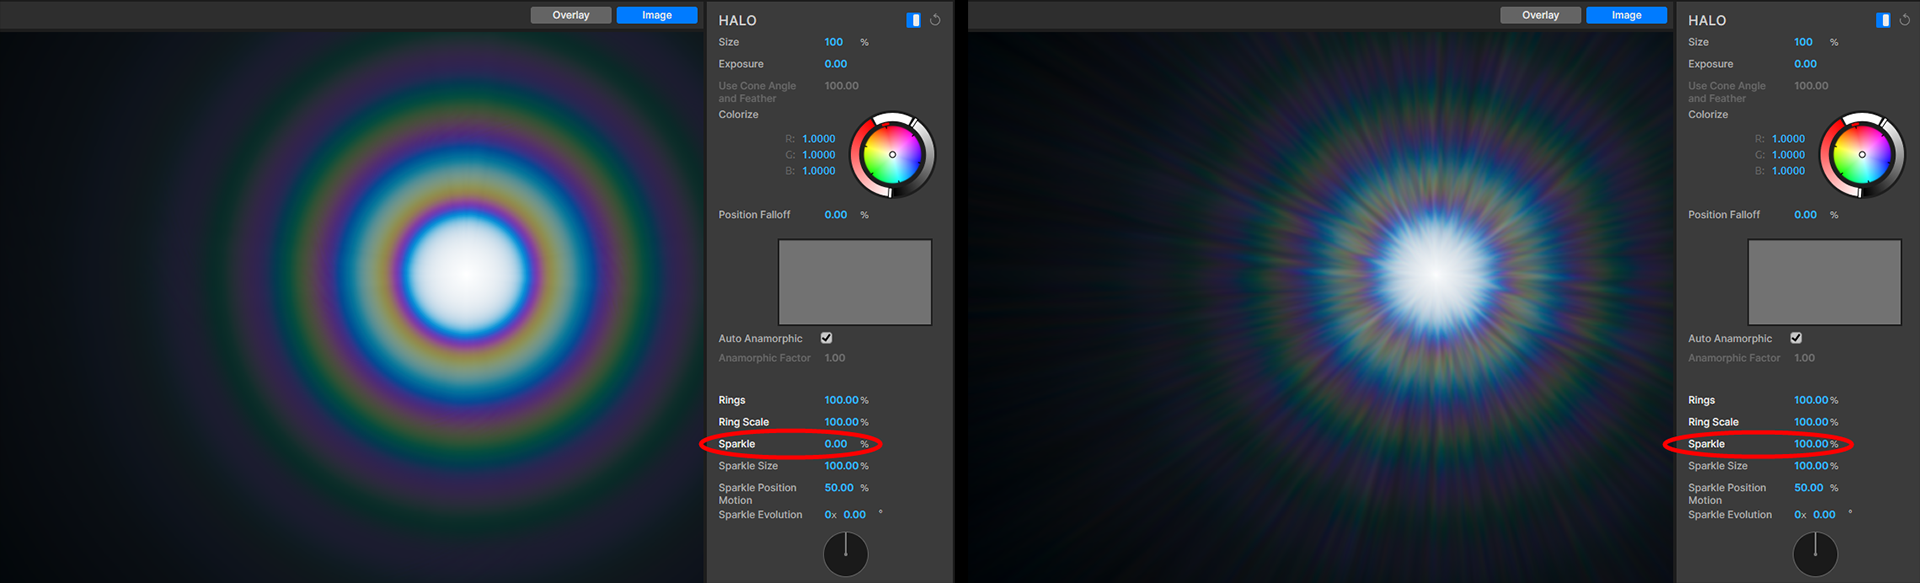
- Sparkle size. Values range from %0 to 100 percent. Preset default values vary.
- Sparkle position motion. As with glowball spikes, halo sparkle position motion introduces variance in effect locations and can produce twinkling when transitioned over time. Values range from 0% to 100 percent.
- Sparkle evolution. This controls the disposition of perlin noise in sparkle effects.
Ring
Specific lens and light source attributes can produce colored rings around lights. Adding a ring around your flare(s) can lend extra drama and realism to your scene, which is why it was an especially popular look in the 1970s and '80s. Due to copyright concerns, we can't directly show you one of the most brilliant examples of red ring use in modern cinema, Ridley Scott's 1982 masterpiece Blade Runner. However, if you're curious to see how Scott used red ring flares, maybe check out this educational video at 19:49. For another great example (and some ring flare discussion), see the shot from Spielberg's E.T. on Stack Exchange.
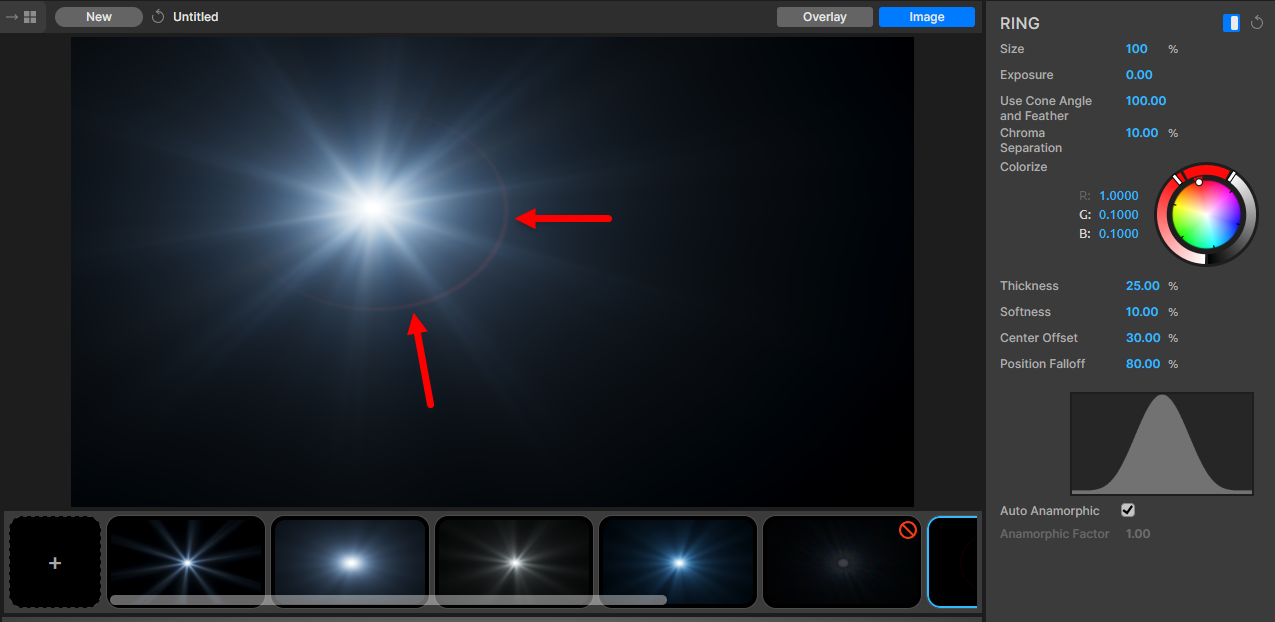
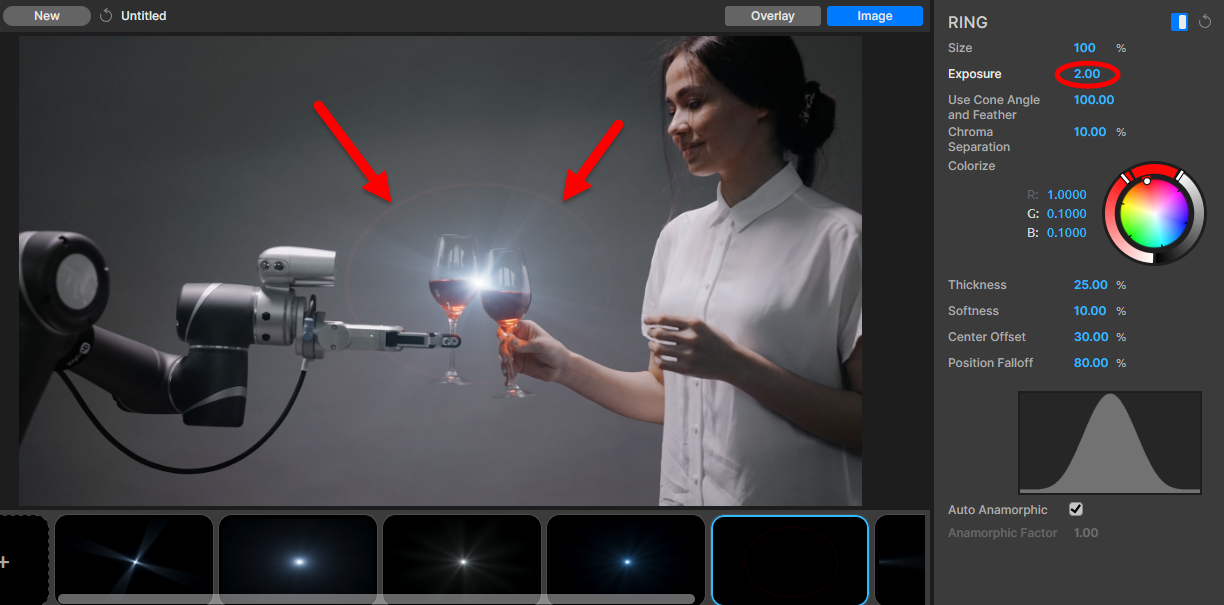
Ring flares are often subtle by nature, so Real Lens Flares defaults to values that reflect this. Keep in mind that rings may be tougher to spot in scenes with non-black backgrounds. In the following image, with that gray backdrop, we had to raise Exposure to 2.00 to make the ring detectable.
Enough subtlety. Let's crank up these settings and see what ring flares can do.
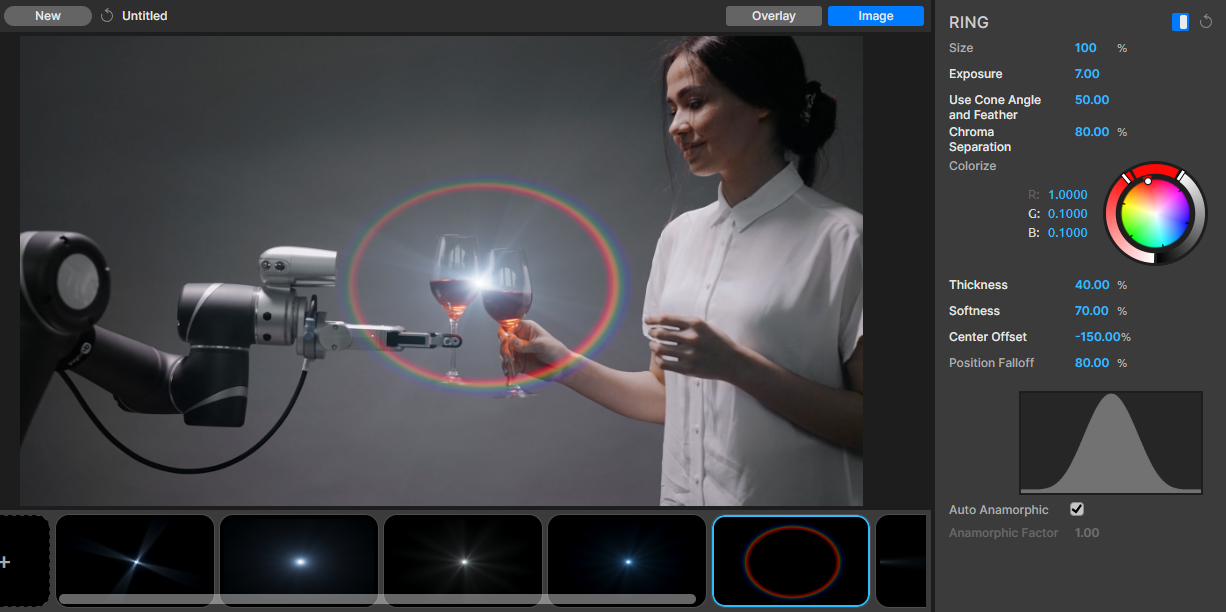
Size determines the ring's diameter, and Exposure controls the projection's brightness. At Exposure: 7, our ring is glaringly obvious, but it allows us to see the impact of other parameters.
Use Cone Angle and Feather only affects your flare when using a spot light as the source. Spot lights in AE have cone angle and feather controls, so this parameter allows you to determine how much of an effect those adjustments have on the ring.
Chroma Separation mimics the prismatic qualities of some lenses and their coatings, creating rainbow-like color bands. Conventional red ring effects show very little chroma separation. Of course, your ring doesn't have to be red, and the Colorize wheel makes it easy to fine-tune your ring to the scene's existing lighting.
Thickness adjusts the ring's width. You can think of Softness as the ring's blur, with 0% (minimum) giving clearly defined edges to color bands and 100% (maximum) yielding very natural blending from one band to the next.
Center Offset allows you to shift the ring's position relative to the flare's location in the image. In the following image pair, see how changing Center Offset from 0 (left) to 200 (the maximum, right) has a fairly inconspicuous effect.

Now, compare that to the same settings when we move the flare's source near the scene's corner.

Single Spike
The single spike, like the halo, is the sort of artifact you might witness from a lens smudge. Oils or other distortions on the lens create a linear flare that, especially when layered with a starburst or glowball, can create striking visual drama.
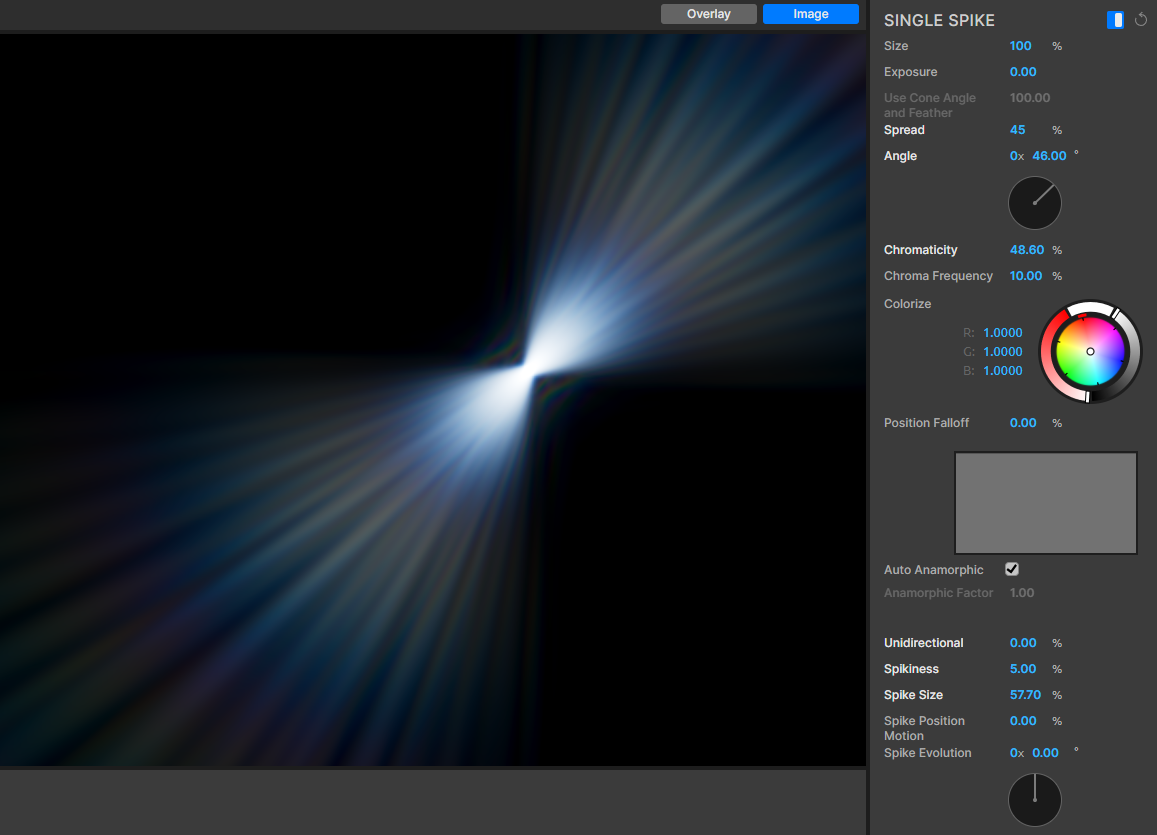
The single spike control set contains most of the same settings found in earlier projections, including the spike settings found in the glowball control set. The three new settings introduced with the single spike are:
- Spread. Imagine the difference between a laser, which has essentially no beam spread, and a flashlight beam that fans out from its source to form a wedge in 2D. That amount of fanning out is spread. Values range from 0% to 100 percent.
- Angle. This controls the amount of spike angle variance from horizontal.
- Unidirectional. A default single spike with 0% unidirectionality is like a Darth Maul light saber, with two beams that travel in equal and opposite directions from a central source. A spike with 100% unidirectionality is a standard light saber, with only a single beam that travels out in one direction from the source. Yes, we know the prequels aren’t as good, but single spike effects remain cool.
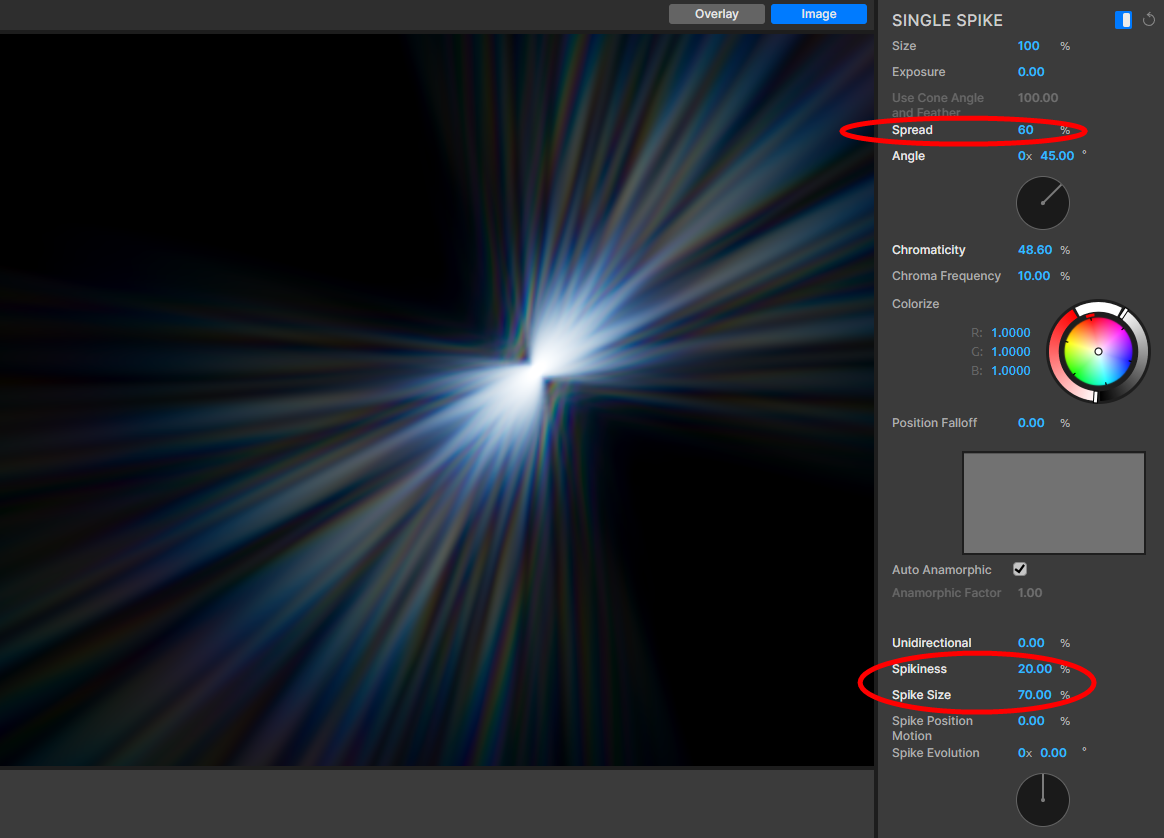
Be sure to play with the possibilities of mixing spread with the chromatic effects of introducing spikiness. Compare the above default core projection to the variation on it created below.
Gate Flare
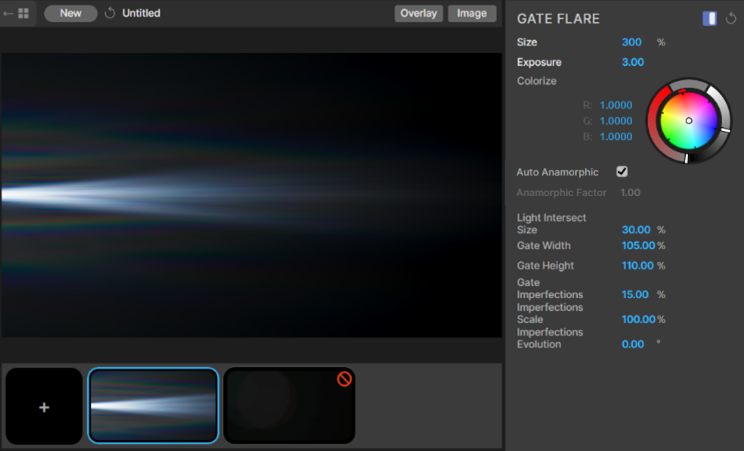
A gate flare mimics the effect of a light bleeding through an opening just off the edge of the field of view. To use the gate flare, set the light source position just outside the edge of the frame, then slowly drag to move it toward the center of the frame. In practice, this can be a bit tricky, so be careful and don’t blink.
The gate flare settings can be equally finicky. For example, in the image above, the flare is visible with a gate width of 105 percent. With no repositioning, the flare vanishes lower than 102% and higher than 109%, even though it remains visible in the projection strip thumbnail.
Maxon will be adding interface elements to help users more easily manipulate gate flares in an upcoming VFX Real Lens Flares release.
Reflections
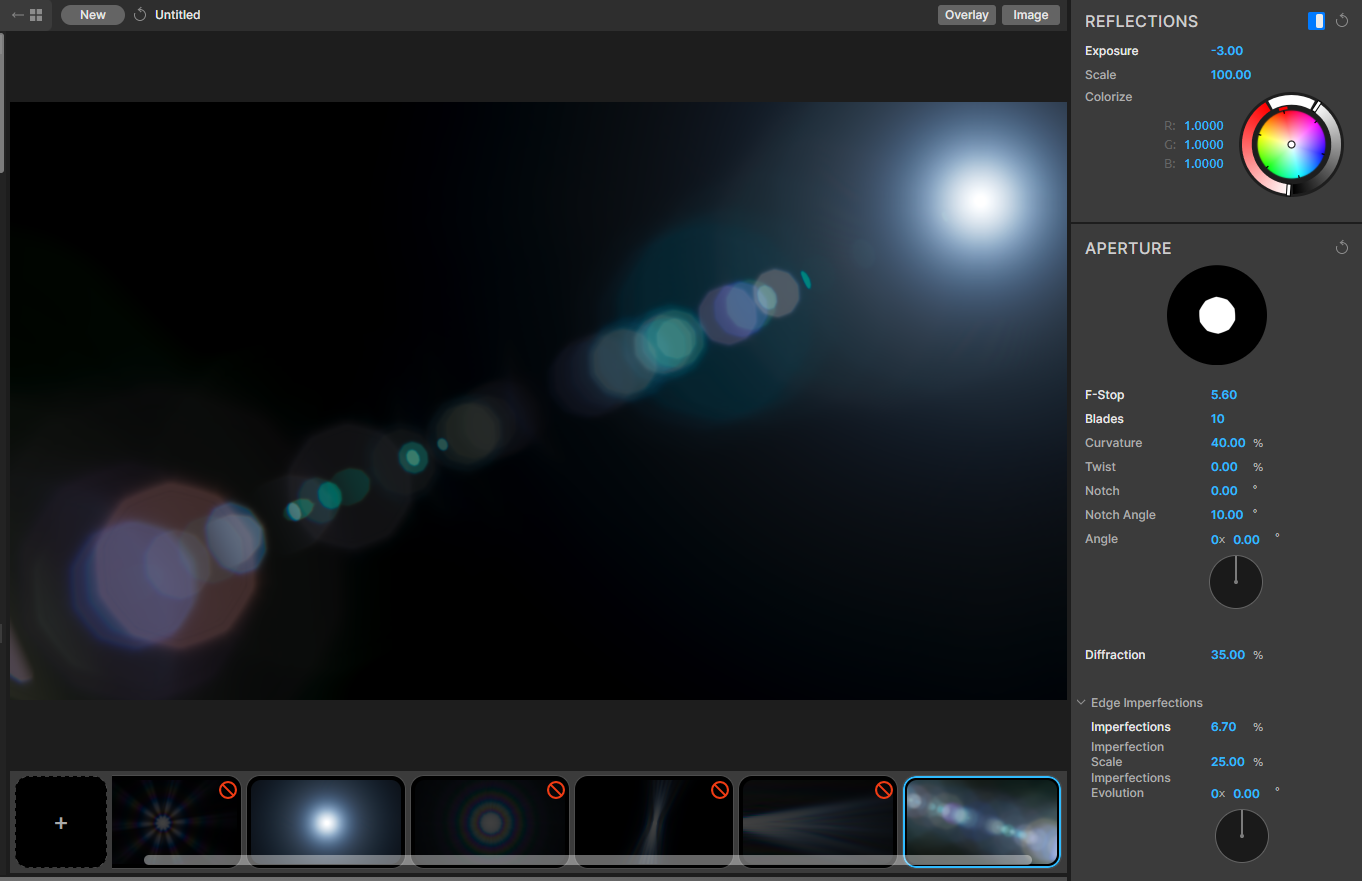
Every lens flare preset contains a reflection on its projection strip. This may not be immediately apparent with core projections because reflections are hidden by default. VFX Real Lens Flares does this to help preserve the clarity of core projection forms when first viewed. You can see in the below capture of the Starburst – Kaleidoscope core projection preset why this might be advisable. The starburst gets a bit lost in its reflections. It’s better to work with a clean core projection first, then add in reflection effects.