
GLIMMER
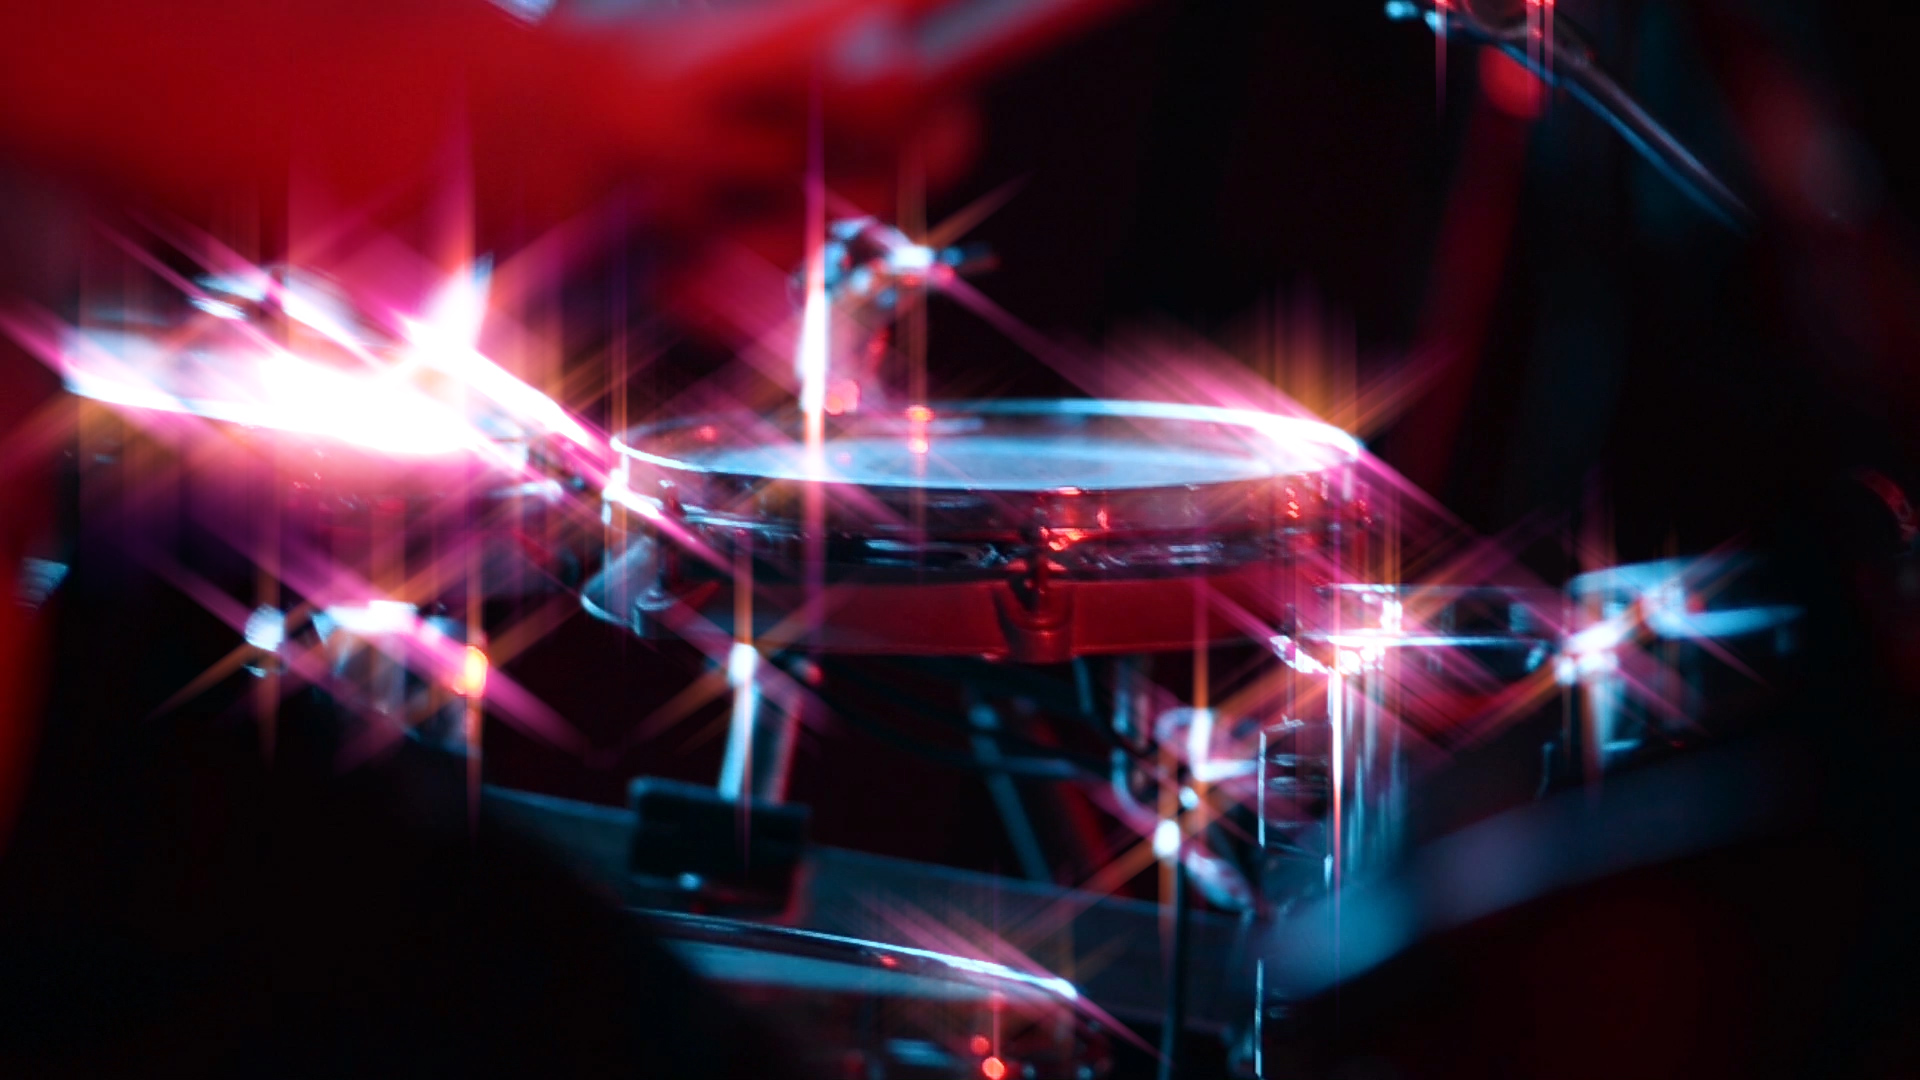
Create colorful glints and animated twinkling effects in your image's bright areas. Great for beauty shots, titles, music videos, and more.
Presets
Glimmer offers a wealth of glittering, multifarious presets that bring instant sparkle to your footage. Find these via the blue Open Dashboard... button or the Choose a Preset... button below it.
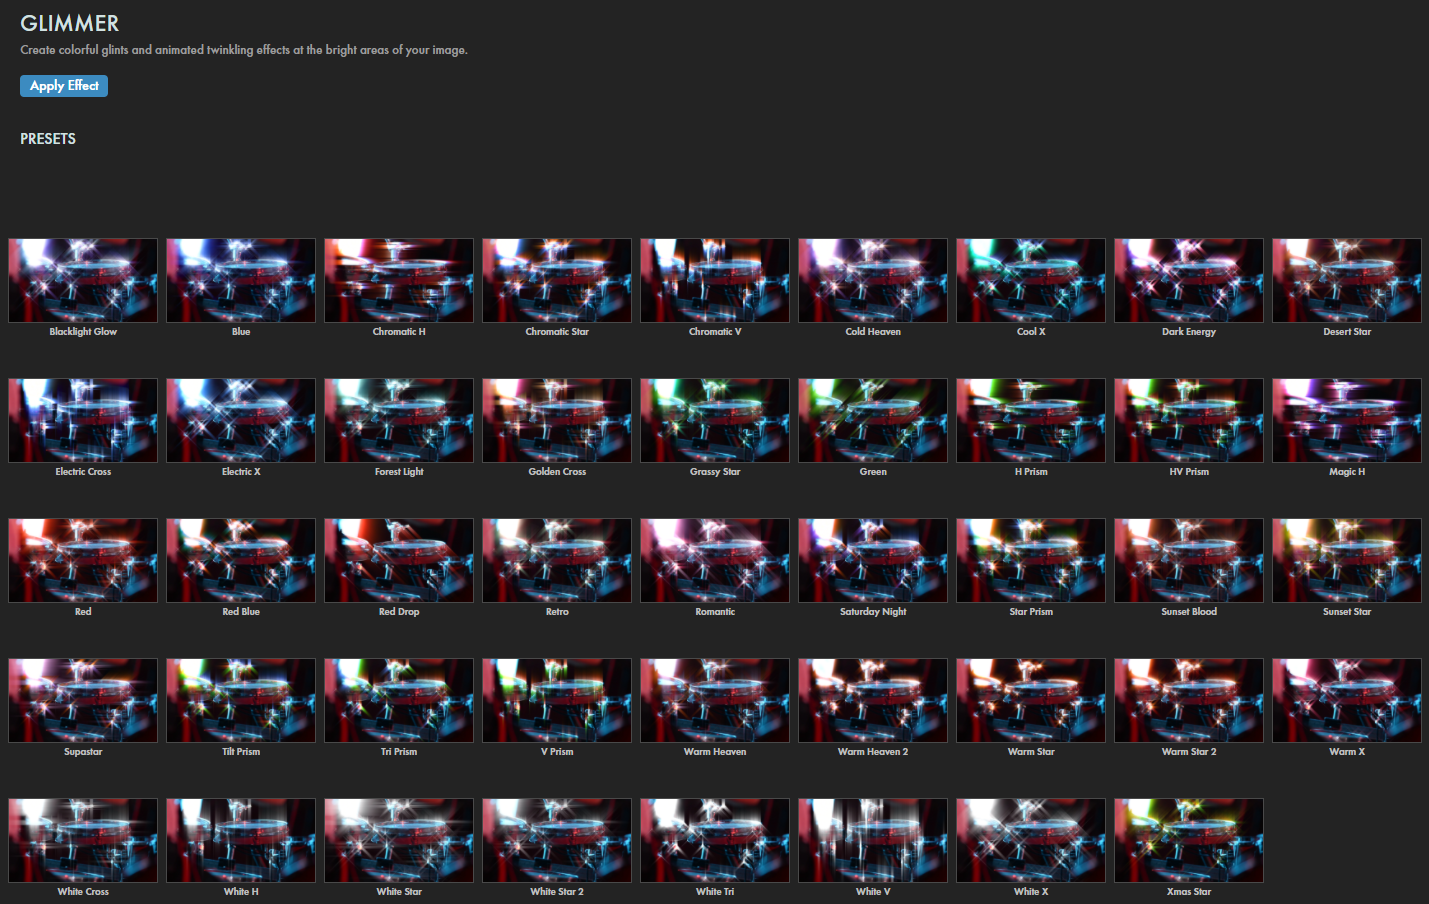
As with all other Universe tools, you can modify or create a Glimmer look and then save it under its own name by pressing the Save Preset... button.
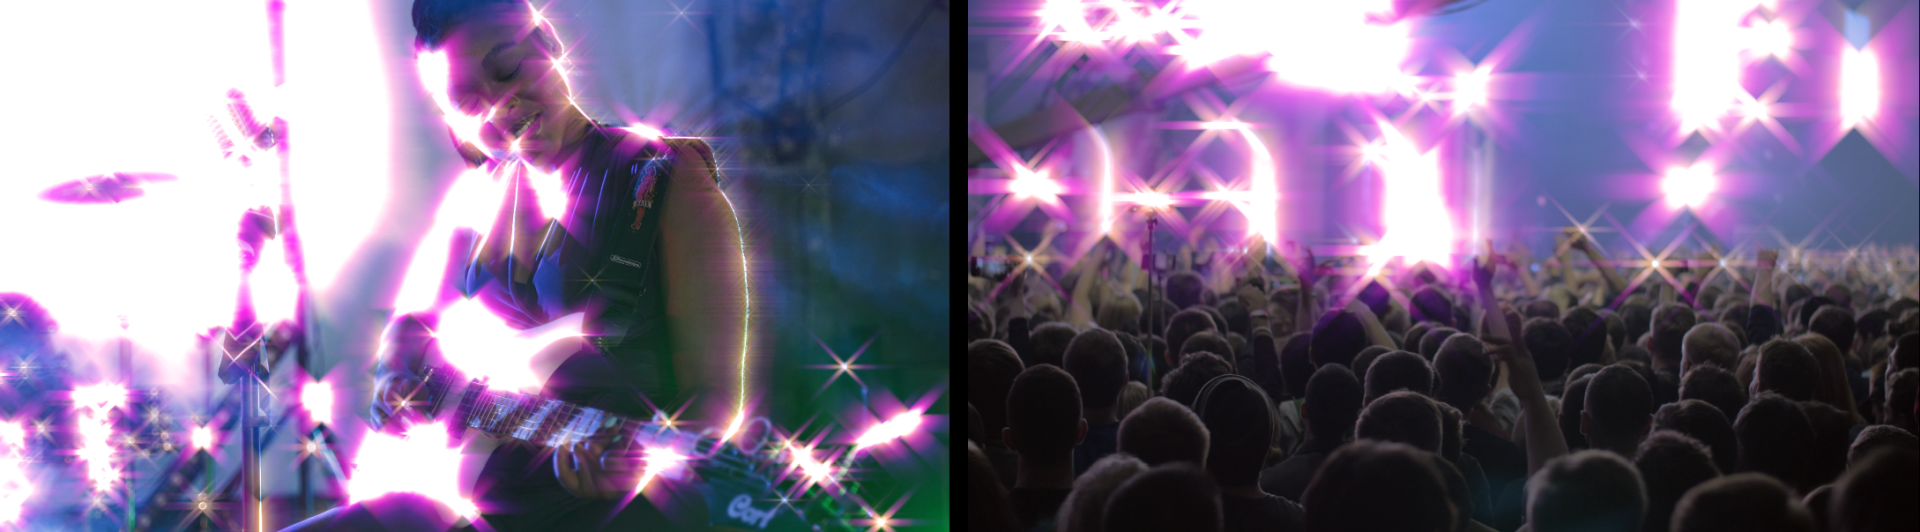
In both images, we simply dropped Glimmer onto our project layer, so what you see here reflects all default values. With the guitarist, the Glimmer effect was far more prevalent than we wanted, blotting out too many details in her body, face, and background. Presets tended to yield similar results. (We'll cover ways to tone down Glimmer's impact in the parameters below, but this caution is about first impressions.) The crowd image on the right proved more in line with our original idea of accentuating concert lights.
That said, you may want Glimmer to obscure much of your subject. Glimmer responds to luminosity in images. You may find it useful to remember this when selecting where and when to employ Glimmer.
Modify the Effect
- Input Channel refers to the type of information in your image that receives the Glow effect. The pull-down menu offers six options spanning the three color channels, Alpha, Lightness, and Luminance. (The calculation for Luminance considers the weighted average of color channels to closely mimic how humans perceive brightness. Lightness, on the other hand, merely averages the highest and lowest color channels without taking into account human perception of brightness.)
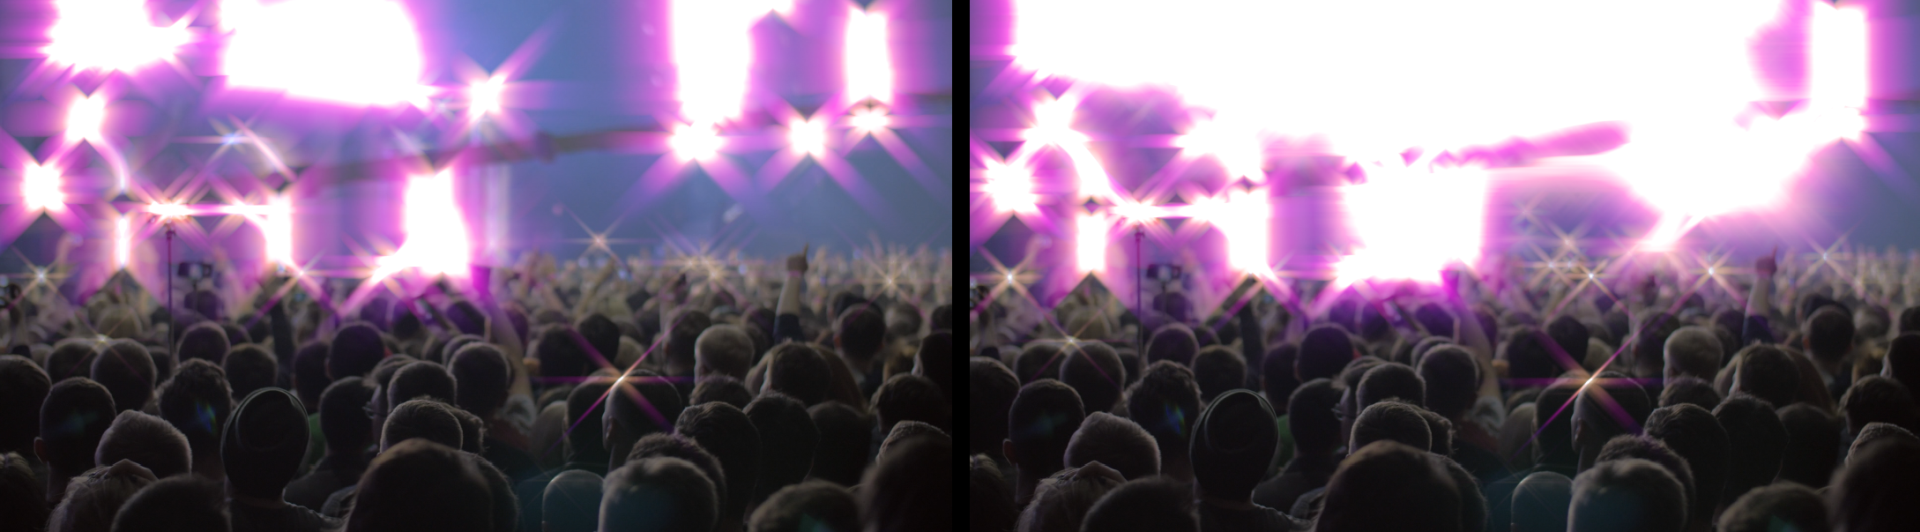
The color mix in your source can greatly influence how Glimmer responds to Input Channel, as this comparison of Luminance (left) and Blue (right) shows.
- Increasing Threshold limits affected areas to only the brightest spots. Lowering Threshold widens the glow to affect darker areas.
- Threshold Softness feathers the Threshold boundaries, adding some additional subtle extension of glow effects.
In Glimmer, these two parameters are closely linked. Notice how Threshold: 75 and Threshold Softness: 10 (left) resembles Threshold: 95 and Threshold Softness: 37 (right), but the
has "softer" glows on close examination, especially on the singer's sleeve.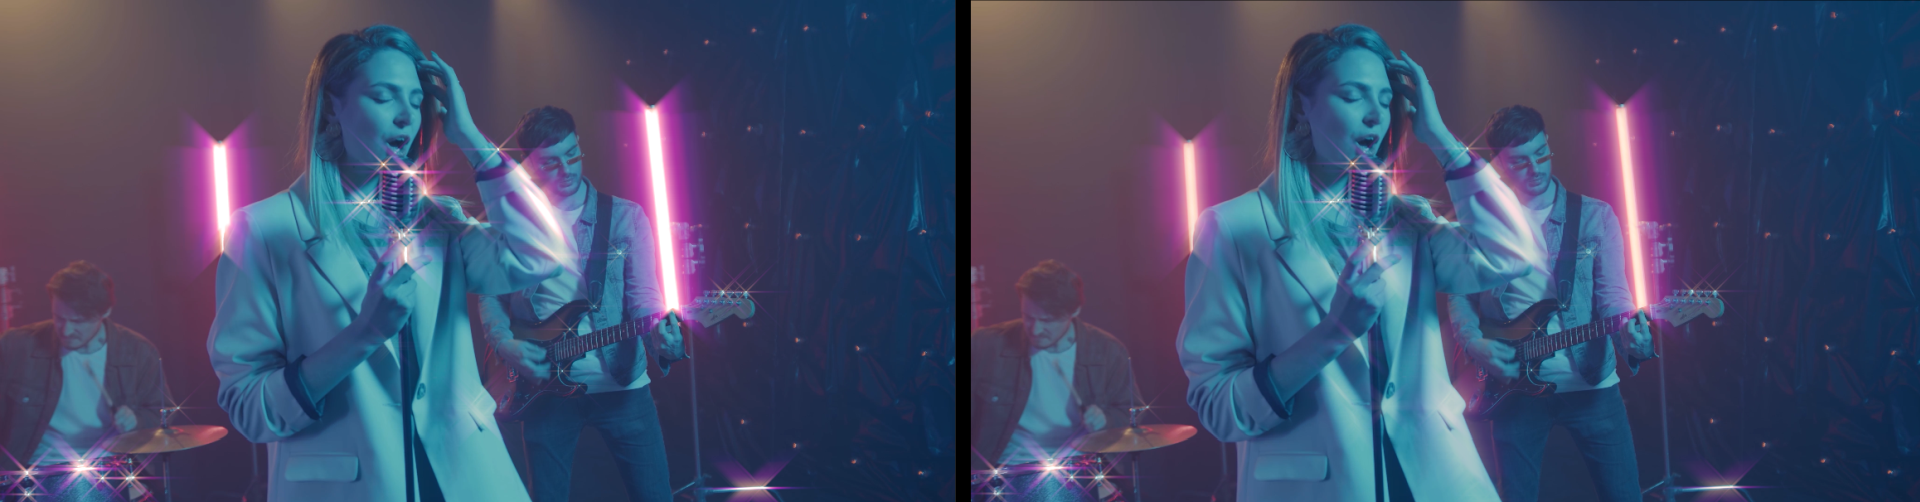
Also, remember that first image in our cautionary note above and how it seemed so overpowered by the effect? Here's the same frame with Threshold: 100 and Threshold Softness: 3.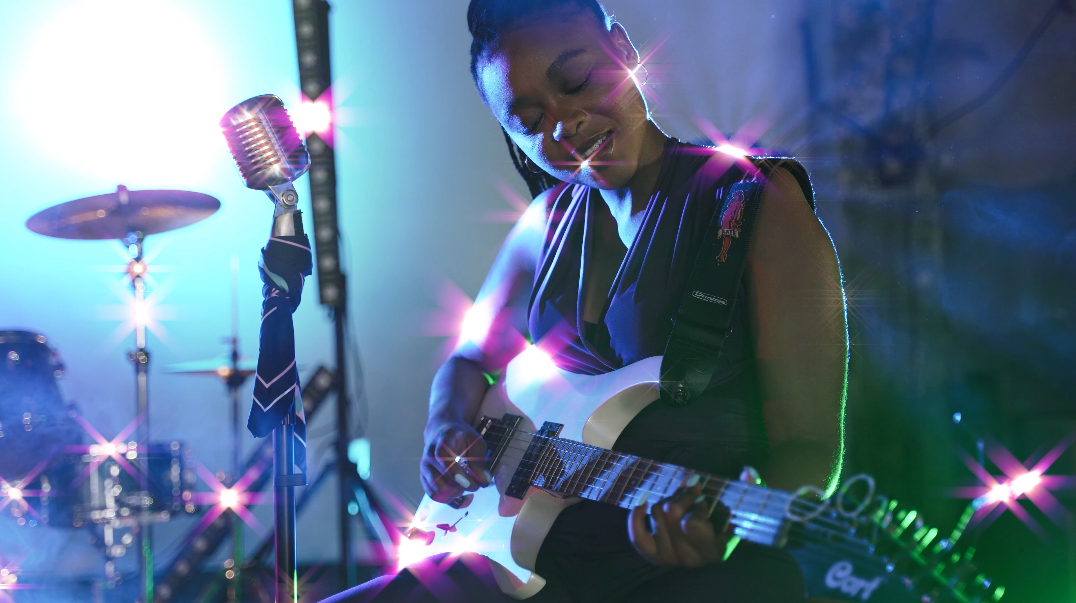
This is much closer to what we originally had in mind. It just required adjusting the tool's controls to get there. - Streak Length lets you adjust the overall length of all Glimmer streaks.
- Boost Light
allows you to raise the overall intensity of the effect.
Be careful with this one, though. As you can see from this modification of the Grassy Star preset, going from a Boost Light value of 0 (left) to 10 (right) can be substantial.
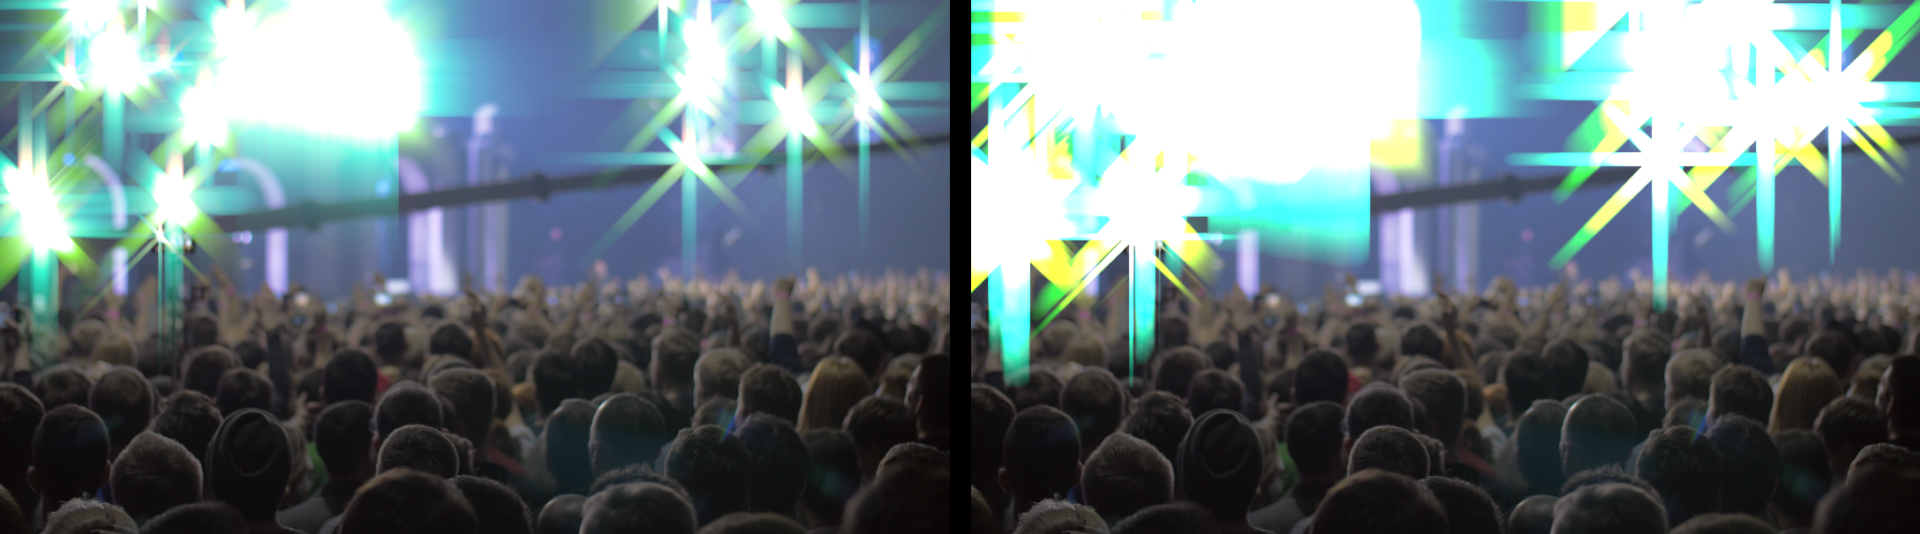
- Rotation spins your Glimmer streak according to the angle(s) you dictate.
- The Legacy Mode checkbox is for long-time Glimmer users who need backward compatibility with older projects.
-
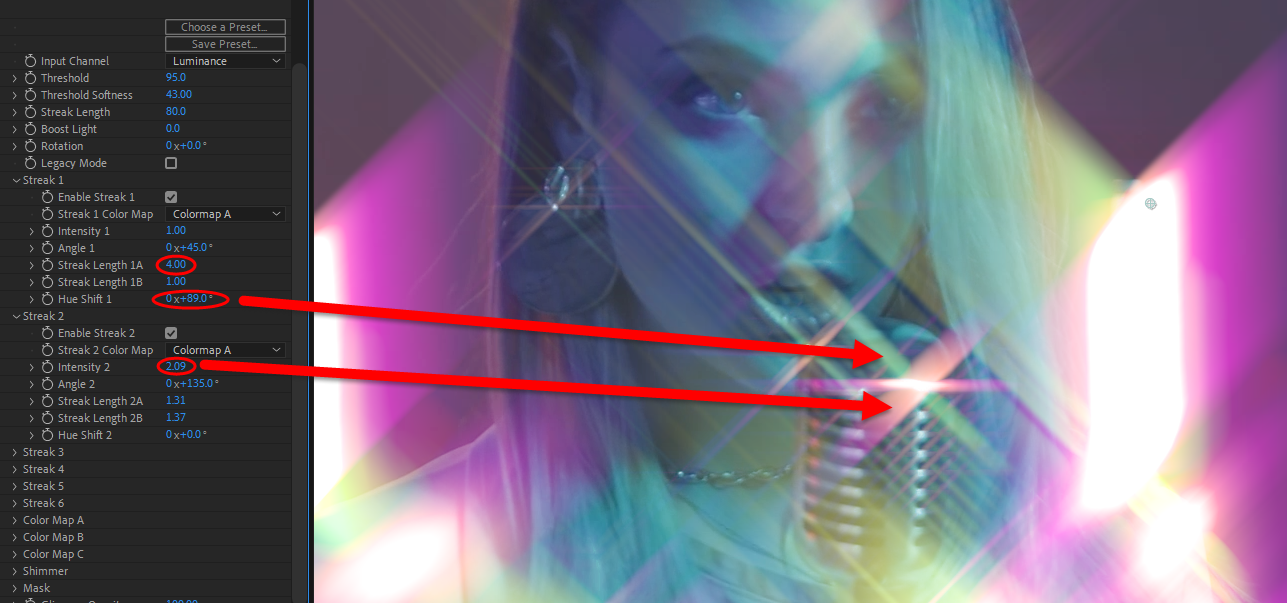
Streak 1/2/3/4/5/6 reference the six streaks that comprise each glimmer effect instance (although 4, 5, and 6 are usually off by default). The first triplet of arrows in the below image point out which streak belongs to each number. For example, with no rotation or angling applied, Streak 1 runs from the center to top-left and bottom-right.
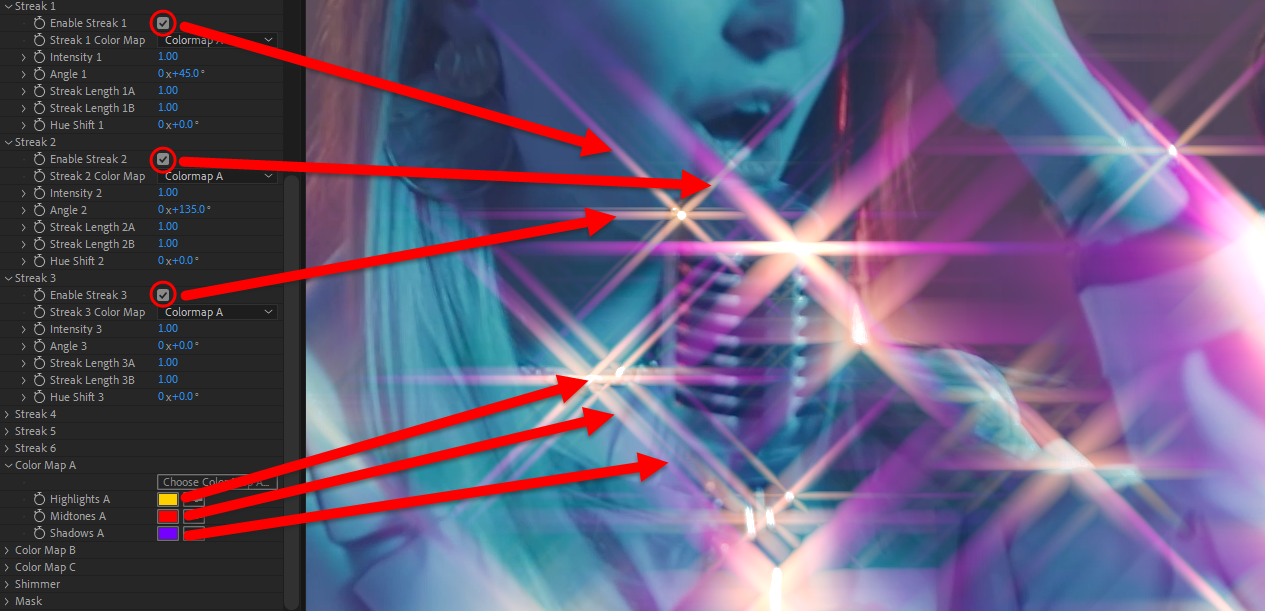
- Each Streak group begins with an Enable checkbox to turn that streak on or off.
- Next, each Streak group offers a Color Map pull-down menu with three options: Colormap A, B, and C. These are user-defined color gradients discussed below. However, we point out in the above image how the three colors of each gradient manifest in a streak. Highlights display at the streak's origin, in the center of each Glimmer effect. Shadows display toward the streak's end, and the Midtone color influences the graded transition between those two.
- Each streak has its own Intensity value. You might adjust these to convey a given directionality to your lighting or a given smearing on a lens.
- Angle lets you alter each streak's orientation. This is different from Rotation (see above), which adjusts all streak angles in tandem.
- Streak Length A/B addresses both halves of a streak, letting you adjust their lengths individually.
- Hue Shift gives you control over the hue range for each streak. In the image below, notice how we maxed out Streak Length A1 and then gave Hue Shift 1 a green tone. (To illustrate Intensity, we also boosted Intensity for Streak 2, which runs top-right to bottom-left. Notice how that streak now appears thicker than the others.)
 Streak 4, 5, and 6 serve as additional accents that overlay on half of the prior three streaks. We pinpoint an example of them here: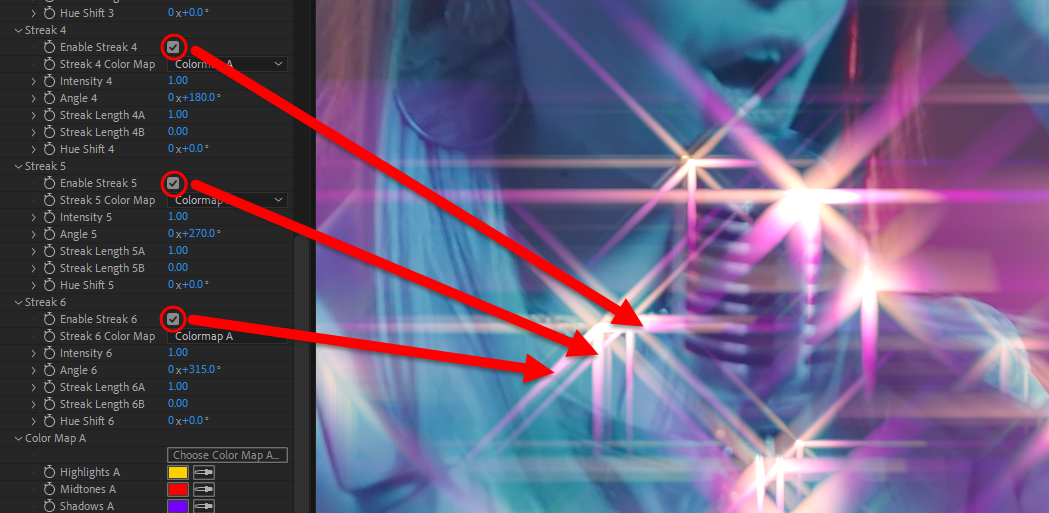
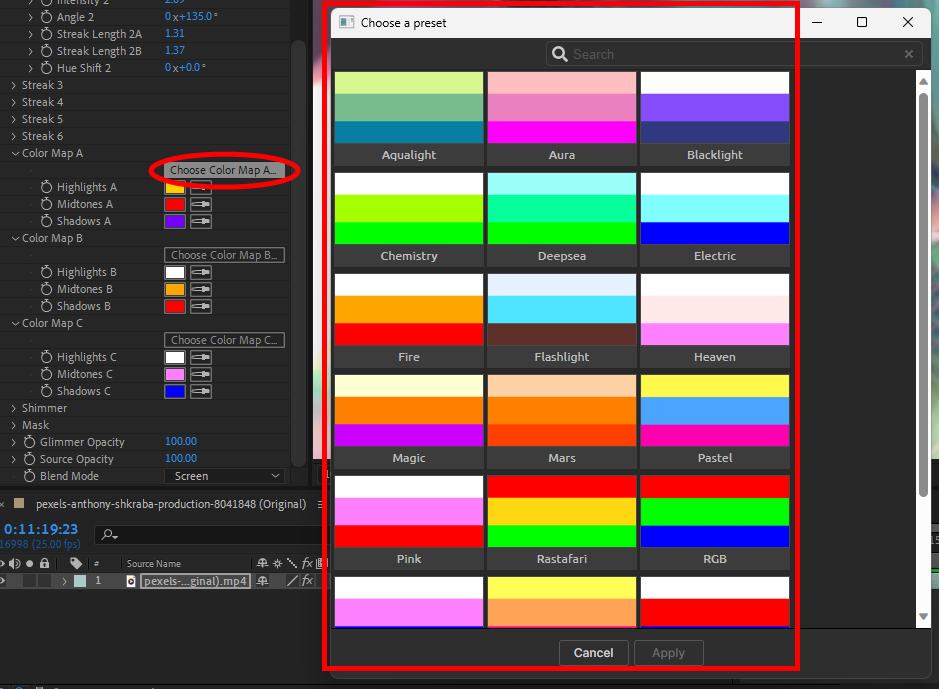
- As described in the Streak discussion above, Color Map A/B/C gives you control over the color gradients displayed within each streak. Earlier, we showed how Highlight, Midtone, and Shadow values comprise each Color Map gradient. Glimmer provides for three color maps (A, B, and C), and any one of these can be applied to each of the six streaks. Additionally, the Choose Color Map button for each color map spawns a collection of convenient tri-tone preset color schemes you can select rather than manually picking each color.
- The Shimmer group adds fractal noise to streaks. The end result is essentially that the fractal noise breaks up the streak a bit and provides a busier, more varied, potentially "spiky" look.
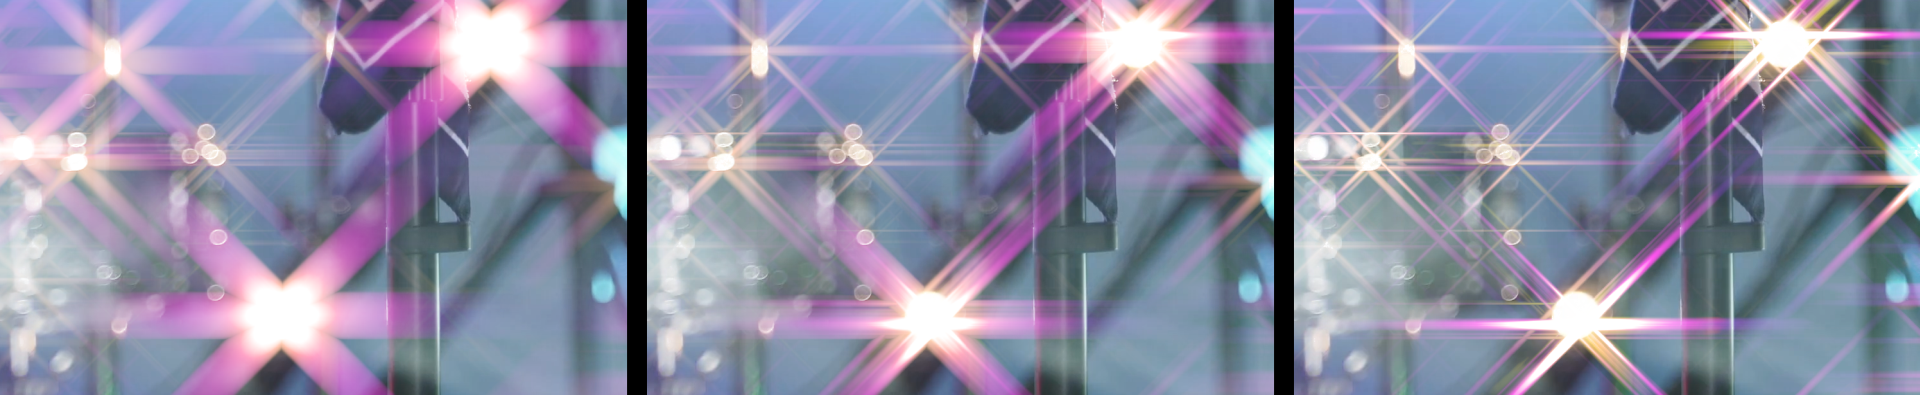
- Amount conveys the degree (or strength) to which fractal noise applies to the Shimmer effect. The image below shows values of 10 (left), 100 (center), and the maximum of 500 (right). Higher values do not necessarily yield brighter effects.
- Scale refers to the magnification of the underlying fractal noise pattern. Higher values result in denser noise and thus thinner streaks. The below image compares values of 20 (left) and 200.
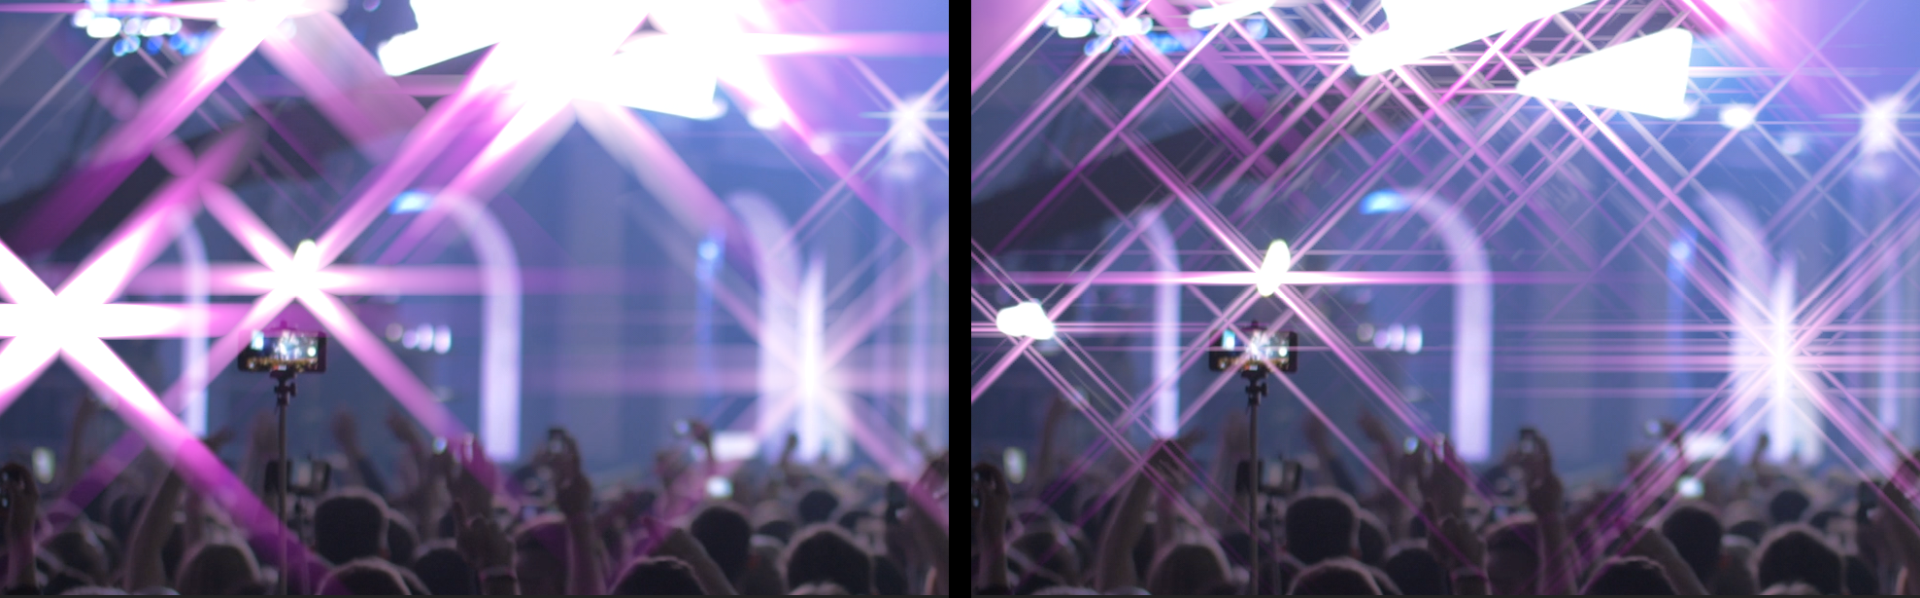
- Complexity governs the intricacy of the noise pattern. As with Scale, Complexity will influence the detail and "spikiness" within each streak.
- Scroll X/Y control the noise fields movement. Animating these will cause the overall Glimmer effect to sparkle.
- Animation Speed controls the rate of that X/Y movement.
- Loop Duration sets how long it takes for the Shimmer fractal patter to return to its beginning and repeat.
- Amount conveys the degree (or strength) to which fractal noise applies to the Shimmer effect. The image below shows values of 10 (left), 100 (center), and the maximum of 500 (right). Higher values do not necessarily yield brighter effects.
-
The Mask control group makes quick work of masking your glow effect, if desired.
- To see your mask more clearly and adjust it to your liking, enable the Show Masked Area checkbox.
- Select an option from the Mask Shape drop-down menu to set the mask as either an elliptical or rectangular shape.
- The Point A cross-hair control corresponds to the position of the top of the mask image. Point B controls correspond to the bottom position of the mask. Both are pointed out in the above images. Moving these points will squash or stretch the shape of the mask as well as move its position.
- Mask Radius spreads the influence of the masked glow outward from its center. Increasing this value will elongate the mask shape.
- Mask Feather increases the mask's edge translucency along a gradient.
- Feather Direction contracts the feathered gradient toward the mask's center if lowered toward -100 and expands it toward the edges if increased toward 100.
- The Invert Mask checkbox, when enabled, switches the glow effect to occur outside the selected mask shape instead of inside.
- Mask Alpha ensures that alpha channel information is included within your mask. This is enabled by default.
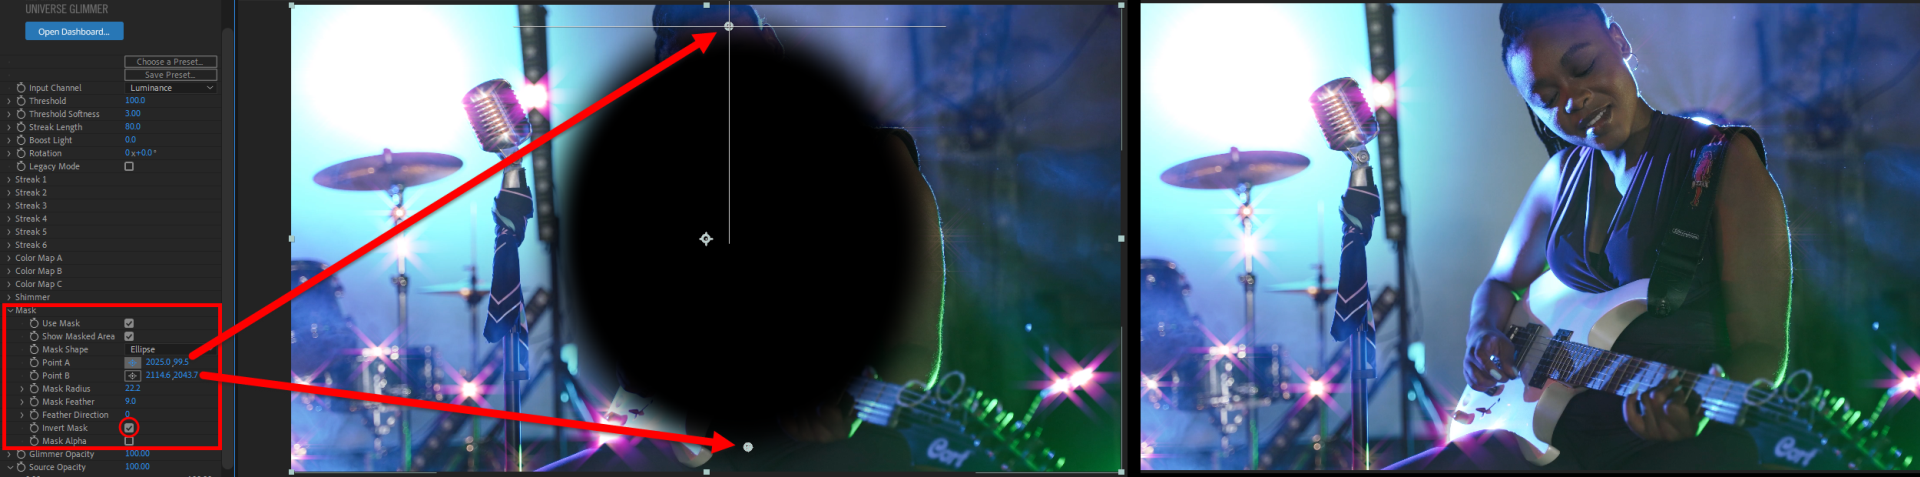
Putting the above controls together, we finally have a way to keep Glimmer where we wanted it in our original comp. We used the Point A/B controls and Invert to set a slightly skewed mask over most of the guitarist's body, only leaving the edge of her left arm and bottom of her guitar body exposed. Subdued Glimmer bursts stay in the scene's periphery, where we wanted them.
-
Glimmer Opacity lowers the transparency of the effect on the layer. This is another method for lowering the strength of Glimmer's presence in your comp without modifying other effect characteristics.
-
Source Opacity, when lowered from its default of 100, increasingly renders the source layer as transparent.
-
The Blend Mode drop-down menu offers the usual assortment of blending modes to composite Glimmer results over the original image.