
VHS
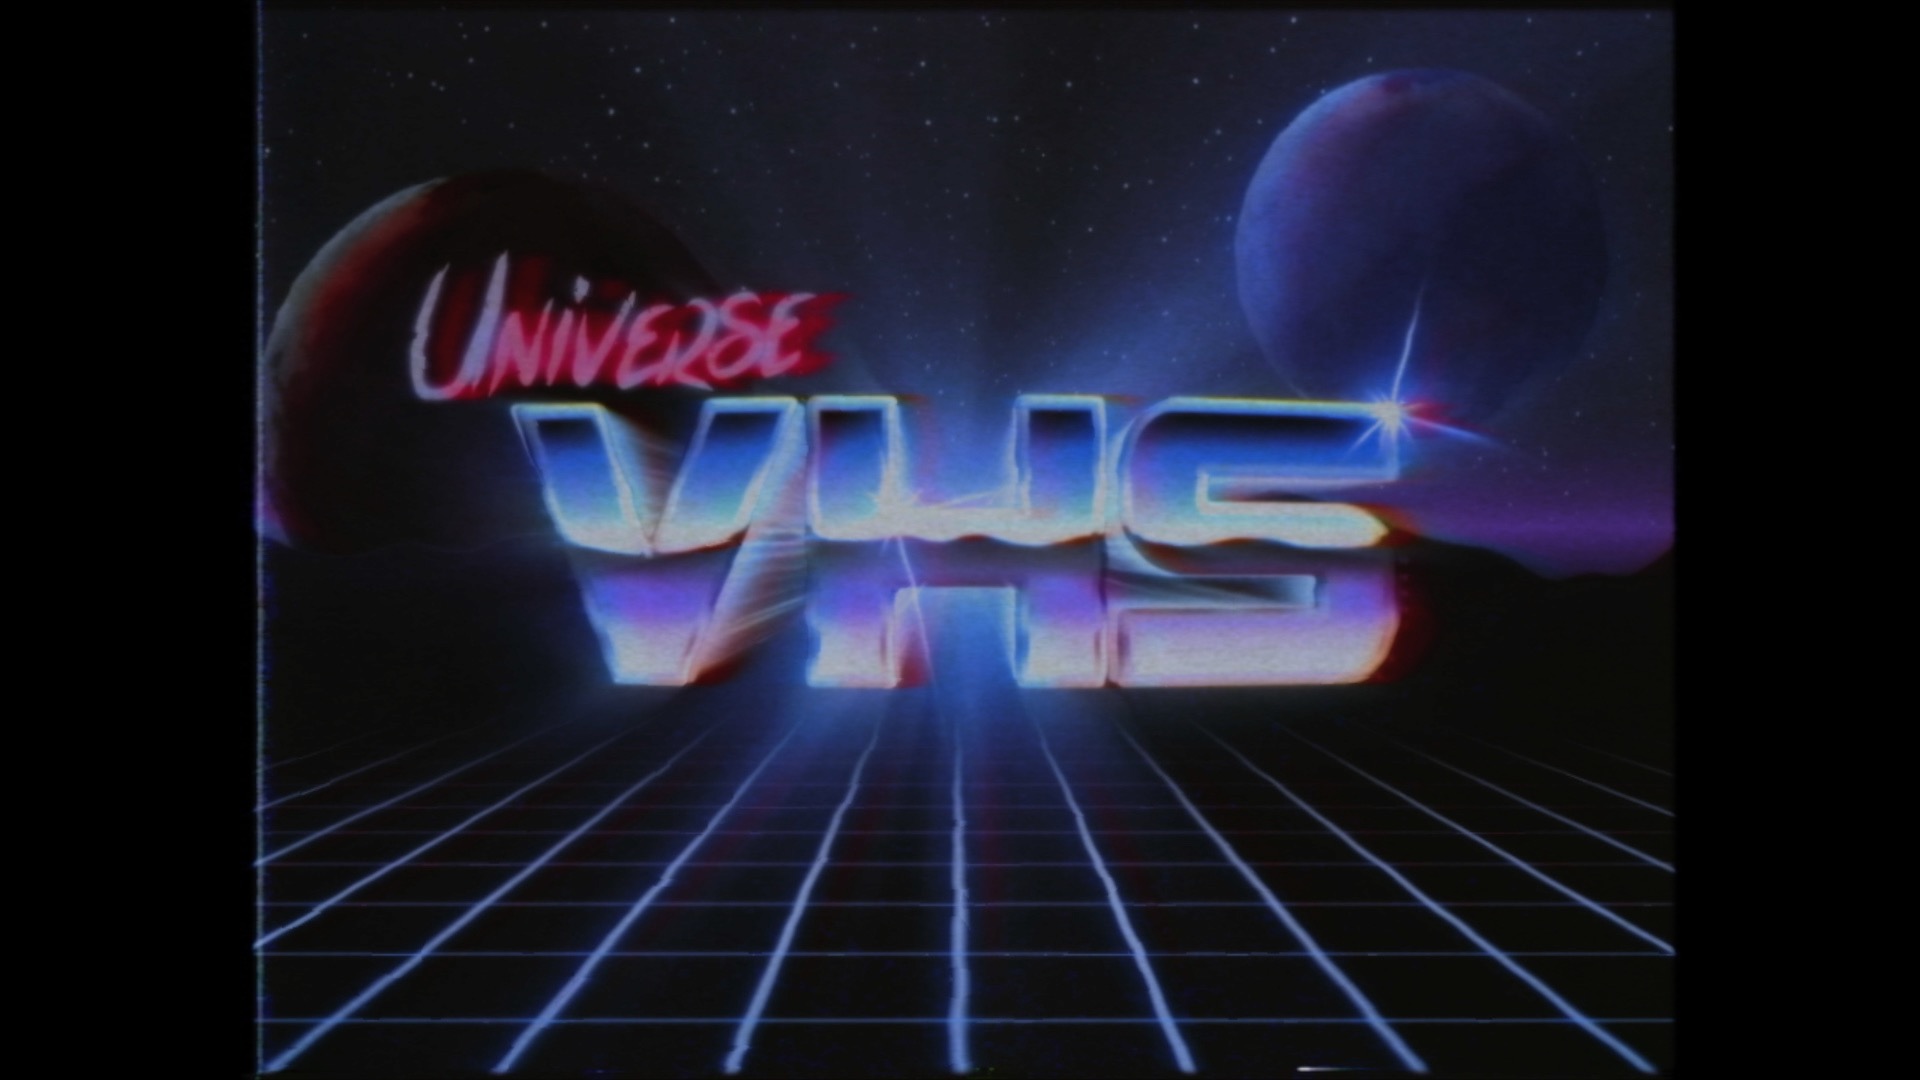
VHS gives you the look of real video tape from inside your favorite editing program. By simply dragging and dropping VHS onto your clip, you can quickly create the iconic look of '70s, '80s, and '90s home video. We used real analog source material to create the unique textures in VHS, which means that you can create the true color, distortion, and damage seen in old video.
Presets
Press play on any of our 18 ready-to-roll VHS presets. Find these via the blue Open Dashboard... button or the Choose a Preset... button below it.
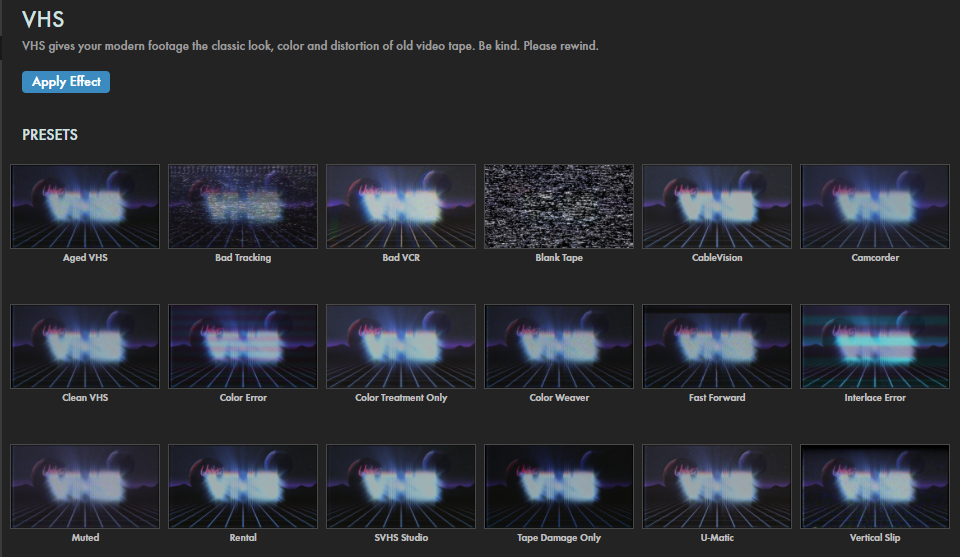
As with all other Universe tools, you can modify or create a VHS look and then save it under its own name by pressing the Save Preset... button.
Modifying the Effect
- Enable Color Controls toggles whether color adjustments apply to your clip. (Note that Tape Damage and other controls below may still affect contrast, brightness, or muted variations on the shot.)
-
Color Controls
- The Black Level slider provides the most contrast when set to 0 and lightens the overall footage when brought up toward 100.
- Bring the Saturation control down to 0 completely desaturate color from the footage and makes the image black and white. Turn it up to 200 to oversaturate color in the footage for a stylized look.
-
The
Luminance Blur
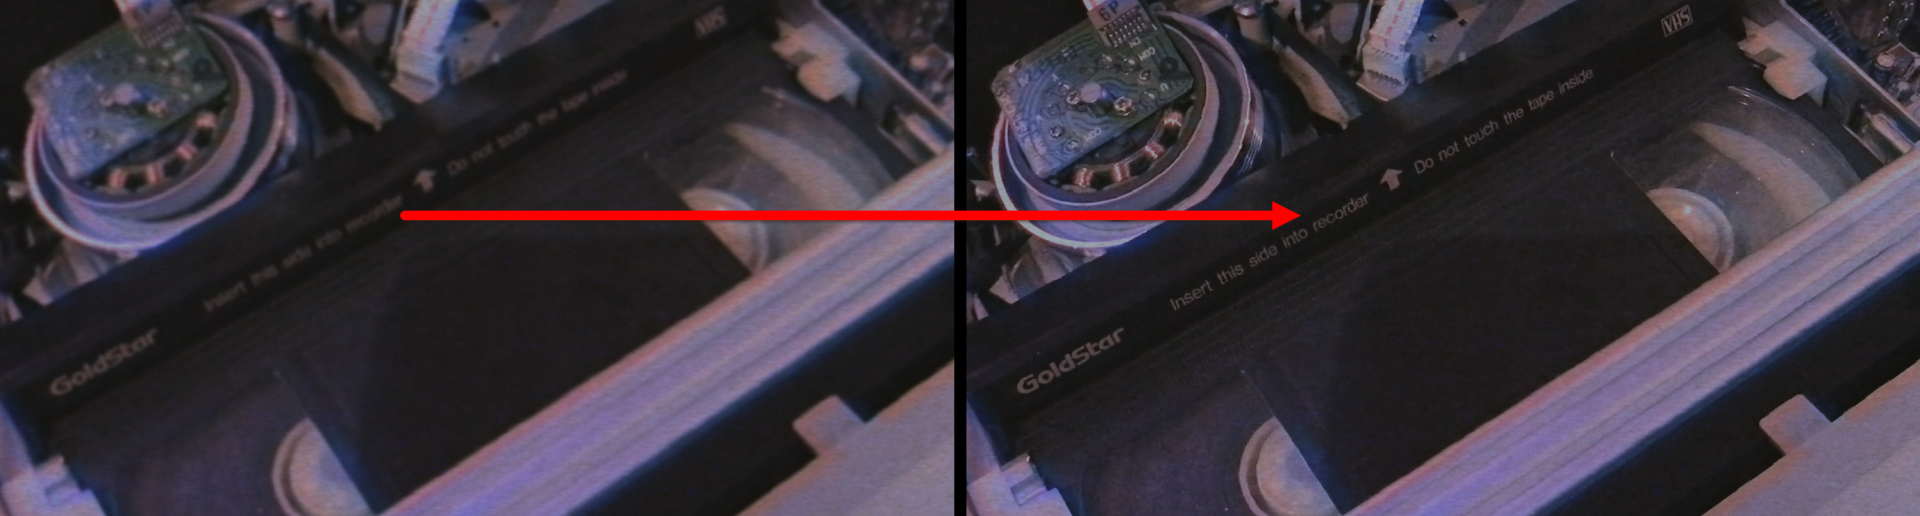
slider blurs the luminance or brightness of the footage when brought toward 20.00.
You may find that this blur obscures fine text in your images you might want to keep clear. Enlarge the following image to see how dropping Luminance Blur from 5 (left) to 0 (right) allows the text on the tape to remain legible.
- Chroma Blur increasingly blurs the chroma color within footage when brought up toward 100.00.
- Sharpen Radius controls the diameter of the areas sharpened by the effect.
- Sharpen Mix adjusts how much or little the sharpness overlays the shot.
-
Color Offset
-
Use the
Chroma Offset X/Y
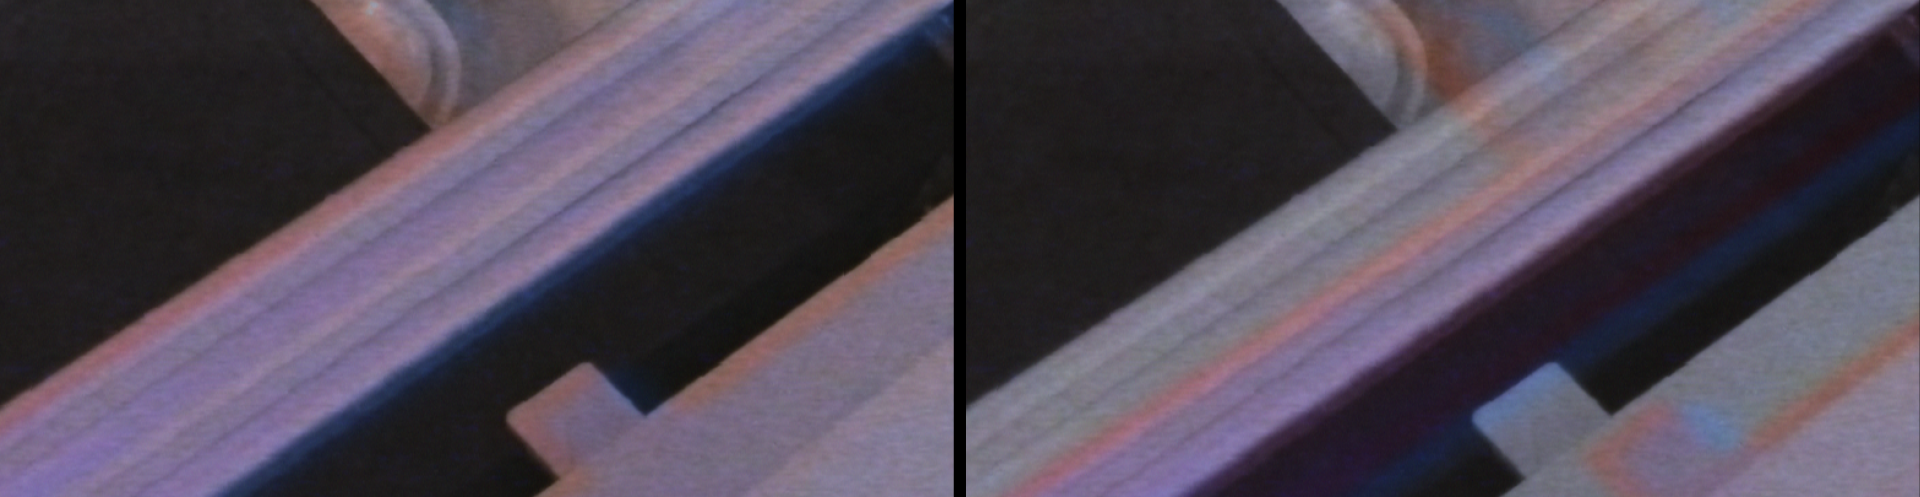
parameters to move the chroma position up, down, left, and right.
In the comparison below, we show VHS's default values at left, which has Chroma Offset X and Y at 10 and 0, respectively. The right image shifts these values to 100 and 30. You'll notice how the chromatic ghosting of our high-contrast edges shift to the right and down.
- Chroma Weave X and Y allow you to create some movement of the color channel by oscillating the chrominance.
- Control the speed of the Chroma Weave by using the Speed X/Y controls.
-
Use the
Chroma Offset X/Y
parameters to move the chroma position up, down, left, and right.
In the comparison below, we show VHS's default values at left, which has Chroma Offset X and Y at 10 and 0, respectively. The right image shifts these values to 100 and 30. You'll notice how the chromatic ghosting of our high-contrast edges shift to the right and down.
-
Channel Controls:
The Color channels can also be offset using the Channel Control group.
-
The
Red Offset, Green Offset,
and
Blue Offset
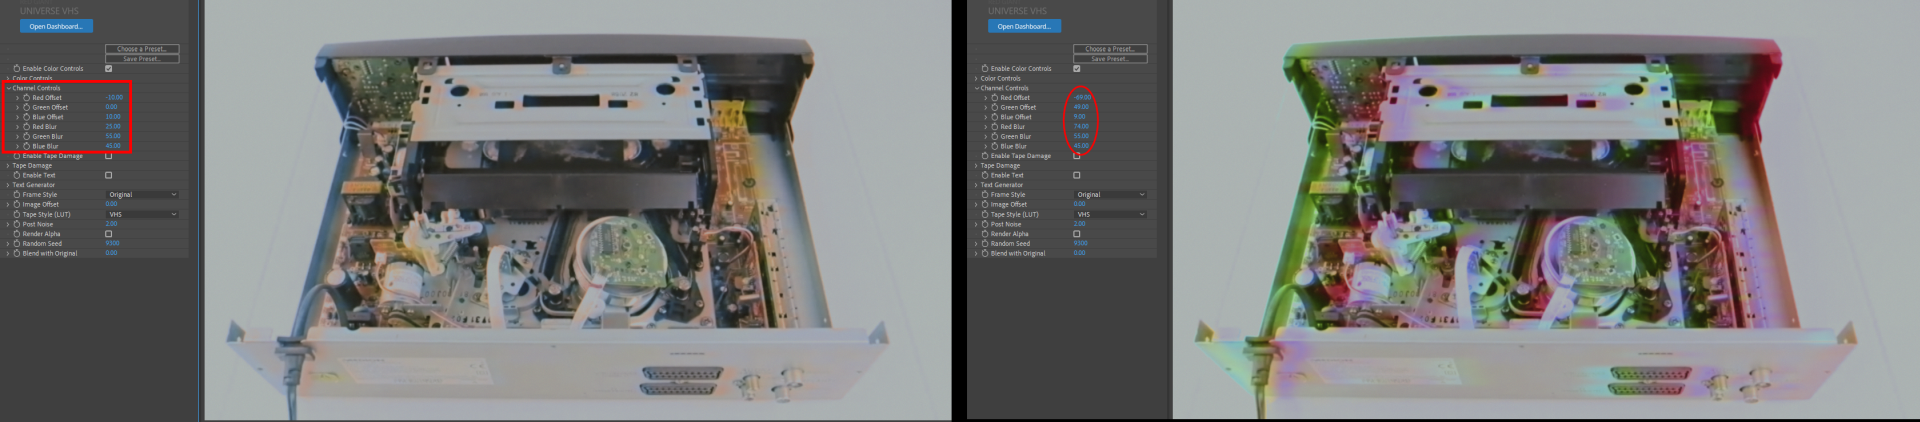
sliders move the selected channel to the right when brought up to 100 or left when turned down to -100. Here's an example of VHS's default values (left) and the changes caused by some heavy-handed color channel offset changes (right).
 *
* - The color channels can also be blurred individually using the Red Blur, Green Blur, and Blue Blur controls.
-
The
Red Offset, Green Offset,
and
Blue Offset
sliders move the selected channel to the right when brought up to 100 or left when turned down to -100. Here's an example of VHS's default values (left) and the changes caused by some heavy-handed color channel offset changes (right).
- Color Mix controls how blended the color adjustments made above will be when they go into the footage.
- Enable Tape Damage toggles whether the artificial Tape Damage (customized below) is created on top of your shot.
-
Tape Damage
-
The
Tape Noise Type
drop-down menu features a variety of presets for authentic tape noise. Choose from:
None, VHS Noise, Bad Tracking, Very Bad Tracking, Blank Tape, Vertical Slip, Mixed Tracking, Color Noise,and Vertical Slip2. Shown below (from left to right) are None, Bad Tracking, Blank Tape, and Color Noise.
 *
* - Adjust Noise Scale determines the size of the artificial noise blanket that covers the shot. Higher values result in a bigger noise texture; smaller values result in a finer noise texture.
- Pop Line Frequency allows you to increase how often (from 0% to 100%) distorted horizontal lines pop up in your footage.
- The Frame Jitter control moves the edges of video footage away from the frame more frequently when turned up to 20. Alternatively, set the control to 0 to eliminate the jitter from the effect.
-
The
Interlace Error
controls add horizontal colored lines to footage to recreate the effect of interlaced scan line distortion.
- Increase or decrease the thickness of the lines using the Scale slider.
- Change the color of the lines using the Color 1 and Color 2 picker tools.
- The Offset control allows you to manually offset the image sequence of the tape noise defined in the Tape Noise Type.
- You can increase the effect of the Tape Noise Type by turning the Tape Noise slider up to 100, or you can keep the number low for a subtler look.
- The Distortion control takes away detail from the image for a more lo-fi effect when increased. It uses a displacement map effect based on the luminance of the selected tape noise.
-
Tape Wrinkle
-
Turn on the
Wrinkle Distortion
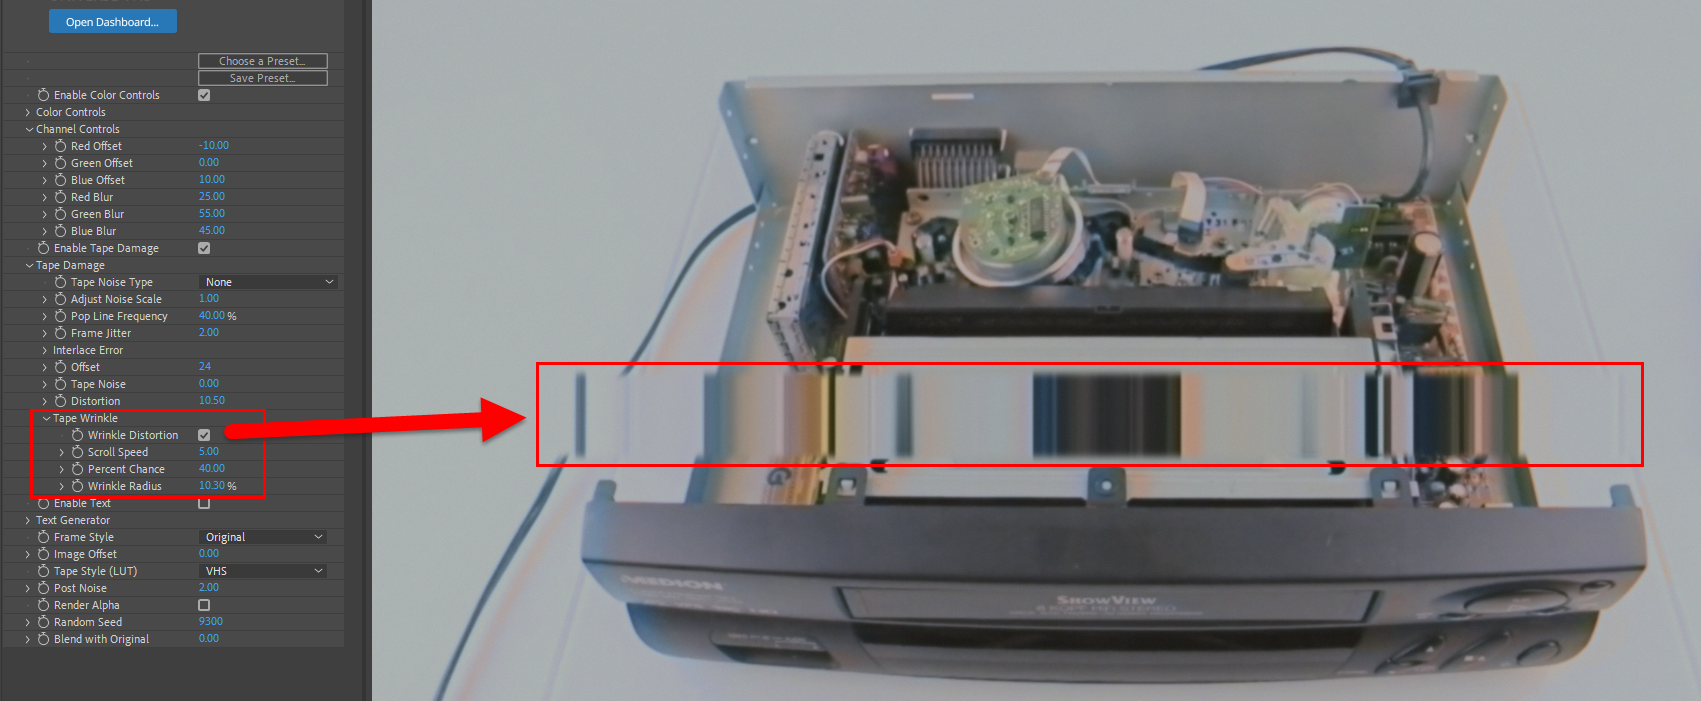
check box to periodically add the effect of folded tape, which tends to generate a bar of stretched distortion across the screen, like so:
 *
* - The Scroll Speed control sets how quickly the folded distortion moves vertically through the screen.
- The Percent Chance slider sets how likely the effect is to appear on the screen.
- Increase the Wrinkle Radius control to make the wrinkle effect larger.
-
Turn on the
Wrinkle Distortion
check box to periodically add the effect of folded tape, which tends to generate a bar of stretched distortion across the screen, like so:
-
The
Tape Noise Type
drop-down menu features a variety of presets for authentic tape noise. Choose from:
None, VHS Noise, Bad Tracking, Very Bad Tracking, Blank Tape, Vertical Slip, Mixed Tracking, Color Noise,and Vertical Slip2. Shown below (from left to right) are None, Bad Tracking, Blank Tape, and Color Noise.
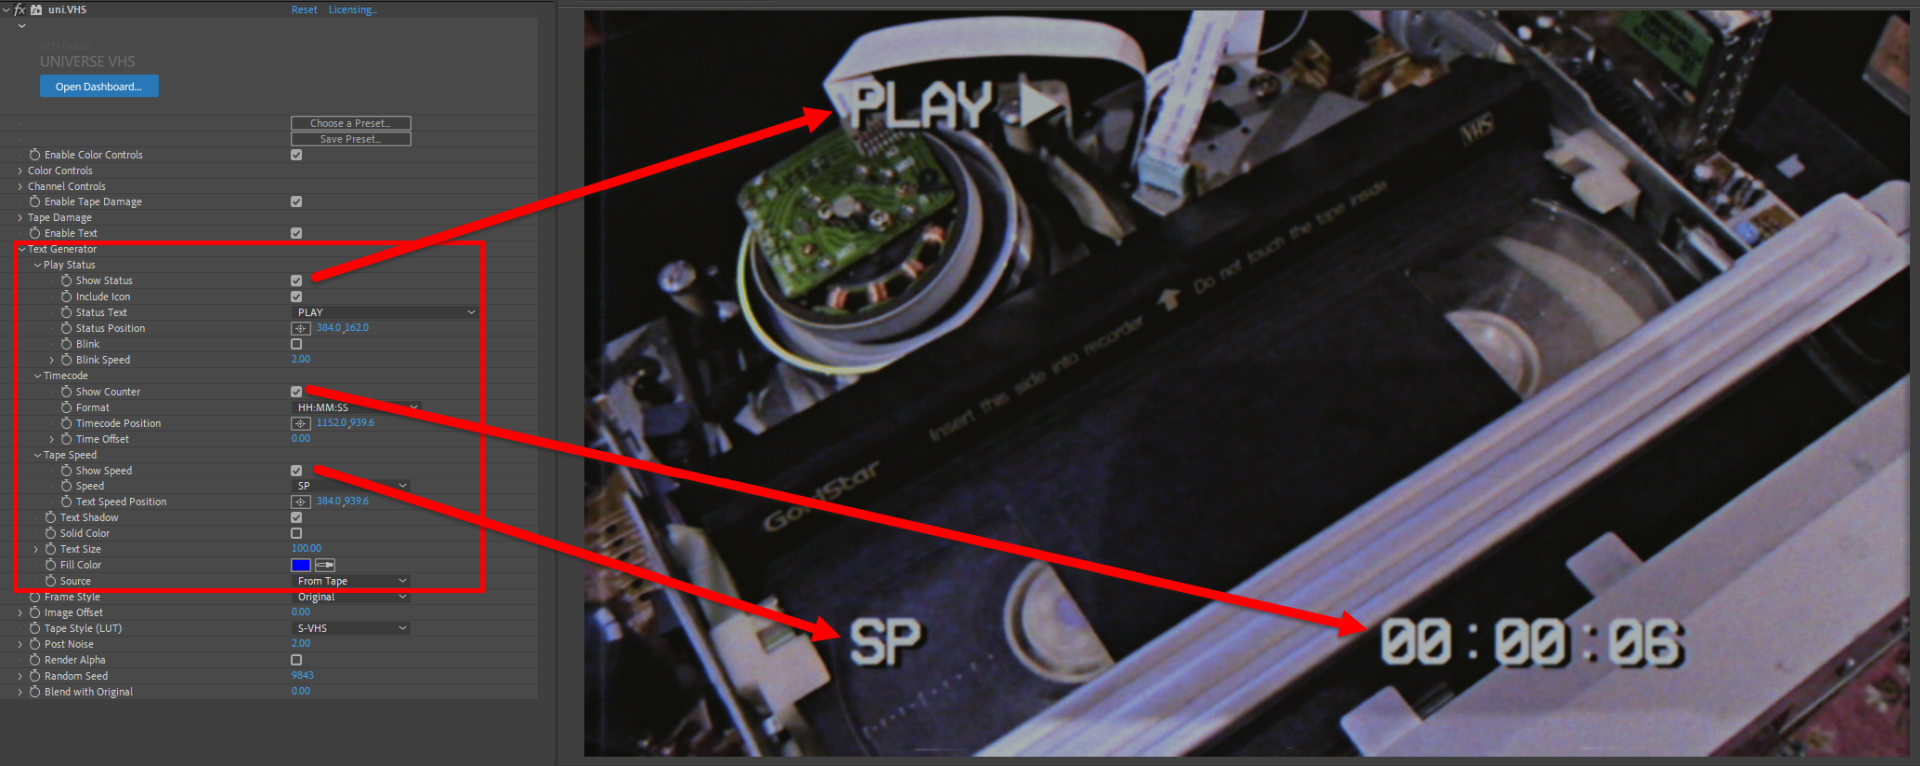
- Enable Text toggles an optional Text overlay including all of the parameters outlined below under Text Generator .
-
Text Generator
-
Play Status
- Show Status toggles whether the status is shown at all.
- Include Icon toggles whether icons, such as the Play arrow, are shown alongside the status.
- Status Text contains a preset list of what text is shown to relay the current status (e.g., Play, Stop, Rewind, etc.).
- Status Position contains adjustable coordinates that dictate where on the screen the status is shown.
- Blink toggles whether the status switches on and off.
- Blink Speed adjusts how fast the status blinks.
-
Timecodes
- Show Counter enables an artificial timecode.
- Format adjusts the formatting of the time code where HH, MM, SS, and FF is Hours, Minutes, Seconds, and Frames, respectively.
- Timecode Position contains adjustable coordinates that dictate where on the screen the timecode is shown.
- Time Offset sets the time shown on the timecode.
-
Tape Speed
- Show Speed enables the Speed Abbreviation status.
- Speed contains the preset list of standard speed times: SP (shot for Standard Play), LP (Long Play), or SLP (Super Long Play).
- Text Speed Position contains adjustable coordinates that dictate where on the screen the Tape Speed is shown.
- Text Shadow toggles whether the VHS text has a drop-down shadow.
- Solid Color covers the entire frame with a solid color.
- Text Size adjusts the scale of the text over the frame.
- Fill Color customizes the color of the Solid Color above using a swatch or eyedropper tool.
- Source lets you decide whether the text's source is coming From Tape or From VCR, which ultimately affects whether the VHS effects impacts the text as well as the footage (Tape) or if the text is unaffected by the VHS stylization and comes from the VCR itself (VCR). From VCR tends to be brighter and sharper.
-
Play Status
- The Frame Style drop-down menu lets you choose between a 4x3 aspect ratio, which will crop anamorphic and HD footage, or set it to Original to keep the footage's original aspect ratio.
- The Image Offset control allows you to slide and reposition the footage to the left or right of the frame. This can be useful for bringing cropped parts of the footage into the frame when using the 4x3 setting or creating a shaky, distorted effect when amimated by keyframe.
-
The
Tape Style (LUT)
drop-down menu includes presets to change the kind of video tape being emulated in the effect via a 3D LUT captured from the following tape formats:
VHS, Bad VHS, S-VHS, U-matic,
Beta, or
None.
Shown below are VHS (left), Beta (center), and None (right).
 **
** - Post Noise modifies an additional, less stylized noise layer on top of the Tape Damage and other VHS effects.
- Render Alpha toggles whether the output renders out an alpha channel. This is useful for feeding into other effects in which you don't want to modify what's meant to be transparent areas of the shot.
- Random Seed allows you to provide more variety to the distortion by setting it to a new number from which all the distortion controls begin, giving the distortion a new and slightly more unique look.
- Blend with Original is useful for making the VHS effect more subtle overall. Turn this control up toward 100 to blend it in completely with the original footage. In effect, a 100 value appears as if no VHS is applied.
* Image attribution: © Raimond Spekking / CC BY-SA 4.0 (via Wikimedia Commons)
** We award 1000 bonus "Boomer Points" to anyone who knew that the device shown in this image is, in fact, a Betamax machine, not VHS. Please redeem your boomer points during your next visit to 1979.