
Real Lens Flares
Effects Control Panel (ECP)
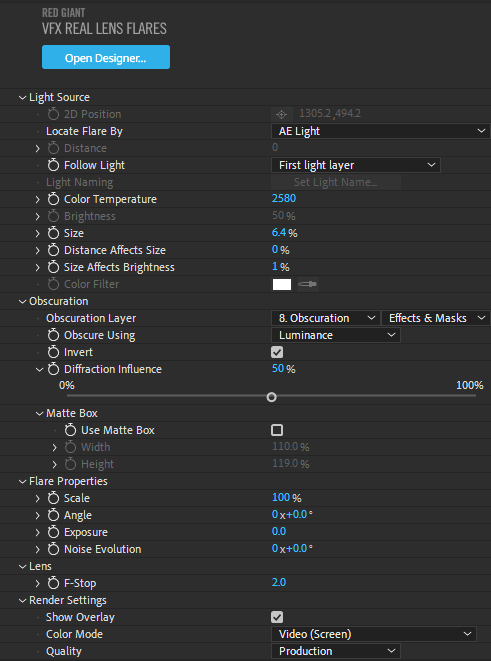
Once you’re out of Designer and back in After Effects, you’re ready to position and animate your lens flare with Maxon’s ECP tools. If you’ve studied your Designer options in this user guide, you’ll have no trouble digging right in with the following features and settings. That said, we've added some new light capabilities specific to the ECP interface that deserve special mention below.
Distance
Real Lens Flares offers the ability to position a light source with the usual 2D Position controls and then manipulate that light along the z axis in After Effects. To access this capability, be sure to select 2D Position + Distance from the Locate Flare By pull-down menu.
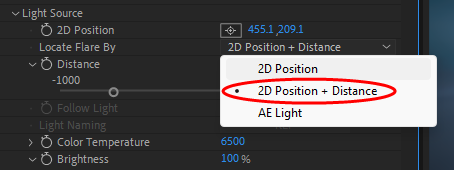
With the Distance slider enabled, you can now bring the light source closer to the camera (lower values, including negative) or push it farther away (higher values). Note that you can drag-slide or manually input values far beyond the UI's apparent -1000 to 5000 range.
Distance works in conjunction with the Distance Affects Size and Size Affects Brightness parameters. Assume that you set both of these controls to 100 percent for linear effect scaling. Now, as you lower the Distance value (bring the light closer), the light will grow larger (due to Distance Affects Size), and because the size is larger, luminosity increases (due to Size Affects Brightness). The outcome can look much like the following example. We used three layers, each with its own instance of Real Lens Flares. Alternatively, you could achieve the same result with three Real Lens Flares instances on one layer.
The 2D + Distance feature can quickly add dimension to your shot, especially if you’re not working in a full 3D workflow but need to illustrate depth. Additionally, if you're working in an editor that lacks 3D lights (such as Premiere Pro), 2D + Distance can simulate convincing 3D flare movement, including flares that zoom in and fill the screen for transitions.
Keep in mind that if you have Size Affects Brightness set at a low value, it's possible to push a light far away yet still have it maintain the similar brightness level, which can give the impression that the light hasn't actually moved. Keep an eye on this.
AE Light
Real Lens Flares can link directly to After Effects lights when you select AE Light from the Locate Flare By control. This time-saving feature makes it much easier to animate flare effects in 3D space, essentially turning your light into a rig for the flare. In the following examples, we'll illustrate this with a directional light (like a spot) rather than an omnidirectional point since this can make visualizing some features more intuitive. Just be aware that Real Lens Flares respects the direction of parallel and spot lights, so pointing them away from the camera will result in no visible flare unless the individual projections have their Use Cone Angle and Feather control (for spot lights) set to a low value.
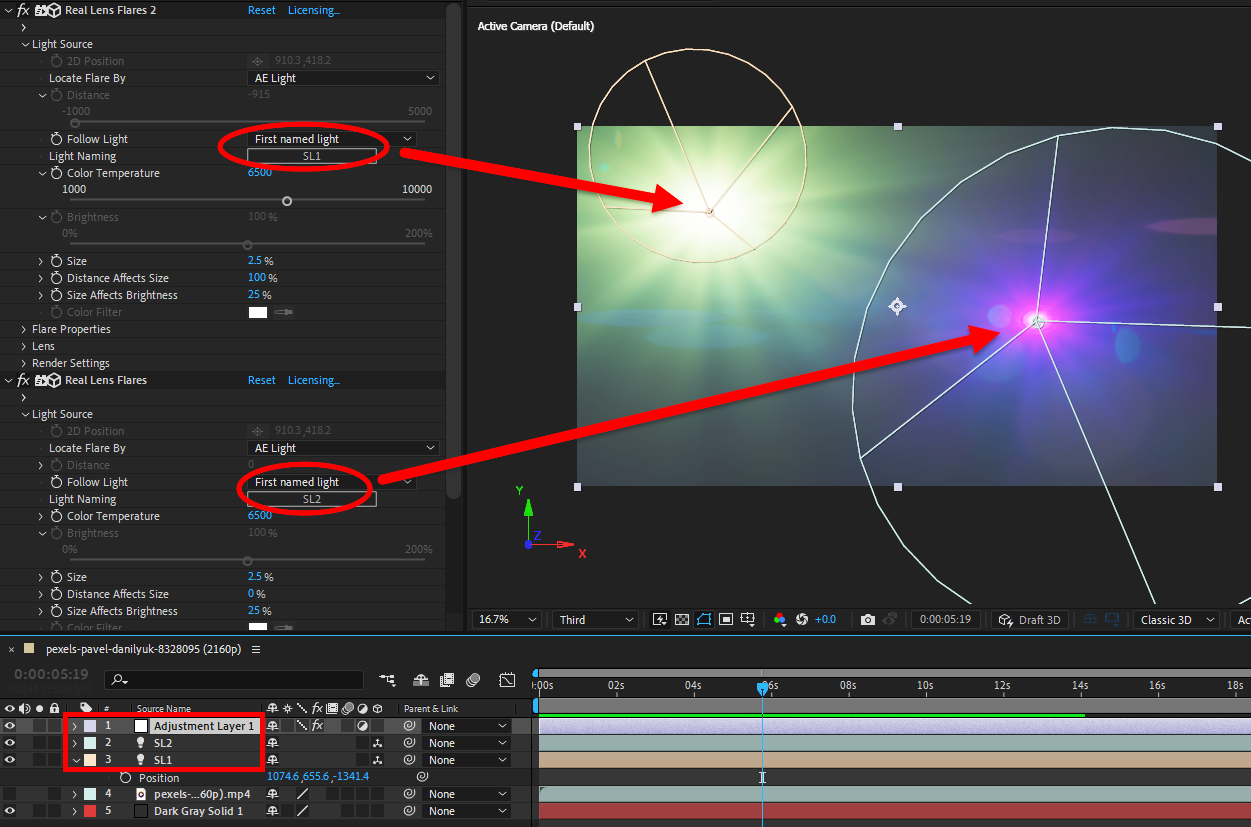
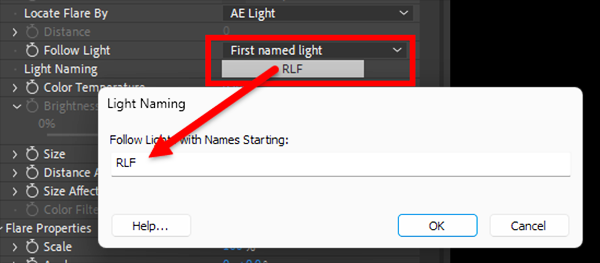
In the next image, we've created two spot lights named SL1 and SL2. We tied these to an adjustment layer with two instances of Real Lens Flares on that layer. The key here is to use the Follow Light control and its two pull-down menu options. The First light layer option instructs Real Lens Flares to track the top AE light in your timeline's layer list. The other option is First named light, which you can use to track a named light. ("RLF" is the plug-in's default name string.) We used this control to point the first instance of Real Lens Flares at SL1 and the other instance at SL2.
Bind a Real Lens Flare instance to a specific AE light by clicking on the name box to the right of Light Naming and typing in the exact name of the target light.
To place your flares in a moving 3D scene, you could use 2D + Distance, but it would be laborious. You'll find that using After Effects to perform 3D camera tracking (also see this Adobe video) is far more efficient.
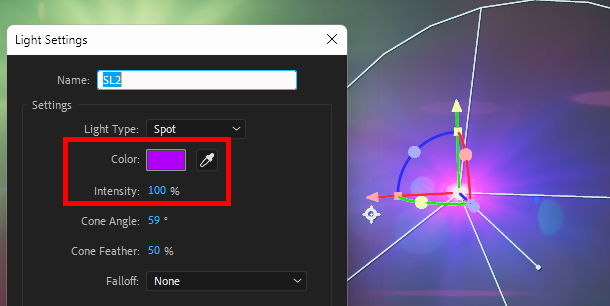
There are other light controls within the ECP, but these features also exist within the Designer and will be discussed elsewhere. Perhaps the one point that deserves special mention here is that Color Filter is enabled in Real Lens Flare instances with 2D Position or 2D Position + Distance selected. This mirrors the Color Filter wheel found in Designer within the Light Source controls. However, if you've selected AE Light, you can control the light's color through AE's own Light Settings parameters. Real Lens Flares respects the color and intensity of AE light settings as well as Cone Angle and Cone Feather (for spot lights).
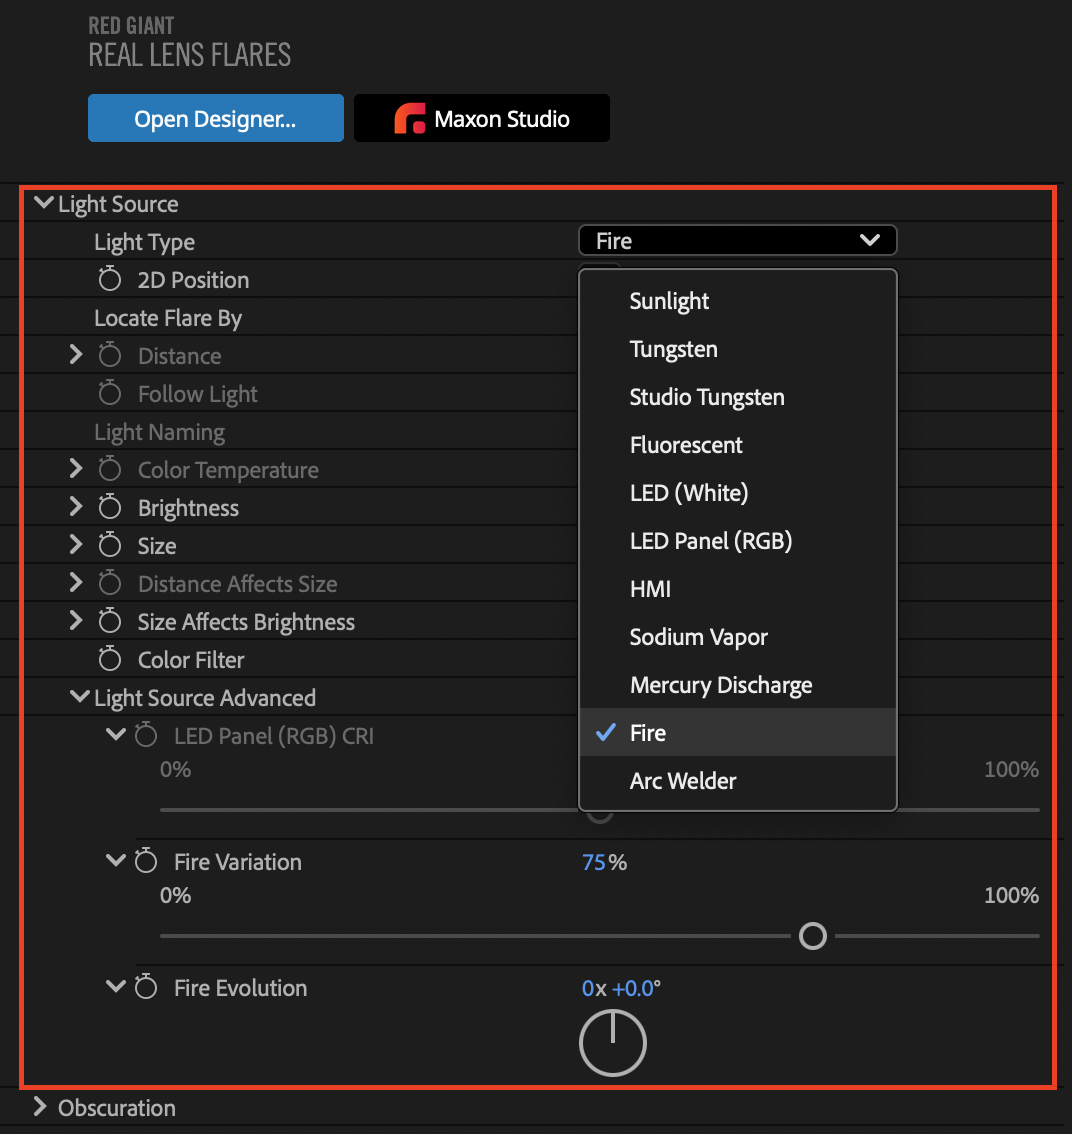
Light Type and Light Source Advanced
The Light Source group in the Effect Controls Panel includes the same Light Type menu as the Designer. Inside the Light Source group, the Light Source Advanced subgroup holds LED Panel (RGB) CRI, Fire Variation, and Fire Evolution. Each one is available when its light type is selected. See Inspector Pane for what these controls do.
Animating Fire
The Designer shows the flare at a single moment, so animate a fire’s flicker in the Effect Controls Panel. Keyframe Fire Evolution or add an expression to it. For example, the expression “time*20” advances Fire Evolution steadily as the timeline plays, and the flare’s core shifts as the spectrum changes. Fire Variation must be above 0% for the flicker to be visible. To watch the flicker while you scrub, turn on Draft Mode (see below).
Schmutz
Most Schmutz controls, including custom texture settings, are in the Effect Controls Panel. Once your flare has a Schmutz core projection, you can adjust them without going back into the Designer. The Influence controls (Visible Schmutz, Affects Starburst, Affects Reflections, Schmutz Zoom, and Schmutz Offset) are only in the Designer.
Fast Render Quality
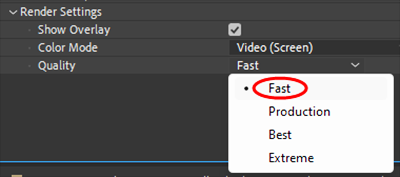
Real Lens Flares recently improved the quality of its Fast option in the Render Settings. If you previously shied away from Fast due to unwanted color shifts, give it another try. You'll find it now delivers a more balanced blend of speed and accuracy.
Draft Mode
Not to be confused with Fast quality mode for rendering, Real Lens Flares now offers a draft mode to help cut the processing load when previewing your flares. You can access this via the layer quality switch on your Real Lens Flares-enabled layer.
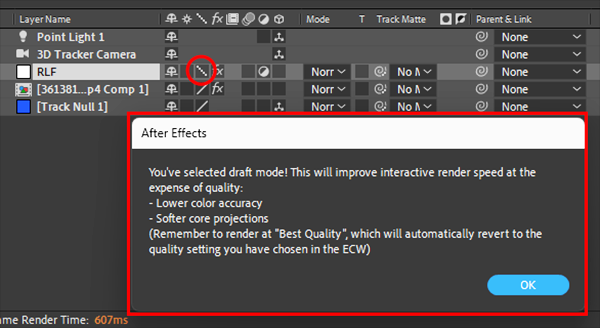
Enabling Draft Mode provides a quick, lower resolution solution for working and animating faster while still preserving the beautiful high quality you want in your final render. Under the hood, Draft Mode downsizes core projection textures from 20482 to 10242, leaving one quarter of the pixels to process. It also halves the number of grid samples used for ray tracing. The end result is a softening of core projections and somewhat less accurate color rendering.