
KNOLL LIGHT FACTORY EZ

Knoll Light Factory EZ is a collection of quick-setup lens flare tools from Industrial Light & Magic’s John Knoll. Use it to instantly add color, depth, and excitement to a live-action scene or your motion graphics.
Knoll Light Factory has been used on the Star Wars films and countless others for over a decade. Knoll Light Factory EZ is found under the Universe Stylize effects category. It is a simplified version of the Knoll Light Factory plug-in found in Red Giant's Effects Suite.
Presets
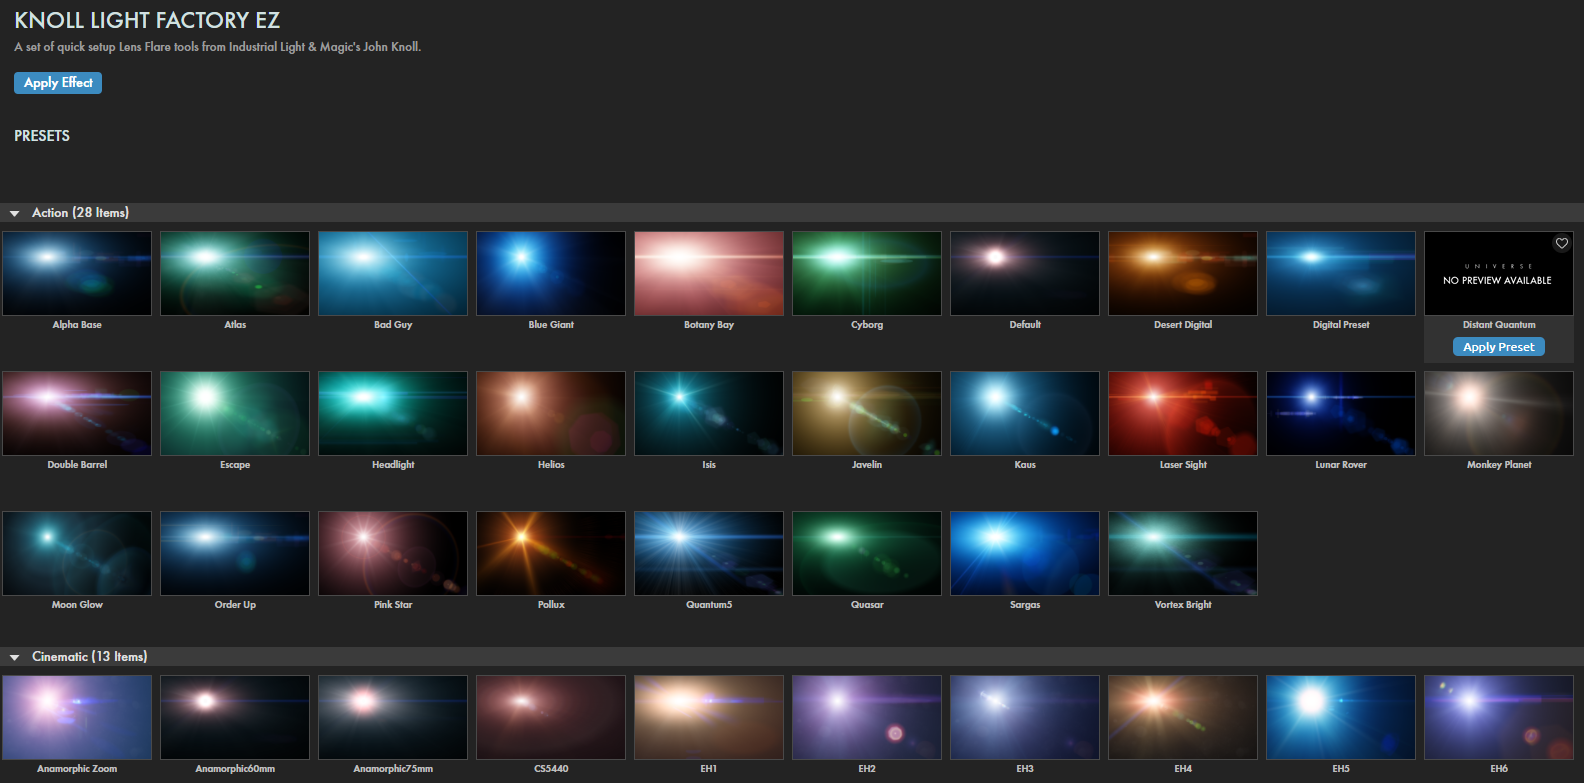
- Click the Choose a Flare button to see a host of presets based on real-world lenses. Double-click any preset to apply. Once a preset is selected, you will see its name highlighted within the preset category drop-down menu below.
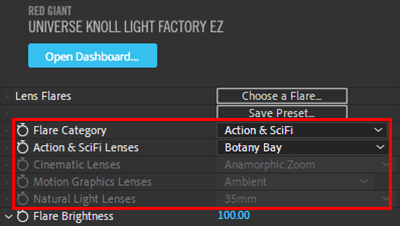
- Presets can also be applied directly in the ECP from preset category menus:
- Action & SciFi Lenses
- Cinematic Lenses
- Motion Graphics Lenses
- Natural Light Lenses
When you select a Flare Category, that particular category its corresponding item from the following four control lines. In the following example, you can see that selecting Action & SciFi for our Flare Category enabled the Action & SciFi Lenses line, and from that pull-down menu we selected Botany Bay.
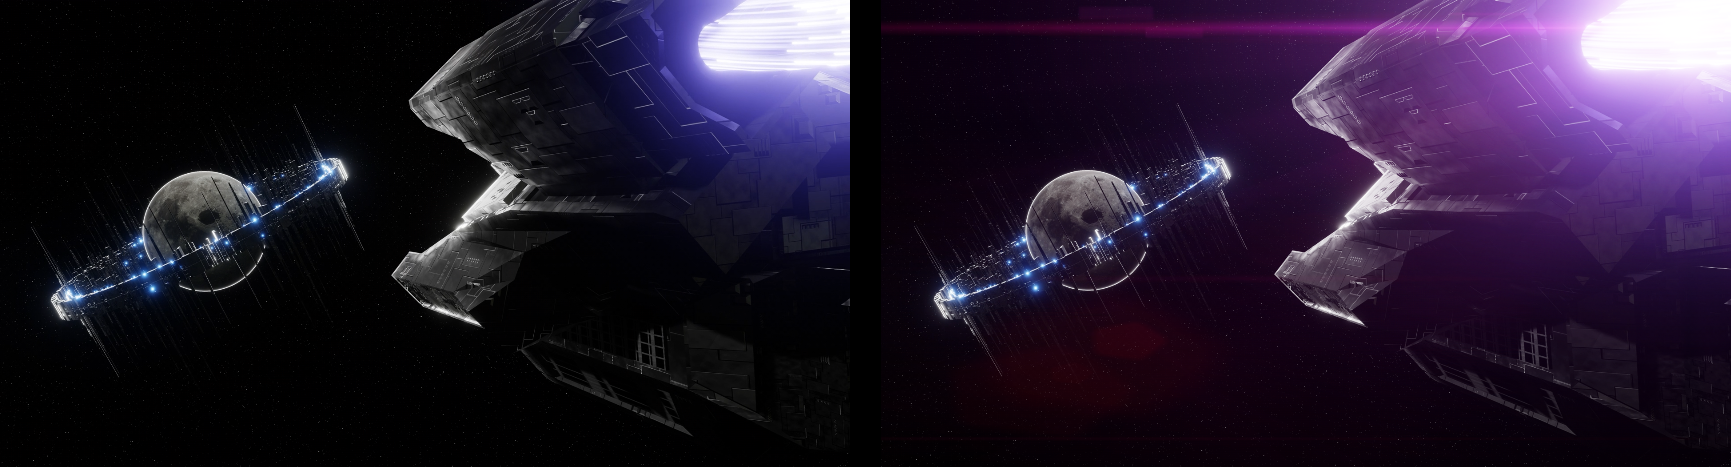
We liked Botany Bay's particular flare pattern for our footage of a spaceship's engine roaring into view. We positioned the light location over the engine exhaust (more or less), boosted the brightness, and adjusted the color closer to our ship's native blue-purple. For 30 seconds of work, we achieved this before-and-after comparison.
Modify the Flare
- Flare Brightness causes the flare's center to enlarge and push toward white as values increase. Note that a brightness value of 0 is a special case and does not render. Use this feature to turn the flare on and off during an animation.
- Flare Scale adjusts the overall scale of the flare elements, but does not brighten the flare or change its position. Animate Flare Scale to simulate the adjustment of a zoom lens' focal length.
- Light Location defines the x- and y-axis positions of the lens flare's light source. Enter numerical x and y values or move the cross-hair or point control in the preview window. Animate the values to move the center of the flare throughout the clip.
- Color specifies a color for the light source. Choose a lens color with the color picking tool or use the eyedropper tool to sample a color from anywhere on your screen. Color affects hue and saturation values. A bright blue and dark blue color will give the same results. Neutral colors like dark gray or black will not darken the flare. As you increase the color's saturation, the color will override individual colors in the flare effect. Therefore, you can use Color to override the individual colors of the elements and sprites in the flare effect.
-
Angle.
Presets such as Double Barrel and Quantum5 from the Action & SciFi category have elements that respond to changes in the Angle control. Flare presets with Random Fan, Photon Spikeball, PolySpikeBall, and Sparkle elements will appear to shimmer when you animate the Angle settings. To create this shimmering effect, enter different keyframe values for Angle at the beginning and end of the flare’s appearance in your project's timeline. Flare elements that respond to Angle animation will change or rotate about the
Light Location
point.
Tip: The Angle control will not rotate lens elements, so in many presets the Angle control may appear to have no effect.
Location Tracking
Location Tracking adjusts lens flare visibility, including where its light source is located and if that light source is turned on.
-
Location Layer.
Choose a layer from the drop-down menu to use its alpha channel to set the light source's position. This overrides the Light Location setting. The layer need not be visible in the timeline to serve as a positioning layer. Setting Location Layer to Noneallows Light Location to set the effect’s position.
Note: Location Layer searches the alpha channel of the selected layer for non-black pixels and calculates their average position. If you have a small white dot in a black alpha channel, the light effect will appear at the dot's center. If the alpha channel contains multiple white dots, the plugin will average the positions of each dot and place the light at that averaged location. If no non-black pixels exist in the alpha channel, the light effect will default to the image's center.
-
Obscuration Layer. Choose a layer that will obscure (hide) the flare, making it appear to pass behind objects in another layer. The default setting of None causes no layer to be used.
-
Obscuration Type.
Your lens flare can be hidden, or "obscured," with different image-based options. Choose one of five ways to use data in the Obscuration Layer:
- RGB modulates the color of the light effect with the corresponding RGB value of the obscuration layer. It's possible to simulate the sun shining through a stained glass window by moving the light flare over the color area.
- Alpha enables pixels with an alpha value of zero or black to let the flare show through. Pixels with a white alpha value will completely obscure the flare. Pixel values between 0 and 255 scale the obscuration by a corresponding amount.
- RGB + Alpha combines the effects of the RGB and alpha types, where light effect transparency is controlled by the alpha channel and color is altered by the RGB channels, just as in RGB above.
- Inverse alpha produces the same result as the alpha choice, but white and black are inverted.
- Luma: Use the source video as an obscuration layer based on its luminance.
- Tip: An RGB color change adds to any color the light effect might have. Thus, a yellow flare passing through a cyan-colored RGB obscuration layer will result in a green flare. RGB + alpha type combines the effects of the RGB and alpha types, where light effect transparency is controlled by the alpha channel and color is altered by the RGB channels, just as RGB above.
-
Source Size
is active when you set an Obscuration Layer. Its value defines the search area, measured in pixels, averaging around the current light source position. This search area then sets the amount of layer that is obscured. Source Size does not change the light source size.
At the default value of 2, the Obscuration Layer Knoll Light Factory EZ examines a two-pixel radius around the light source for obscuring values (white or black). If 20% of the pixels inside that radius are obscured, the brightness of the flare will reduce by 20 percent.
Render Alpha
With this checkbox enabled, all black in the lens flare becomes transparent. Render Alpha generates an alpha matte for the lens flare's black pixels. This is helpful for compositing your flare against other project clips.