Tao
Textures Group
The Textures group lets you select a color texture and specify how to map it over the mesh.
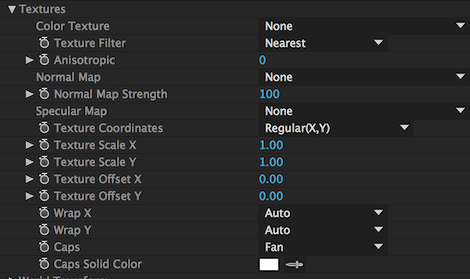
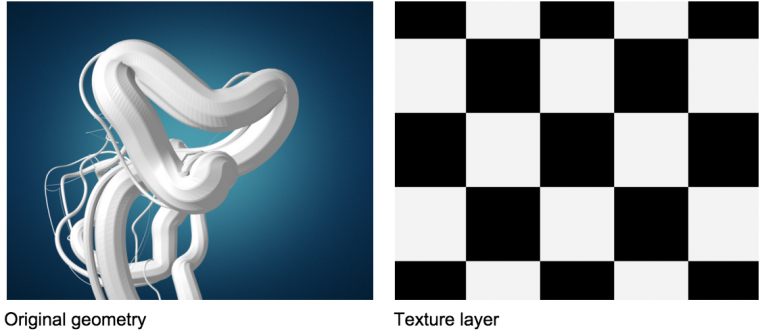
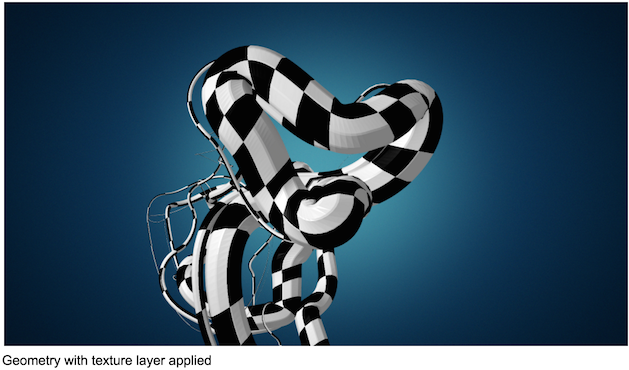
The Color Texture pop-up menu is where all the magic starts. From this pop-up menu, you can choose a layer in the current comp as a texture to apply to your geometry. The texture covers all of the geometry, like wallpaper. This can be any type of layer, including text layers, shape, and video layers or Adobe Illustrator files.
NOTE: When using a text layer as a Texture layer, be sure your text size is large and that you choose the Texture Filter > Linear setting for smoother, anti-aliased edges on the text.
BONUS NOTE:
You can use an alpha channel, but all pixels should be either full on or full off (no semi-transparencies) unless the
Rendering > Blend
pop-up menu
is set to
Add
and
Rendering > DepthBuf
is set to
Off
. In that case, any kind of alpha channel will work.
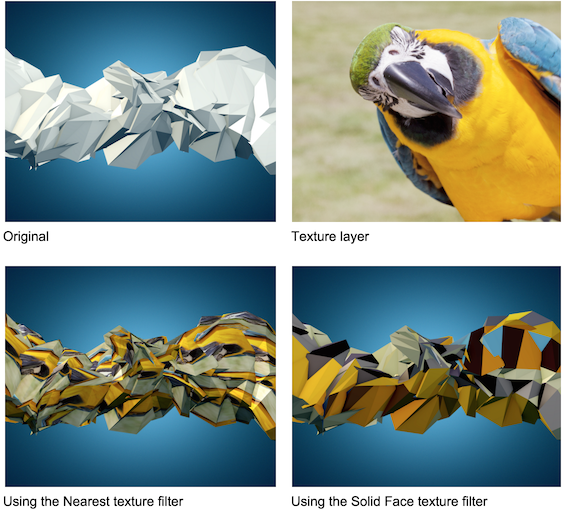
The Texture Filter pop-up menu allows you to choose how the texture filters when applied to the geometry. The choices are Nearest, which means the nearest neighbor is used. Linear uses a linear interpolation. Solid Face means the full polygon face will be one solid color from the texture. There are three Texture Filter modes:
-
- Nearest uses nearest neighbor filtering.
- Linear uses a linear interpolation.
- Solid Face applies one solid color from the texture to each polygon.
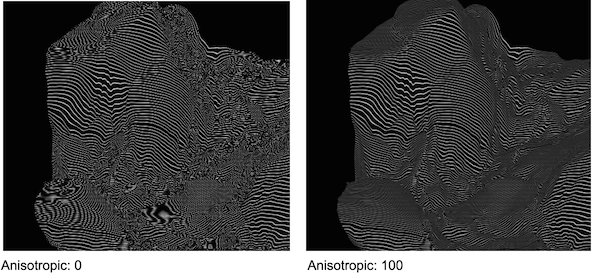
The Anisotropic value enables anisotropic filtering, meaning that more sample points are used as the surface becomes parallel to the viewing ray. This is useful when using a detailed texture and sampling artifacts (such as moiré) are visible when the surface is viewed from the side.
The
Normal Map
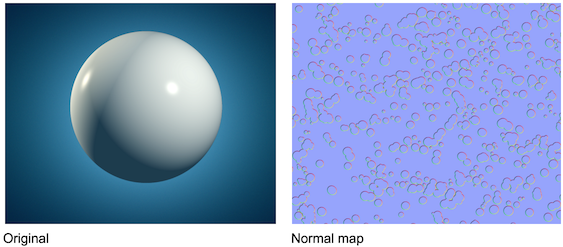
pop-up menu allows you to select a layer to use as normal map. A normal map is an RGB image wherein RGB values represent the normal vector at that position in the texture. The normal describes which way the surface is facing, and it can create the illusion that the geometry is displaced.
In texture libraries, there is usually a normal map provided for each texture, and there are ways to make normal maps from a texture. The normal map should be encoded such that the red channel is the x part of the normal, zero means -1, and full on (255 in 8bpc mode) means +1. Green and blue are y and z in the same way.
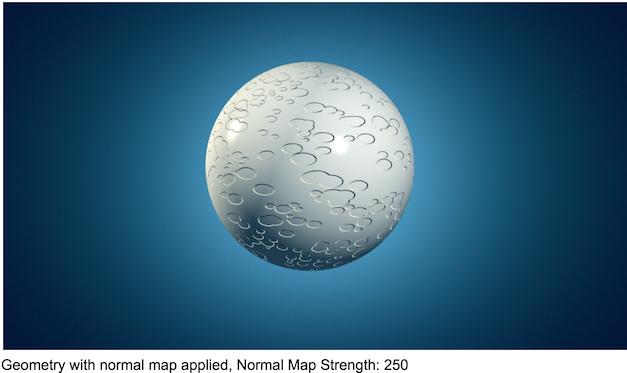
Normal Map Strength controls the influence of the normal map. This is useful for controlling how much the normal map distorts the surface. It can also be set to negative values in case the normal map needs to be inverted.
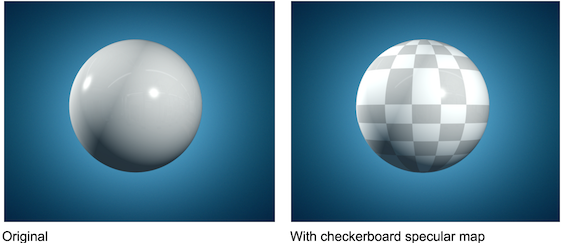
The Specular Map pop-up menu allows you to select a layer to use as specular map. The specular map controls how reflective the surface is at each texture position. Specular maps are usually provided for each texture in a texture library. The specular map controls both specular reflection from AE lights and the environment reflection.
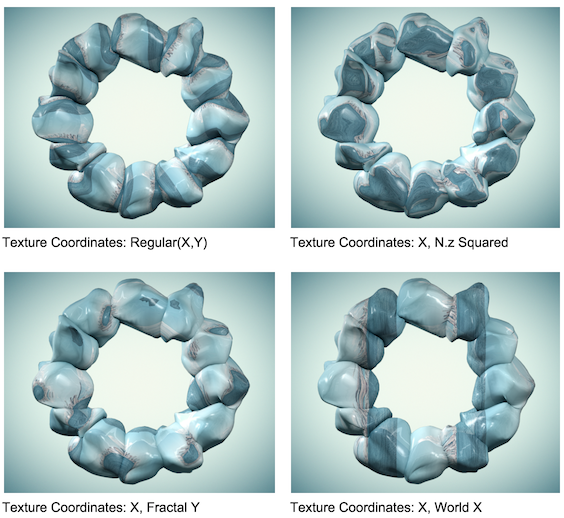
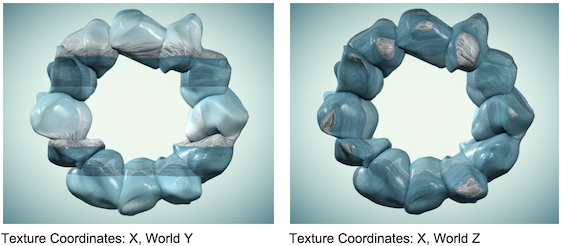
The Texture Coordinates pop-up menu allows you to control how textures map onto the geometry surface. There are six options:
- Regular (X, Y) is the default way to map textures. For Extruded N-gon, x maps along the path and y maps across it. For Repeated N-gon, x maps along the extrusion and y across it (similar to Extruded N-gon). For Repeated Sphere, x maps across the sphere and y maps between the poles.
- X, N.z squared uses the x axis for mapping as Regular does, and for vertical uses the square of the normals’ z component. This means that the more the surface faces the camera, the bigger the y component.
- X, Fractal Y uses the x axis for mapping as Regular does, and the y coordinate is taken from the fractal displacement. The more the displacement, the higher the coordinate. This can be useful to create a map-like appearance, where each height level gets one color from the texture.
- X, World X uses the x axis for mapping as Regular does and the y coordinate is from the world x position.
- X, World Y : uses the x axis for mapping as Regular does, and the y coordinate is from the world y position.
- X, World Z : uses the x axis for mapping as Regular does, and the y coordinate is from the world z position.
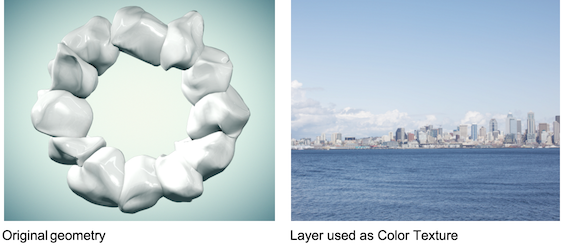
Texture Scale X sets the x axis scale for the texture. This value can also be used to repeat the texture. When Segment > Segment Mode is set to Extruded N-gon, x maps along the path, allowing Texture Scale X to repeat the texture along the path.
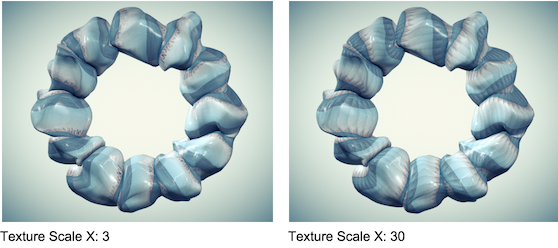
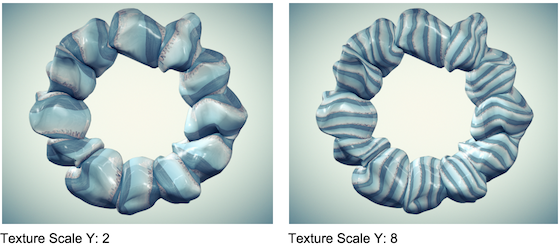
Texture Scale Y
sets the y axis scale for the texture. This value can also be used to repeat the texture.
Texture Offset X
can be used to reposition the texture along the x axis.
Texture Offset Y
can be used to reposition the texture along the y axis.
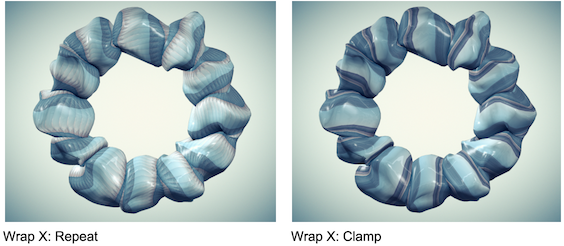
Wrap X
controls if the texture repeats or clamps along the x axis. The default is Auto, where the plug-in tries to guess what is desired based on the type of texture coordinates and how scale and offset are used. If the auto mode fails, this can be set manually to Repeat or Clamp.
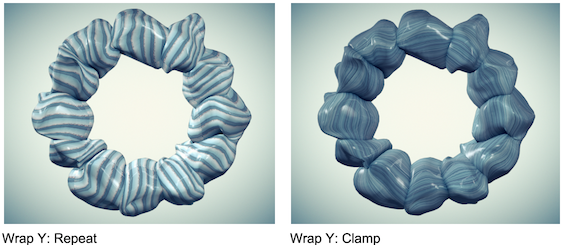
Wrap Y
controls if the texture repeats or clamps along the y axis. The default is Auto, where the plug-in tries to guess what is desired based on the type of texture coordinates and how scale and offset are used. If the auto mode fails, this can be set manually to Repeat or Clamp.
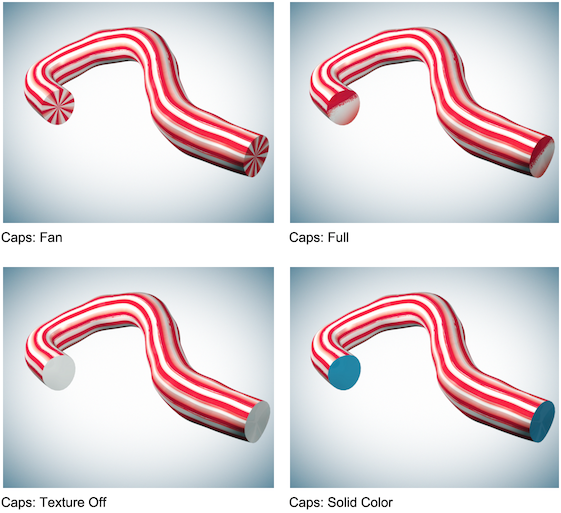
The Caps pop-up menu controls how the texture is used on caps. For caps to be visible, they must be enabled in the Segment menu, and tapering on the path must be disabled. There are four ways to map textures on caps:
- Fan makes a fan, so the texture is “pinched” inward at the caps.
- Full maps the full, non-repeated, non-offset texture onto the cap.
- Texture Off turns off the texture on the caps and uses the object's regular diffuse color.
- Solid Color turns off the texture and allows you to choose a solid color for the caps using the Caps Solid Color option.
Caps Solid Color
is enabled if the Caps pop-up menu is set to Solid Color. You can choose cap color by either clicking the color swatch to open the color picker or by using the eyedropper tool to select a color in your scene.