
ELECTRIFY
Flip through various tiled textures over the output, adding an animated and grungy quality to your footage.
Presets
Apply already-optimized Electrify motion patterns and color schemes to your text and images with lightning fast ease. Find these presets via the blue Open Dashboard... button or the Choose a Preset... button below it.
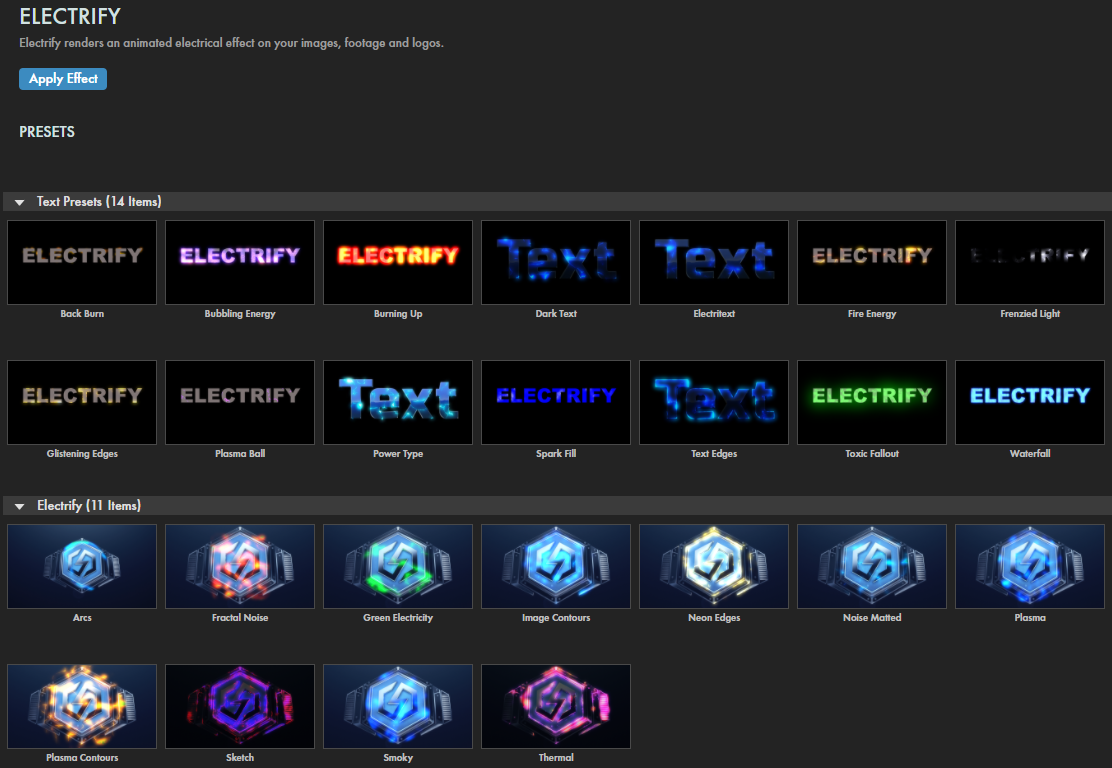
As with all other Universe tools, you can modify or create an Electrify look and then save it under its own name by pressing the Save Preset... button.
Source and Distortion
The "electric" effects you see in Electrify conform to underlying patterns, or sources. Those sources may be a Fractal Noise field generated by Electrify, Image Contours within your layer (that typically follow lines of high contrast that mark object edges), or Alpha Outline shapes for content with alpha channels. Using Electrify default settings, we show (from left to right) the Fractal Noise, Image Contours, Noise + Image Contours, and Alpha Outline Noise Source pull-down menu options below. Note that our clip does not have an alpha channel, hence the mess of blue blobs floating everywhere.

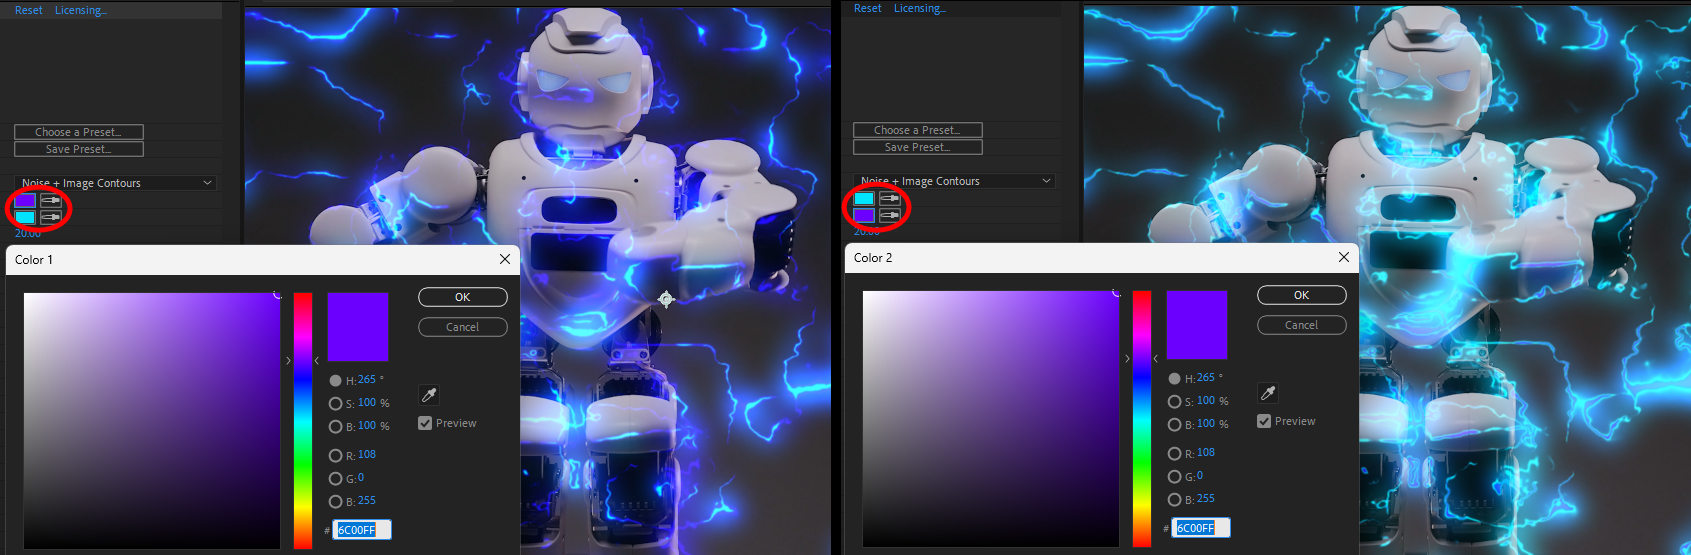
Electrify lets you select two colors for your effect. Which color you assign to Color 1 versus Color 2 can make a very noticeable difference, as we show with the following swap of aqua blue and purple tones.
Electrify defaults to a Distortion value of 20, which tends to mimic the look of a typical lightning bolt. However, these electrical "currents" actually begin (value: 0, shown below at left) by looking quite smooth, almost like reflections in a pool surface. Increasing Distortion adds jaggedness and chaos. The right image shows this at a maximum value of 100.

From a visual perspective, there's a lot of overlap between the various distortion parameters. We can offer brief descriptions of the Distortion Settings controls, but illustrations might be more effective. The following images are based on Electrify's default settings save for the changes of that one parameter.
Distortion Scale determines the size of the distorting effect dependent on the texture map's scale.
Distortion Influence adjusts the distortion effect's granularity based on its noise distortion layer. Understandably, you will see more impact from Distortion Influence if Distortion and/or Distortion Scale values are elevated.
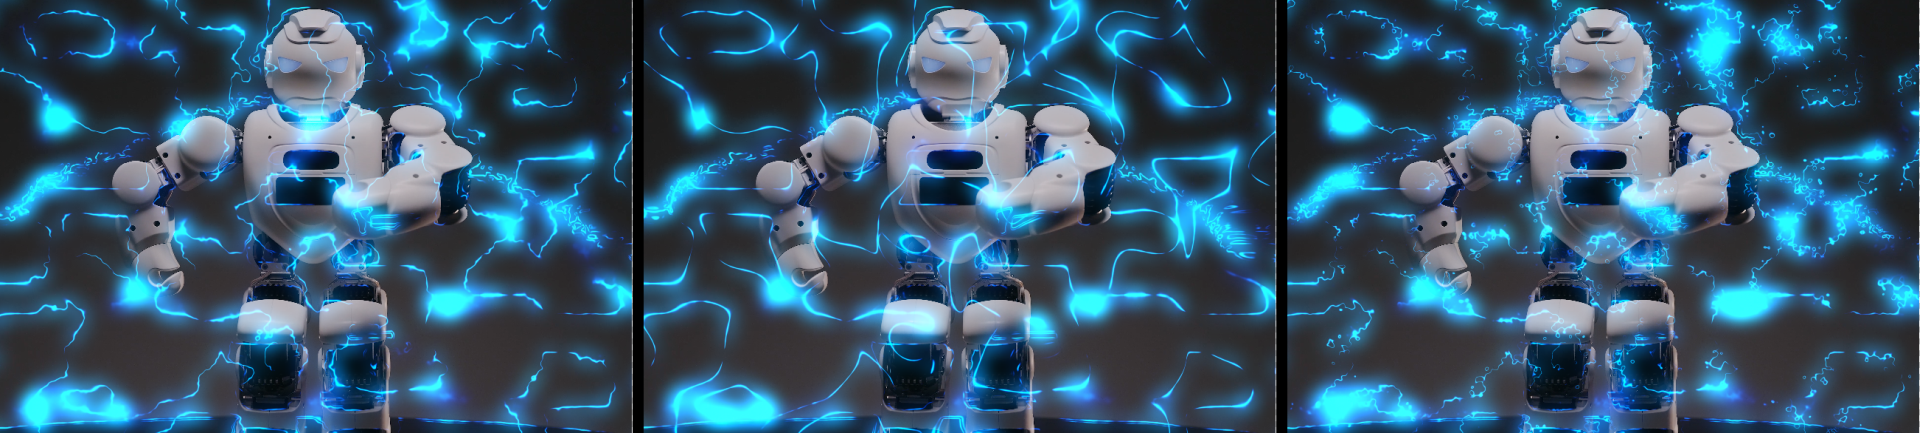
Distortion Octavesvalues increase or decrease complexity (via higher or lower values, respectively) to the distortion pattern. As you can see, the difference between settings of 1 and 4 is more pronounced than 4 and 8.
Brightness, Evolution & Blending
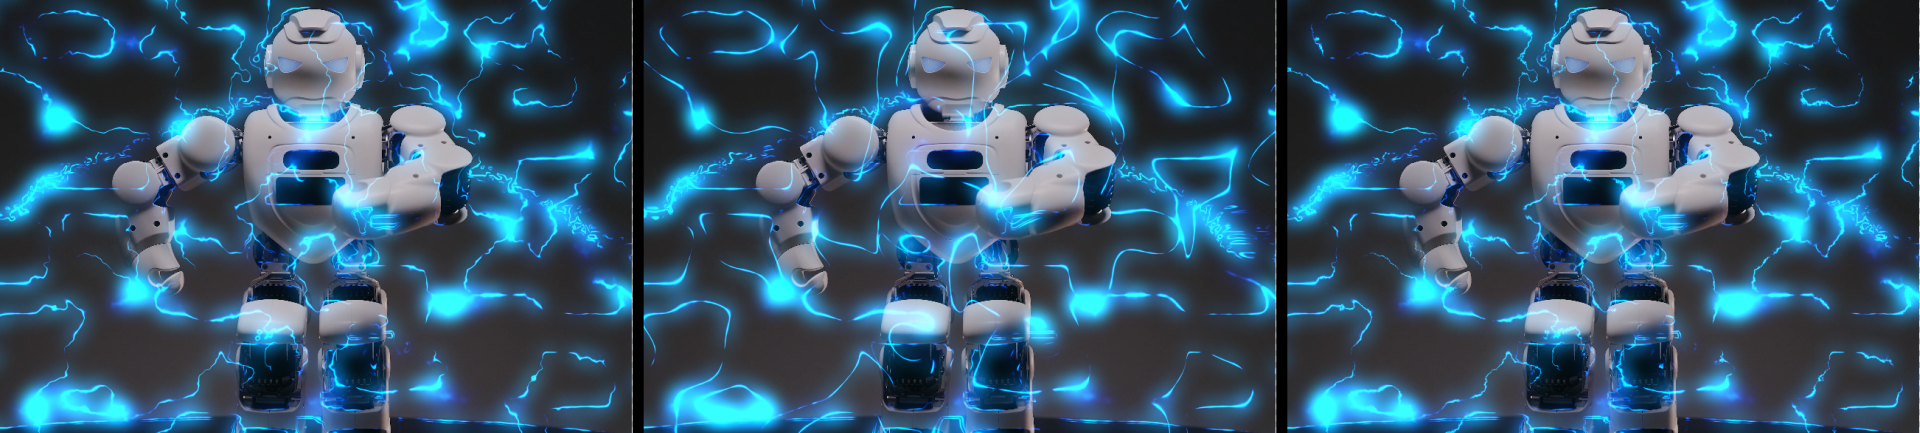
Brightness can render an Electrify effect invisible (at 0) or scene-filling (at 100) and all points in between. However, it can also be more subtle, as when confined within a masked area. Note below how we escalated the effect along the robot's head from 10 (left) to 100 (right), using green as Color 1 to match the scene's ambient lighting while making Color 2 red to convey...well, you decide. What exactly is that kid telling the robot, hm?

Evolution Speed changes the electrical motion's pace as it moves across the effect area.
Evolution Offset moves the electricity effect away from or toward its Noise Source.
Blend Mode establishes how Electrify will composite the effect over the original image. If you've done blending before, you'll have no surprises here. Take these four examples based on the Sketch preset, showing (from left to right) the Blend Mode default setting of None, Normal, Saturation, and Cutout.

Fractal Noise Settings
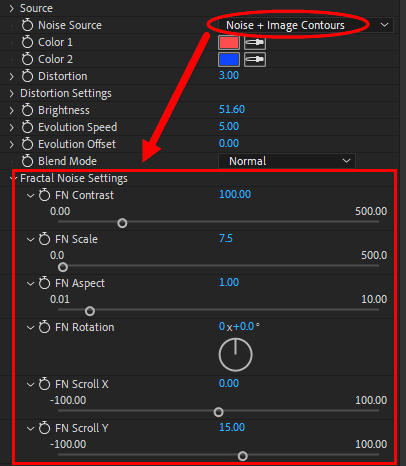
Fractal Noise Settings control the fractal noise source once selected from the Noise Source pull-down menu (see above image).
- FN Contrast adjusts the range of values between the noise's brightest and darkest spots. As the following images show, a low setting of 40 (left) shows electrical effects following the same noise pattern as a high setting (400, right). However, the higher value allows for the effect to apply to a greater contrast range. Expressed as a percentage, you might say our left example allows the effect to manifest along 8% of the contrast range while the right example allows for 80 percent.
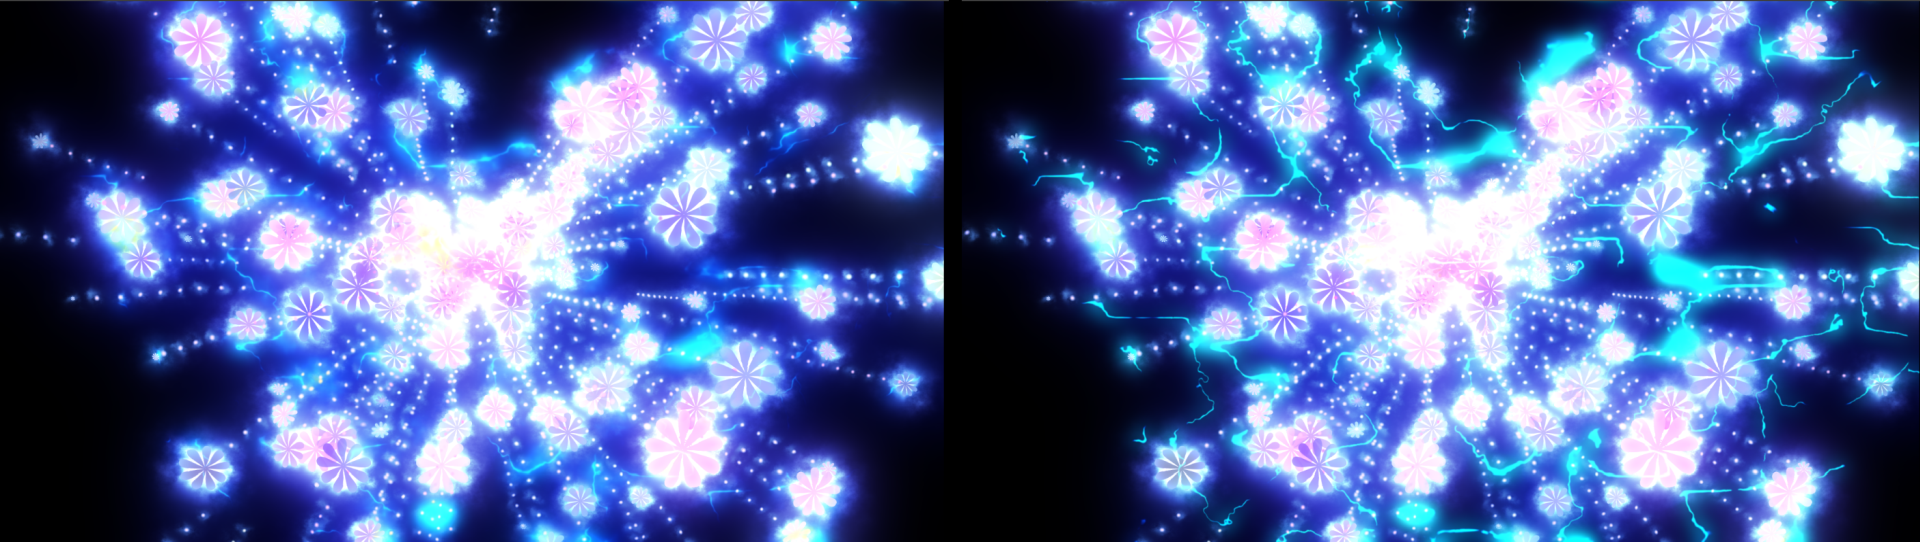
- FN Scale defines the fractal's scale. Low values create smaller scaling, which gives the effect a bigger, smoother look. Higher values increase detail, eventually to the point of appearing like dust or static.
- FN Aspect sets the distortion's directional bias. Very low values (such as 0.1) will manifest Electrify bolts in a generally vertical orientation. The default of 1.00 shows a neutral, random bias. Roughly 1.5 and higher yields more horizontal orientation. Try experimenting with values above 7 to emulate the gentle undulation of surface ripples in a pool.
- FN Rotation rotates the noise around the center axis. You might coordinate this with FN Aspect to mimic the tilting of a camera capturing those electric waves.
- FN Scroll X and Y moves the noise along the x and y axes, respectively.
Matte Settings
- Matte Source creates an optional added matte from either Fractal Noise or Image Contours. See View Matte Source below for an example of the difference in these two options.
- Matte Evolution Speed controls the rate at which the Electrify effect moves through the matte source.
- Matte Brightness adjusts the brightness of the added matte source. A little change can go a long way with lower values here.
- Matte Contrast sets the range of contrast values within the matte. The following example compares a value of 25 (left) versus 500 (right).
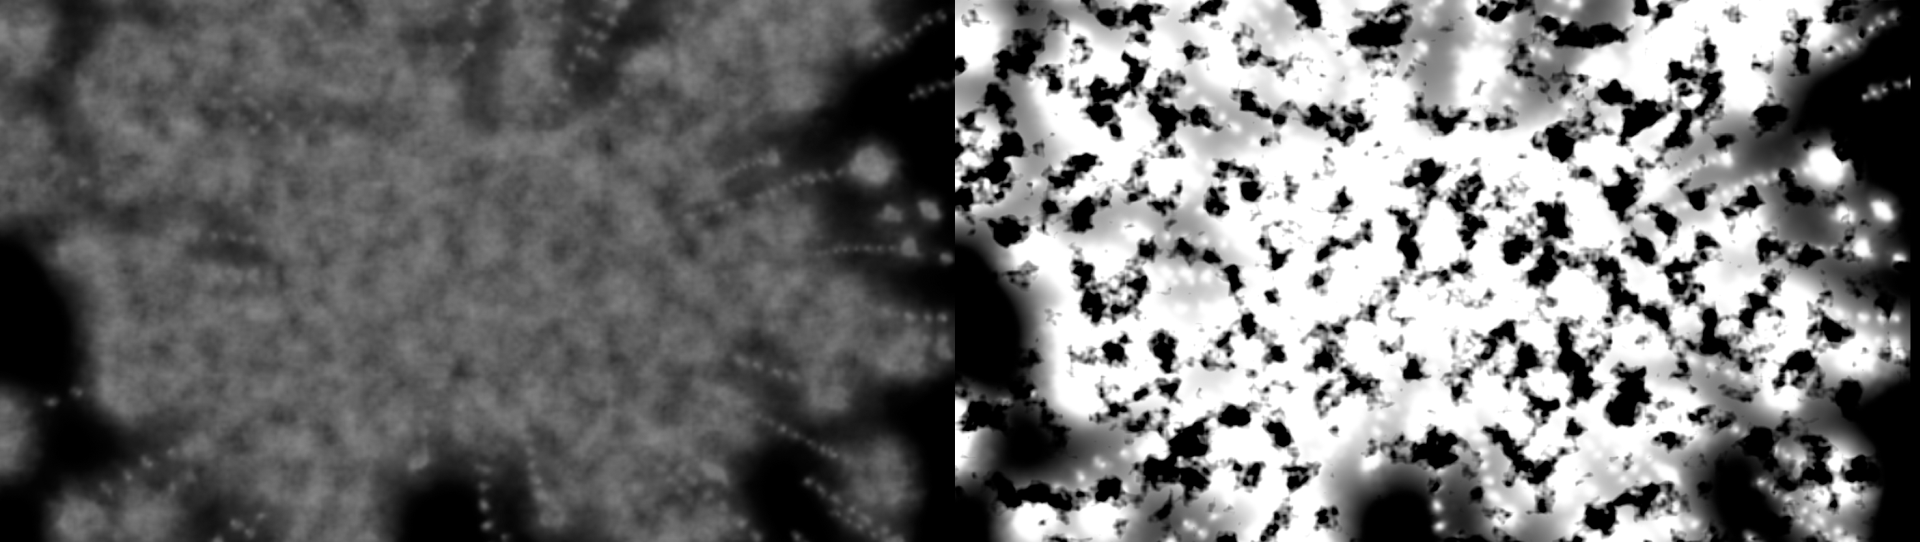
- Matte Scale defines the matte size. Higher values yield smaller, more granular features.
- Matte Aspect sets the matte's aspect ratio, with very small values giving features a vertical orientation and higher values yielding horizontal orientation.
- Matte Rotation rotates the matte around the center axis.
- Matte Scroll X and Y move the matte along the x and y axes, respectively.
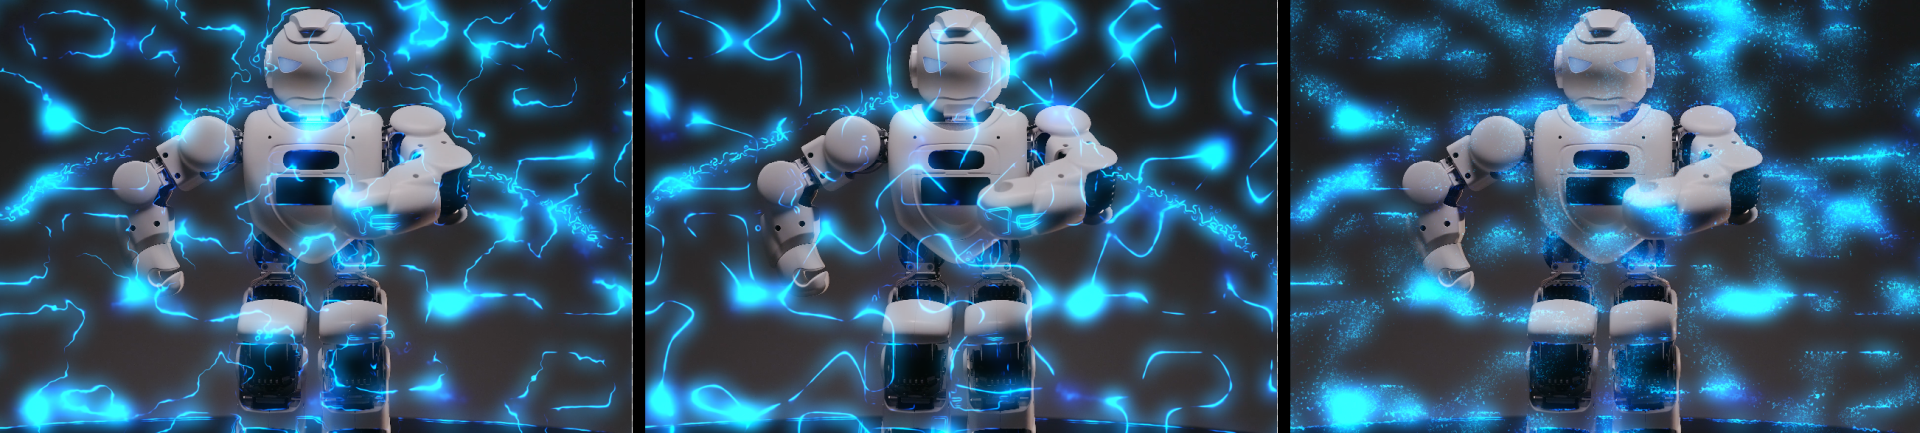
- View Matte Source toggles showing the matte area. In the triptych below, you can see the original image (left), with the View Matte Source box unchecked. With the box checked, you can now see the Matte Source control's Fractal Noise option (center) and its Image Contours option (right).

Mask Settings
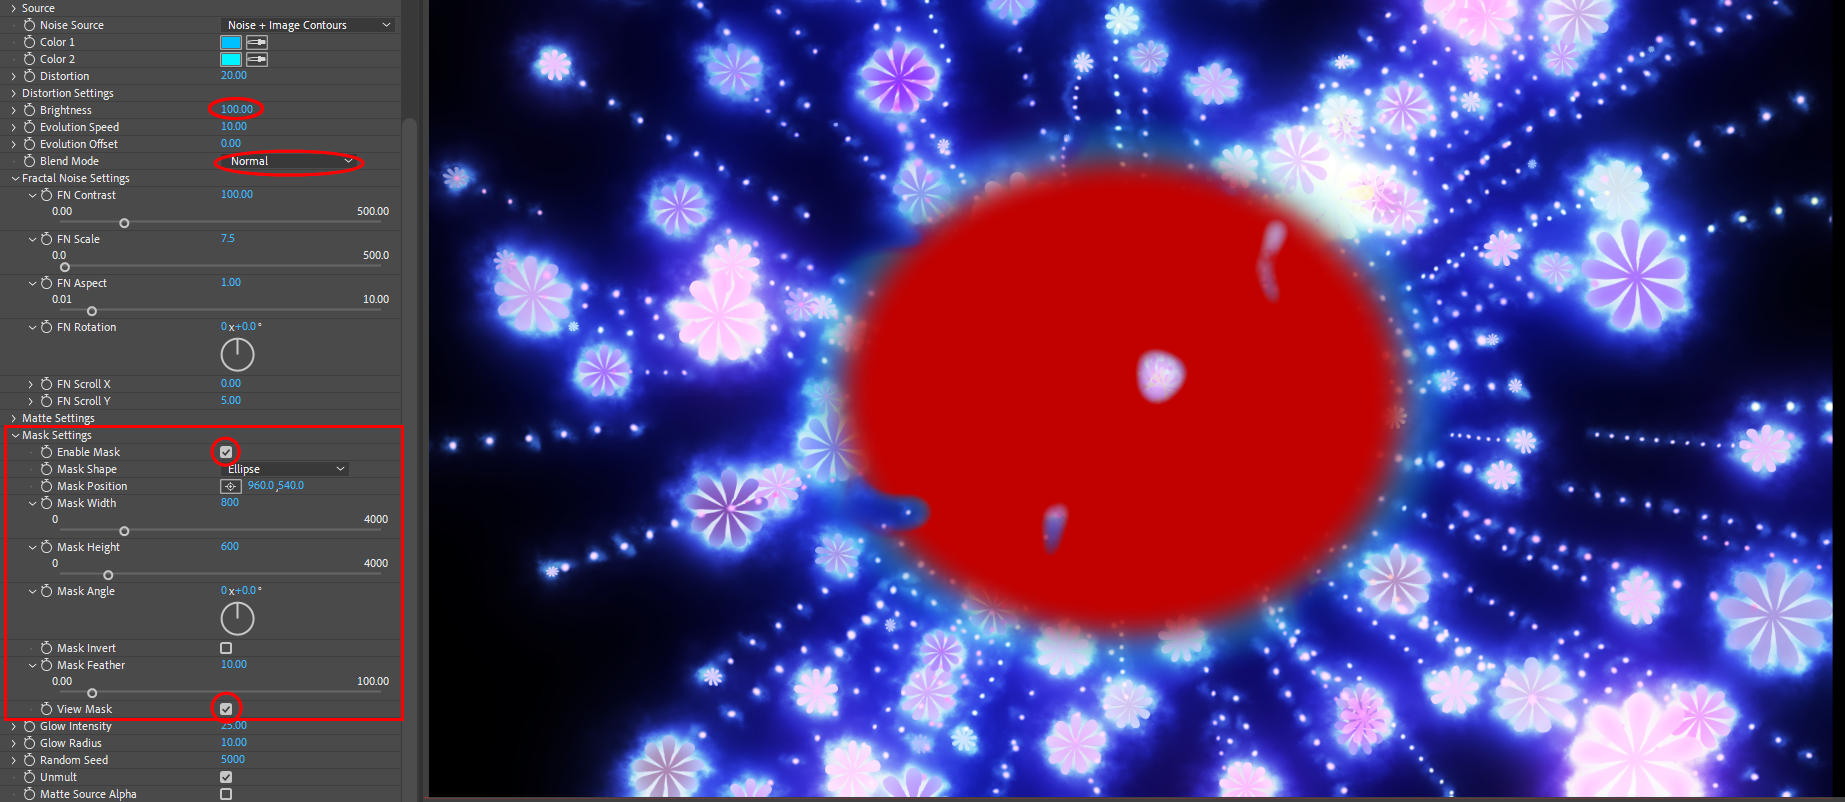
- Enable Mask toggles the optional mask on or off over the effect. Depending on your settings, it may be difficult to discern the mask's attributes, so we've made a few parameter tweaks in the above illustration to show more clearly what's going on. First off, make sure you have the View Mask box (see below) enabled. Electrify defaults to the Screen option in Blend Mode; changing this to Normal makes a world of difference for mask visibility. We also changed Brightness to 100, just to clearly define the mask shape. Once you have the mask shape, position, and dimensions as you like, feel free to revert these "visualization" settings back to their former or other values.
- Mask Shape sets whether the mask is a rectangle or an ellipse.
- Mask Position moves the mask position along the x and y axes using cross-hair or numerical controls.
- Mask Width and Height scale the mask respectively along the x and y axes.
- Mask Angle sets the mask's rotation angle.
- Mask Invert switches the blur to occur outside the selected mask shape instead of inside when checked “On.”
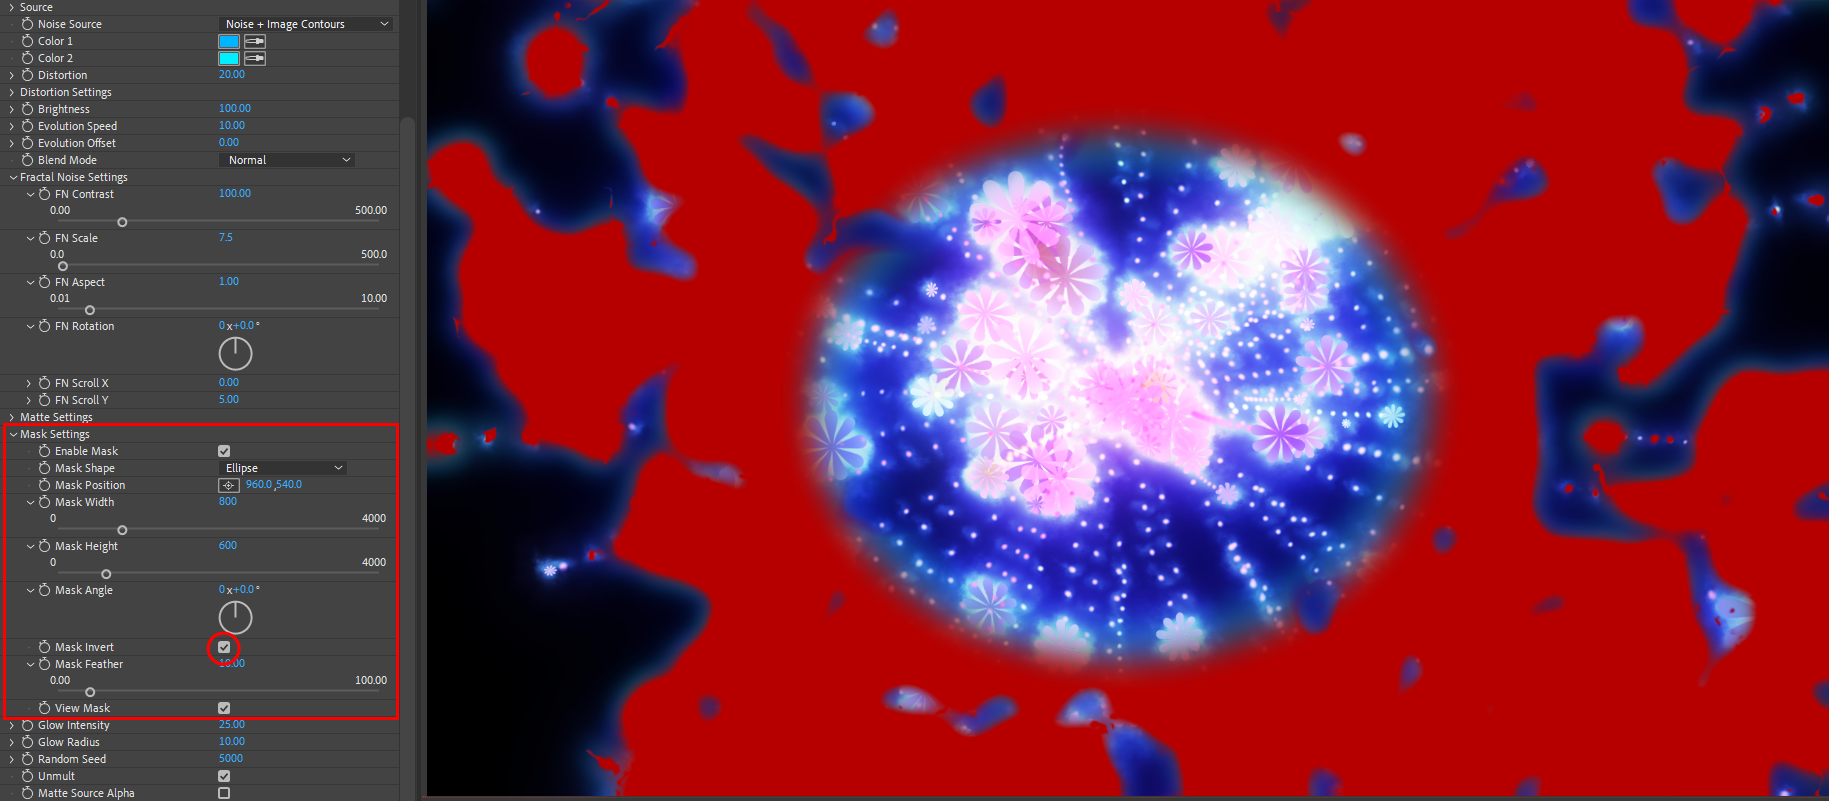
- Mask Feather increases mask edge translucency along a gradient. The Feather direction will pull the transparent gradient toward the mask's center if turned down toward -100 or out toward the edges if turned up to 100.
- View Mask toggles showing the mask area.
Remaining Controls
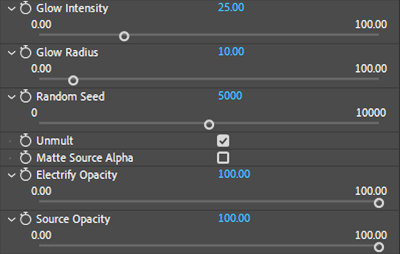
Glow Intensity increases the glow's brightness, reducing its opacity and giving it a more solid, neon-like effect.
Glow Radius expands or shrinks the glow from highlight areas. Lower values (5, shown at left below) concentrate the glow. Higher values (90, right) make the glow more diffuse.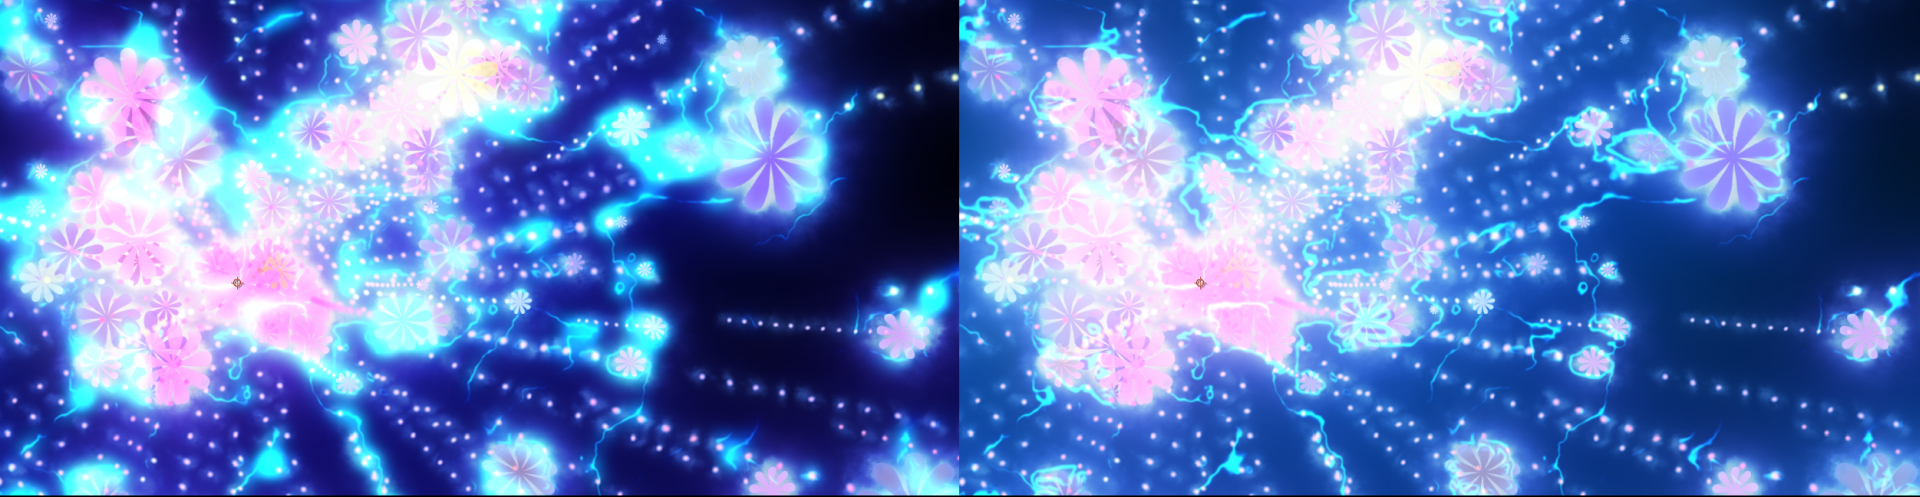
Random Seed adjusts the randomness formula used throughout the effect. This is useful for discerning one similar effect from another or seeing other variance options.
Unmult detects the layer's black areas and turns them into a transparent alpha channel.
Matte Source Alpha toggles whether the matte is applied to the source alpha channel (if applicable).
Electrify Opacity adjusts the Electrify effect's transparency.
Source Opacity sets the transparency of the footage onto which the effect is applied.