
Universe
COMPOUND BLUR

Blurs pixels based on the luminance values of another layer. Note: Compound Blur is not supported in Avid Media Composer.
Getting Started in a Timeline



- Add video layers in the timeline for the blur luminance source and the image to be blurred.
- Apply uni.Compound Blur on the layer you want to be distorted.
- Use Blur Layer to choose the video layer that you want to guide the luminance blur.
Getting Started in a Compositor


- Apply uni.Compound Blur on the layer you want to be distorted.
- Use Blur Layer to choose the video layer that you want to guide the luminance blur.
Presets
Compound Blur provides five presets via the blue Open Dashboard... button or the Choose a Preset... button below it. You can also find these along with another four presets in the Blur Channel(s) pull-down menu.
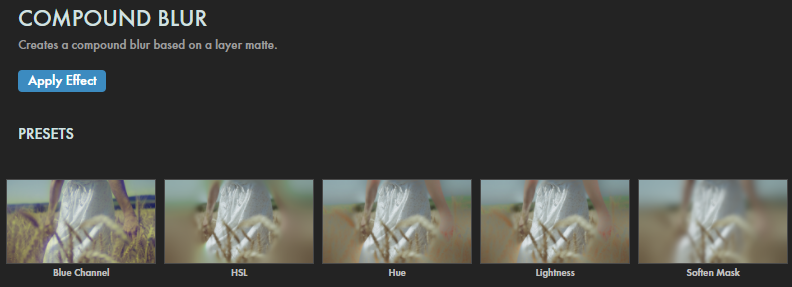
As with all other Universe tools, you can modify or create a Compound Blur look and then save it under its own name by pressing the Save Preset... button.
Modify the Effect
- Adjust Maximum Blur Size to increase the blur's intensity and influence from the center point. Starting from the Lightness preset, the series below shows values of 15 (left), 50 (center), and 500 (right).

- The Blur Channel(s) drop-down menu selects which image channel you'd like the blur to affect.
- RGB selects all color channels. Alternatively, restrict the blur to a single color channel selecting the Red, Green, or Blue options.
- Alpha allows the blur to affect only your image's alpha channel.
- HSL affects the image's hue, saturation, and lightness together. Isolate just one of these by choosing Hue, Saturation, or Lightness.
-
The
Mask Controls
group confines Compound Blur to a specific area within the layer.
- Soften Mask adds a blur to the mask's edges.
- To utilize only one aspect of that chosen layer, use the Mask Channel drop-down to pick your selected layer's Luma, Red, Green, Blue, or Alpha channel.
- Check the Show Mask box to see the areas within the layer your mask is affecting.
- Invert: When checked, this control switches the blur to occur outside the selected mask shape instead of inside. The default is off.
- Mask Scale scales your mask up or down in the range from 0% to 800% across the image.
- Mask Position allows you to move the position of the mask along the x and y axes using the crosshair or numerical controls.
-
The
Quality
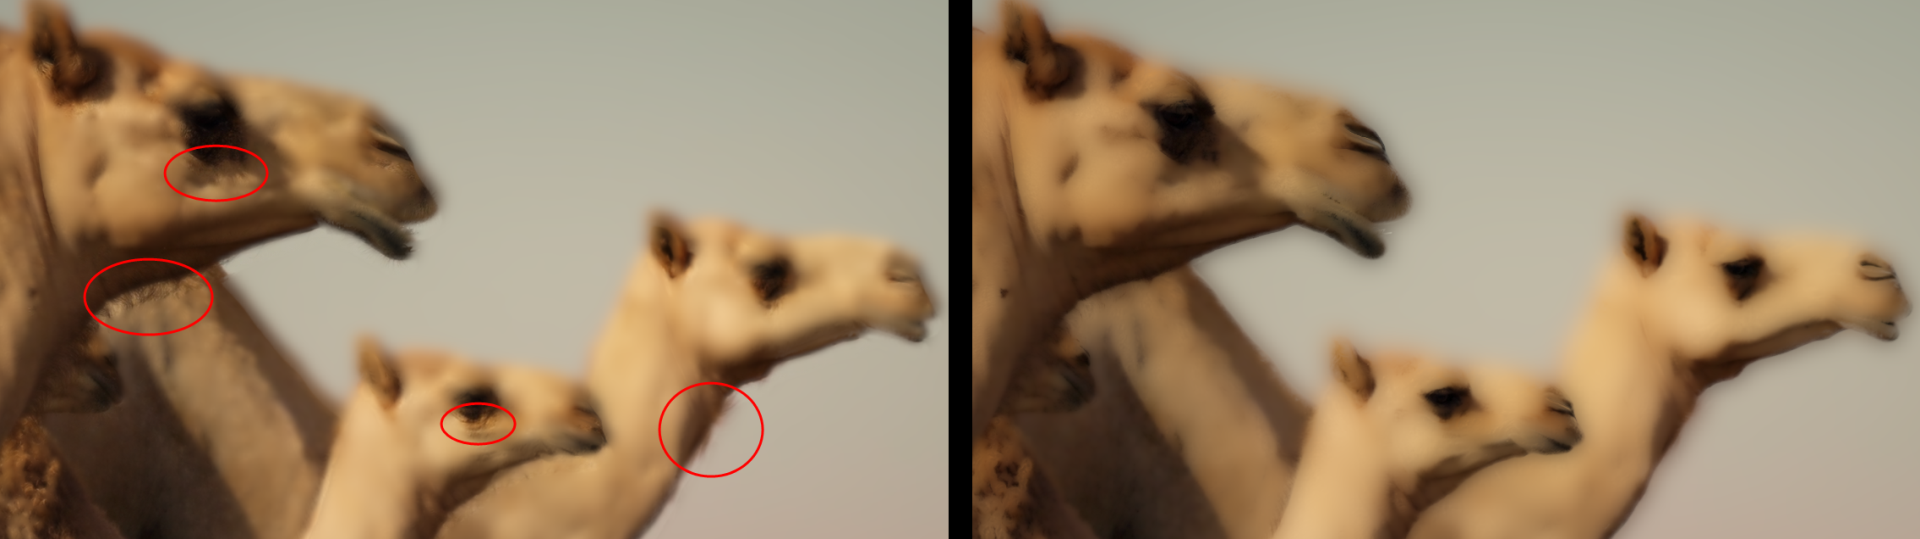
control spreads the blur gradient more evenly across the image, blending the edges and colors more as values increase.
Below we highlight some details with a setting of 2 (left) that largely vanish (for better or worse) at 10 (right).
- Enabling the Apply Linear checkbox will convert the gamma from standard video gamma (Rec 709 assumed) to linear gamma (1.0). This results in less smearing of blacks, and highlights tend to be preserved.
- The Blend Mode drop-down offers blending modes used to composite the blurred result over the original input image.
- The Opacity Slider can make the blur effect more subtle and transparent over the original image.
Want More?
Compound Blur is even better when used in conjunction with other Universe tools. Watch the following two-minute video to see what happens when we combine Compound Blur with Universe Texturize Motion and Gradient Ramp.