
Universe
SHAPE WIPE
Change from one footage source to the next using a modifiable shape of your choosing. Shape Wipe allows you to control its position, direction, stroke, and other properties to get the look just how you want.
Presets
Use the Shape Wipe presets to streamline your form-centric A-B transitions. Simply keyframe the Mix duration (see below) and tune to taste! Find these presets via the blue Open Dashboard... button or the Choose a Preset... button below it.
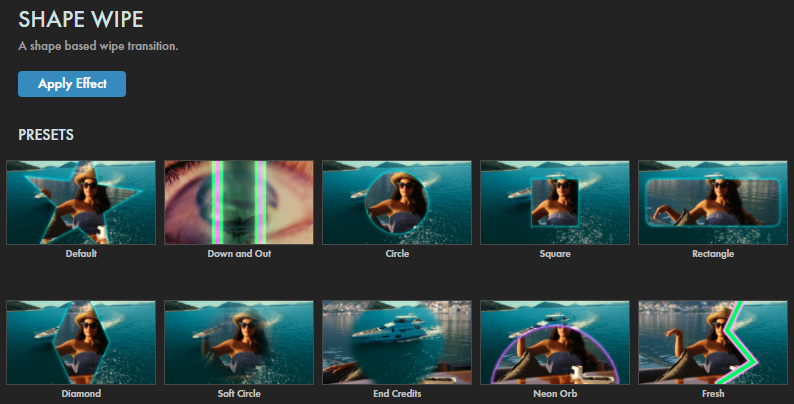
As with all other Universe tools, you can modify or create a Shape Wipe look and then save it under its own name by pressing the Save Preset... button.
Getting Started in a Timeline




- Drag the transition over your edit in the timeline, placing it at the end or beginning. Alternatively, you can place it between two successive clips.
- Modify the Duration of the transition either by entering a length in the field or dragging directly in the timeline.
- You can choose the Alignment (Center at Cut, Start at Cut, End at Cut, or Custom Start) either by positioning the transition in the timeline or by choosing from the Alignment drop-down in some host applications.
Getting Started in a Compositor


- Apply the transition to the layer from which you want to transition.
- Choose the footage layer you would like to transition to in the Transition B drop-down menu. (Note for Motion users: Drag the footage layer up to the Transition B box.)
- Animate your transition using the Mix slider from 0% to 100 percent. Set a keyframe for 0% where the transition should start, then set another at 100% for the end.
Modify the Transition
- Shape contains a drop-down list of four basic shapes which determine the wipe shape: Star, Circle, Square, and Rectangle.
-
Shape Options
contains a list of controls that are dependent on which shape you selected from the
Shape
menu (above).
-
Rectangle Width
controls the width of the
Rectangle shape.
Below, you can see how we raised this value considerably.
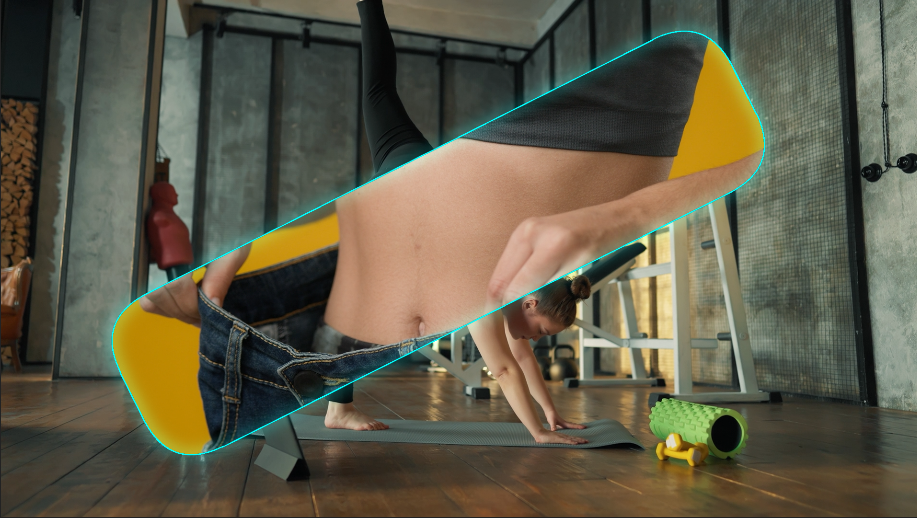
- Rectangle Rounding rounds the corners of both the Rectangle and Square shapes. In the above image, we maxed out this value at 100.
-
Star Inset
adjusts the concavity of the
Star
shape's inner corners.
In the following examples, we show 0.4 (the minimum, left), 0.6, and 1.0 (the maximum, right). Note how this last value turns our five-pointed star into a decahedron.

- Star Points determines the number of points in the Star shape.
-
Rectangle Width
controls the width of the
Rectangle shape.
Below, you can see how we raised this value considerably.
-
Position
controls where the shape is located during the transition.
Compare the animation at this page's top, which leaves Position fixed in one place, with the below keyframing of Position from left to right across the scene.
- Start Angle controls the shape's angle at the transition's beginning.
-
Rotation Speed
dictates how quickly or slowly the shape rotates during the transition.
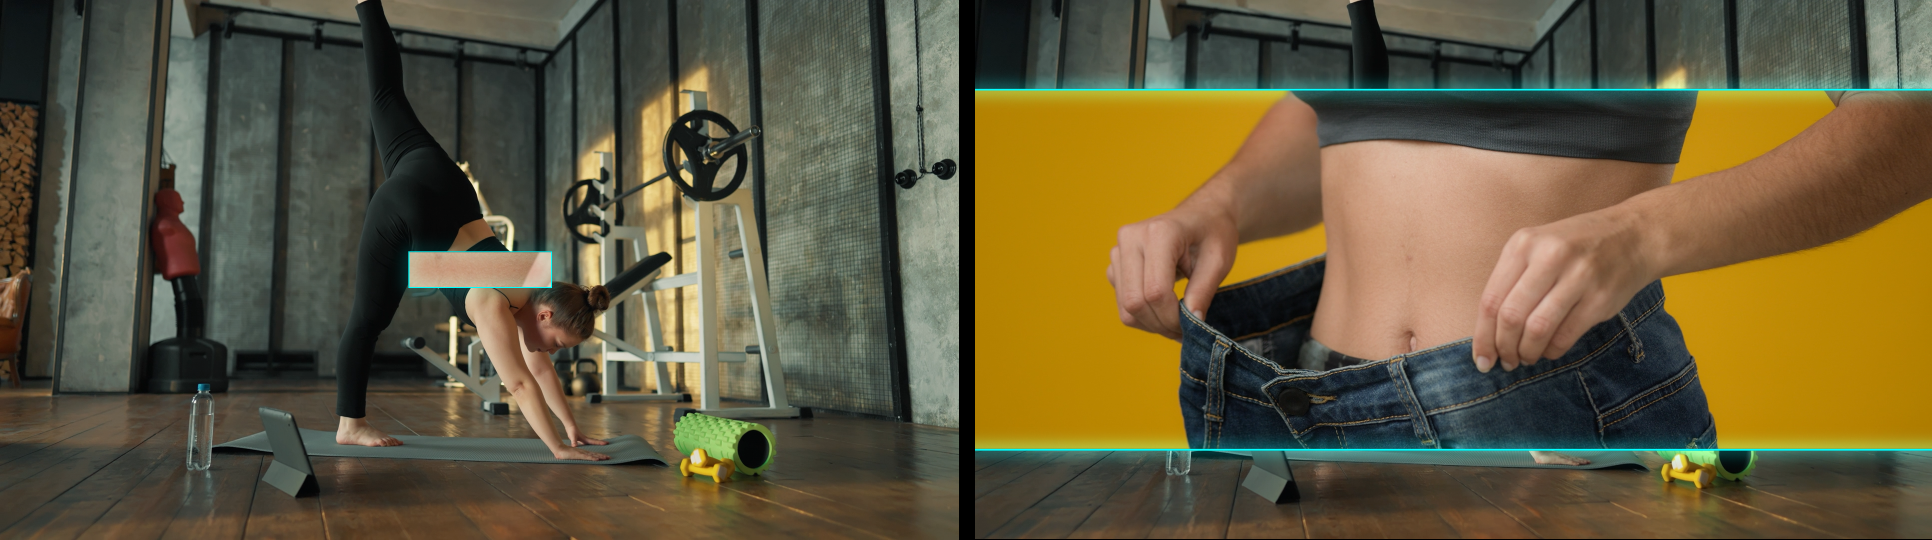
In the following comparison, we set Position at the comp's center, then we set Start Angle and Rotation Speed both to zero. Thus, only the size (Mix) animates over the transition time, allowing the B-clip shape to grow from nothing to filling the whole screen.
-
Reverse
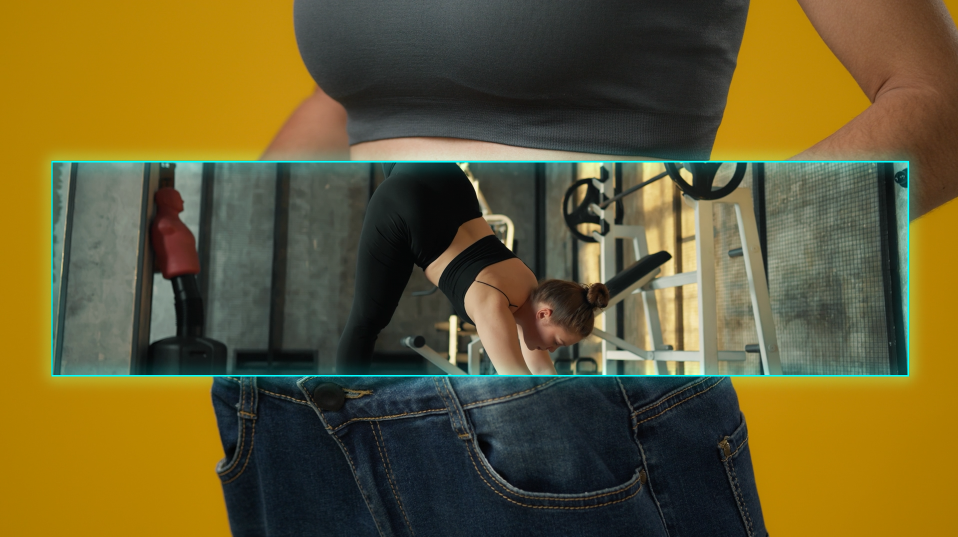
will swap the footage inside the shape with footage outside the shape.
Note that the Mix flow also reverses, so your shape size shrinks over the transition.
- Edge Softness controls the blur along shape edges.
- Enable Stroke enables a line bordering the shape.
-
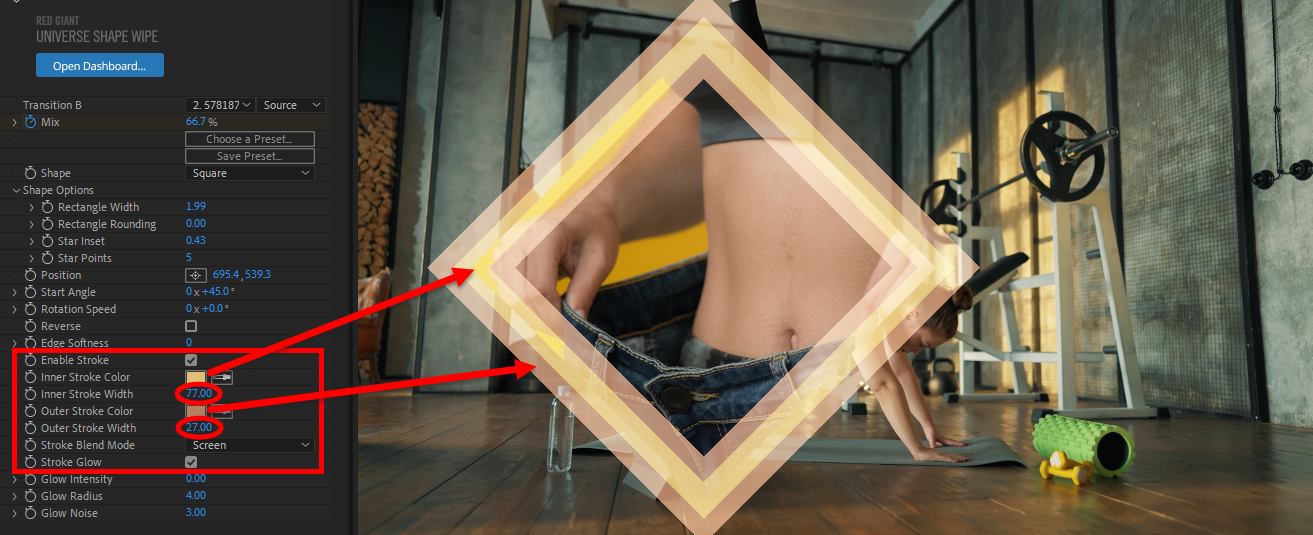
Inner Stroke Color
and
Outer Stroke Color
adjusts the color of the Inner
and Outer Strokes, respectively.
The arrows in the image below show which is which.
-
Inner Stroke Width
and
Outer Stroke Width
control the width of the Inner and Outer Strokes, respectively.
- Note that the only difference between the Inner and Outer Strokes is that the Inner Stroke occupies the center of the Outer Stroke. Increasing the Inner Stroke Width "pushes" the outer stroke further outward.
-
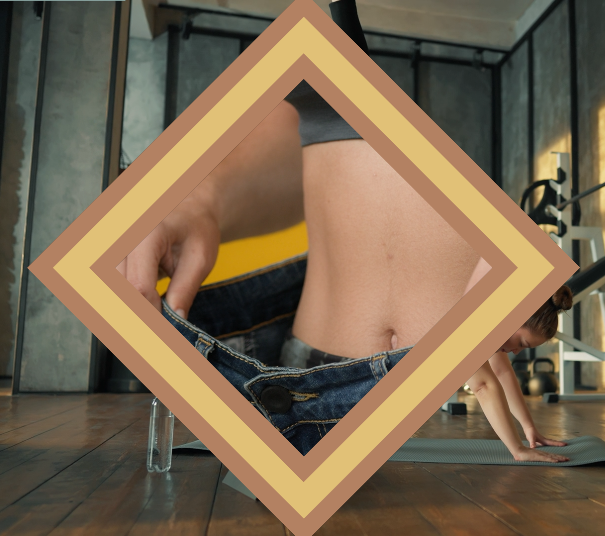
Stroke Blend Mode
adjusts how the stroke is composited over the source footage, with standard blend modes available from the drop-down menu.
In the above image, we used Screen to achieve that light translucency. Compare that to the Normal blend shown here.
- Stroke Glow toggles an optional glow emanating from both the Inner and Outer Stroke.
- Glow Intensity adjusts the brightness boost of the Inner Stroke Glow.
-
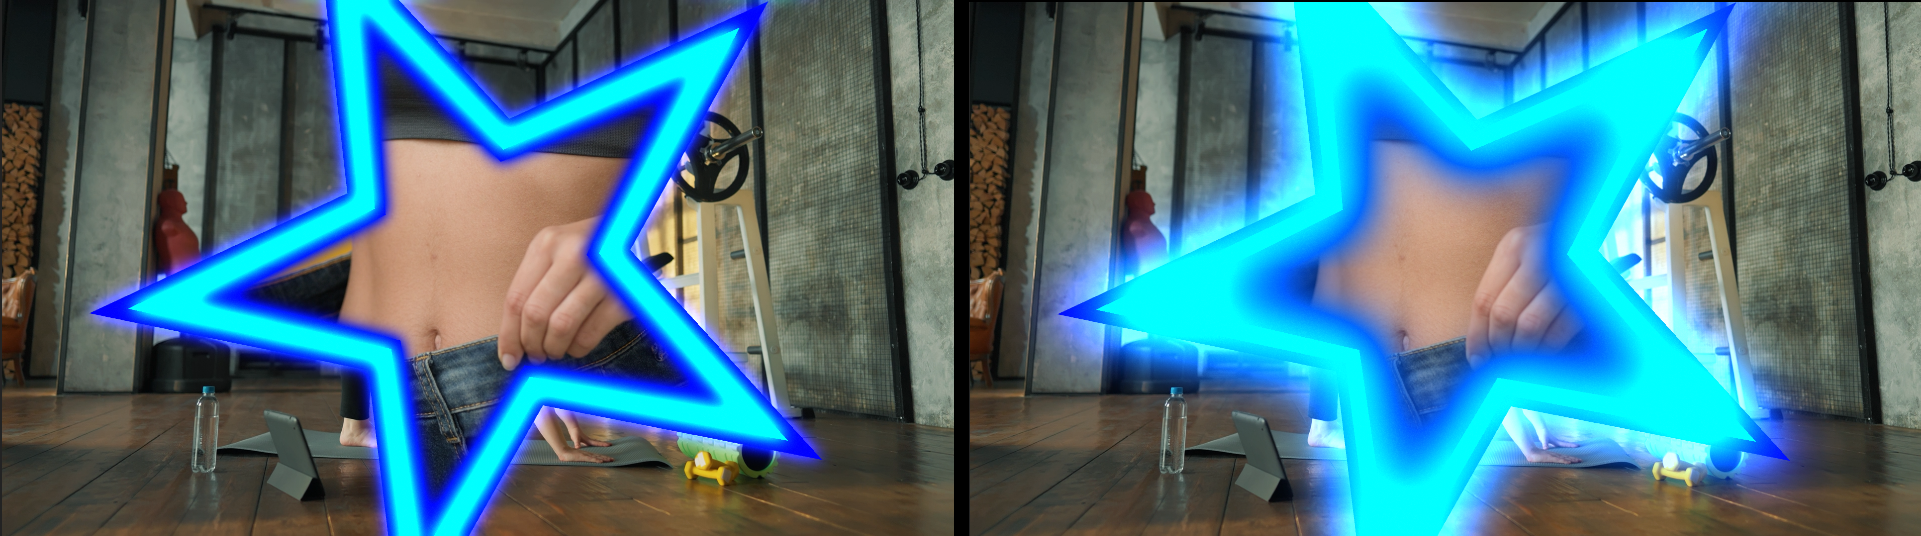
Glow Radius
controls how far the
Stroke Glow
tapers out from the
Inner
and
Outer Stroke.
In the following comparison, we show the default values of Glow Intensity: 2 and Glow Radius: 4 (left) versus Glow Intensity: 4 and Glow Radius: 16 (right).
- Glow Noise adds or removes optional fuzziness to the Stroke Glow.