
Universe
TYPE ON
Quickly create computer terminal-style type reveals. Includes tons of options for customizations and randomizations.
Presets & Video Walk-Through
Type On provides several versatile starting points for your simulated computer text output. Find our presets via the blue Open Dashboard... button or the Choose a Preset... button below it.
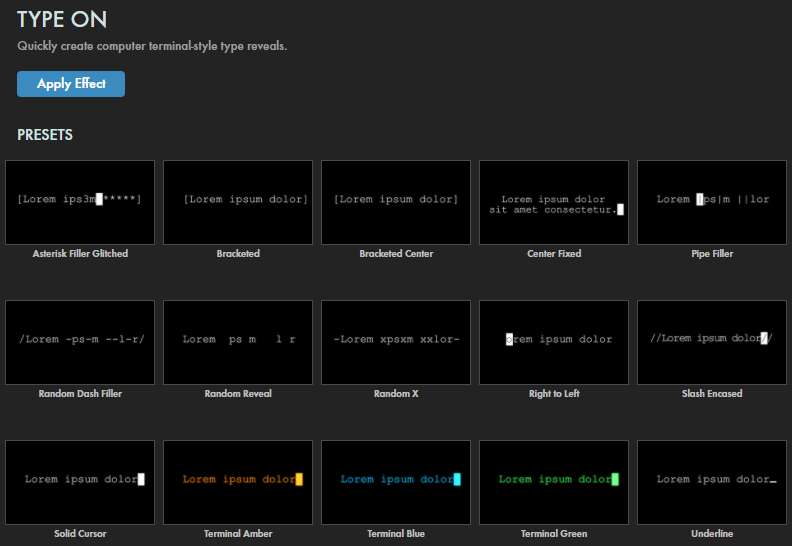
As with all other Universe tools, you can modify or create a Type On look and then save it under its own name by pressing the Save Preset... button.
If you'd like a visual overview of Type On before diving into this guide, we recommend giving our Cineversity tutorial a watch.
Modify the Effect
Note:
When applying a text effect directly to footage, head into the Blend Mode
control at the bottom of the ECP parameters and switch it from its default of None to Normal.
-
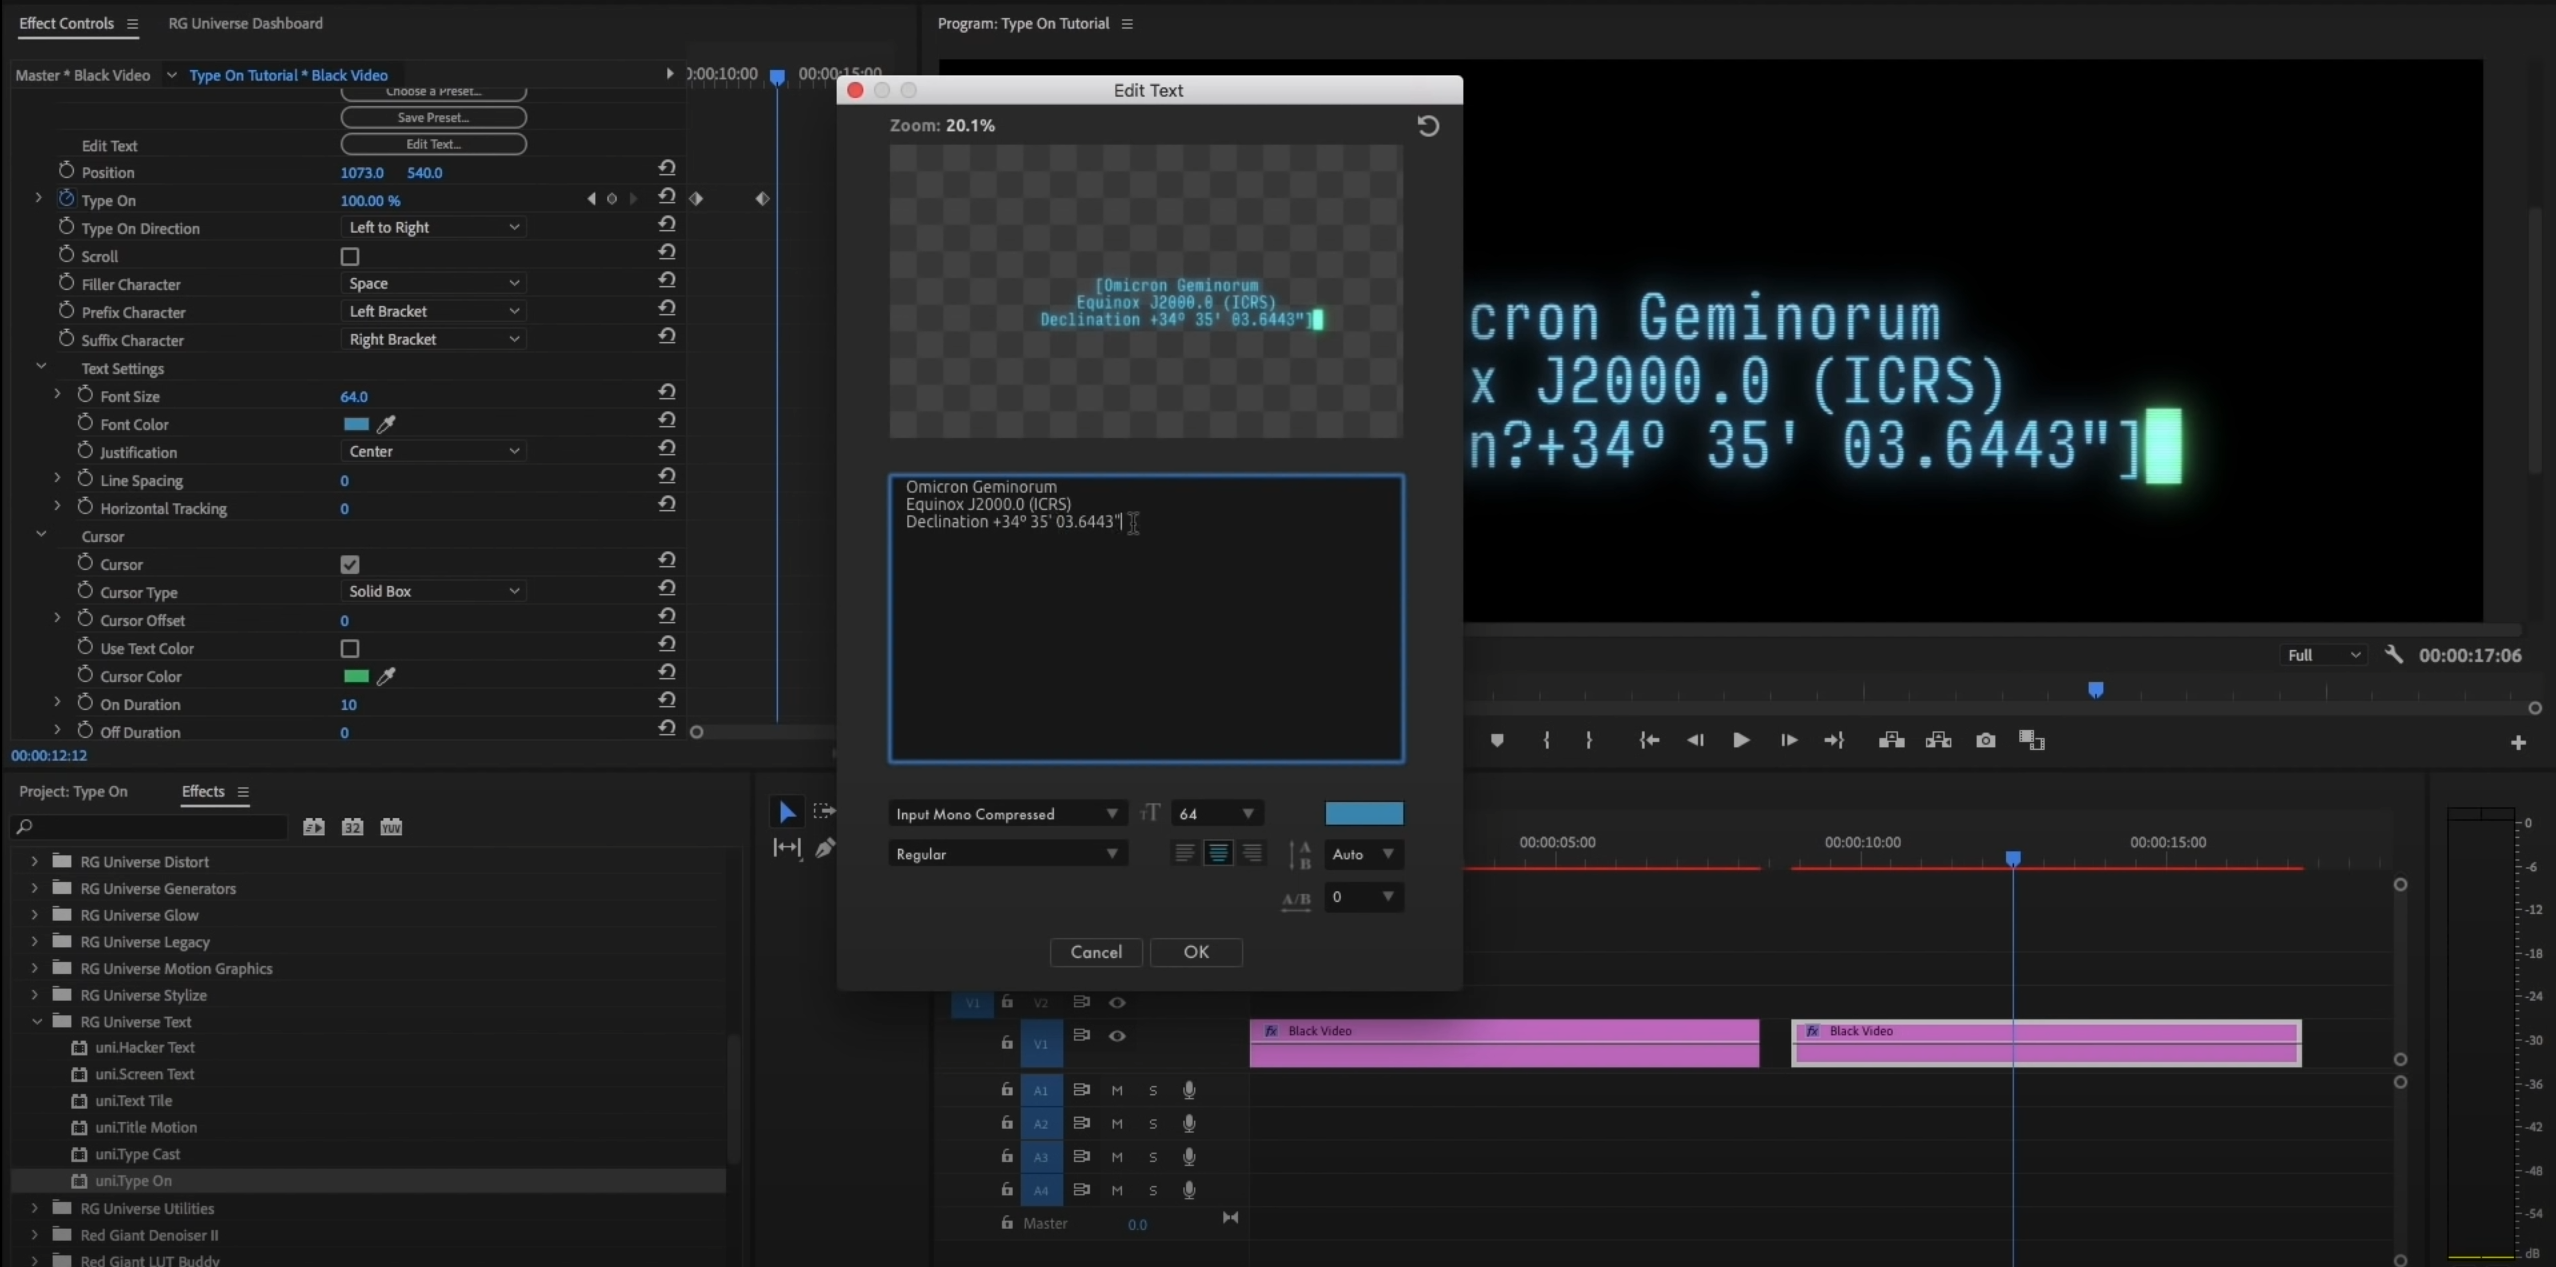
Edit Text...
, located below the Save Preset... button, opens a Type On Edit Text window offering a range of controls to adjust your text's font and other attributes. Some of the controls in this window repeat controls in the Text Setting subgroup (see below) for your convenience.
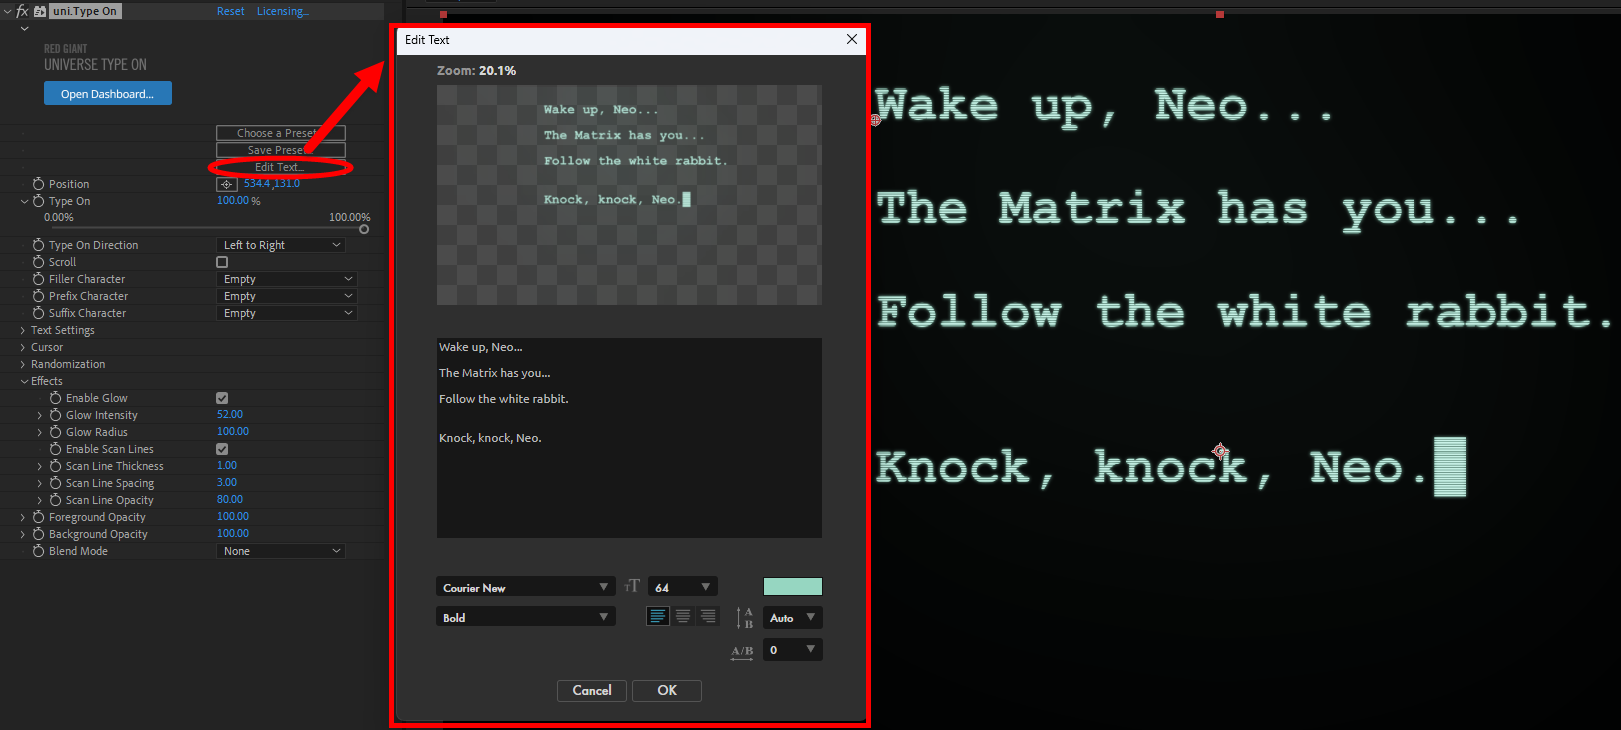
- Position controls the coordinates that define where within the frame your text will appear.
-
Type On
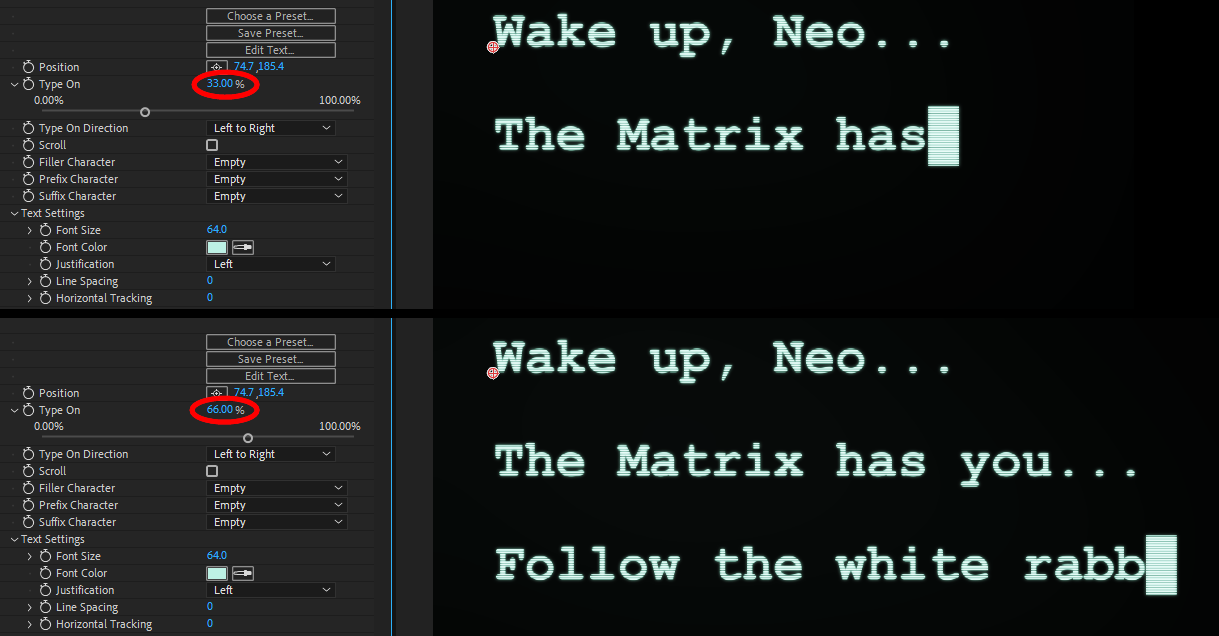
adjusts the animation's progress on a scale from 0% (start) to 100% (end).
To illustrate, we show values of 33% and 66% below.
-
Type On Direction
controls where the text types on from (Left to Right, Random, or Right to Left). Given our example above, selecting Right to Left and a Type On value of 20.00% shows only the cursor followed by "ock, Neo." on the screen. Selecting Random and keyframing values from 0% to 100% looks like this:
- Scroll toggles whether the text moves upward when one line completes and the next one begins. Keep in mind that this control governs how text position shifts upward relative to the Position control point, not whether text appears line after line.
-
Filler Character
determines what character appears in any space unoccupied by text.
We modified the above Random example by using the U.S. dollar symbol as our Filler Character.
- Prefix Character sets which character (from a pull-down menu of 26 options) appears as a precedent to the text. Note that if your text has multiple lines, the prefix character will only appear before the first line.
- Suffix Character sets which character (from the same list as the Prefix Character) appears following the text's last line.
-
Text Settings
- Font Size adjusts how large or small the text appears.
- Font Color defines the text color.
- Justification determines if the text is aligned to the Left, Center, or Right relative to the Position control point..
- Line Spacing adjusts the spacing between lines.
- Horizontal Tracking controls the spacing between characters.
-
Cursor
-
Cursor
toggles whether a cursor appears where text is typed.
-
Cursor Type
contains a preset list of options that define the cursor's appearance.
The four options are Solid Box, Inverted Square (shown below), Underline, and Vertical Bar.

- Cursor Offset adjusts where in relation to the type-on effect the cursor appears.
- Use Text Color toggles whether the cursor is the same color as the text.
- Cursor Color defines the cursor's color if Use Text Color is disabled (see above).
- On Duration and Off Duration controls the rate the cursor blinks on and off.
-
Cursor
toggles whether a cursor appears where text is typed.
-
Randomization
- Random Direction sets the direction in which any random characters appear: Random, Left to Right, or Right to Left.
-
Random Characters
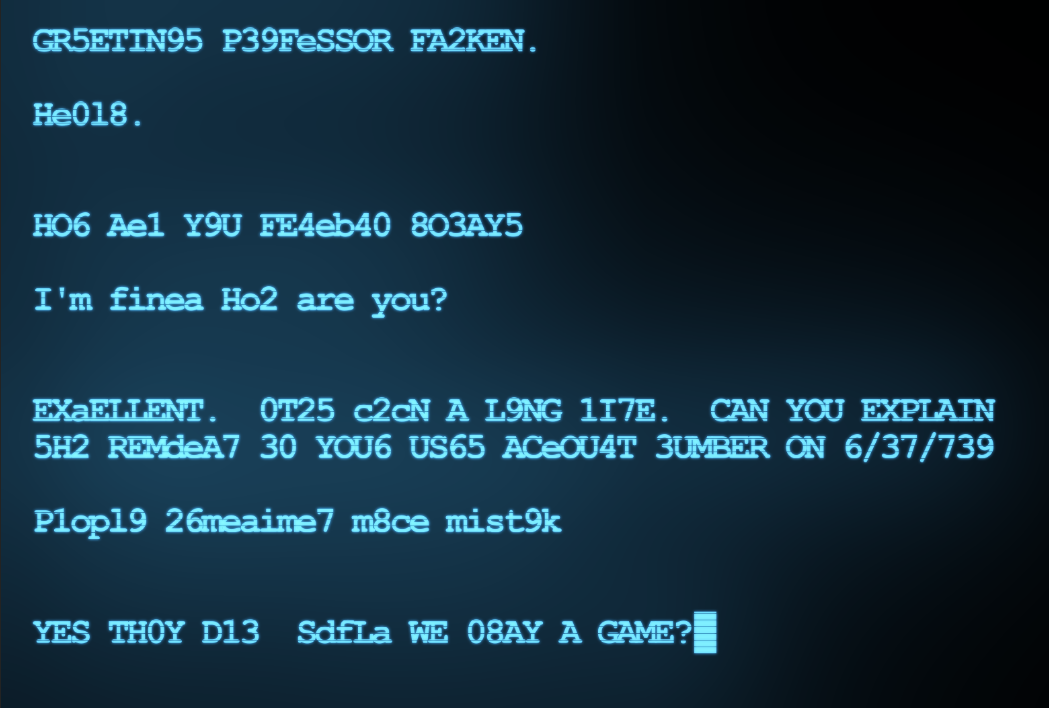
controls the percentage of characters in the text that are overwritten with randomly-generated characters.
The following example shows a value of 40.
- Manual Scroll scrolls through more randomizations occurring on any of the Random Characters appearing in the text.
- Scroll Rate controls the speed at which randomized text changes from one character to the next.
-
Link Type On / Scroll
toggles whether the randomized text only changes when the text is typed on.
Following is an example of when this checkbox is enabled.
- Preserve Spaces toggles whether spaces in your text inputs are included in the randomized text animations.
- Random Seed adjusts the formula, and subsequently the variations, used to create the random effect. Change the seed to make sure you get different randomized outputs.
- Random Characters contains toggles that define which types of characters appear within the randomizations as well as what Number Limit or Character Limit (A-Z) is in place.
-
Effects
-
Enable Glow
toggles a glow around the text with control over the brightness
(Glow Intensity)
and expansion
(Glow Radius)
of the glow.
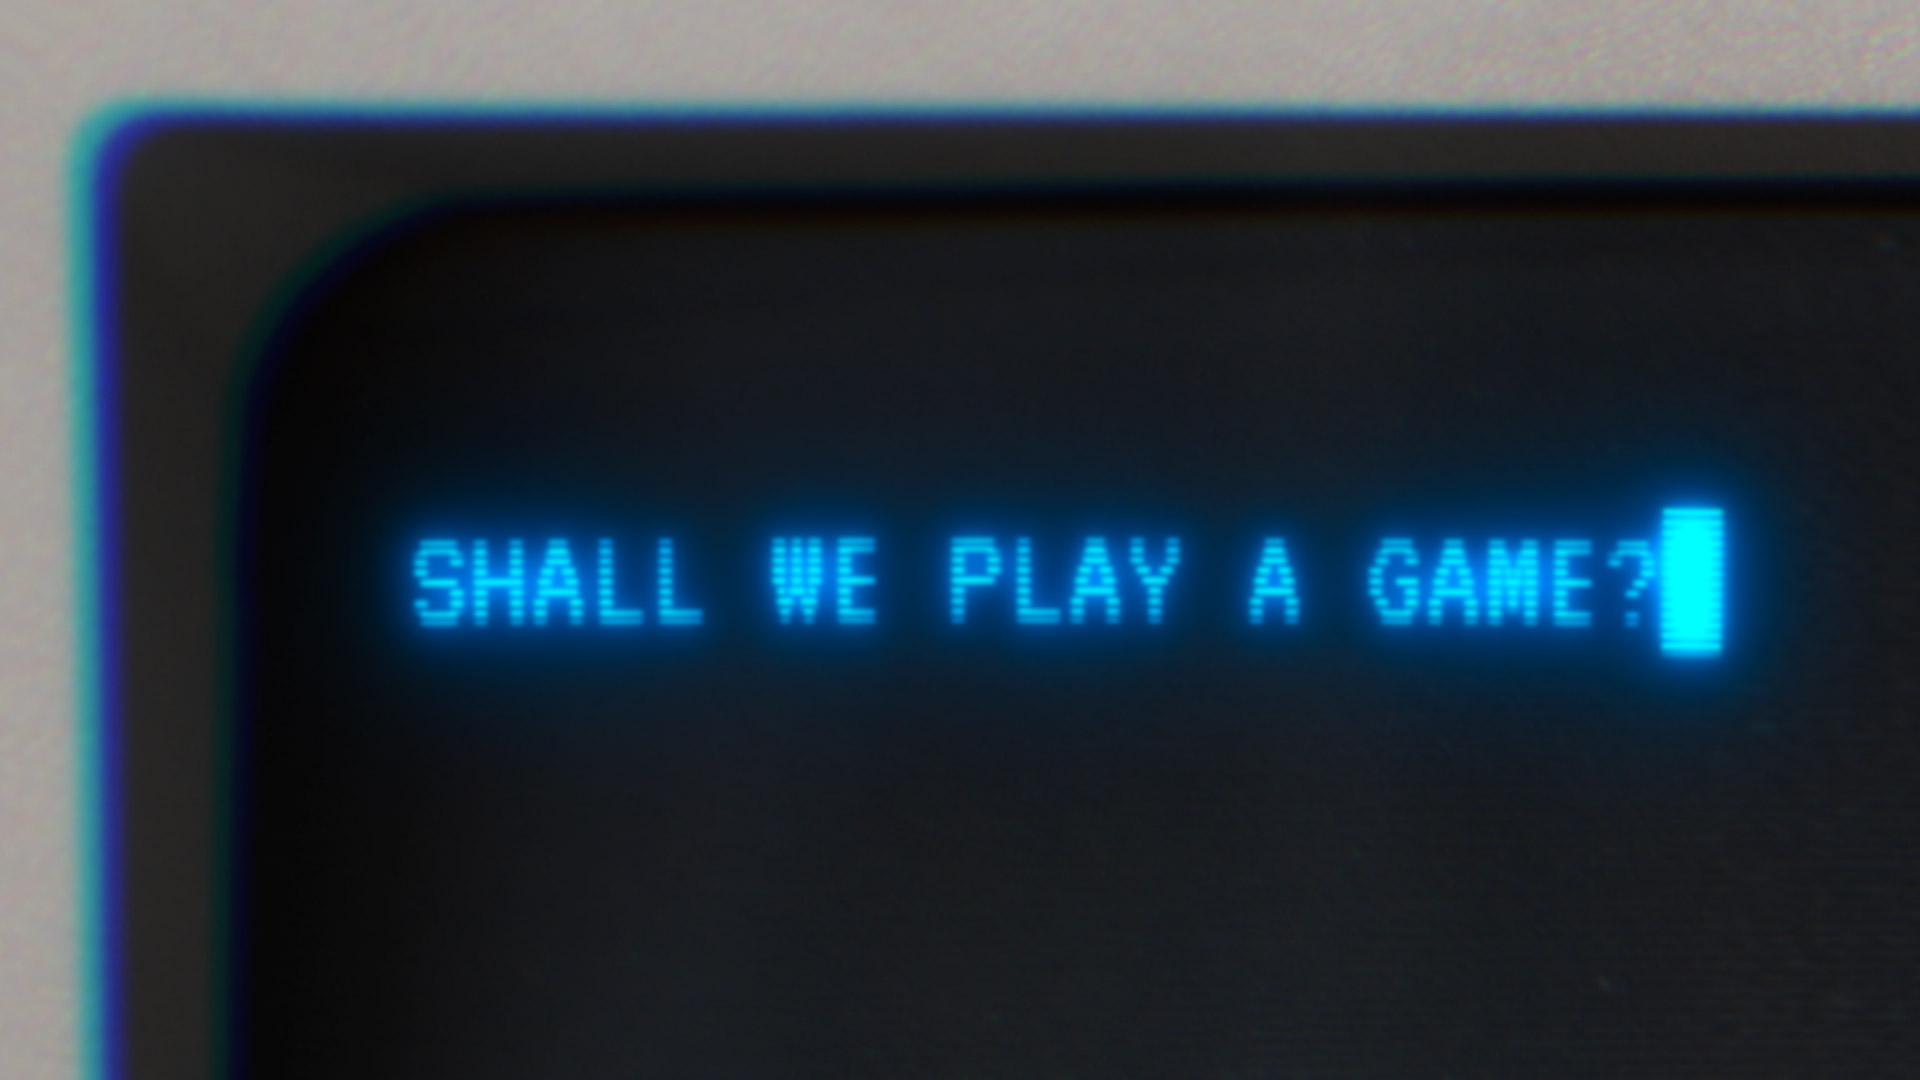
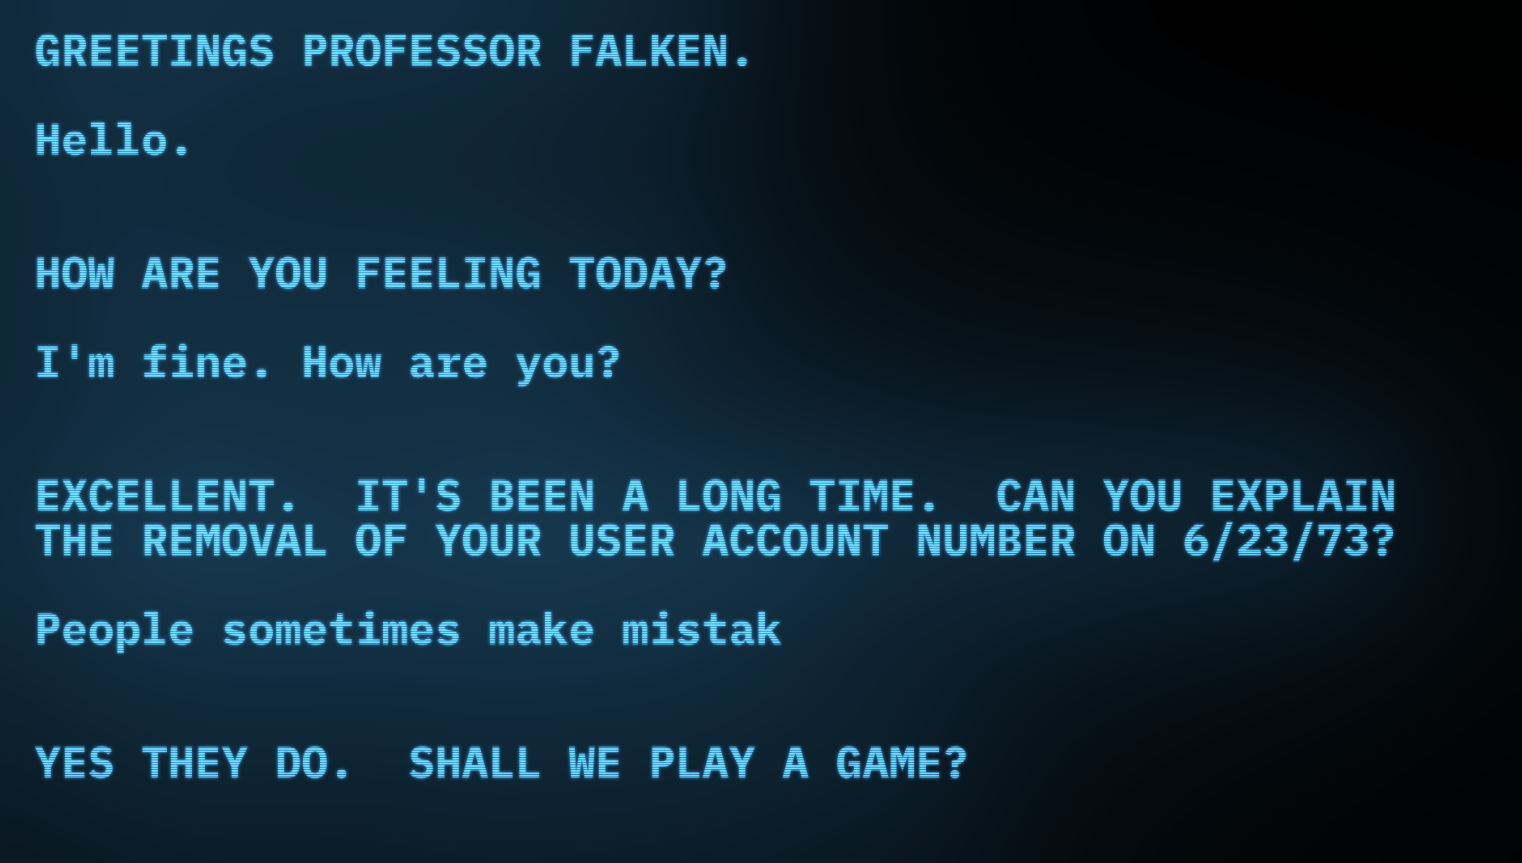
You may find that increasing Glow Radius (and thereby potentially reducing contrast between characters and their immediate background) makes character brightness appear somewhat less intense. Still, it's a cool effect. If you go back and watch a clip of the classic movie War Games, there's an obvious glow around the blue on-screen terminal text. A Glow Radius of 60 gets us just about to that same look.
-
Enable Scan Lines
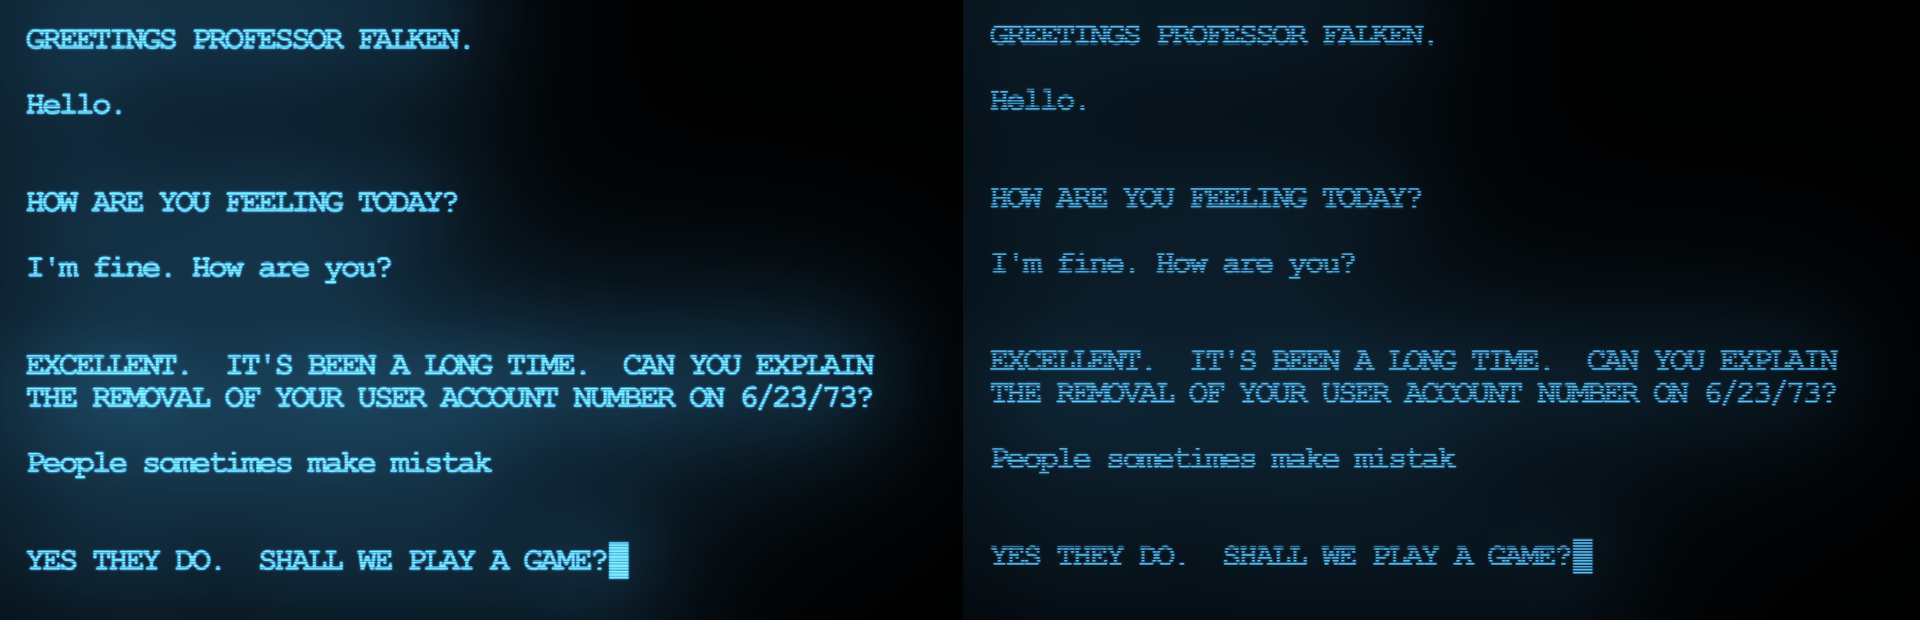
toggles an array of lines that overlay the text, complete with adjustable line width (Scan Line Thickness), spacing between lines
(Scan Line Spacing), and opacity (Scan Line Opacity). Keep in mind that scan lines can reduce text brightness. Compare the following images. Both have Scan Line Spacing at 5, but the left image has a Scan Line Thickness of 0.5 while the right image uses 3.0.
-
Enable Glow
toggles a glow around the text with control over the brightness
(Glow Intensity)
and expansion
(Glow Radius)
of the glow.
You may find that increasing Glow Radius (and thereby potentially reducing contrast between characters and their immediate background) makes character brightness appear somewhat less intense. Still, it's a cool effect. If you go back and watch a clip of the classic movie War Games, there's an obvious glow around the blue on-screen terminal text. A Glow Radius of 60 gets us just about to that same look.
- Foreground Opacity and Background Opacity control the opacity of the text (Foreground Opacity) or the layer the text has been applied to (Background Opacity), complete with the standard Blend Mode options that adjust how the text overlay interacts with the background. None is the default, with Normal overlaying the text on top of whatever background to which it's been applied.