
Unwrapping lays the surface of a 3D model flat in UV space, so a texture can map onto it. In ZBrush's UV Editor, you create the UVs, cut them into islands where you need seams, and pack the islands into the UV space.
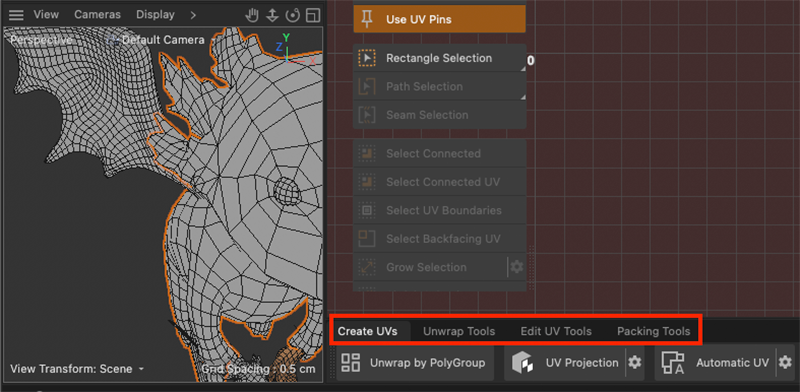
Four tabs at the bottom of the default UV Editor layout follow that workflow order: Create UVs, Unwrap Tools, Edit UV Tools, and Packing Tools. You won't need every tab for every model, but in many cases you'll work through them from left to right.
To learn how to open the UV Editor and send your UVs back to ZBrush, see UV Editor.
Tool Options
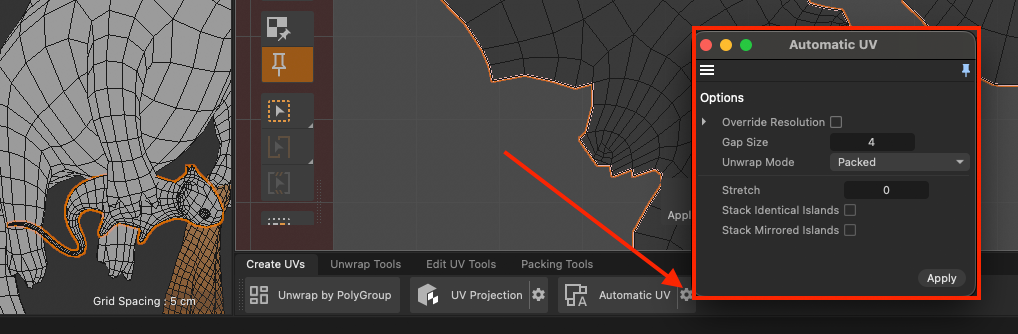
Many tools have a gear icon next to their button. Click the gear to open the tool's options, change the settings, and click Apply. In the tables on this page, the Options column links to each tool's options in the Cinema 4D documentation (where appropriate).
Creating UVs
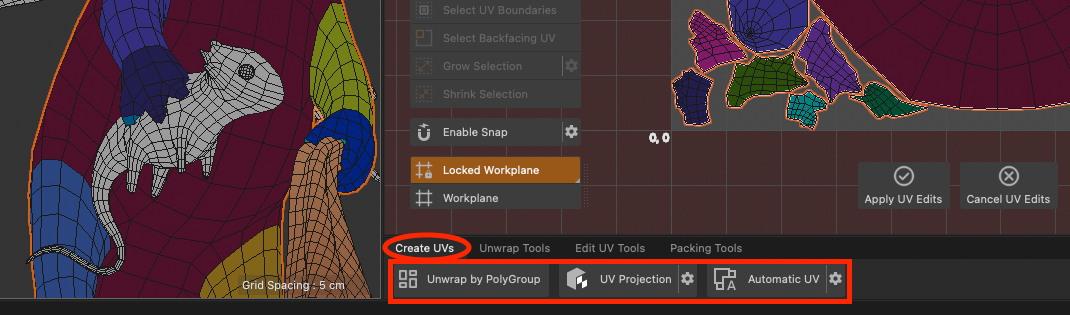
Each button on the Create UVs tab makes a full set of UVs for the selected mesh with one click.
| Tool | What it does | In the Cinema 4D documentation | Options |
|---|---|---|---|
| Unwrap by PolyGroup | Unwraps and packs the mesh based on its ZBrush Polygroups. Unique to ZBrush, see below. | — | — |
| UV Projection | Creates new UVs from one of several standard projection types. | UV Projection | Options |
| Automatic UV | Unwraps and packs the selected mesh automatically. | Automatic UV | Options |
For details on these tool options, see their respective pages (linked in the table above) in the Cinema 4D documentation, which contain ample descriptions and examples.
Unwrap by PolyGroup
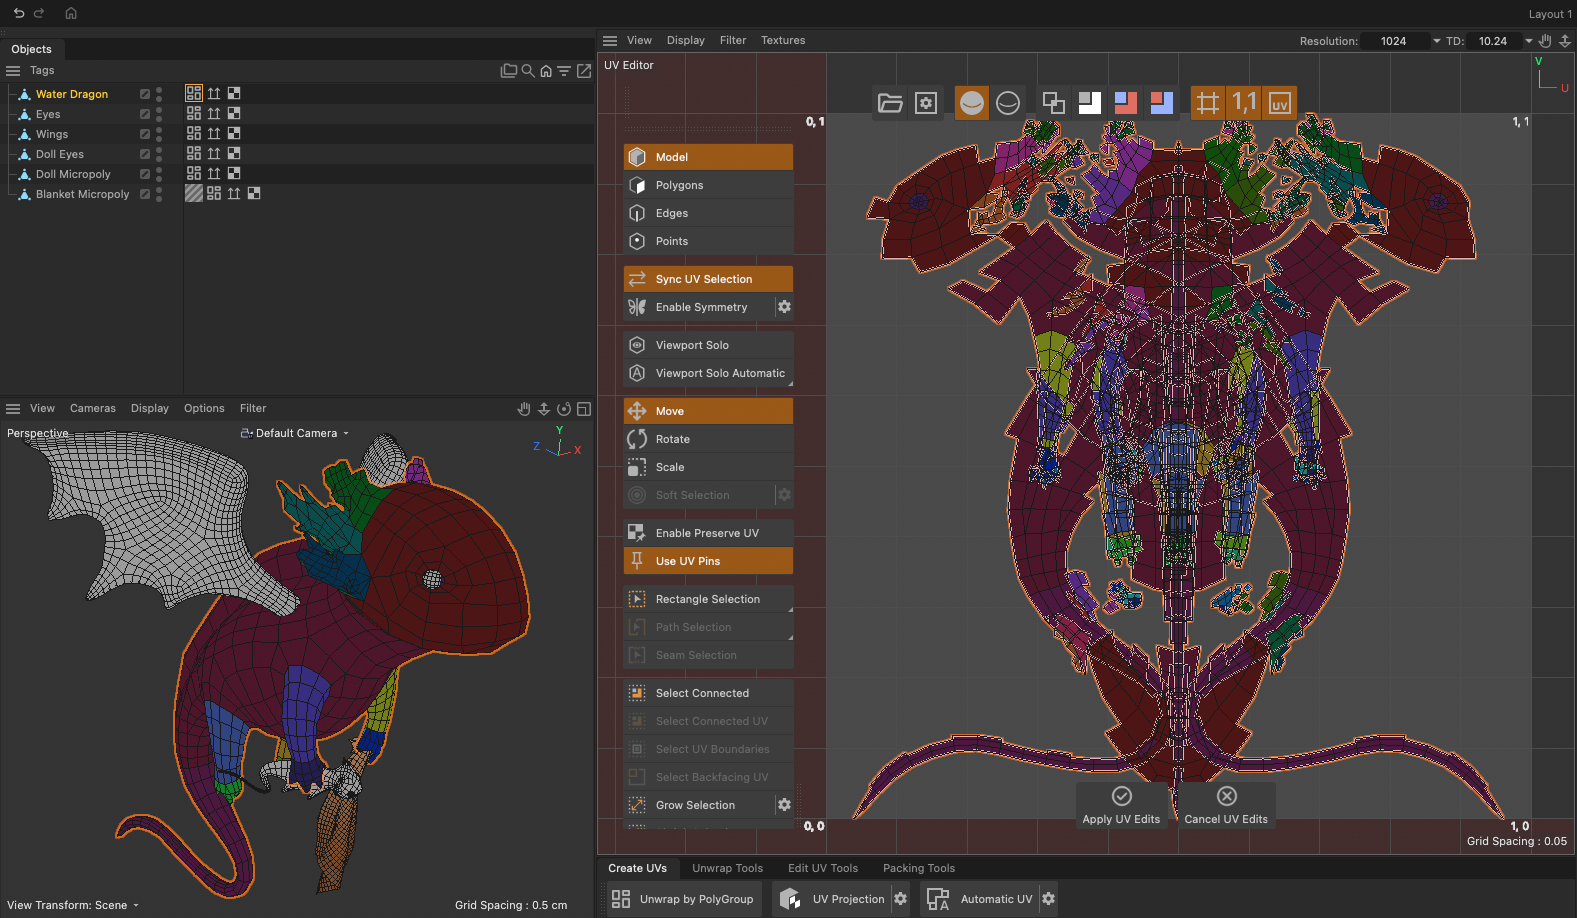
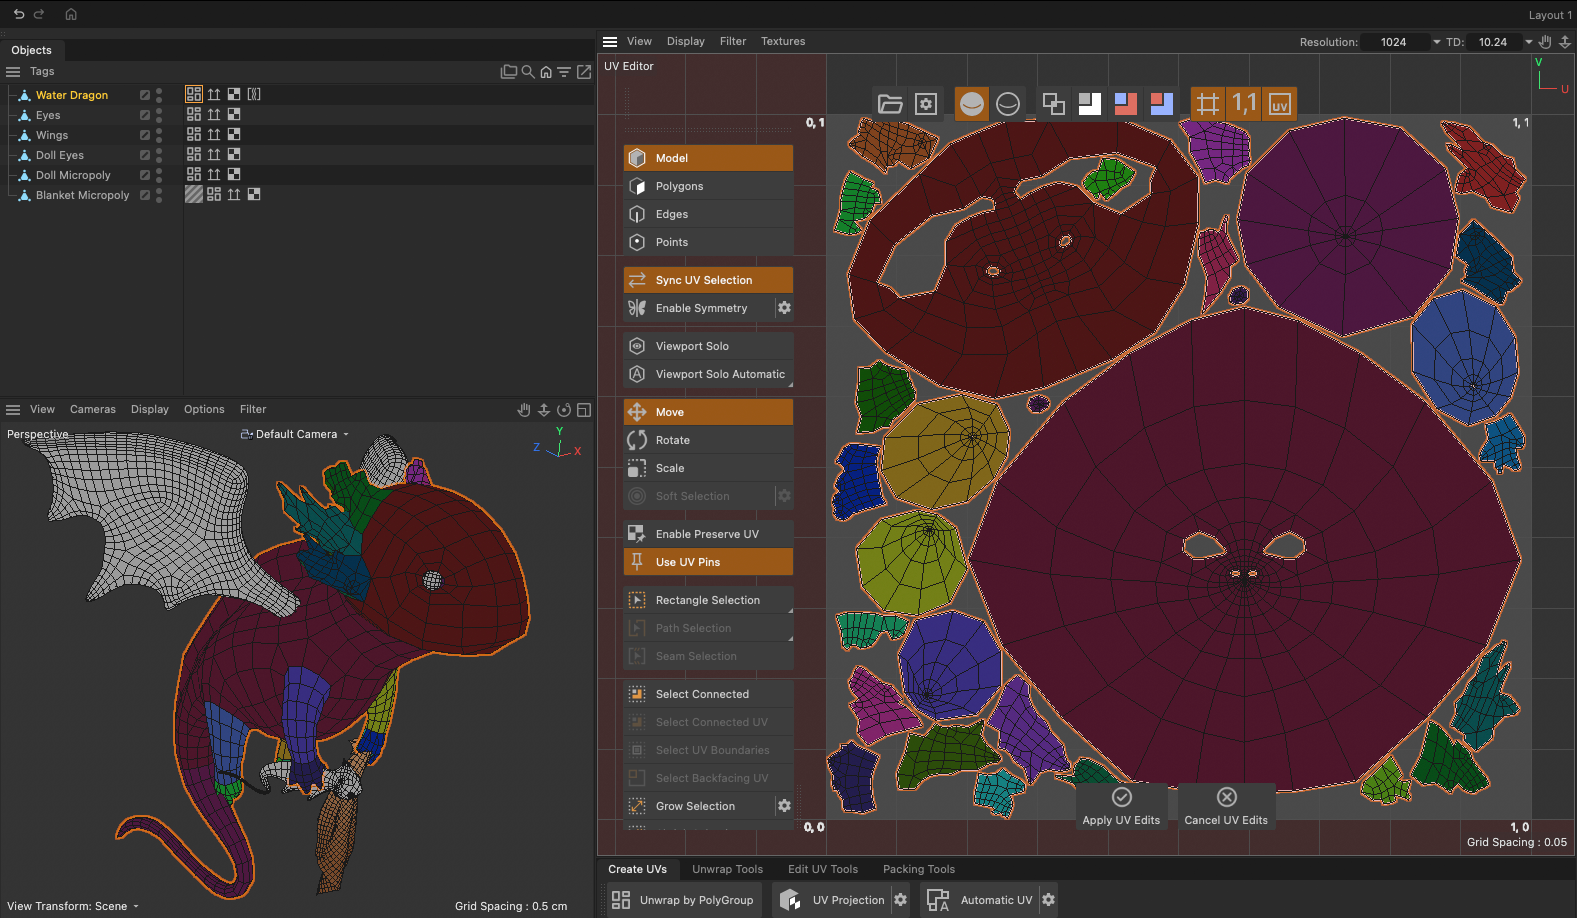
Unwrap by PolyGroup unwraps a mesh based on the Polygroups you made in ZBrush, then packs the result. The Polygroups decide how the mesh splits, so you can plan your UV islands while you model.
Unwrap by PolyGroup works differently from a UV Master unwrap with Polygroups turned on. Unwrap by PolyGroup places seams only where Polygroups meet and never adds any others. UV Master also starts from the Polygroup borders, but it adds extra seams wherever it calculates they will reduce stretching.
- In ZBrush, make one Polygroup for each UV island you want.
- Send the SubTool to the UV Editor.
- Click the SubTool's Polygroup tag in the Objects panel to see its Polygroups.
- Open the Create UVs tab and click Unwrap by PolyGroup.
Each Polygroup becomes its own UV island, and the islands come out already packed in the UV space.
Unwrap by PolyGroup also adds an Edge Selection tag named Seams to the SubTool in the Objects panel. To learn how selection tags work, see Edge Selection Tag in the Cinema 4D documentation.
Tip!
You can keep a separate set of Polygroups just for UV work, next to the ones you use for posing or masking. Selection Sets store as many Polygroup layouts as you like, so you can switch to your UV Polygroups before you open the UV Editor.
UV Projection
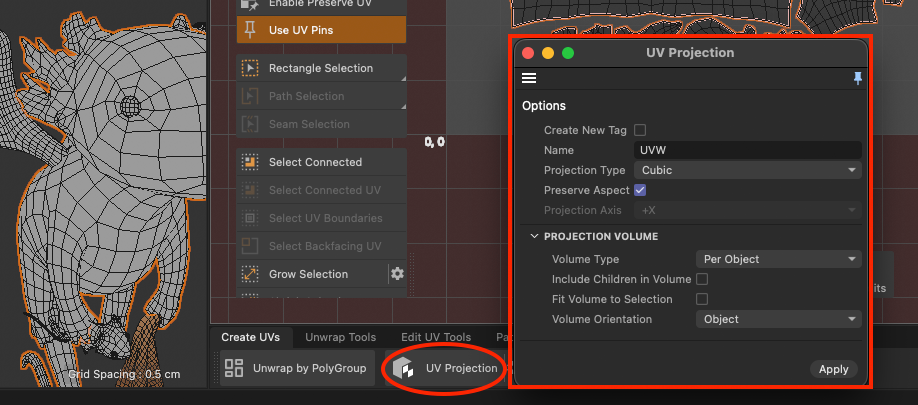
UV Projection makes new UVs by projecting the mesh onto a standard shape you choose with Projection Type. The default shape is Cubic.
- Select the SubTool in the editor's Objects panel.
- Open the Create UVs tab.
- Click the gear next to UV Projection.
- Choose a Projection Type, and change any other options you need.
- Click Apply.
The UV Projection options are Create New Tag, Name, Projection Type, Preserve Aspect, and Projection Axis. Open the Projection Volume group for Volume Type, Include Children in Volume, Fit Volume to Selection, and Volume Orientation. For descriptions of each option, with examples, see UV Projection: Options in the Cinema 4D documentation.
Automatic UV
Automatic UV unwraps the mesh and packs the islands in one pass, and it tries to keep parts of the UV layout from overlapping. Use it when you want working UVs quickly and don't need to choose where the seams go.
To create UVs automatically:
- Select the SubTool in the editor's Objects panel.
- Open the Create UVs tab.
- Click Automatic UV.
To change the settings first, click the gear next to Automatic UV, change the options, and click Apply. The options are Override Resolution, Gap Size, and Unwrap Mode, plus a few that depend on the mode. Unwrap Mode is set to Packed by default, which shows Stretch, Stack Identical Islands, and Stack Mirrored Islands. Cubic shows Preserve Orientation, Stretch to Fit, and Relaxation Steps instead, and Angle adds an Angle setting to those three. For descriptions of each option, with examples, see Automatic UV: Options in the Cinema 4D documentation.
Unwrap Tools
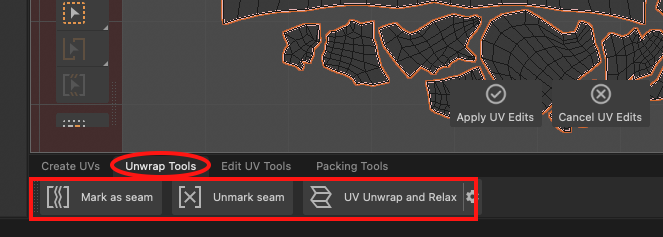
The Unwrap Tools tab works with seams. You mark the edges where the UVs should split, then unwrap along them.
| Tool | What it does | In the Cinema 4D documentation | Options |
|---|---|---|---|
| Mark as seam | Marks the selected edges, or the outline of selected polygons, as seams. | Mark as Seam | — |
| Unmark seam | Removes the seam from the selected edges. | The UV Editor and Its Tools | — |
| UV Unwrap and Relax | Unwraps the mesh and relaxes the UVs. | UV Unwrap and Relax | Options |
To unwrap along seams you choose:
- Press 3 to switch to Edges mode.
- Select the edges where you want the UVs to split.
- Click Mark as seam.
- Click UV Unwrap and Relax.
To remove a seam, select its edges and click Unmark seam.
Edit UV Tools
The Edit UV Tools tab contains tools for cutting, joining, and adjusting UVs. In a narrow window, the last few (Add UV Pins, Mirror Tile U, and Mirror Tile V) may sit past the right edge. Widen the panel to see them.

| Tool | What it does | In the Cinema 4D documentation | Options |
|---|---|---|---|
| Disconnect UVs | Splits the UVs along the selected edges (shortcut C). | Disconnect UVs | Options |
| Weld UVs | Reconnects separate UV points or edges. | Weld UV Points / Edges | — |
| Optimize UVs | Merges UV points that lie within a set distance of each other. | Optimize UV | Options |
| Brush | Adjusts UVs with a brush. | The UV Editor and Its Tools | — |
| Align UV Island | Aligns UV islands. Works in Points, Edges, or Polygons mode without a selection. | Align UV Island | — |
| UV Straighten | Straightens the path of the selected edges. | UV Straighten | Options |
| UV Rectangularize | Straightens selected four-sided polygons into rectangles. | UV Rectangularize | Options |
| Add UV Pins | Locks the selected UV points, edges, or polygons so other tools can't move them. | Add UV Pins | — |
| Mirror Tile U | Mirrors the U coordinates of the selected UVs with respect to the UV tile, or of the whole UV tile if nothing is selected. Select whole islands: polygons left out of the selection stay put and stretch. | Mirror Tile U | — |
| Mirror Tile V | Mirrors the V coordinates of the selected UVs with respect to the UV tile, or of the whole UV tile if nothing is selected. | Mirror Tile V | — |
Cutting UV Islands
A UV island is a group of connected UVs. You make islands by cutting the UVs along edges, and each cut becomes a seam on the model.
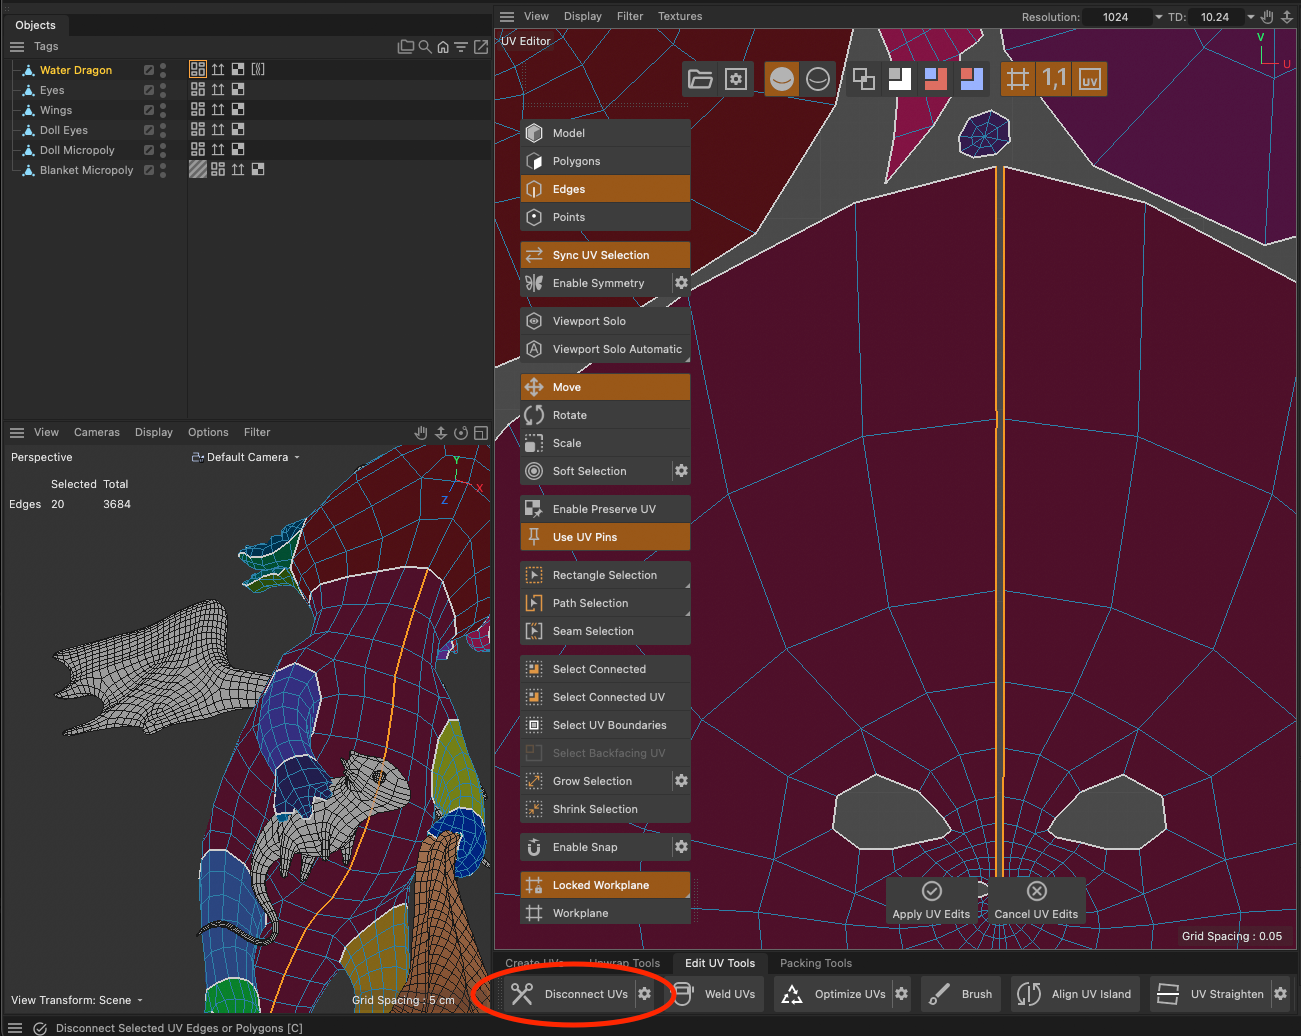
- Press 3 to switch to Edges mode.
- Select the edges where you want the seam.
- Press C, or click Disconnect UVs in the Edit UV Tools tab.
The UVs split along the selected edges, and each side becomes its own island.
Packing Tools
Packing fits your UV islands into the UV space as tightly as possible, so less of the texture space goes to waste. Packing is usually the last step before you send the UVs back. To pack, press P or click UV Packing.
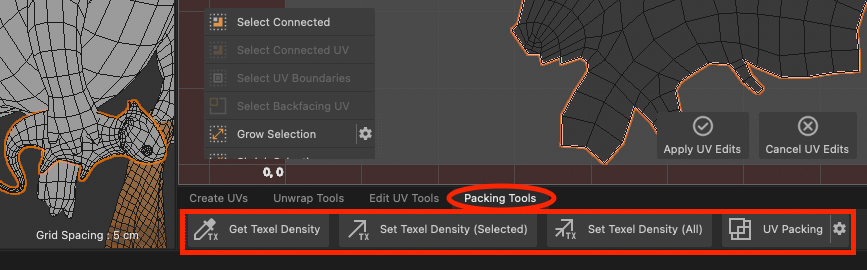
| Tool | What it does | In the Cinema 4D documentation | Options |
|---|---|---|---|
| Get Texel Density | Reads the texel density of the selection. A texel is one unit of a texture on the 3D surface, as a pixel is one unit of a 2D image. | Get Texel Density | — |
| Set Texel Density (Selected) | Applies the texel density value from the TD field above the UV view to the selection. | Set Texel Density (Selected) | — |
| Set Texel Density (All) | Applies the TD value to all UVs. | Set Texel Density (All) | — |
| UV Packing | Arranges the UV islands in the UV space (shortcut P). | UV Packing | Options |
The UV Packing options are Override Resolution, Gap Size, UV Space, Start Tile U, Start Tile V, Skip Populated Tiles, Orientation, Scaling, Override Texel Density, UV Packing Mode, Stretch to Fit, Stack Identical Islands, and Stack Mirrored Islands. For descriptions of each option's capabilities, see UV Packing: Options in the Cinema 4D documentation.
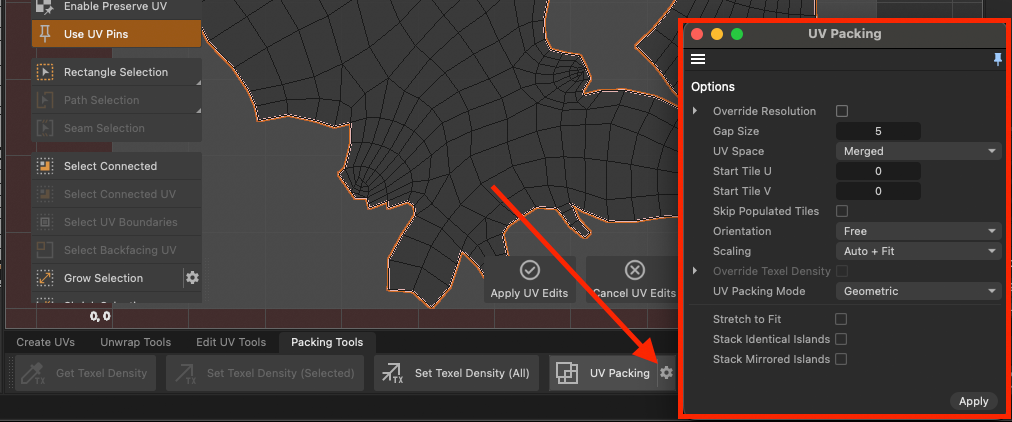
For background on texel density, see Texel Density.
Finding More UV Commands
The four tabs don't hold every UV command. To find the other UV commands, point at the UV view and press Shift+C to open the Commander, then type UV in the Commander's search field. With the pointer over the UV view, the Commander shows UV Editor in front of the search field and lists the UV commands. For more on searching for commands, see The Commander in the Cinema 4D documentation.
Checking UVs with a Texture
The Textures menu at the top of the UV view sets what the UV view shows behind your UVs. Choose Colored Grid or Checkerboard to check your UVs against a test pattern. Alternatively, select Empty Canvas for a plain background. For every option in the menu, see The UV Editor: Textures Menu in the Cinema 4D documentation.
If a SubTool has a texture map in ZBrush, the texture arrives with that map in the UV Editor, and you can show it in the UV view from the same menu. For example, you can make a texture from your polypaint with Tool > Texture Map > New From Polypaint before you open the UV Editor.
Keeping More Than One UV Layout
When you're happy with your UVs, click Apply UV Edits to send them back to ZBrush. To try another layout, store the current one as a UV set in Selection Sets, send the SubTool to the UV Editor again, and make new UVs. Switch between the stored UV sets at any time.