Bend Object
This page documents the Bend deformer in Cinema 4D, one of the most used deformers. It bends child geometry within an adjustable box — with an interactive viewport handle — for arcs, curled pages, bent pipes and countless motion-graphics effects.

As the name suggests, objects are bent with the Bend object. This deformation has a yellow gripper on its upper side that is visible when selected. This handle can be used to control it interactively in the editor. The two arrows in the deformer preview symbolize the bending plane.
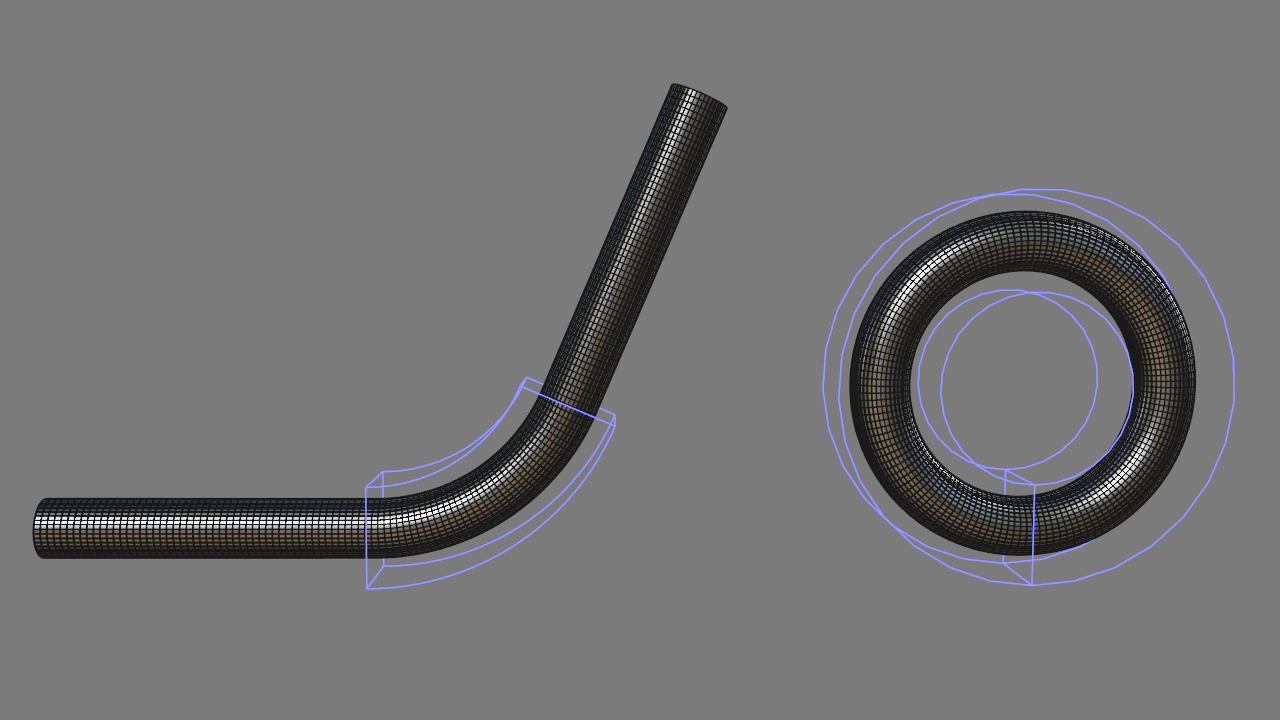 Ensure sufficient subdivision for a soft bend.
How does it work?
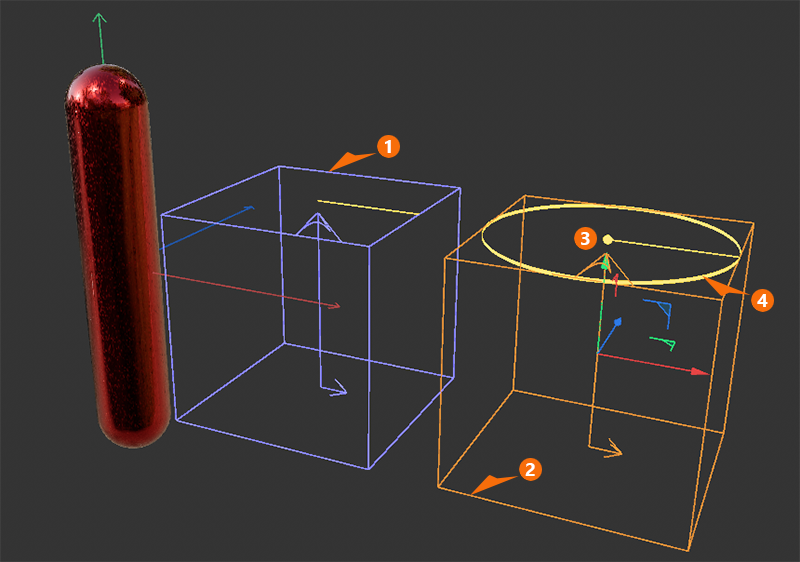
The Bend Deformator is originally cube-shaped but can be scaled individually in all three directions. As shown in the figure above, an unselected Bend object is displayed in blue. When selected, the color changes to orange, and additional controls appear along the object’s Y-axis:
1A Bend object that has not been selected is displayed in blue. Two arrows indicate the plane in which the bending occurs. The Bend object must therefore first be rotated to match the desired bend and object shape. The same applies to adjusting the size of the bend box. Its size can be specified manually using the Size values and should generally be adjusted to fit the area to be deformed. The origin of the bends can be at the ends of the bend box or in its center. This is determined by the selection in the Origin menu. In general, the Bend object must be grouped to the object in the Object Manager that is to be deformed. By clicking the Fit to Parent button, the deformator can automatically snap to the axis view selected via Alignment and adopt the dimensions of the parent object.
If multiple objects are to be deformed simultaneously, the deformator can be placed at the same hierarchical level as the objects to be deformed. For example, you can group all the objects to be deformed under a Null object and then simply place the deformer within that group. It will then automatically affect all objects in that group. However, when using this method, the Fit to Parent function and automatic resizing no longer work. These must be adjusted manually.
2A selected deformator is highlighted in orange and also features a handle at its top end that can be dragged directly with the mouse to adjust the strength of the bend (see 3). The corresponding numerical value can also be found under Strength in the Attribute Manager if you want to bend the object by a precise angle.
4The yellowish ring can also be selected and rotated directly with the mouse. This allows you to edit the bending direction of the deformator. The Angle value in the Attribute Manager provides the same functionality. Note that holding down the Shift key at the same time enables the standard quantization feature, which by default ensures precise 5° increments for rotations. The quantization value can be freely selected in the Modeling Settings (e.g., accessible via Attribute Manager > > > Quantize).
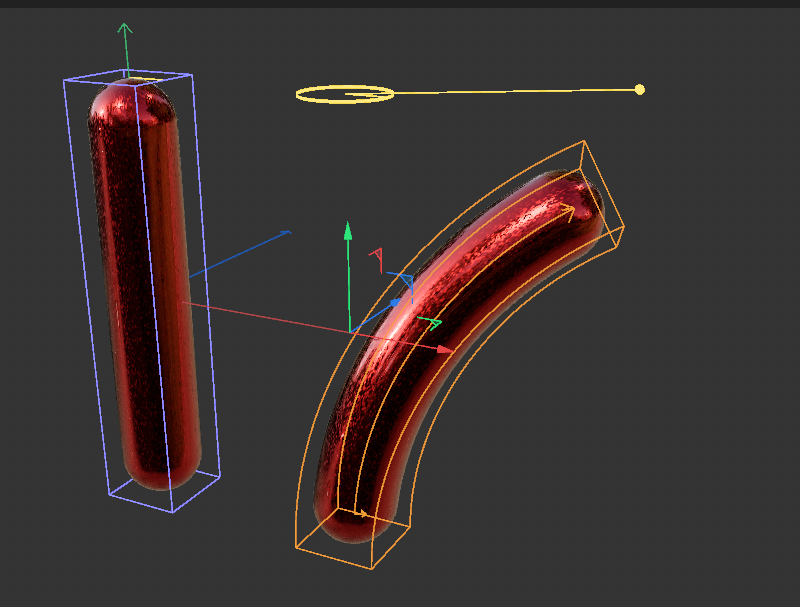
To bend the capsule object shown in the example above, we’ll place the Bend deformator in the Object Manager as a child object under the capsule primitive and then click the Fit to Parent button. The deformator adjusts its position, rotation and size to match the capsule. Next, make sure the Bend object is selected so you can manipulate its handles directly in the viewport, as shown on the right side of the image. The capsule will bend accordingly.
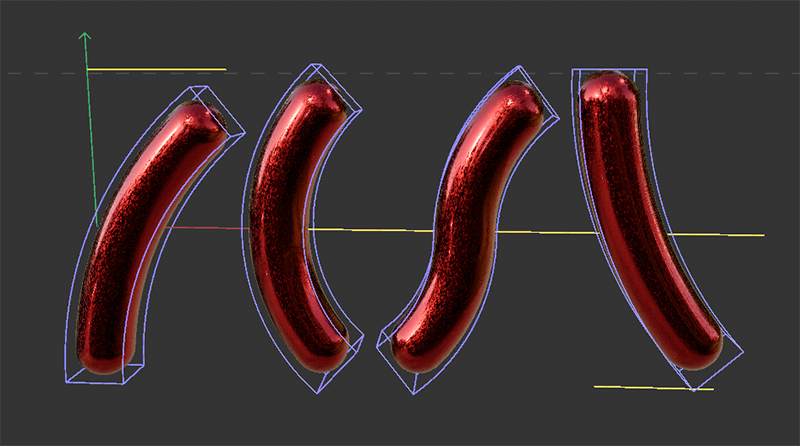
As shown in the figure above, simply by switching the Origin mode, you can achieve different bending directions while keeping all other settings unchanged. From left to right, the Origin settings shown here are Bottom, Center C-Shape, Center S-Shape, and Top.
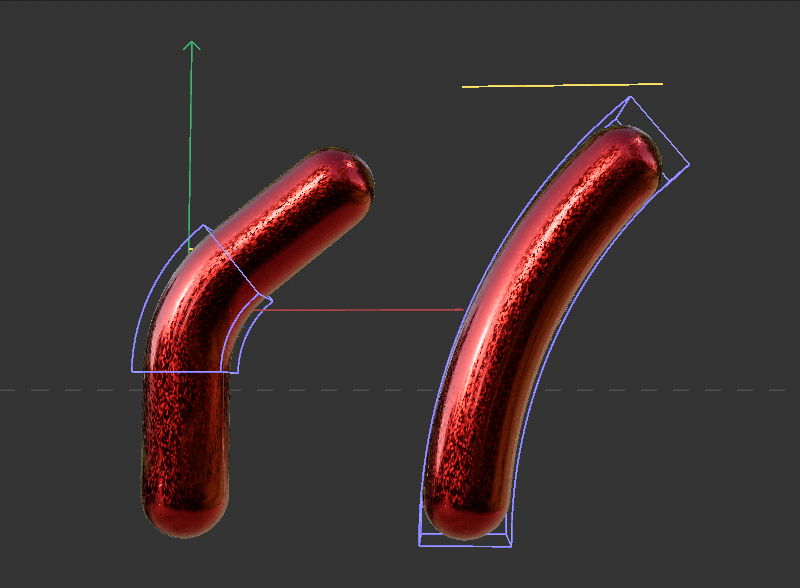
Also keep in mind that the area to be deformed can be limited using the Size setting of the bend deformation (see figure above). The Mode setting also plays a major role here, as it determines what happens to the parts of the objects that lie outside the deformation box.
Example