
Workplane Modes
Details regarding Workplanes can be found by clicking on this link.

This disables any defined automatic Workplane modes and fixes the Workplane. You will automatically be switched to this Workplane if one of the commands below is selected. The orthographic views (that don't adapt accordingly in the automatic modes when the Workplane is modified in the Perspective view) will be adjusted accordingly; the tip view will be perpendicular to the Workplane, etc.
Automatic Workplane Modes
Depending on which one of the 3 following modes is selected, the Workplane will be positioned automatically.

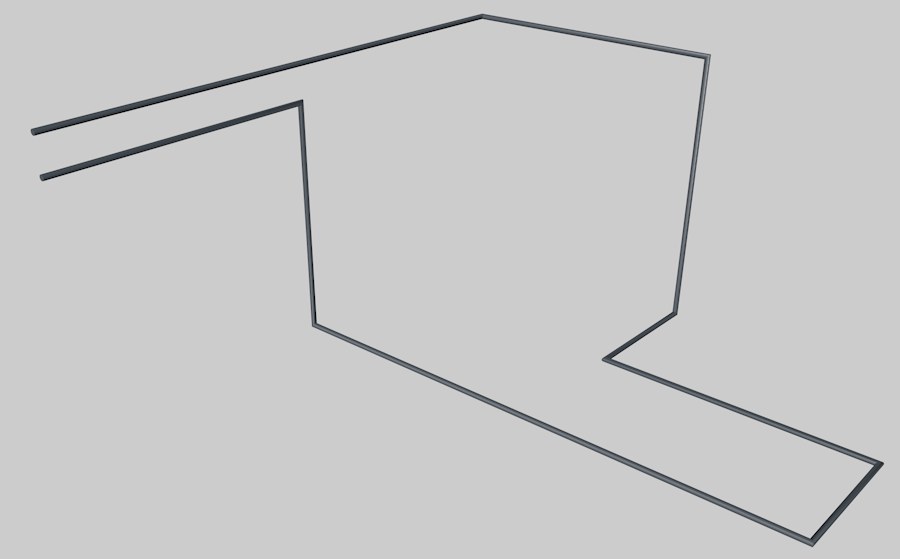
Depending on the angle of view of the camera, one of the world coordinate planes will always automatically be displayed as the Workplane. This, for example, lets you create Splines at right angles to each other (e.g., for piping); when setting points, Workplane and Grid Point must be enabled in the Snap settings.

The Workplane will be positioned perpendicular to the camera's angle of view (Z axis) and 500 units from the camera. All new objects created will be created at the center of view.

In this mode, the Workplane will orient itself according to:
- the modeling axis when in component mode or
-
the multi-selection axis in other modes.
The Workplane will be positioned perpendicular on the Y axis.

If enabled, the Workplane will automatically be positioned on each polygon over which the cursor is hovered (as long as the mouse button is not pressed). If no polygon lies underneath the cursor, the Workplane will orient itself according to the currently active mode (Planar, Camera or Axis).
In this mode you can move vertices, edges or polygons onto any polygon. By hovering the cursor over the respective polygon, the Workplane will position itself over this polygon. Clicking the mouse button will move the selected element onto this polygon (3D Snap and Workplane must be enabled in the Snap settings).
Example
This functionality makes it easy to, for example, arrange objects perpendicular on the surface of other objects.
In this example, we want to position a cone on the surface of this platonic shape.
To do so, the  Align Selection to Workplane was assigned a hotkey in the Command Manager (the Interactive Workplane will jump back when the cursor is removed from the polygon).
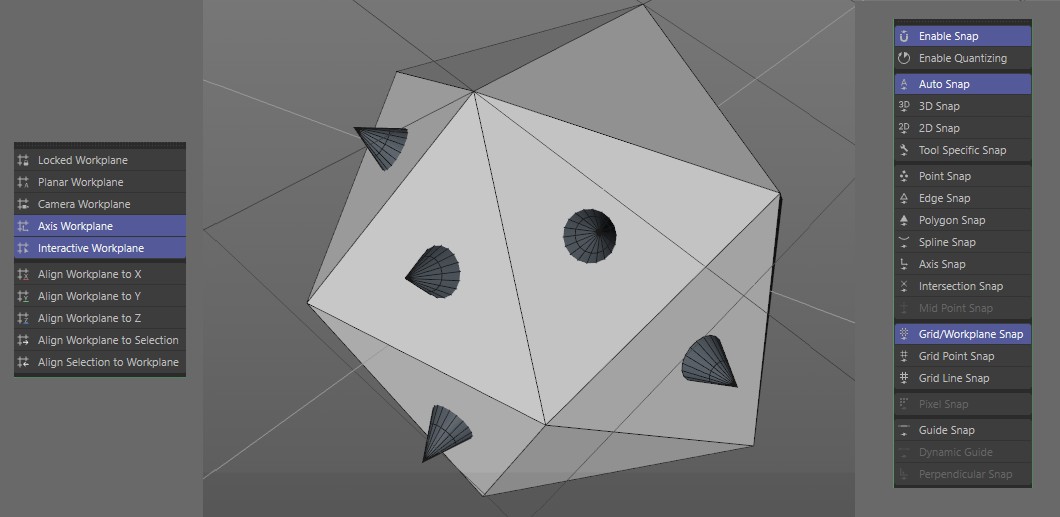
Proceed as follows to position a cone perpendicular on a surface:
- Define the Snap and Workplane settings as shown in the image above (Axis Workplane is not necessary but an automated mode must be enabled for Interactive Workplane.
- Select the Move tool and select a cone..
- Hover with the cursor (without pressing the mouse button) over an empty polygon (e.g., the one at the top right). The Workplane will position itself on this polygon.
- Ctrl + Click the mouse button and drag slightly. The cone will be duplicated and will only move on the Workplane in accordance with the polygon on which it is positioned.
-
Press the previously defined hotkey for Align Selection to Workplane. If your cursor still lies over the polygon, the cone will be oriented perpendicular to the Workplane and therewith the polygon.
- Drag the cone to the desired position on the polygon. Done.