

Detail
Here you will find settings with which you can further customize the level of detail and memory requirements of the plant.
This activates the input field for Minimum Branch Thickness, which can be used to trim branches from the ends. This can be used to reduce the number of polygons.
Minimum Branch Thickness[0..10000m]
This input is enabled by the preceding Use option. All branch sections whose diameter is below this value are cut off on the model. In this way, the thin branches, which are often not visible from a greater distance anyway or are covered by leaves, can be removed automatically. This can be used to optimize the storage requirements for the plant, or if you want to visualize a pruning on a bare tree in winter, for example.
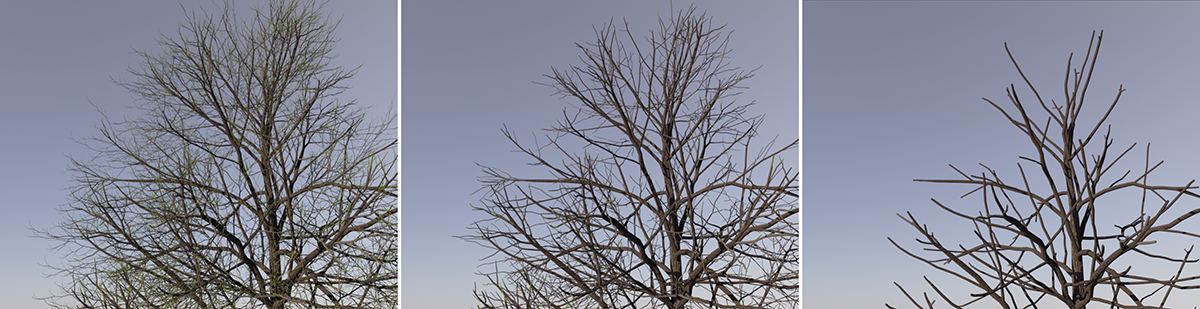 From left to right, a tree crown can be seen here on which the Minimum Branch Thickness was gradually increased.
This activates the input field for Maximum Branch Depth, which can be used to configure the complexity of branch branching. This can be used to reduce the number of polygons. Unlike when using Minimum Branch Thickness, the thinly tapering branch ends are retained.
This value controls the complexity of the branching. The lower the Maximum Branch Depth is chosen, the fewer fine branches are calculated, but the overall size of the plant or tree is retained as far as possible. This can be used to reduce the number of polygons and thus the memory requirement, or to be able to control the visible complexity individually.
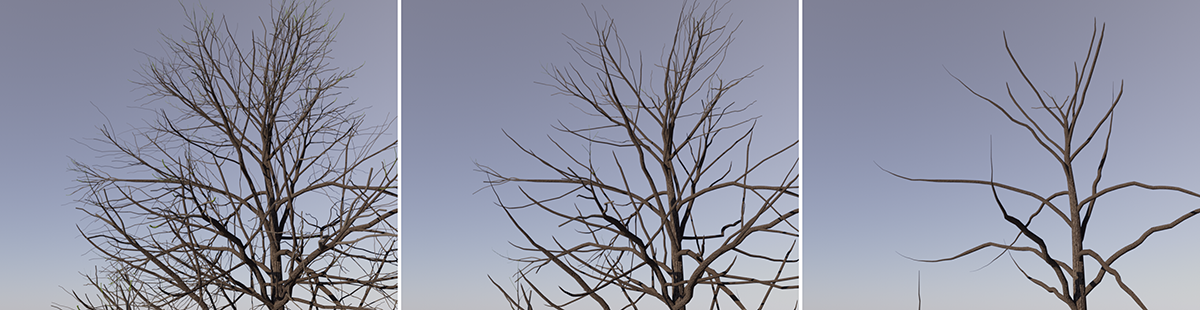 From left to right, you can see a tree crown where the Maximum Branching Depth was reduced to 4, 3 and finally 2.
Similar to the Interpolation settings on splines, the number and distribution of points along the branch paths and in the circumference of the branch cross-sections can be set here. Two methods are available for this:
- By Level: The point density along the branches and the circular branch cross-sections adapts to the curvature of the branches. This means that the subdivisions are used primarily where a change in direction of the branches can be observed. This means that the subdivisions can be used particularly effectively to improve the quality of shape reproduction at bends without wasting subdivisions on primarily straight sections.
- Uniform: Here, the course of the branches and the branch cross-sections do not play a role. Instead, the sections between the base points of the branches, which are always present, are divided into sections of the same size. Therefore, if you want to achieve the same subdivision quality as in By Level mode, more polygons are created. This mode can therefore not be used quite as effectively. On the other hand, there may be situations in which a uniform subdivision is helpful, e.g. to implement a deformation of the plant.
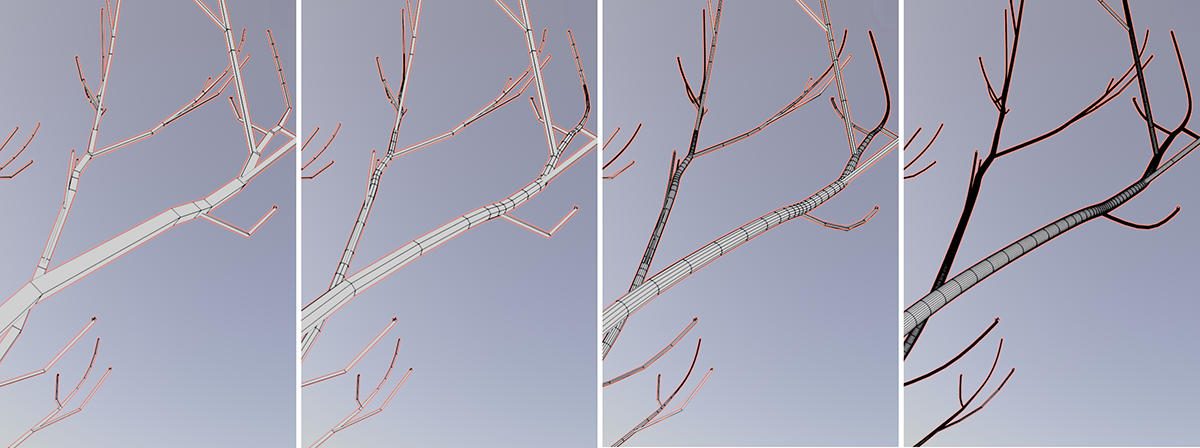 Here you can see examples of By Level subdivisions that focus on curved sections of the branches. From left to right, you can see branches of a tree crown on which 3, 4, 5 and 6 Subdivisions are used.
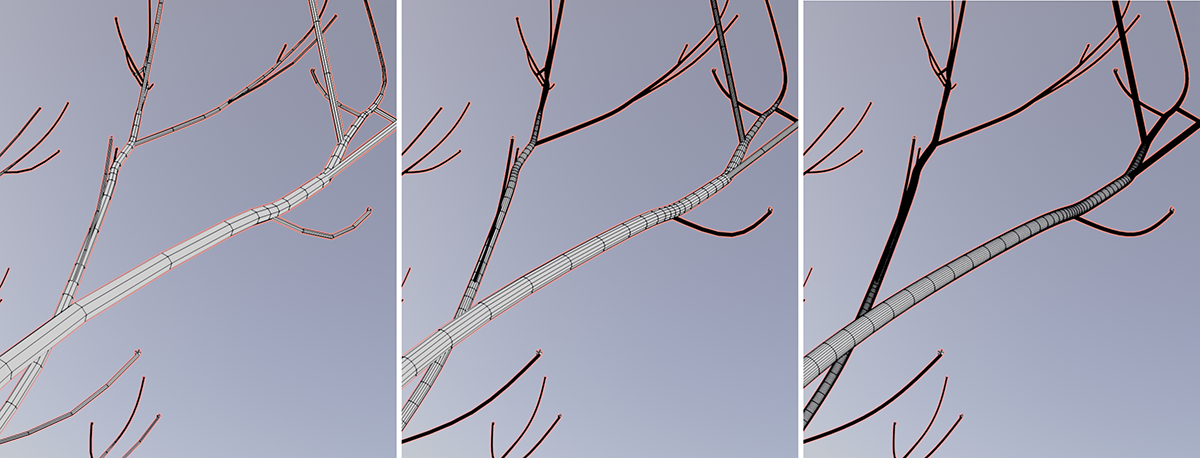 Here you can see examples of Uniform subdivisions that are used regardless of the shape of the branches. From left to right, you can see branches of a tree crown on which 1, 2 and 3 Subdivisions are used.
Subdivision value
Enter the desired subdivision value here. Depending on the complexity of the plant, make sure that you do not use too high values here, but only increase them in individual steps and check the result after each increase. A large number of polygons can be created very quickly, especially with the already complex, large deciduous and coniferous trees.
This can be used to individually enlarge the polygons through which the leaves and needles are displayed. At the same time, their number is reduced, which leads to a corresponding reduction in memory requirements. In this combination, the effect is therefore particularly useful for optimizing the number of vertices and polygons in the background of a scene without having to accept visual restrictions.
The scaling of the visible needles or leaves can also be helpful as an artistic stylistic device (depiction of fresh leaves at the beginning of spring), or simply to close visible gaps in a tree crown, as documented in the following sequence of images. Smaller values lead to fewer but correspondingly larger leaves, whereby the original number and size of needles or leaves is always calculated at 100%.
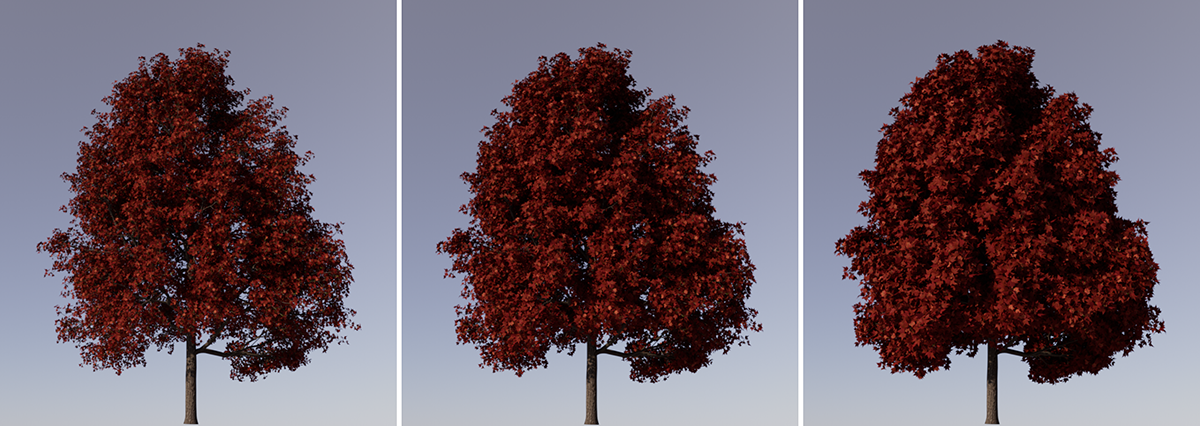 Viewed from left to right, an identically configured tree can be seen here. The only difference is the reduction of the Leaf Amount value from 100% (left) to 75% (center), down to 50% (right).
If you are only interested in reducing the number of leaves or needles in order to optimize the memory requirements of the plant or its motif coverage, you can also use the Leaf Density value, which does not trigger a simultaneous scaling of the leaves. Both settings can also be used together to create a balance between the number of leaves/needles, the plant's memory requirements and the optical volume of the plant.