

Object Properties
Internally, the Text Object uses the Extrude object to make it three dimensional. Use the Depth setting to define the extend of the text's 3D depth.
Use this setting to define the subdivision of the extruded text elements. In most cases, a value of 1 will suffice. Only if you want to deform the text elements further, e.g., bend them, should Subdivision be set higher.
Enter the text into the Text box. You can enter up to multiple lines of text — press Return to start a new line. The text appears in the Viewport as a spline primitive when click outside the text box.
TrueType, OpenType and PostscriptFonts can all be used in Cinema 4D. However the following restrictions do apply:
- Macintosh (with an operating system prior to macOS X 10.5): OpenType fonts will only work if they contain TrueType applications. All characters within an installed font can be used (Euro characters, Japanese characters, etc.)
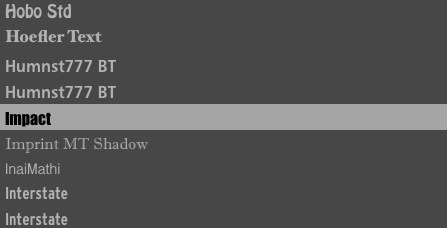
The font preview in the selection menu makes it easy to select the right font. You can also scroll up and down the list using the arrow keys or scroll wheel.
Set the text’s alignment to left-aligned, centered or right-aligned.
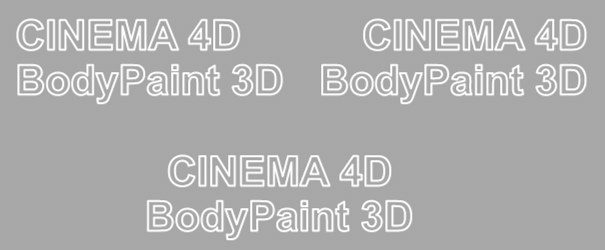
The height of the letters, in world coordinates.
With these command you can insert space between the characters.
With these command you can insert space between the text lines.
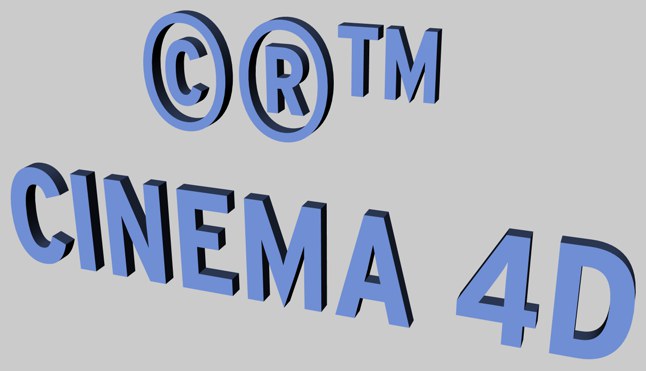
Some fonts are poorly designed and will have noticeable overlapping edges. CINEMA 4D cannot improve these faults. Always use high quality fonts for best results.
You can get a good result with 3D fonts by using the Bevel command on a font object and restricting the angle limit to approx. 20°.

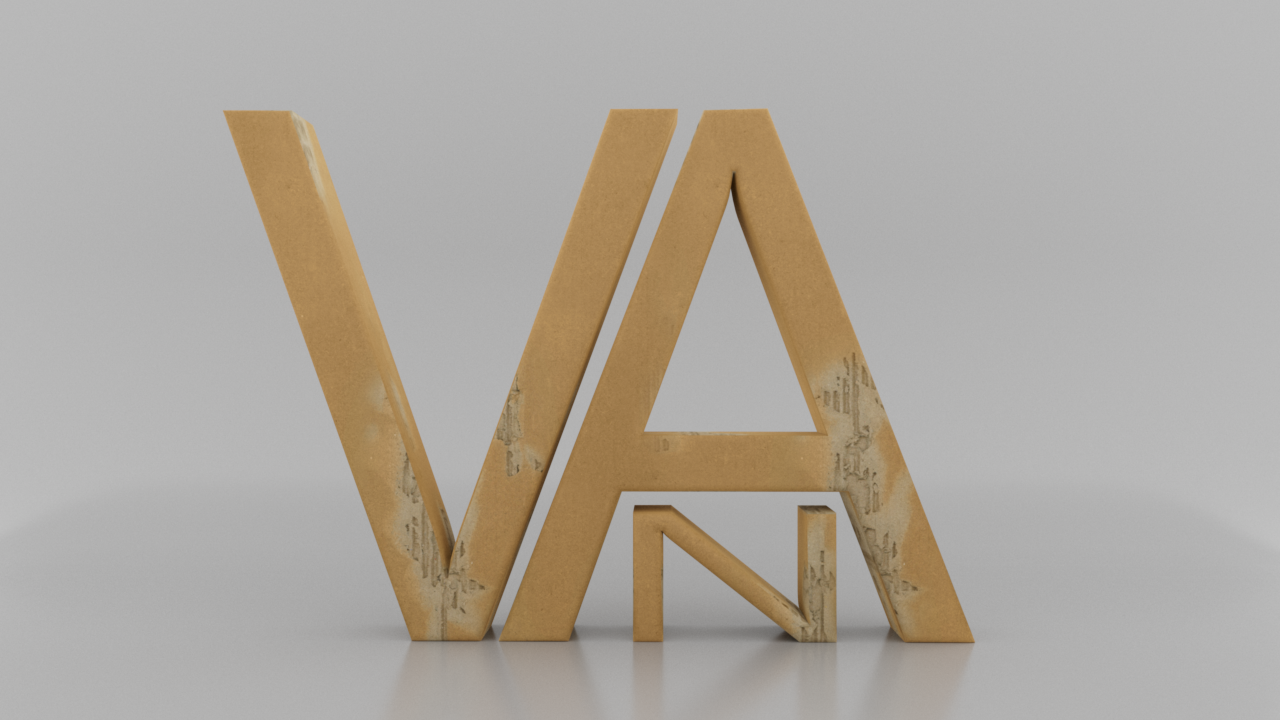

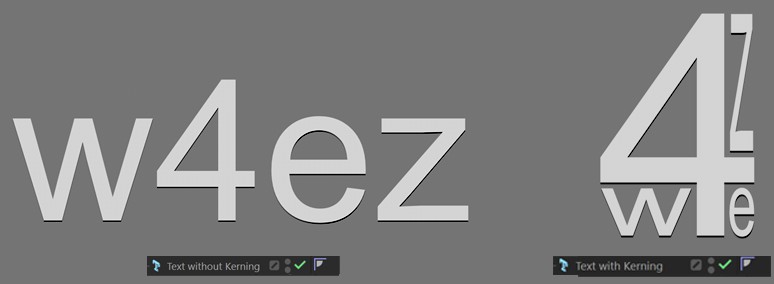
The Kerning settings let you define text size and spacing per letter. This should eliminate the need for external programs for making parametric modifications to text, e.g., if you want to adjust the spacing between the letters "A” and "V” (which is quite common). All modifications can be made interactively in the Viewport.
The following properties can be modified for a given letter (or for an entire text):
- Distance from previous letter
- Horizontal or vertical size, or overall scale
- Baseline Shift (vertical position)
In the end you can come up with parametric creations like the one on the right:
How it Works
Enabling the Show 3D GUI option will display the following handles in the Viewport:
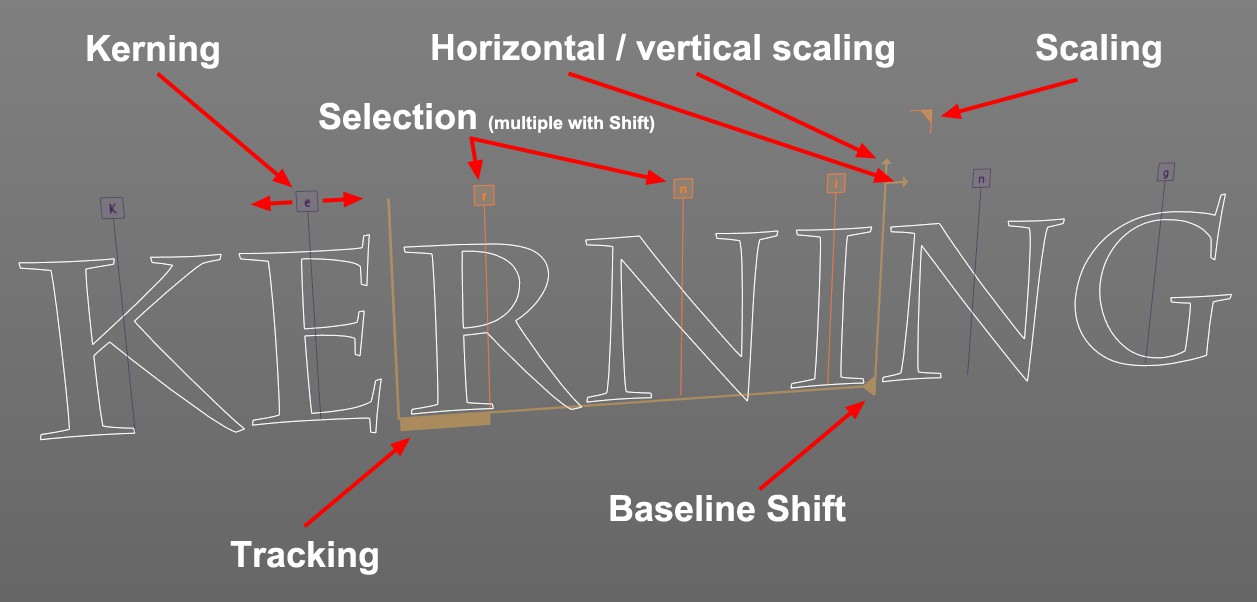 Any of the marked handles can be selected and dragged with the mouse.
Above each letter you will see a correspondingly marked square handle, which can be dragged (without Selection) to adjust the spacing to the left of the letter. Of course a Selection can also be used:
- Click on a letter handle to select it
- Shift+ click on a handle will additionally select all letters between this letter and the last selected letter (or deselect if you clicked on the wrong letter). The properties of the selected letters (Tracking, Scale and Baseline Shift) can then be modified simultaneously (each to the same absolute value) when one of the handles marked in the image above is moved.
Letter selections can be made independent of the text itself and affect only those letters, i.e., if you select letters 5-9 and enter a different text, only letters 5-9 will be affected.
Dragging a handle – and pressing the following keys - will have the following effect:
- Shift: Corresponding parameters will be modified in steps of 10.
- Ctrl/Cmd: Corresponding parameters will be modified interactively and very slowly (which makes fine-tuning easier; if the Shift key is pressed simultaneously, parameters will be modified in steps of 1).
Settings
3D Handles
Use this option to define whether or not the interactive 3D handles should be displayed in the Viewport. This option should be disabled as soon as you have finished fine-tuning the kerning of the text to avoid inadvertently modifying text properties at a later point.
The following parameters can also be adjusted interactively in the Viewport by using the corresponding handles (see above).
Start/End
These settings are numeric selections that you can normally define interactively in the Viewport (see above). However, it can be easier to modify these values in the Attribute Manager if, for example, the letter handles overlap. If you want to select the 2nd letter, enter 1 for Start and 2 for End. To select letters 3 to 6, enter 2 and 6, respectively.
Kerning / Tracking
Both settings basically have the same function in Cinema 4D with the exception that Tracking can be modified at any time in the Viewport without making a selection using the handles positioned above each letter. The Kerning setting – which is displayed as a single handle when multiple letters are selected – can be applied to multiple letters simultaneously.
Both settings are used to adjust the spacing to the left of each letter.
Horizontal / Vertical Scale
Use these settings to individually adjust letters’ horizontal and vertical scale.
Scale
This value defines the overall scaling of letters (taking the aforementioned values into consideration).
Baseline Shift
Use this setting to shift the position of letters up or down.
Reset All
Clicking this button will set all values back to their default values.
Reset Selected
Clicking this button will reset the values of all selected letters back to their default values.
Select All
Clicking this button will select all letters in the Attribute Manager’s Text field.
Here you set how the spline is to be subdivided during further processing. This is always important when you generate meshes with the help of generators. Depending on which type you select from the menu for Interpolation, you have further options.
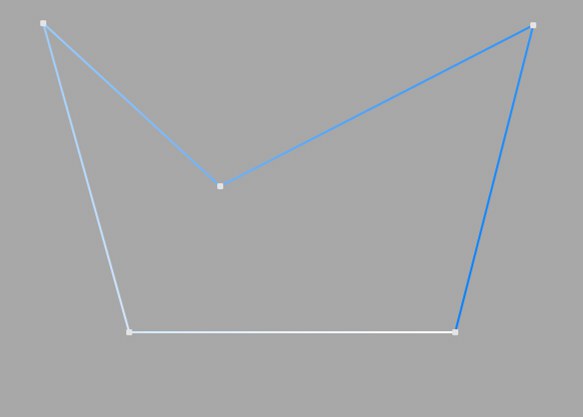
This type of interpolation uses the interpolation points of the spline directly and connects them via straight lines without setting additional intermediate points.
You cannot make entries in the fields for Points or Angle.
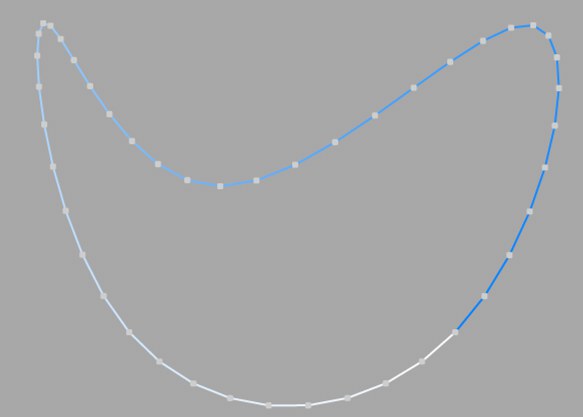
This type of interpolation divides the spline in such a way that a corresponding number of Points are used per interpolation point. The inserted points follow the natural course of the spline directly, i.e. they are closer together at support points than in between. The curve resulting from this interpolation does not necessarily pass through the interpolation points. If a spline has several segments, the value for Points applies to each interpolation point of each segment.
You cannot make any entries in the Angle field.
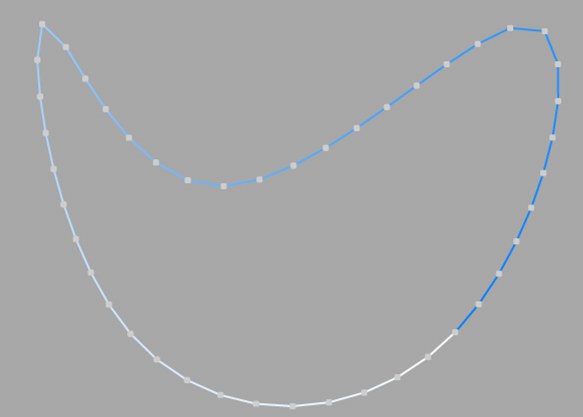
This interpolation type divides the spline so that the selected number of Points is used for each interpolation point. The points are exactly the same distance apart. The curve resulting from this interpolation does not necessarily pass through the interpolation points. If a spline has several segments, the value for Points applies to each interpolation point of each segment.
You cannot make any entries in the Angle field.
Opened spline: ((Points + 1) * (number_of_base_points - 1)) +1
Closed spline: (Points + 1) * number_of_base_points
This means, for example, that an open spline with four support points and a Points value of 2 is divided into a total of ((2+1)*(4-1))+1 = 10 points. If you close this spline, (2+1)*4 = 12 points are used. This procedure prevents, for example, a spline from being split more roughly after it has been closed.
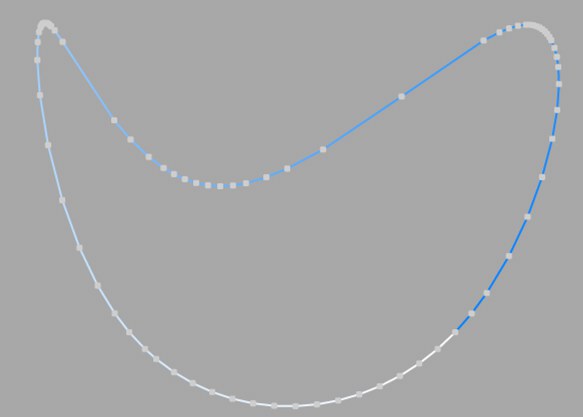
This type of interpolation always sets intermediate points if the angular deviation of the curve is greater than the value entered under Angle. The curve resulting from this interpolation passes exactly through the interpolation points. If a spline has several segments, the value for Angle applies to each segment.
In contrast to the other interpolation types, different interpolations result if you change the interpolation point sequence of the spline.
The subdivision, also known as Adaptive, produces the best results in rendering. This is therefore the default Interpolation method.
You cannot make any entries in the Points field.
Subdivided is similar to the Adaptive type. In addition, intermediate points are inserted until the segments in between are shorter than the length defined under Max Length. This does not necessarily mean that the point distances correspond exactly to Max Length. Smaller values lead to higher quality, but as is so often the case, they also have the disadvantages associated with high point counts (slower redraw speed in the editor, etc.).
This enables significantly better rendering quality, especially with deformed text. If you enter the same value for Max Length as for Size in the Extrude object (Caps tab, Regular Grid option activated), you will get fairly perfect cap areas and edges without shading errors, as the subdivisions of letters and their caps fit together and triangles do not have to be inserted arbitrarily to connect the two mesh elements.
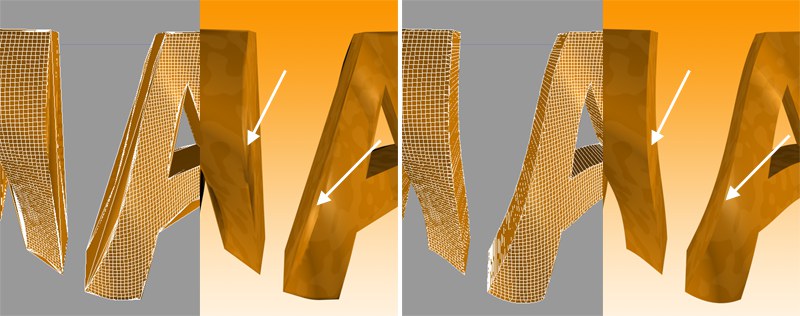 On the left Adaptive, on the right Subdivided Interpolation in combination with a Formula deformation object. Note the clearly defined edges on the right-hand side of the illustration.
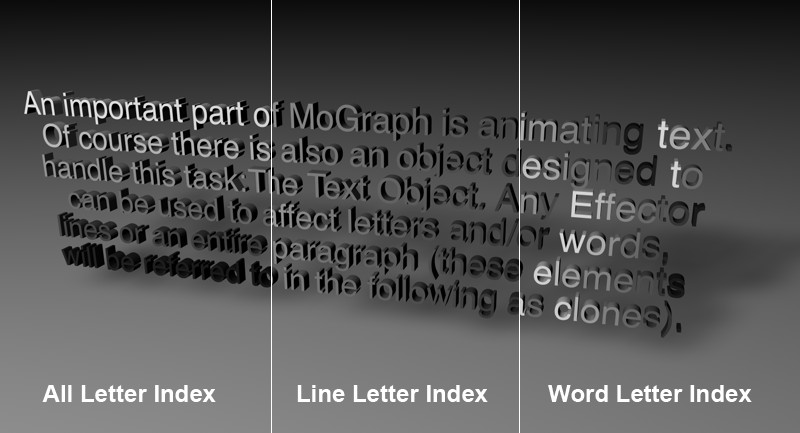 From left to right: All Letter Index; Line Letter Index; All Letter Index with a color shader whose Channel setting has been set to Index Ratio.
Each letter of the Text Object is numbered internally. Depending on which Shader Indexing option is selected, the letters of the Text Object will be numbered consecutively (All Letter Index), or the numbering will start again at 0 for each line (Line Letter Index) or word (Word Letter Index). So, what is this good for? Well, a color shader (see your Cinema 4D reference manual) with an Index Ratio channel setting uses this numbering for orientation. Furthermore, the internal U-coordinates also orient themselves according to this numbering scheme. The U-coordinates, which always have a range of 0 to 1, will be assigned to the letters as follows:
From the first letter of the text to the last.
Per line.
Per Word