
The Capture Viewer
As soon as you select a capture, the Capture Viewer will open. For face and body captures, this shows you the calculated facial animation or the calculated skeletal animation (for object captures, the captured frames are displayed):
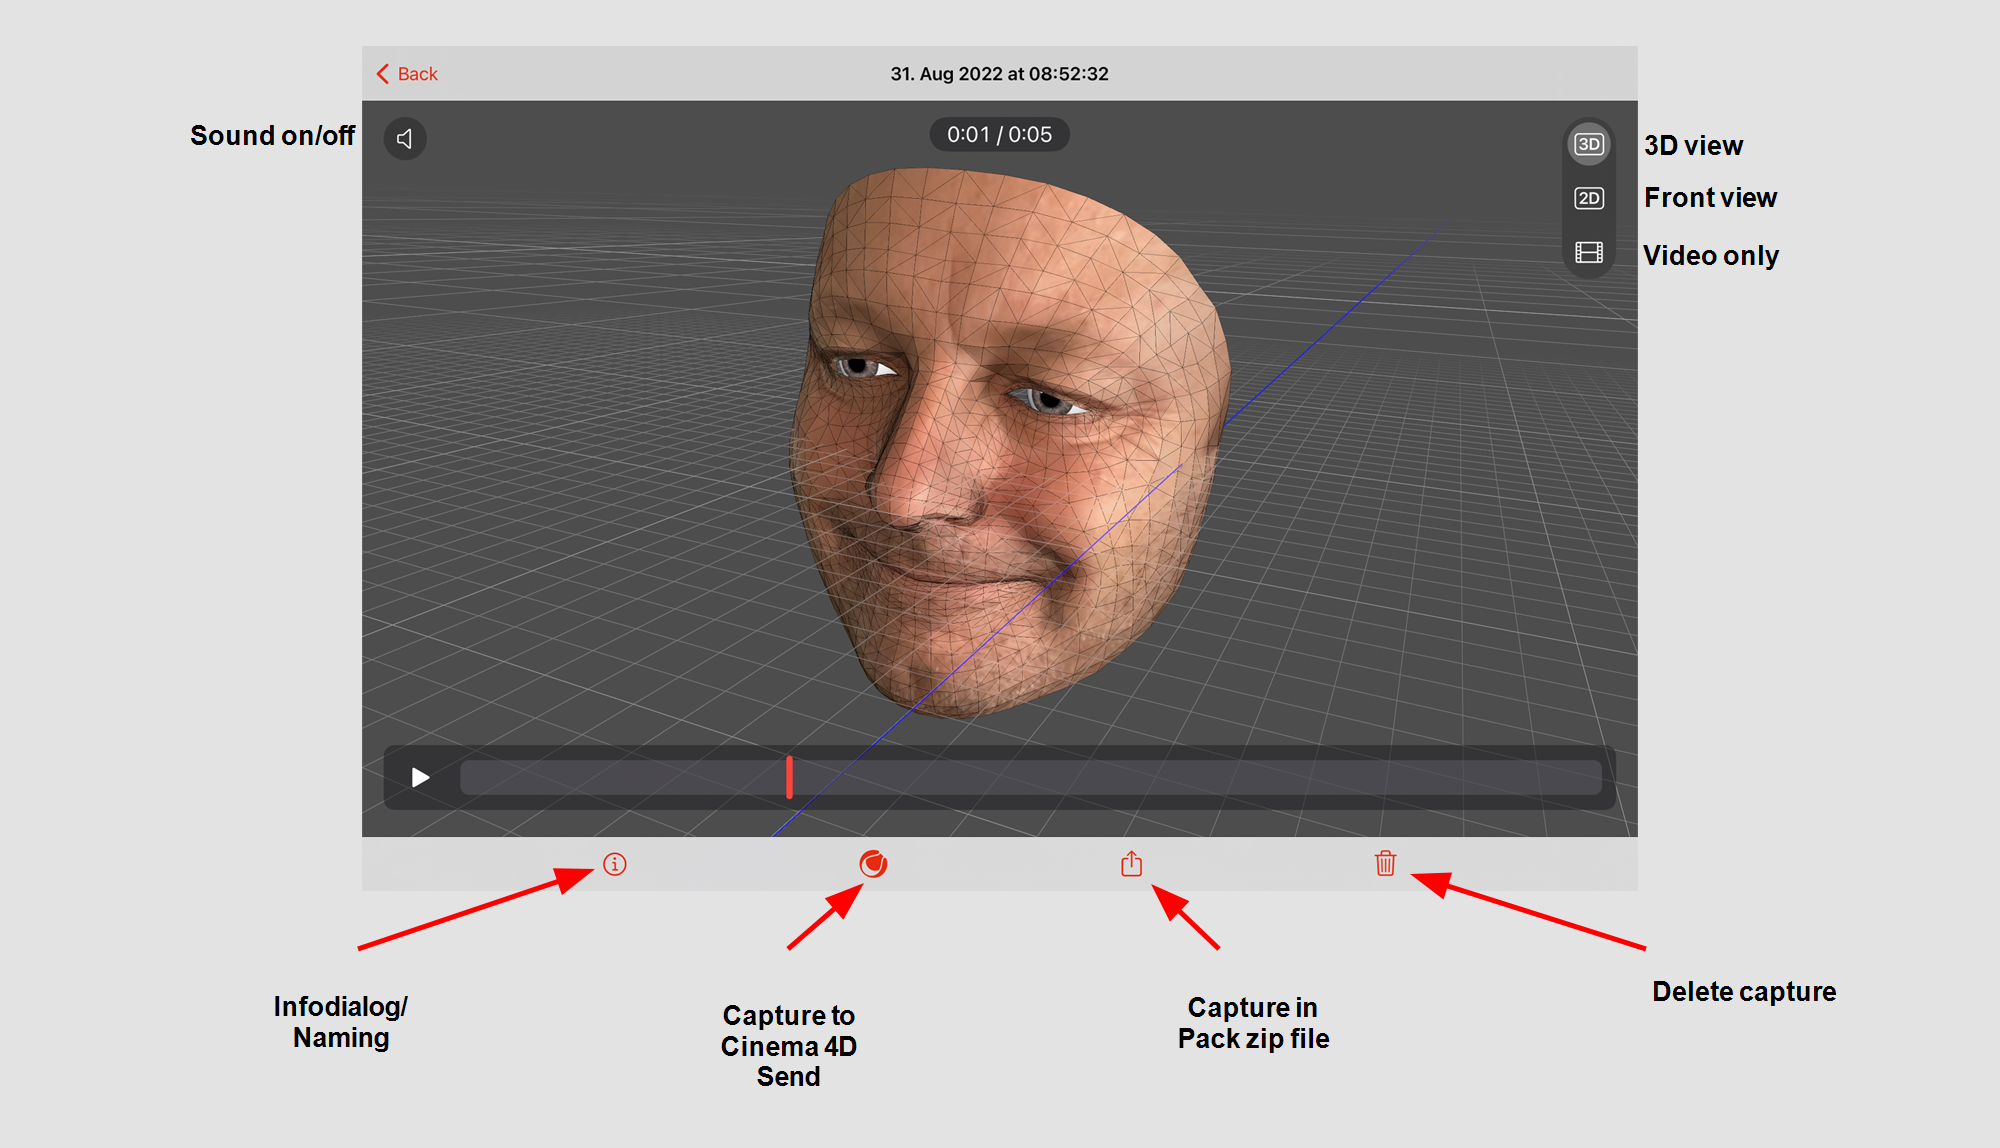 The Capture Viewer when viewing a face capture.
Swipe your finger to the left or right to view the previous or next capture.
You will find at controls from top to bottom:
- Back: Use this to jump back to the capture start page.
- Sound: Face and body capture videos can be played with or without sound.
- 3D View: Allows you to view the calculated result in 3D from all sides. Drag with one finger to rotate the camera around the object. With 2 fingers, the camera can be moved/rotated around its viewing axis (constant finger distance) or shifted in the viewing direction (vary finger distance).
- Front view: When this option is selected, the result is always shown from the view of the recording camera.
- Video Only: Select this option to play the recorded video alone, without face overlay or joint skeleton.
- Player: Here you can pause or play the video. The red playhead can be moved as desired.
- Info Dialog: Opens a window that gives you information about recording date, video duration, file and image sizes. In addition, the capture can be given an individual name here.
In case of object captures, you will find a set of objects automatically detected on the photos under Tags. By the way, this works amazingly well! These tags will later - once you have calculated the 3D data in Cinema 4D - be adopted as keywords in the Asset Browser. - Send to Cinema 4D: see below.
- Pack into zip file: see below.
- Delete capture: Use this to delete the displayed capture irretrievably.
Send capture data to Cinema 4D
You will also find the two buttons that allow you to pass the capture data to Cinema 4D.
- Send to Cinema 4D: If the device (e.g., iPhone, iPad) and the running Cinema 4D are in the same network, a window will open showing your computer name including IP. Just tap on it and the data will be sent directly to Cinema 4D and stored there permanently. The other command Send to IP located there can be used if the computer is not displayed here. You can then manually enter the IP address and port (this can be found in the Moves by Maxon dialog on the right) to connect to the computer.
- Pack to Zip: The capture is packed into a zip file - which may take a moment - and can be sent using the device's own sharing features. These zip files can then be loaded in the Moves by Maxon dialog via drag&drop.