

Balloon

A flat, horizontally divided cube becomes a cushion when inflated. The constriction effect is achieved by soft Connectors that connect the top and bottom of the cushion.
If you have closed objects, you can inflate them. To do so, activate the Balloon option while the simulation is running and carefully increase the Overpressure value. Increasing the value too quickly can result in penetration occurring.
The Overpressure setting is used to control the actual volume. The default value of 1 produces a neutral behavior and a value of 2 will double the volume. You can even use negative values to create a vacuum. The Balloon option must be enabled to apply the Overpressure setting.
As soon as you activate the Balloon, the volume will adhere to the Overpressure setting, i.e., even with a value of 1, the behavior will, for example, change so that a ball compressed by collision objects will squeeze out at the sides to maintain the volume. Otherwise the sphere will simply be flattened.
If a Balloon object ruptures, the Balloon function will be disabled internally.
A modified Overpressure or an Overpressure at the start of simulation will increase within this period. This assures a uniform inflation without any penetration. This behavior is similar to real-world behavior: With the exception of a car's airbags, inflation rarely occurs instantaneously.
Be careful with very short time spans. The simulation might be overwhelmed with suddenly having to generate a giant volume. It can easily result in surfaces being penetrated.
Here, a Vertex map can be used to define which parts of the assigned object the compressive forces should act on - physically impossible in the real world.
This works best when Stretch Influence is disabled.
If there are unwanted movements of the balloon, it can help to activate With Force in the Mix Animation tab to counteract them with small Strength values. By the way, there does not have to be a keyframe animation for this, it is dragged in the direction of the initial state.
Also consider placing the Vertex map in the interface settings at Stretchiness. In combination with high extensibility values, you can also limit the balloon effect (see difference below).
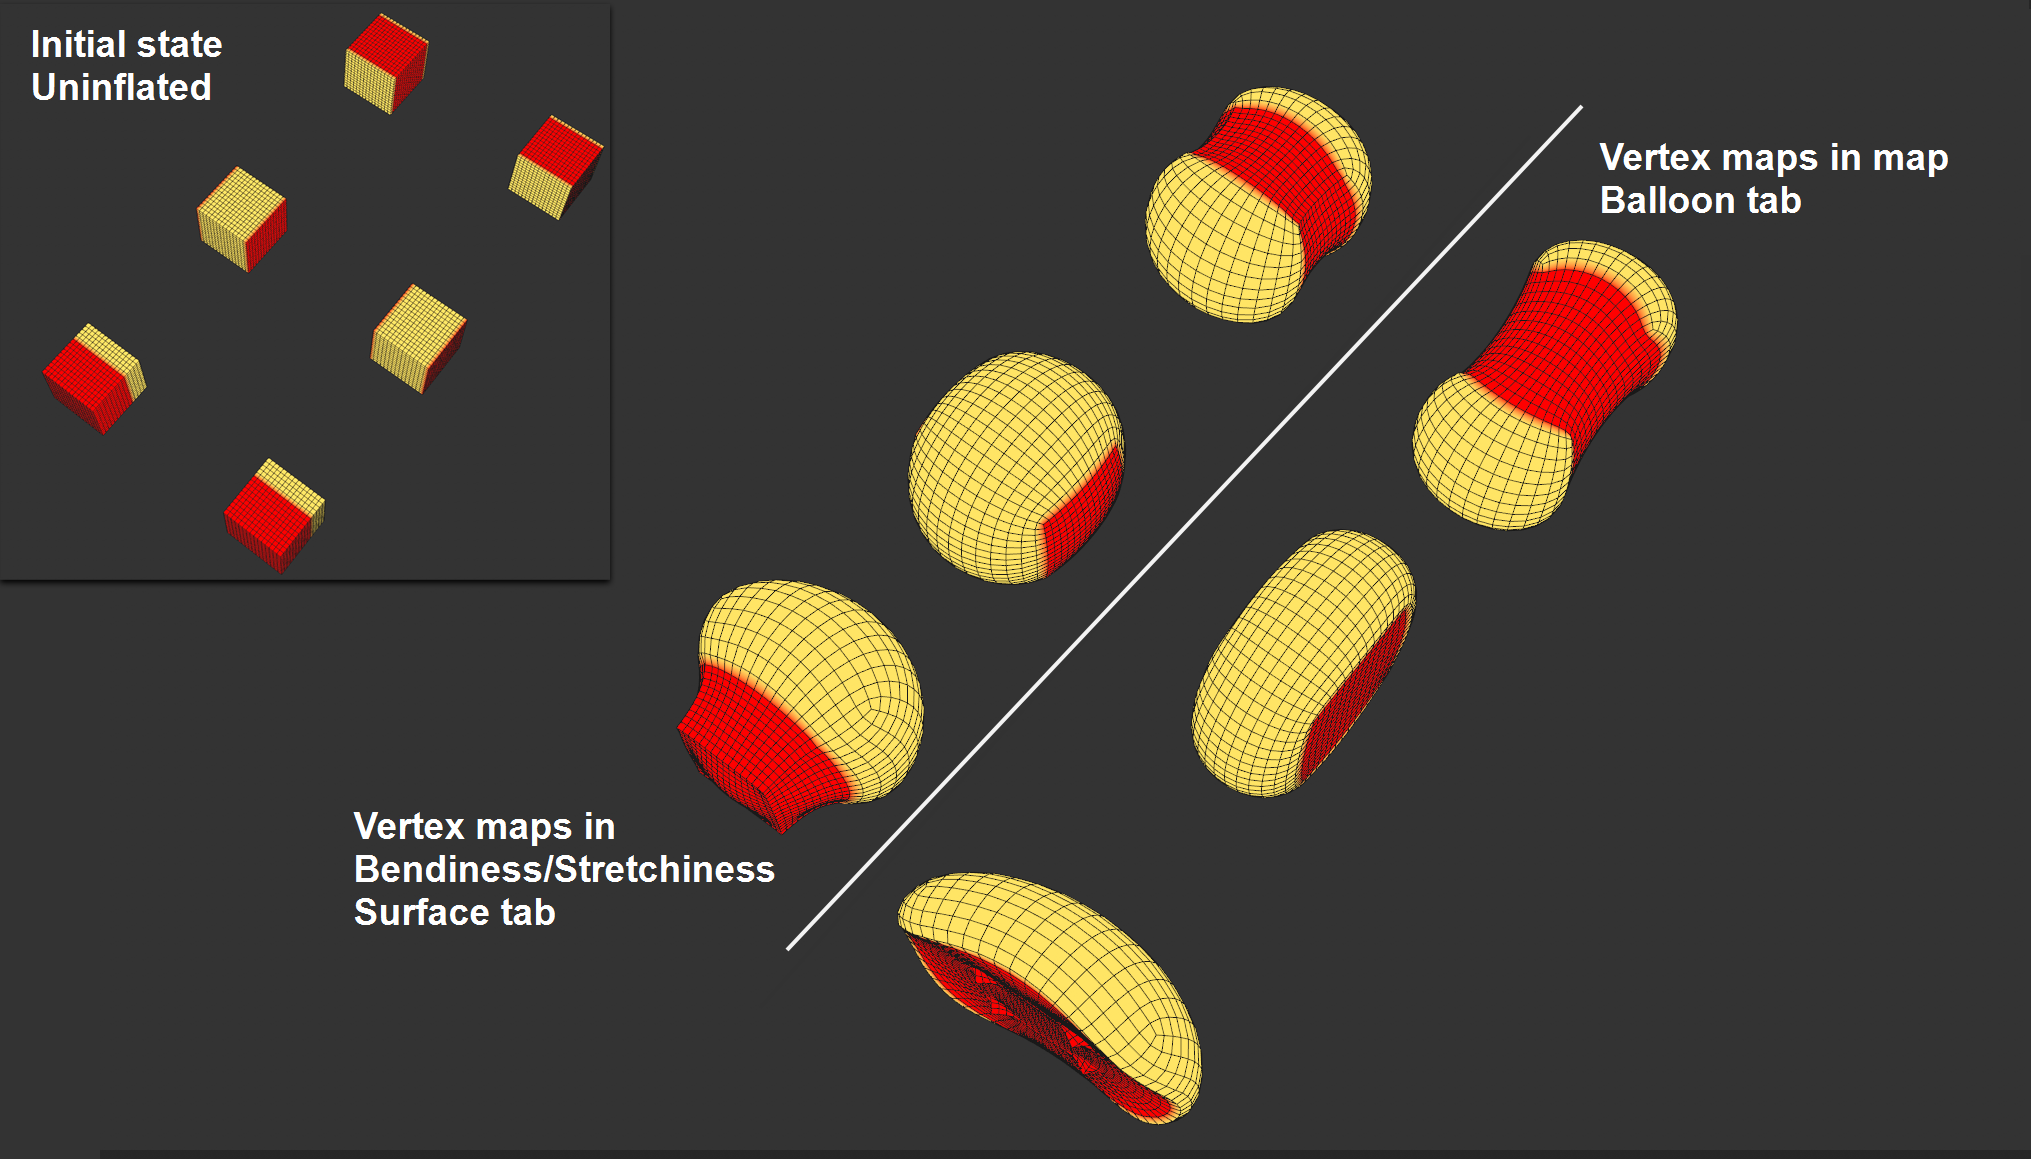
Here you can see a comparison of different vertex maps (top left) that influence the inflation of a balloon. To the left of the line, the Vertex maps are assigned to the Bendiness and Stretchiness settings (Surface tab); on the right to Map (Balloon tab). In the first case, you can see how the overpressure also causes the red Null surfaces to bulge, while on the right the red surfaces are not affected by any bulging.
Note when using objects that consist of multiple volumes - for example, a word consisting of multiple letters - and a Vertex map at only one letter, each letter requires its own Balloon tag. Otherwise, the total volume of all letters will be applied to this one letter, which leads to undesirable results. If each volume has its own Balloon tag, only the corresponding volume will be taken into account.
You surely know how it is to blow up a balloon. At first you have to use a lot of lung power, but once the balloon fills up a bit, it goes much easier. You can recreate this effect when this option is enabled. It becomes noticeable, for example, in a scene like this: One of the four pillow sections stretches a little more compared to the others, then offers less resistance, and all the "air" flows into this section:
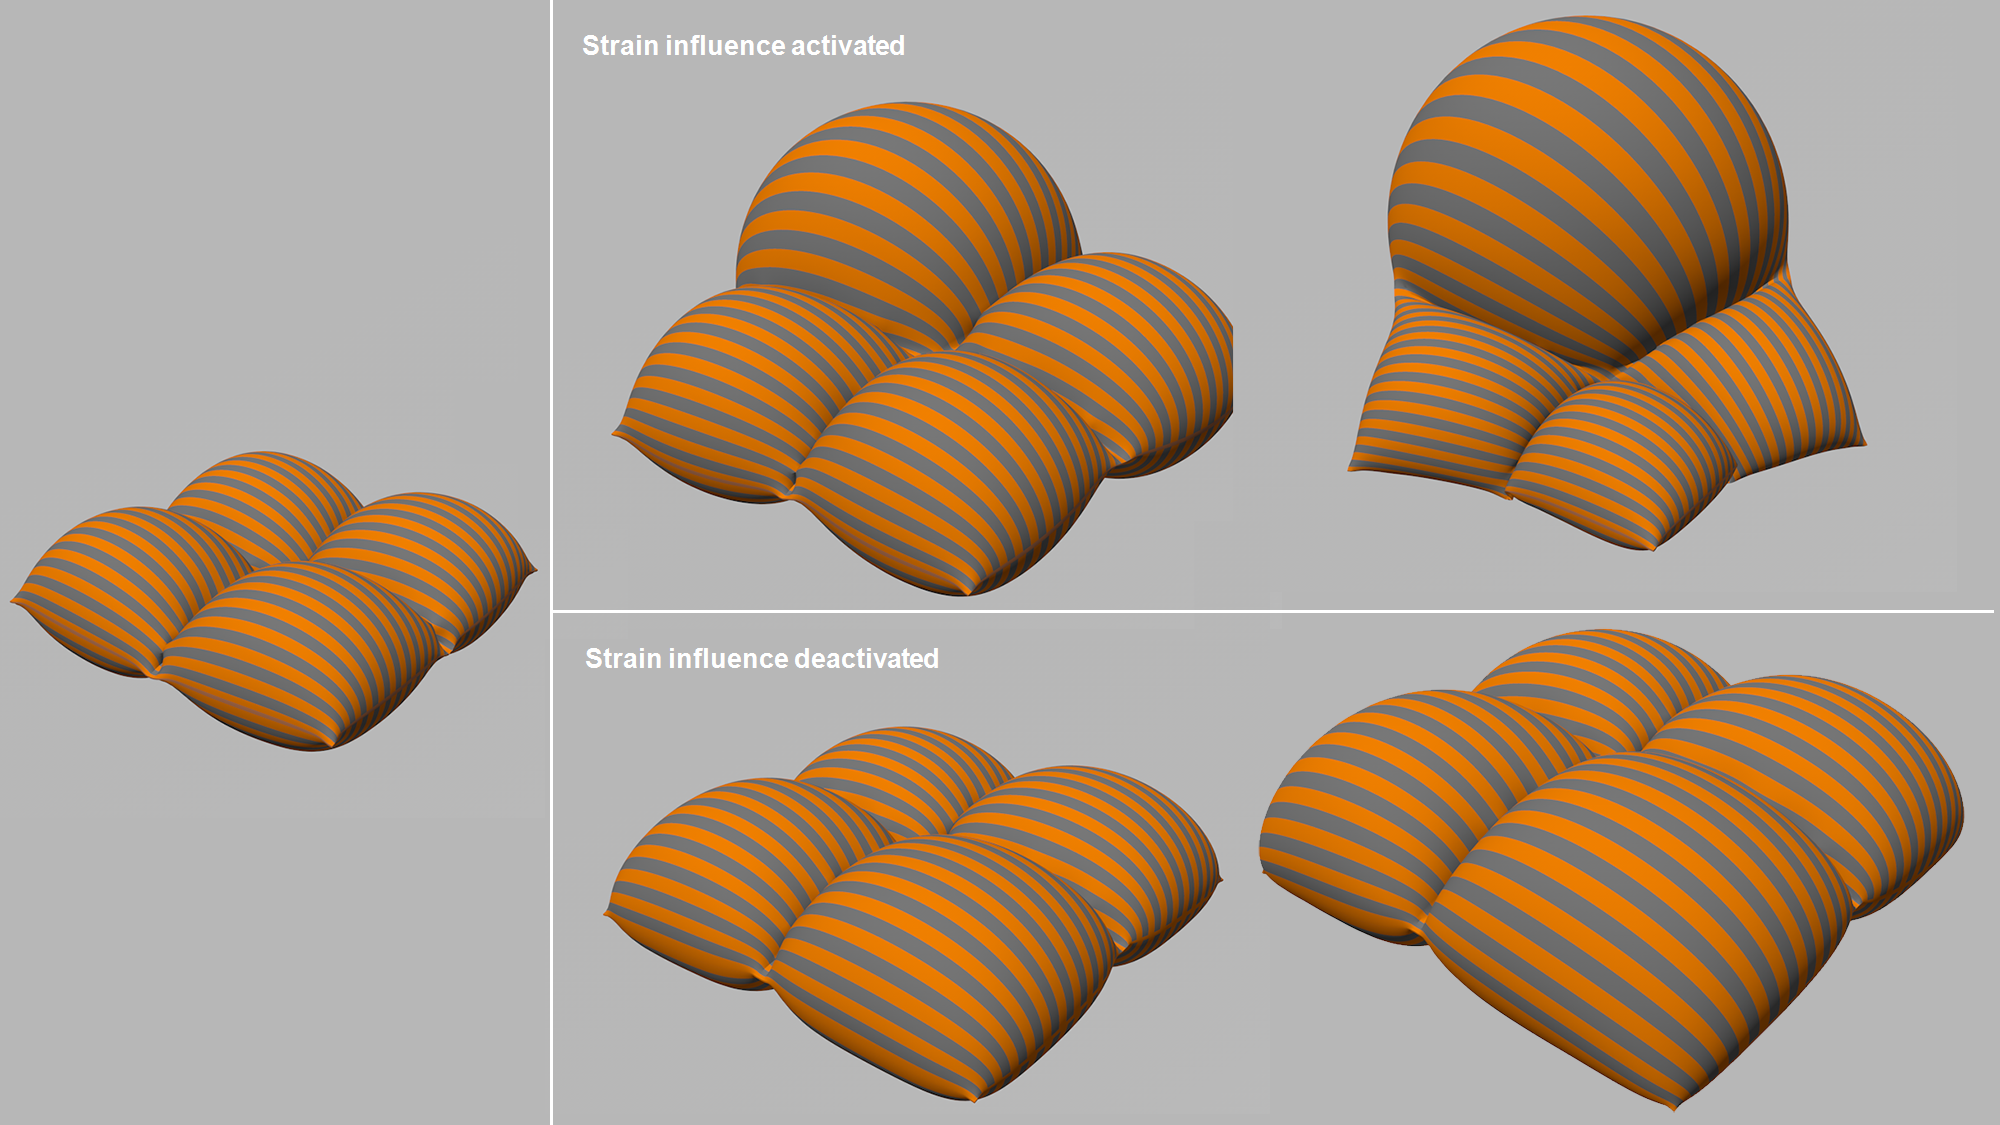 A cushion behaves according to the set option as the pressure increases (also see example scene below). Surface deformer).
If, on the other hand, the option is disabled, the inflation process will take place evenly. This should then also be the desired normal case.