

Settings
Here you can define the size of the brush. This can also be done interactively in the Viewport by pressing Shift+Ctrl+left click+drag left / right (Hotkeys).
At the right is a second fx button that offers the 3D functionality of the Effector as you know it from BodyPaint 3D.
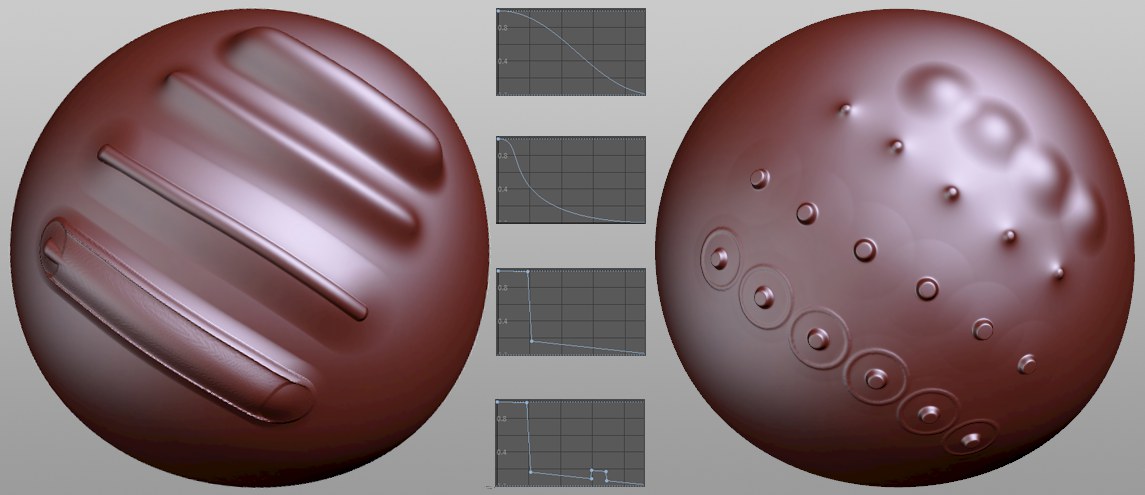 Various Falloff values, at left the default value, at right with a large distance (Draw brush).
Normally, a brush’s effect fades evenly from its center to its edge. This effect is additive when sculpting/painting because each brush stroke is offset slightly from the previous stroke(s) and as a whole creates an entirely new brush stroke.
This setting lets you define how the falloff should occur from the brush center to its edge. The value should generally be reduced to 0 at the far right, which avoids hard edges from being created.
Sets the falloff back to the default value.
This setting defines the strength of the brush (real-world brushes also apply more color the harder they are pressed onto a surface). This is exactly the same effect that is reproduced by this setting. Note that, for internal reasons, a value in excess of 100% can be used for several brushes but some brushes (e.g., the Wax brush) will not benefit from values in excess of 100%.
The pressure can also be defined interactively in the Viewport by pressing Shift + Ctrl + left click + drag up/down (see also Hotkeys).
At the right is a second fx button that offers the functionality of the Effector as you know it from BodyPaint 3D.
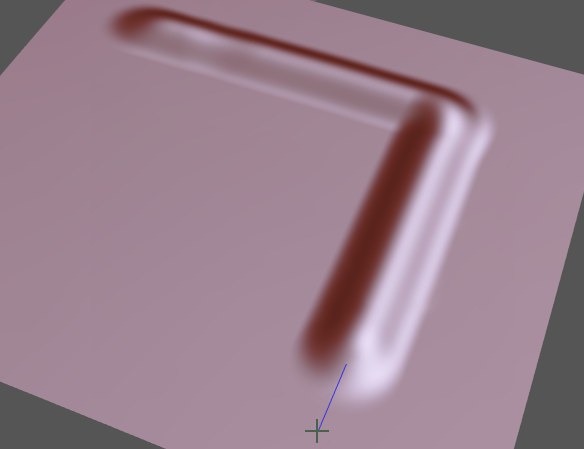
Using these settings you can more or less pull the brush along a string, which makes creating straight brush strokes much easier. The Length setting defines the string’s length. The greater the value, the better, unsteady’ movements will be compensated for and the more straight the stroke will be.
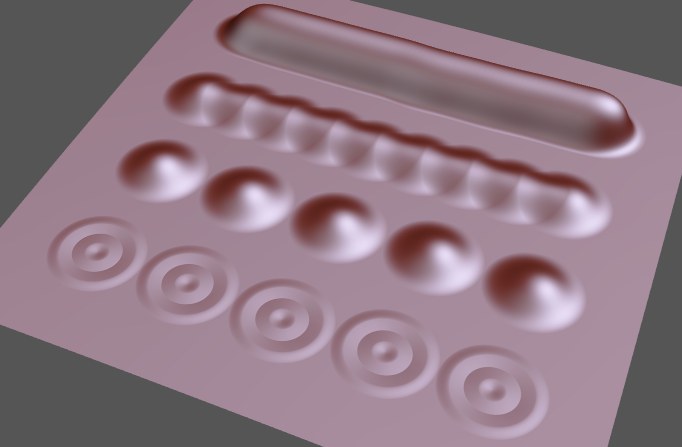
These settings affect how often the brush will exercise its effect during each stroke. With larger values (Pressure should be increased accordingly) a brush’s profile can even be applied.
In the image above, the Percent value increases from the rear to the front. The brush stroke at the front has a modified falloff value.
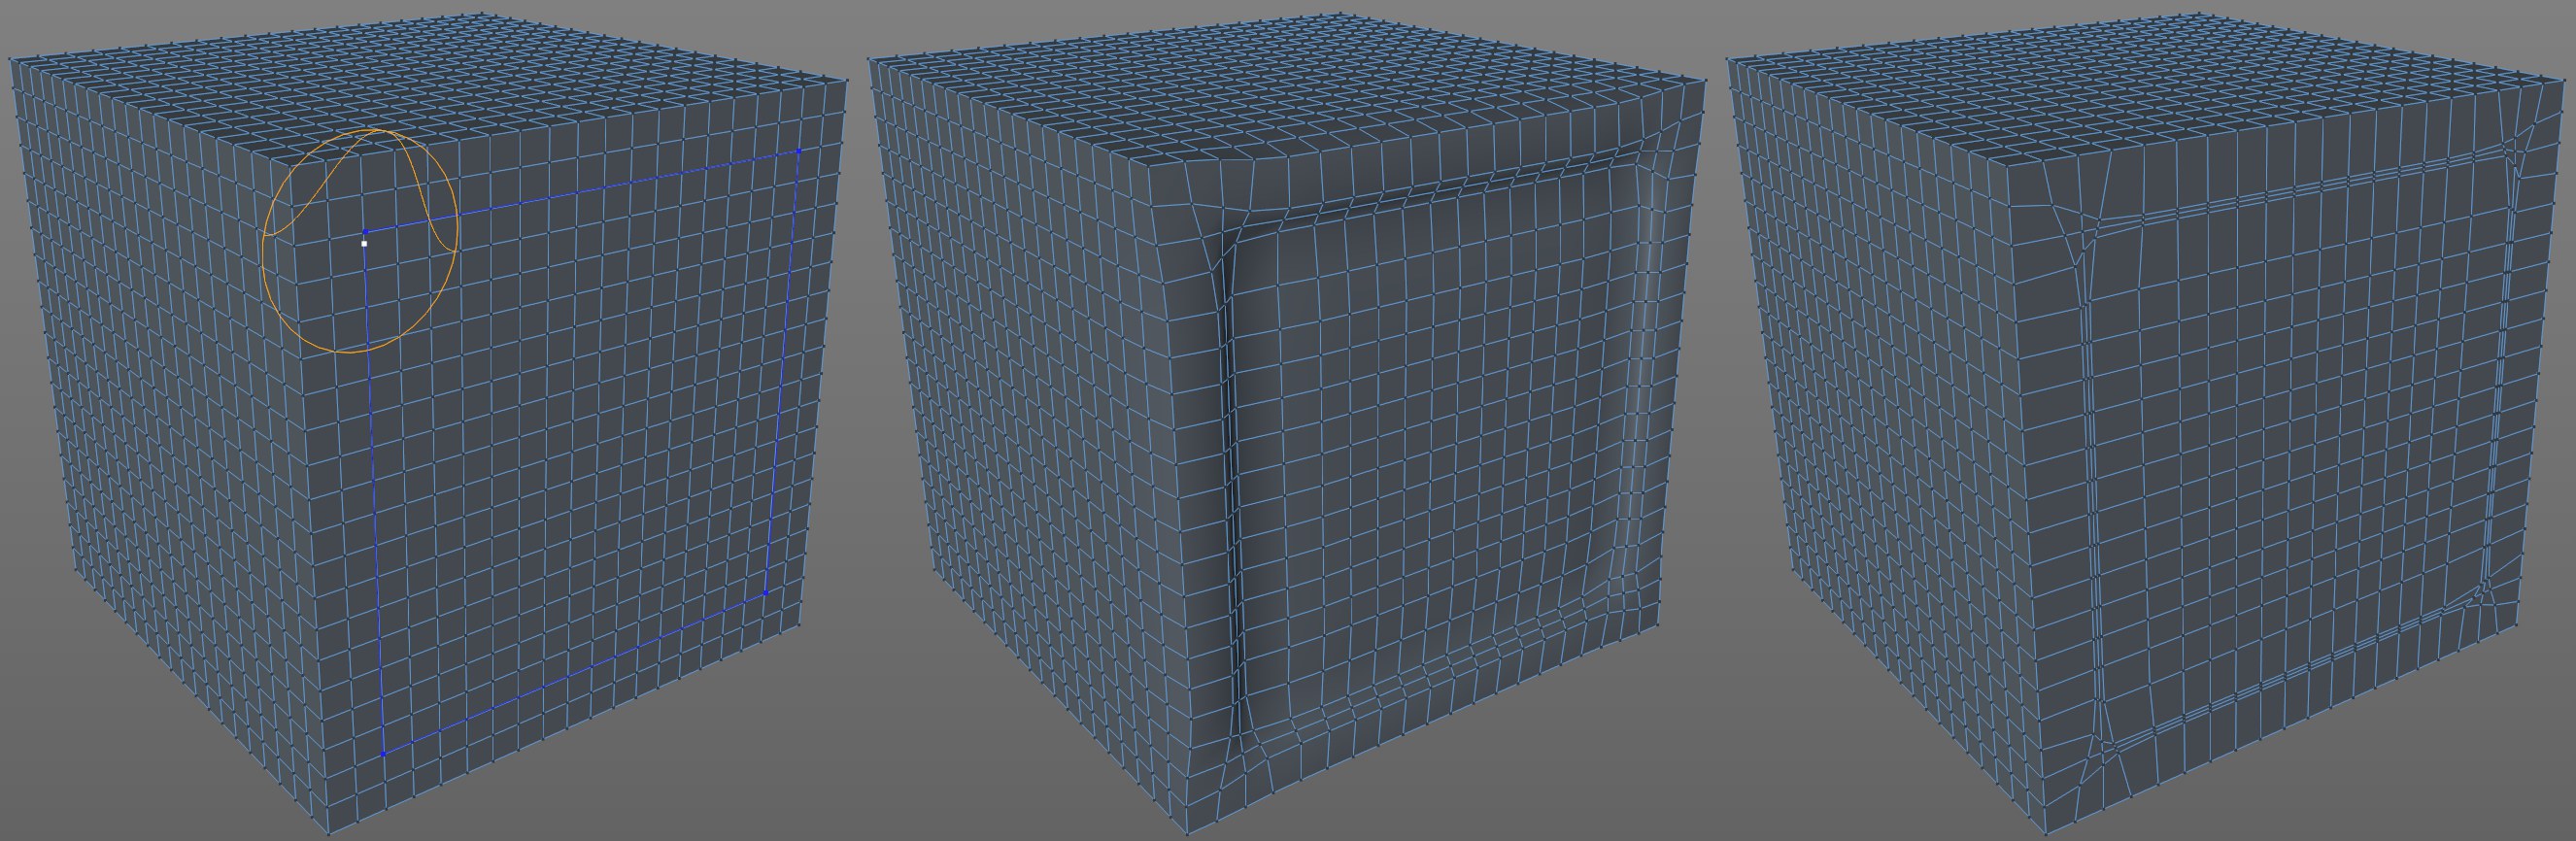 The Pinch brush, for example, spares the edge vertices when the Edge Detect option (at right) is enabled. This option is disabled at the center.
Occasionally it would be practical if a brush’s effect would end at an object’s edges. This is exactly what these setting does. If enabled, the brush will constantly compare the surface Normals that lie with in its radius of operation with those at the brush’s center. If the angle deviation is greater than the value defined in the Angle setting, the brush will not affect those regions. To put it differently, the smaller the Angle value the larger the angle deviations have to be for the brush to affect a region.
The edge recognition is very abrupt, which can lead to rugged edges on high-resolution objects. These must then be subsequently smoothed.
The edge recognition works very well in conjunction with masking (see also Invert).
Another use would be the selection of flat surfaces using the Select brush (with a very small Angle value).

Here are several modes that do the following when sculpting using a brush (these are not available for all brushes):
- Drag Rect: An impression can be created in conjunction with the Stamp function. As long as the mouse button is held pressed, size and angle can be changed interactively. The final shape will take effect once the mouse button is released.
- Drag Dabs: A click of the mouse will cause the brush to make its sculpting mark once on the object. As long as the mouse button remains pressed, this brush’s effect can be moved to a different location on the object. This mode is best used in combination with the Stamp or Stencil functions.
- Freehand: The brush works as usual; as long as the mouse button is pressed and the cursor moved, the brush will sculpt the surface accordingly. A rectangle selection can be made with the Mask brush (as long as the cursor lies outside of the object being sculpted) under which everything will be masked.
The following modes basically function as follows: you define a shape (which does not have to lie completely on the object to be shaped) without using a brush, which will, in a second step, be traced using a brush (see image top right). The following modes of operation can be used:
- single click to set start and end points
- double-click (or RMB) to end a line or connect start or end points
- Esc key to interrupt shape creation
- Backspace to delete the last point created
- Line: Click in the Viewport to set a line’s end points (or start and end points).
- Lasso Fill: A freehand line is drawn and the start and end points will be connected automatically when the LMB is released. The brush will then affect the entire area enclosed by the line.
- Poly Fill: Set corner points to create a polygonal outline. The brush will affect the entire area enclosed by the shape.
- Rectangle Fill: Click and drag a rectangle within which the brush will have an effect.
In the Customize Commands … Manager you can assign hotkeys to these modes (the commands are named Freehand, Rectangle, DragDab, Line, Lasso Fill and Rectangle Fill, and will only work if a Sculpt brush is active).
For the Fill modes, this option defines whether or not the brush effect should adhere to the symmetry settings defined in the symmetry settings, if defined. . If this option is disabled, multiple Sculpt objects can be shaped simultaneously.
For the Fill paint modes, this option defines whether or not the brush effect should be projected through the object onto the object’s backfaces. This is especially useful for the Mask brush so large object areas can be quickly masked.
In the Command Manager you will find the Sculpt Brush Fill Backfaces command, which can be accessed via a hotkey (only for the three Paint modes) and remains active as long as the corresponding hotkey is pressed. This is particularly well-suited for use with the Mask brush to quickly mask entire object regions (e.g., in Rectangle Fill mode.
As described above, a help layer can be displayed. If this option is enabled, this layer will be hidden during painting.
Use this setting to define the size of the guide plane (the brush will also work outside of the visible surface). This setting can be modified interactively using a hotkey (see above).
Use this setting to define the guide plane's distance from the Sculpt object's surface. This setting can be modified interactively using a hotkey (see above).
If enabled, the brush will simultaneously flatten and smooth (like the Smooth brush). This relaxes the mesh when it's flattened and regions with irregular geometry (e.g., intersecting surfaces) can be corrected.
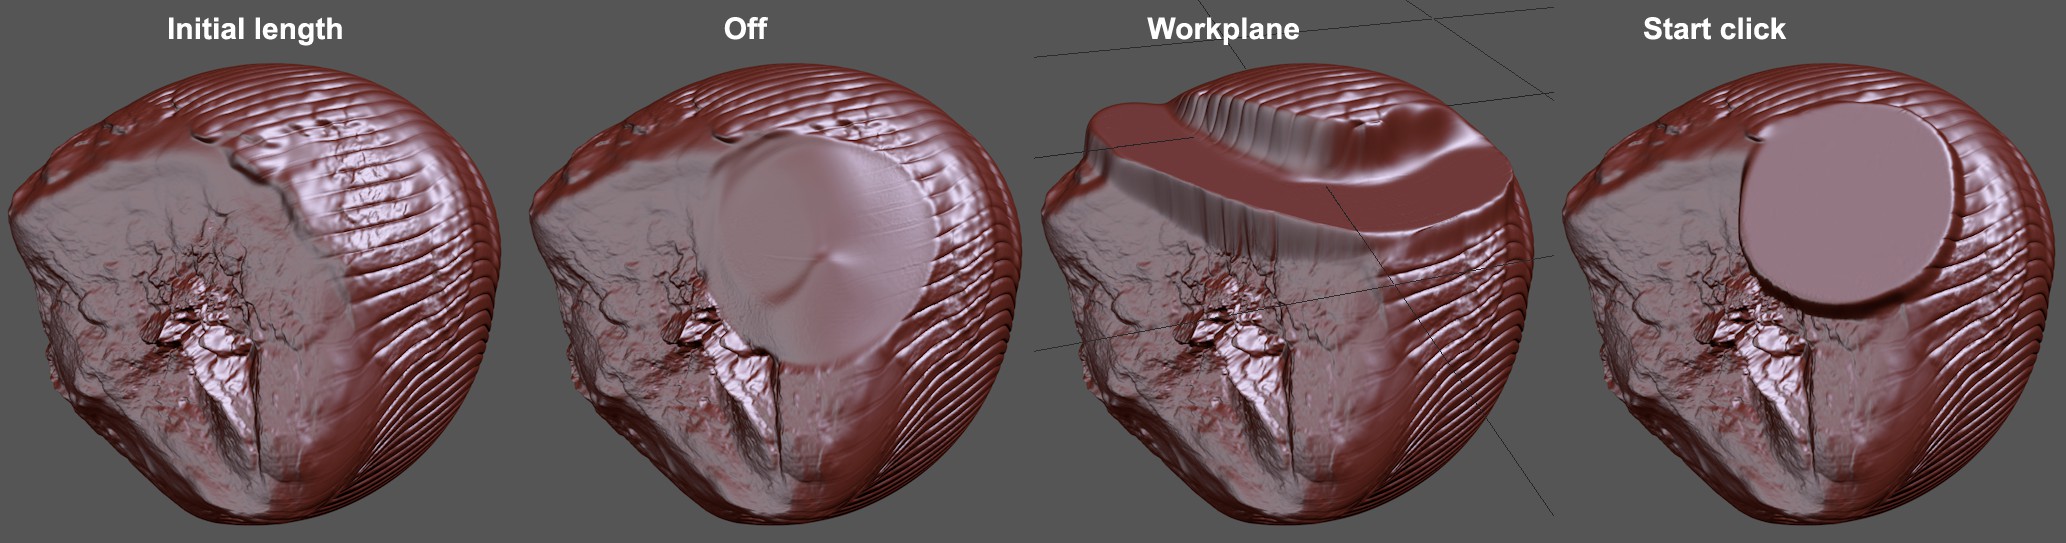 Various Fixed Plane modes.
Off
An average plane will be continuously created beneath the brush's area of application onto which all points will be placed.
Mouse Down
If enabled, an average, fixed plane will be calculated at the beginning of the brush stroke using vertex Normals beneath the brush. All vertices over which this brush is subsequently stroked will be set (either raised or lowered) to this value. This is a very good method of creating regions that are completely smooth.
However, this only works well across smaller regions. It's not possible to simply smooth half of a sphere at once, for example. The fitting mesh structure on the opposite side is not available.
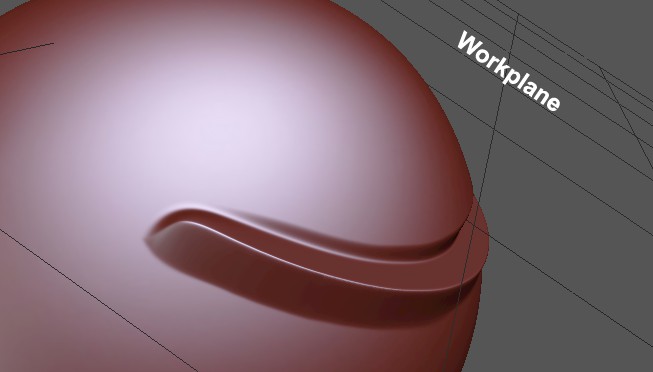
This option takes into consideration the Workplane when flattening. All regions within the brush's area of application (and simultaneously in a radius equal to this around the workplane) will be projected onto the plane. Since the Workplane can be positioned freely, the flattened areas’ orientation can be adjusted more precisely.
If this option is selected, a temporary guide plane will be displayed when you Ctrl/Cmd+click on the object to be deformed. The sculpting object points will be placed onto this surface. Note the Sculpt Brush Custom Plane Adjust hotkey (located in the Command Manager where a hotkey can be assigned to it). This command lets you adjust the scale of the guide plane (hotkey + RMB) and its distance from the surface (hotkey + LMB). If you are deforming various objects simultaneously, each object will be assigned its own guide plane. The Depth value (see below), which can also be modified if multiple guide planes are selected simultaneously, only affects the plane with the orange outline (the guide planes of other objects will have a blue outline). If only one Sculpt object is selected, each object can be assigned its own Depth value. As soon as you switch tools or change the symmetry settings, the guide planes (which also work in Symmetry mode, incl. symmetrical guide plane) will be deleted.