

Tag Properties
Enabling this checkbox will display every point that is belted as a yellow dot. A line or sample will be drawn from this point to a relatively close area on the deforming Cloth Belt object. This is represented as a yellow line in the Viewport. Disabling the option will remove the display in the Viewport.
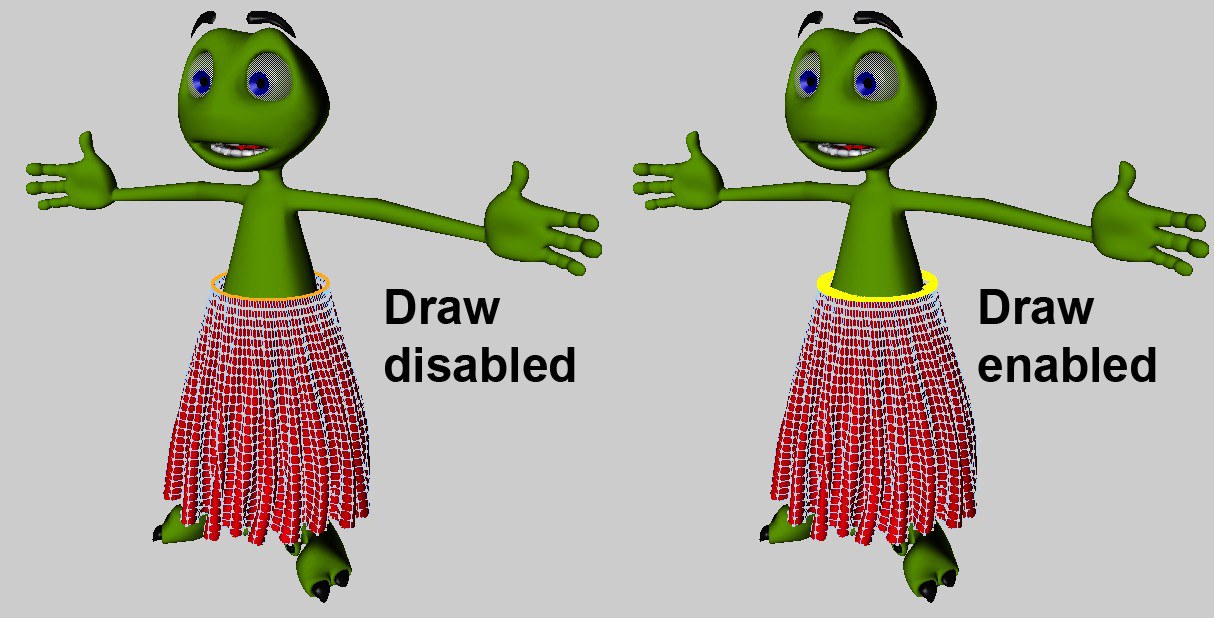
When the points of a Cloth Belt object are belted to a deformed object, a sample is sent out from each of the belted points within a reasonable area on the deformed surface. These samples can be adjusted using parameters that are found within the Belt tag: Belt Influence and Belt Hover.
This will reselect any of the points that have been assigned to the Cloth Belt object. If this command is executed while in any other mode than points, Cinema 4D will automatically switch over to Points mode.
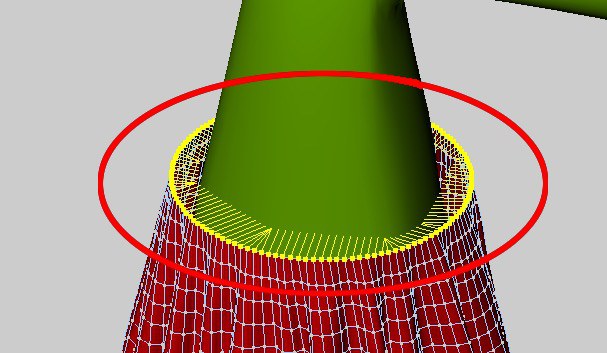
Sets the selected points as belt points.
This will remove any points that have been assigned to the Cloth Belt object.
Selects all points assigned to the Belt Object. Cinema 4D will automatically switch to Point mode, if not currently there, once this command is selected.
The (polygonal) object in this field is the Cloth Belt object's Cloth object. If an object is defined in this field, all points along the belt will move with each deformation of the Cloth object (but only after the Set button has been clicked).
This percentage value will determine how much influence the Cloth Belt object has on the Cloth object. A value of 0% will not allow for the Belt object to influence the cloth object at all, whereas a value of 100% will have complete influence on the cloth object. The area of Influence can be controlled through a vertex map using the corresponding section on the Effects page.
Regarding the new Simulation System: Values greater than 99.5% will "pin" the Cloth object to the Cloth Belt object. This means that, internally, very strong constraints will be applied. Values less than or equal to 99.5% will allow minor movement due to correspondingly weaker constraints being applied. This lets you define stronger and weaker "pinning" (internally, these are actually 2 different types of constraints).
This field controls the influence the belt object has on the Cloth Belt object. Points with 100% weighting will be completely influenced by the Cloth Belt object. Points with 0% weighting will not be influenced by the belt object at all.
This value controls how far or how close the Cloth Belt object will be to the Belt object. When the cloth points sample to the deformed geometry, they have an initial distance that represents the Hover value at 100%. This means that if the value is decreased to 50%, the cloth points will be half the distance from their initial state. A value of 200% will be twice the distance from the points’ initial state.
You can animate this value from its original value of 100% to 0% to completely adapt this Cloth object to the Cloth Belt object. Don't forget to then set the initial state of the Cloth tag.
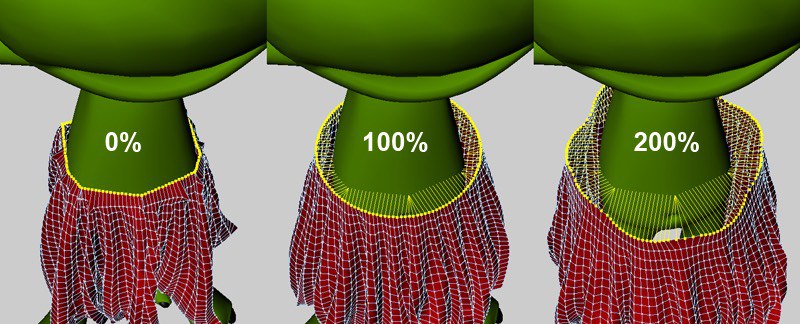 Notice how the points adapt to the shape of the geometry.
With the example of a real belt influencing a pair of pants, areas of the pants around the sides of the character's hips would be a lot closer to the belt, whereas areas around the crotch would be allowed a little more freedom. Using a vertex map in this box would allow for painting the areas on the sides of the pants closer to the Belt object, and giving a little extra room in the crotch area.
Remember that a distance is defined from the Cloth Belt object to the set points of the cloth object. The Belt Hover parameter on the Forces tab controls that distance. With a Belt Hover value of 100%, painting the areas around the crotch with 100% weight will leave that area at its current distance to the Belt object. Painting the sides of the pants with 50% weight would half this distance, bringing that area closer to the Cloth Belt object.