

Simulation
If most of the parameters in this tab look familiar to you: no wonder, you already know them from the Cloth Tag. Almost all the parameters in the "Surface" tab are identical to those here in the Fabric Brush and work in exactly the same way. For further details, please refer to that page.
You have the following choice here:
- Geometry is the normal simulation mode as described on the previous pages. Click on the textile and drag it into an appropriate shape, for example.
- Ghost Points switches to a brush mode with which you can mark object points that are excluded from the self-collision query. These are called Ghost Points and are marked in red. As always, when it comes to selections, the SHIFT key is used to add points and the CTRL key to deselect points that have already been selected.
What are Ghost Points good for?
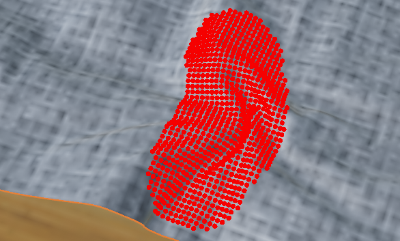 Selected Ghost Points (self-collision switched off).
When processing textiles, self-penetrations occur quickly and easily, which are difficult to undo, as the previously "failing" collision control now unfortunately works too well and the penetrating pieces of fabric cannot be separated again. Then simply define all points in the area of the self-intersections generously as Ghost Points and - don't forget to switch back to geometry Mode - pull the fabric apart (e.g. in Drag Mode; "Tool" tab).
Also note the Detangle Mode ("Tool" tab), which makes similar things interactive.
Can Ghost Points be defined in any other way than with the Fabric Brush?
Yes, this also works with a Point Selection ag on the fabric object. Make sure that the Name in the "Base" tag tab is __fabricghosts__ (2 underscores before and after fabricghosts). Only then does the Fabric Brush evaluate the tag.
Scene

The higher you set the value here, the more precise and accurate the simulation will be. This has the effect - up to a certain limit - of increasing the stiffness of the fabric, i.e. seemingly reducing its Bendiness and Stretchiness.
Collision detection also benefits from higher Substep values.
Further details can be found at Substeps.
When using the Fabric Brush, gravity can be switched on at any time by pressing the G button. You do not need to touch the fabric. Hold down the G key and click in an empty part of the scene and the currently selected fabric objects will fall down and collide with the collision partners located under Colliders ("Colliders" category).
With Gravity, the magnitude and direction - normally in the negative Y direction, of course - of the gravitational force can be set. You have an X, Y and Z input field for this purpose. If you want gravity to act diagonally downwards, enter an additional 9.81 in the X field, for example. Gravity then acts exactly at a 45° angle between the -Y- and X-axis.
These two settings characterize the properties of a fabric like no other (see also Illustration at Bendiness):
- Bendiness: the higher the pliability, the more easily the fabric wrinkles (e.g. silk), while lower values increasingly behave like a stiff rubber mat.
- Stretchiness: the higher the stretchability, the more effortlessly the mesh points move apart when force is applied. With small values, on the other hand - and this is characteristic of the vast majority of fabrics - the distances between neighboring mesh points remain almost the same: if you pull on one end of a flat spread-out cloth, the other end follows immediately! If Stretchiness is low enough, creases form.
In the video above you can see the behavior of a substance with the following variations:
- Left: with the preset high Bendiness and minimal Stretchiness. This gives you a filigree drape.
- Center: low Bendiness, minimal Stretchiness. The drape is coarser than in the previous example and is more similar to the behavior of a rubber mat.
- Right: high Bendiness, Stretchiness greater than zero. There are hardly any longitudinal folds as in the other two examples.
Use this to specify how high the friction should be, both for self-collision and for contact with collision objects ("Colliders" category). In the latter case, the total friction is the product of the two collision partners.
If one of the two values is 0, there is no friction at all between the two collision partners. In general, friction is a measure of how well contacting elements can slide against each other. Smaller values define correspondingly less friction and larger values increase the friction accordingly.
At first glance, this is similar to the following parameter Stickiness, but stickiness also works if you pull objects that are touching each other vertically away from the surface (friction would not exert any forces here).
The Stickiness provides additional adhesive force compared to Friction. Put simply, Friction slows down the relative movement of contact surfaces, while Stickiness ensures that contact surfaces hold or adhere to each other. The behavior during processing then resembles a dripping wet T-shirt that sticks to your body. This property applies to all collision objects in the list above.
Stickiness is similar to Friction: it is the product of the stickiness values of the individual collision partners. If this is 0 for one of the two, nothing sticks.
This setting defines the distance from the object surface at which the collision is assumed to occur. It should always be greater than 0 to prevent visible penetrations. For details see Thickness.
Imagine a spring between each neighboring mesh point that has exactly this length as the rest length at the start of the simulation and thus ensures that the distance between the mesh points remains constant. This is the situation at 100% Target Length. If you now define smaller values here, the object will contract when the simulation starts. The Target Length therefore always applies to the entire object, not just within the effective range of the tool radius!
In the following illustration, the hand shown on the left was processed once with a Target Length of less than 100% and once above 100%
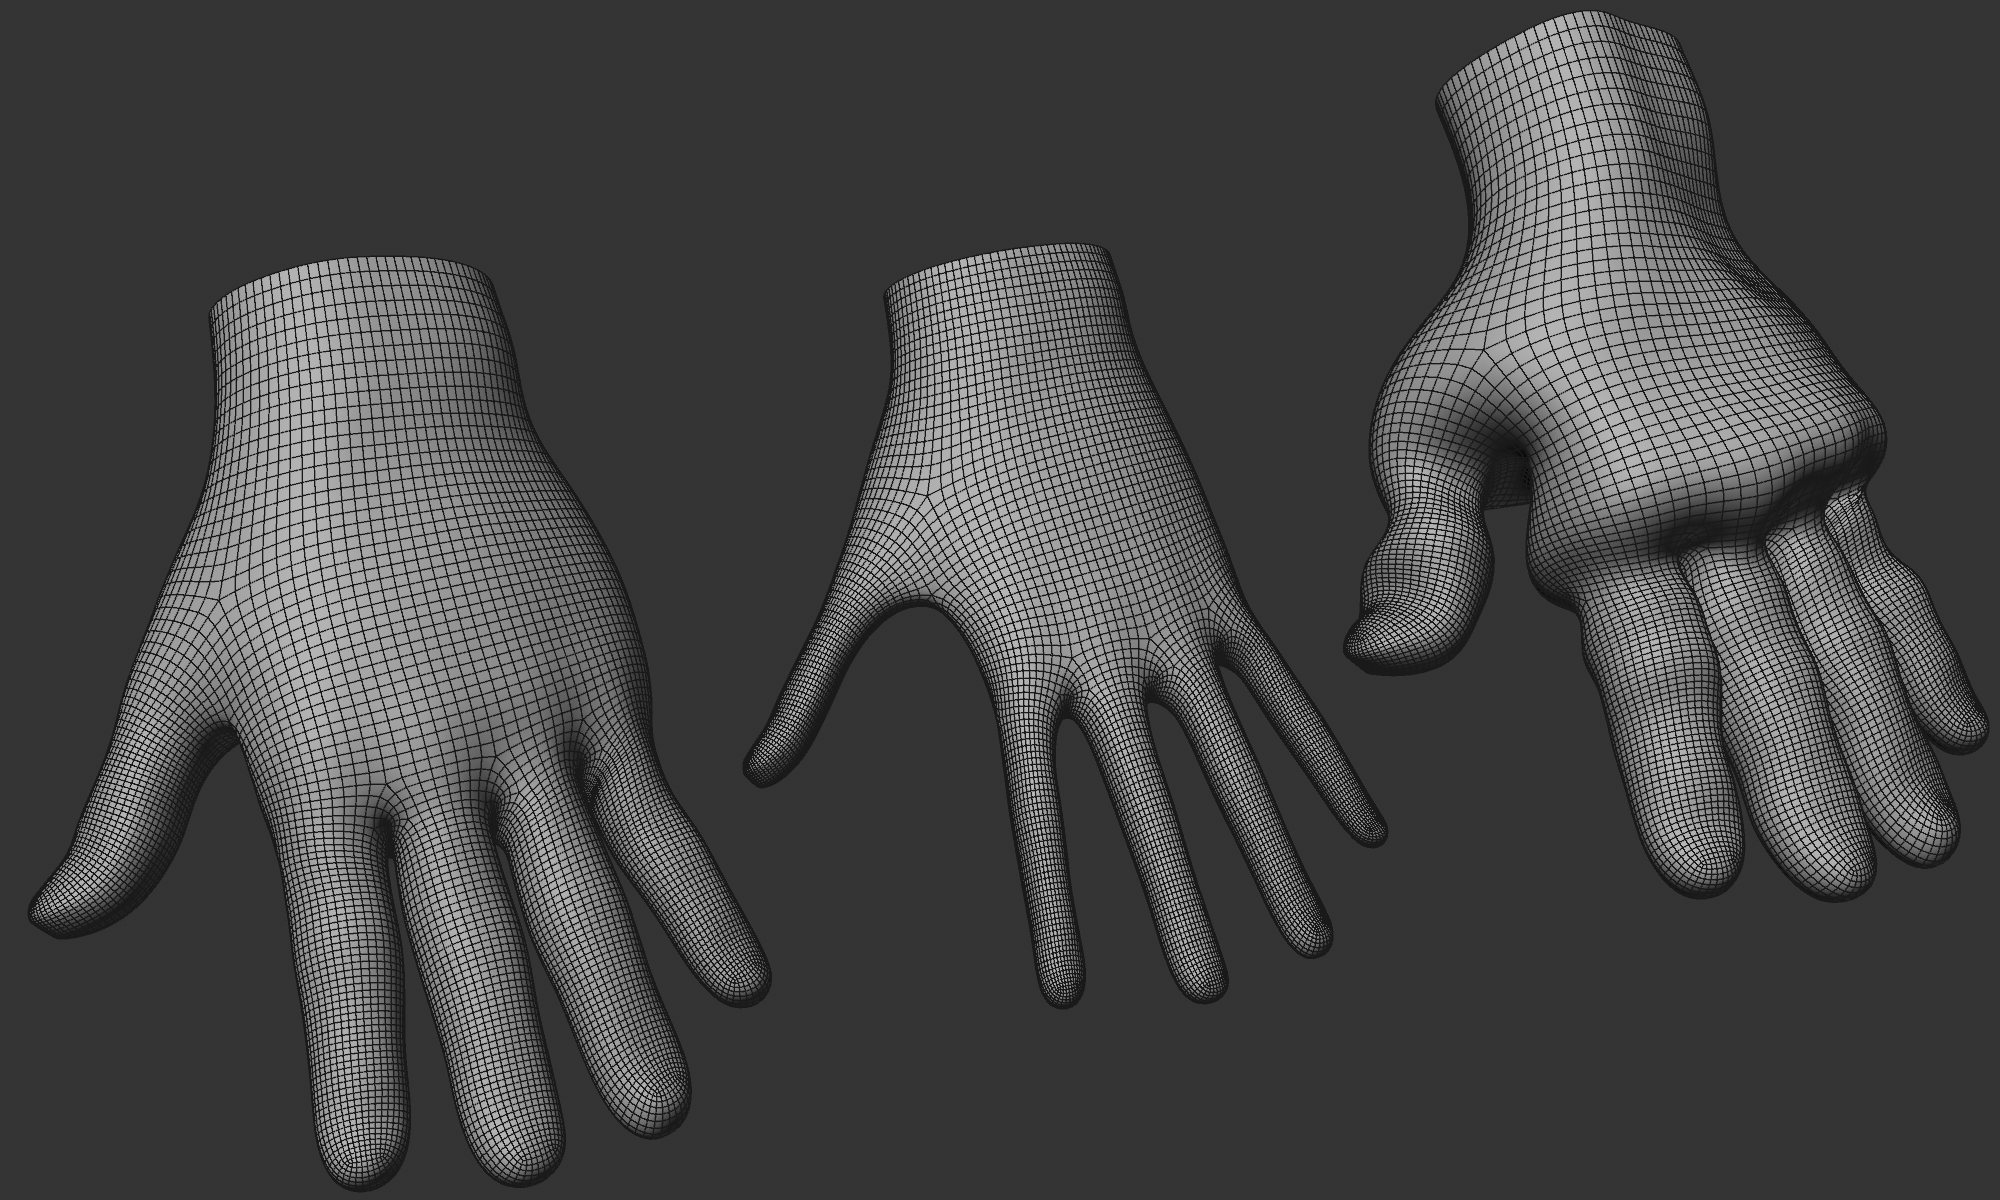
By varying the Bendiness, you can influence the exact effect of contraction and expansion, for example by creating different folds.
If you want to wrap an object in shrink wrap, for example, this can also be done very well with this parameter. For example, create a closed volume such as a sphere that completely encloses the object to be wrapped, reduce the Target Length and let the brush do its work.
Would you like to drape a tablecloth on a table? Or put a cushion on the sofa? Then this section is the right place for you. Here you can define objects that the fabric perceives as a solid object and does not penetrate when working with the Fabric Brush or simply dropping it.
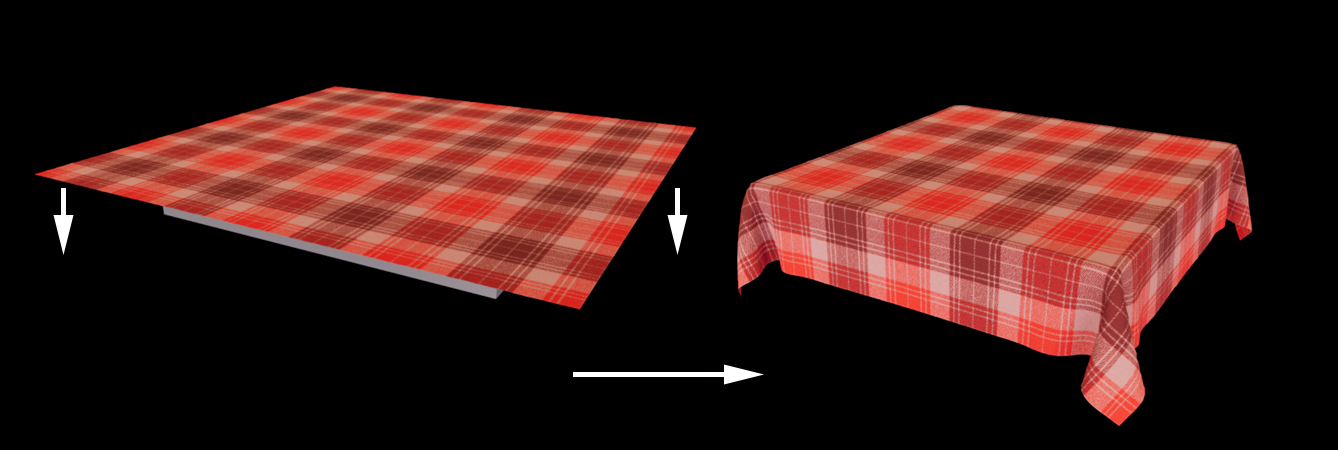 The Fabric Brush can drop fabric onto an object (press the G button and the mouse button over an empty view area).
However, you can of course also interactively "brush" a fabric against a collision object with the fabric brush.
Drag and drop all objects from the Object Manager with which the fabric is to collide here. Hierarchies are taken into account: subordinate objects are included - but not displayed in the list.
Here you can set from which polygon side of the collision object defined above should be checked for collisions. You can choose from:
- Front: Collisions will only occur when collision components approach from the outside (with respect to the Normals).
- Back: Collisions will only occur when collision components approach from behind (with respect to the Normals).
- Both: Collisions will take place on both sides.
If, for example, the normals of a collision object are reversed, you can switch to the Back. Otherwise, you should also try Both for collisions.
Use this to specify how large the friction of the collision objects in the list above should be. Remember that the collision friction depends both on the friction value of the material (parameter of the same name in the "Simulation" tab) and on the friction defined here. If one of the two values is 0, there is no friction at all between the two collision partners. Exception: if the fabric folds/crumples so that it touches itself, only the first friction value in this tab applies.
In general, Friction is a measure of how well contacting elements can slide against each other. Smaller values allow this, while larger values increasingly prevent sliding.
At first glance, this is similar to the following parameter Stickiness, but stickiness also works if you pull objects that are touching each other vertically away from the surface (friction would not exert any forces here).
The Stickiness provides additional adhesive force compared to Friction. Put simply, Friction slows down the relative movement of contact surfaces, while Stickiness ensures that contact surfaces hold or adhere to each other. The behavior during processing is then similar to a soaking wet T-shirt that you are wearing on your body. This property applies to all collision objects in the list above.
Stickiness is similar to friction: it is the product of the stickiness values of the individual collision partners. If this is 0 for one of the two, nothing sticks.