

Advanced
This allows the central area of the deformation, which lies around the Y-axis of the deformation, to be flattened. This creates a circular plateau whose height corresponds to the Ridges value. As the radius increases, the start of the twisting deformation is also shifted further and further outwards.
 From left to right, here you can see the effect of an increasing value for the Inner Radius.
This value can be used to flatten the transition to the amplitude valleys. In extreme cases, it then appears as if the valleys have been filled in.
 Increasing Fade values from left to right ensure that the valleys in the deformation are filled.
You can use this value to control where the majority of the twist angle is to be calculated. With negative values, the majority of the twist is generated in the immediate vicinity of the Y-axis of the deformation matrix, i.e. in the center of the deformation. With high positive values, on the other hand, the center of the deformation remains almost free of twists and the twists mainly take place in the outer area of the deformation.
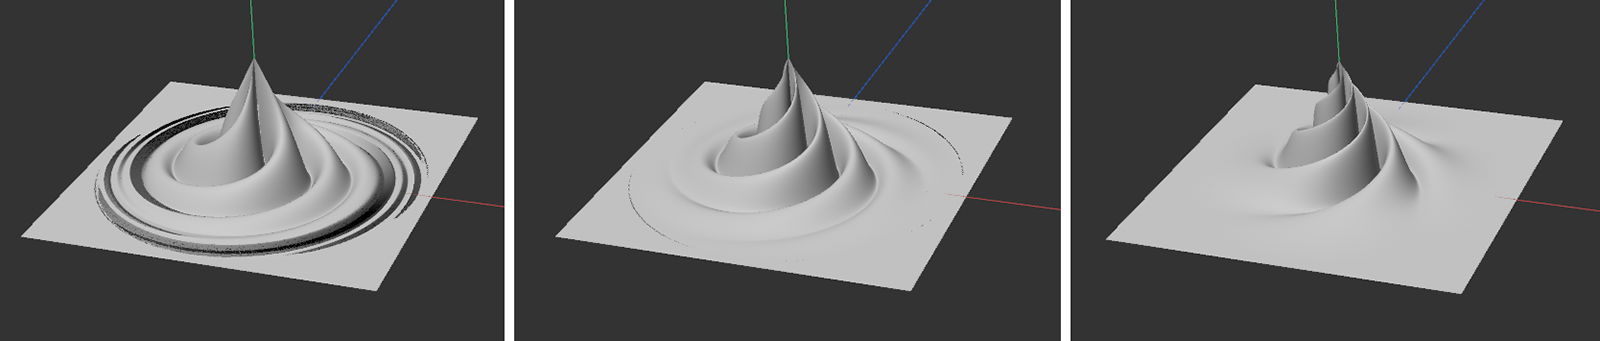 From left to right, the effect of decreasing bias values is documented here, starting with a high positive value in the left image. The twisting deformation is thus concentrated on the outer area. On the right, a strongly negative value was used. The twisting is concentrated on the center of the deformation.
This can be used to compensate for the differences in twist intensity added by the Swirl Bias.
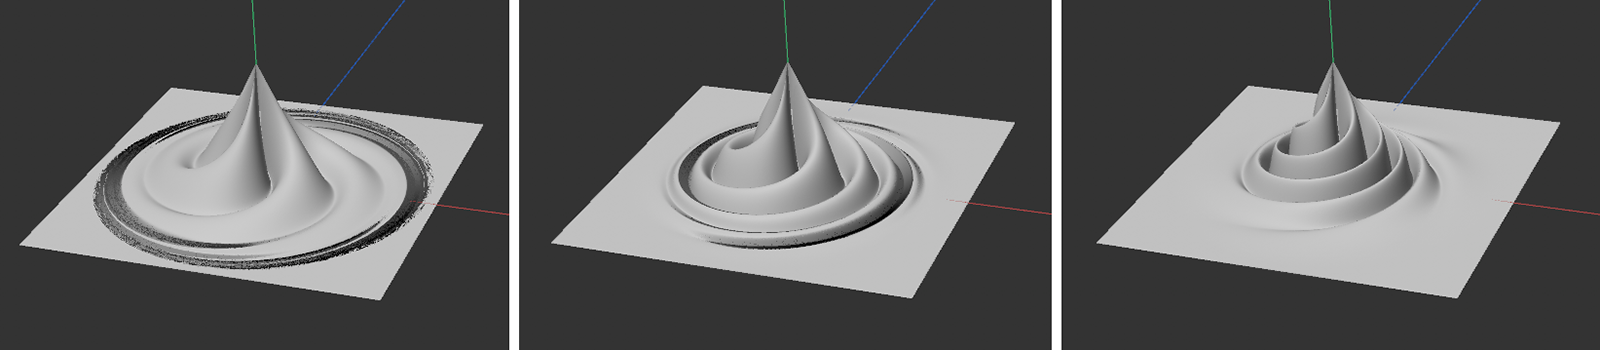 This series of images uses a Swirl Bias value of 100% throughout, which concentrates the twists on the outer area of the deformation (see left image). By increasing the smoothing value, this imbalance can be compensated until a uniform twist is finally achieved over the entire deformation area (see far right image).
This setting is only available if a Height value other than 0 is used. The Height Bias value can then control how the height shift decreases towards the edge of the area of influence. Negative values restrict the height shift to the center of the deformation. Values above 0% lead to a more dome-shaped distribution of the height shift.
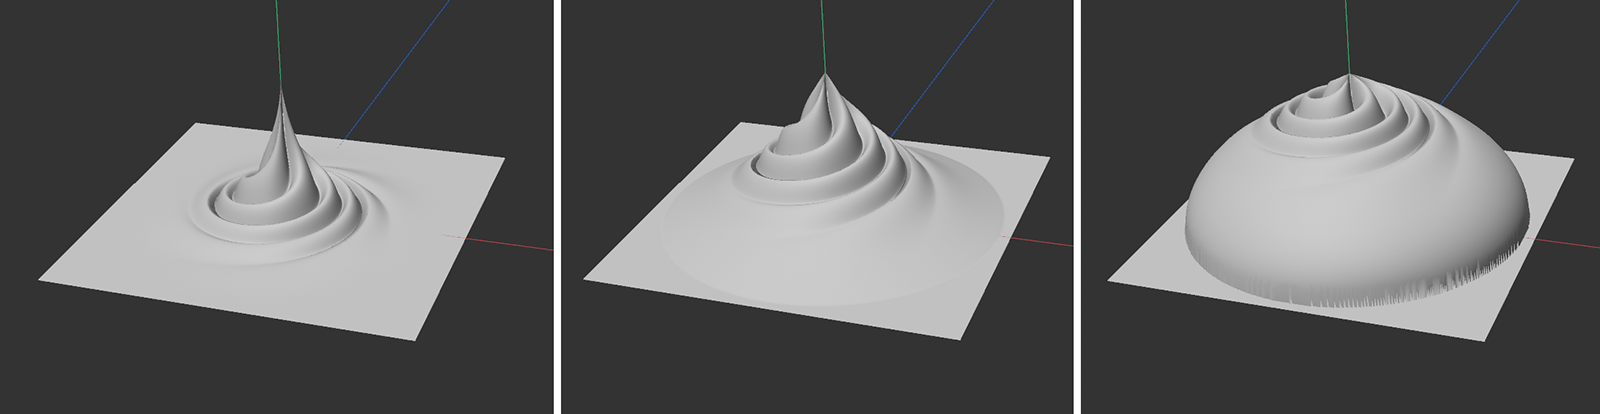 A height bias of -100% was used on the left, a height bias of 0% in the middle and a height bias value of 100% on the right. For negative values, the height shift only occurs near the Y-axis and then decreases steeply in intensity. For positive values, the height shift is dome-shaped, which can lead to a hard transition at the edge of the deformation.
This setting is only available if a Height value not equal to 0 is used. The intensity difference of the height shift (see Height value) between the center and the edge of the deformation can then be smoothed out. The decrease curve of the height shift shifted by the Height Bias value can thus be balanced out again.
This setting is only available if a Pull value other than 0 is used. The deformation decrease curve selected via Pull can be amplified or attenuated here.
 In this example, a Pull value of -100% is used. The image series starts on the left with a Pull Bias value of -100% and ends on the right with a Pull Bias of +100%.
This setting is only available if a Pull value other than 0 is used. Increasing this value results in an equalization of the changes to the Pull falloff curve implemented by the Pull Bias.
This can be used to change the cross-section of the highs and lows (the amplitudes). Negative values lead to concave and positive values to convex shapes.
 On the left -100%, in the middle 5% and on the right 100% was used for Ridge Shape.
This smoothes the cross-section of the highs and lows. The shape selected via the Ridge Shape is thus softened and rounded.
The amplitude of the highs and lows can be influenced in their decrease towards the edge of the deformation. With negative Bias Height values, the amplitude decreases faster from the center and the outer area of the deformation remains relatively flat. With positive Bias Height values, the amplitude remains constant for longer and then only decreases abruptly at the outer edge of the deformation.
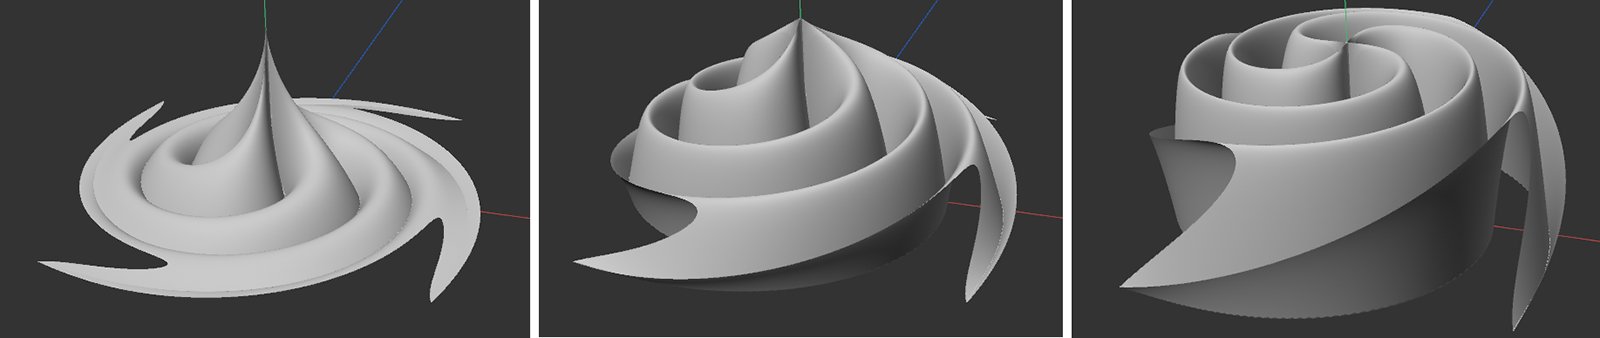 On the left -100%, in the middle 0% and on the right 100% was used for Ridges Bias Height.
This can be used to smooth the decrease curve of the highs and lows. This reduces the effect of the Bias Height setting.