
Volume
|
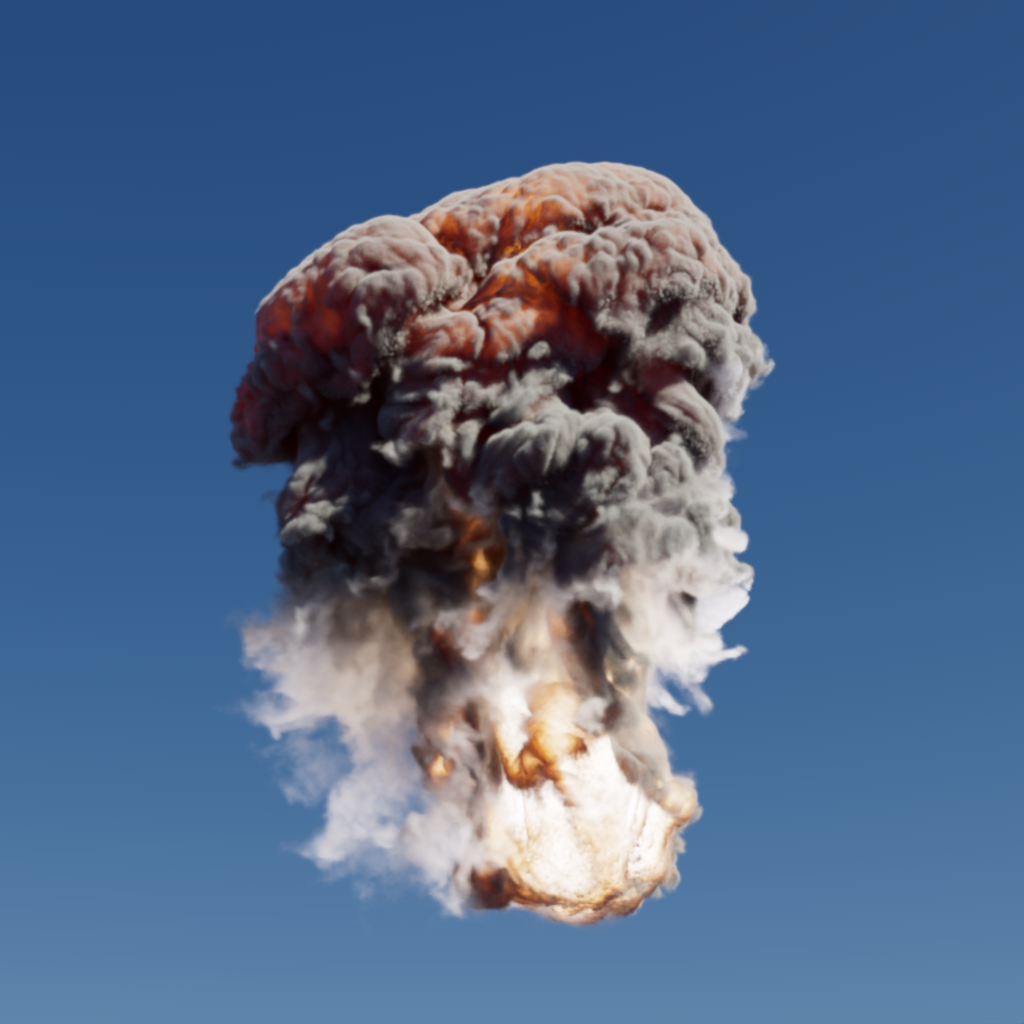
The Redshift Volume shader is a physically based shader designed to render heterogeneous volume objects like clouds, smoke, fire, and explosions. The shading components of a volume shader are driven by grids of voxel data contained inside a volume object, like an OpenVDB file. Volume grids may also be referred to as channels, particularly in a shading context, and Redshift uses the channel terminology when referencing a VDB grid in a volume shader.
For more information on OpenVDB files, example VDBs, and loading them into your scene please see the Volume Object page.
The volume shader is divided into three shading components: Scatter, Absorption and Emission. For a loose approximation of volume shading as compared to object shading you might think of Scatter as similar to "diffuse" shading, Absorption like volume "transparency," and Emission as "incandescence" or "self-illumination." Therefore, if you want to make your volume brighter or darker, you should adjust the Scatter parameters. If you want to make your volume appear more solid or dense, you should adjust the Absorption parameters. Finally, if your volume represents a self-illuminating effect like fire and want to make it brighter or dimmer, you should adjust the Emission parameters.
The VDB file used to generate the examples on this page can be downloaded here: Redshift demo volume VDB (242 MB)
In order to match the look of the example images the Advanced parametersDensity Old Max must be set to 3 and Emission Old Max must be set to 1.6. All example images were rendered with a volume trace depth of 1 unless noted otherwise.
Shader Graph Setup and Scene Requirements
|
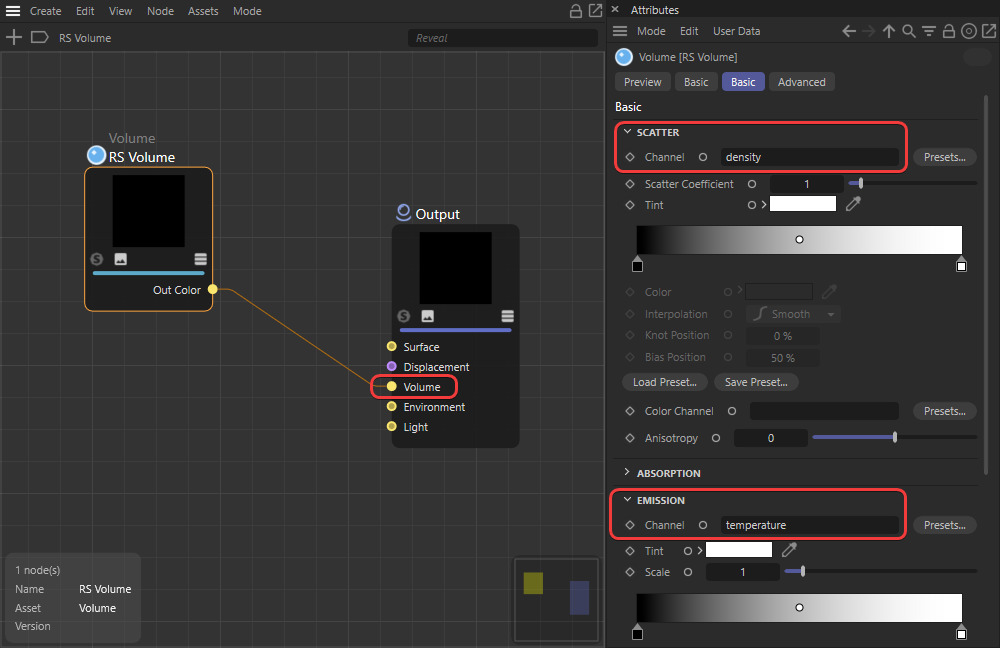
The volume shader requires more careful consideration than your average material. Before any volume rendering can even occur the following prerequisites must be met:
-
At least one channel must be set from the volume object to drive a volume's scattering or emission.
-
At least one light must be present in the scene with volume contribution set to a value greater than 0 (by default lights have a volume contribution of 1).
-
The RS Volume node must be connected to the 'Volume' input of an Output node.
-
This should occur automatically with the creation of a new volume shader but it's an important distinction to be aware of if you are setting up a volume shader from scratch or troubleshooting a volume that is not rendering.
-
Volume objects have to be stored on the GPU's memory in their entirety and are not handled by Redshift's out-of-core system. Therefore, if a scene uses too many different volume objects or if these volume objects are of a particularly high resolution and do not fit on the GPU's memory, rendering will be aborted with an out-of-VRAM error message.
Pyro Rendering
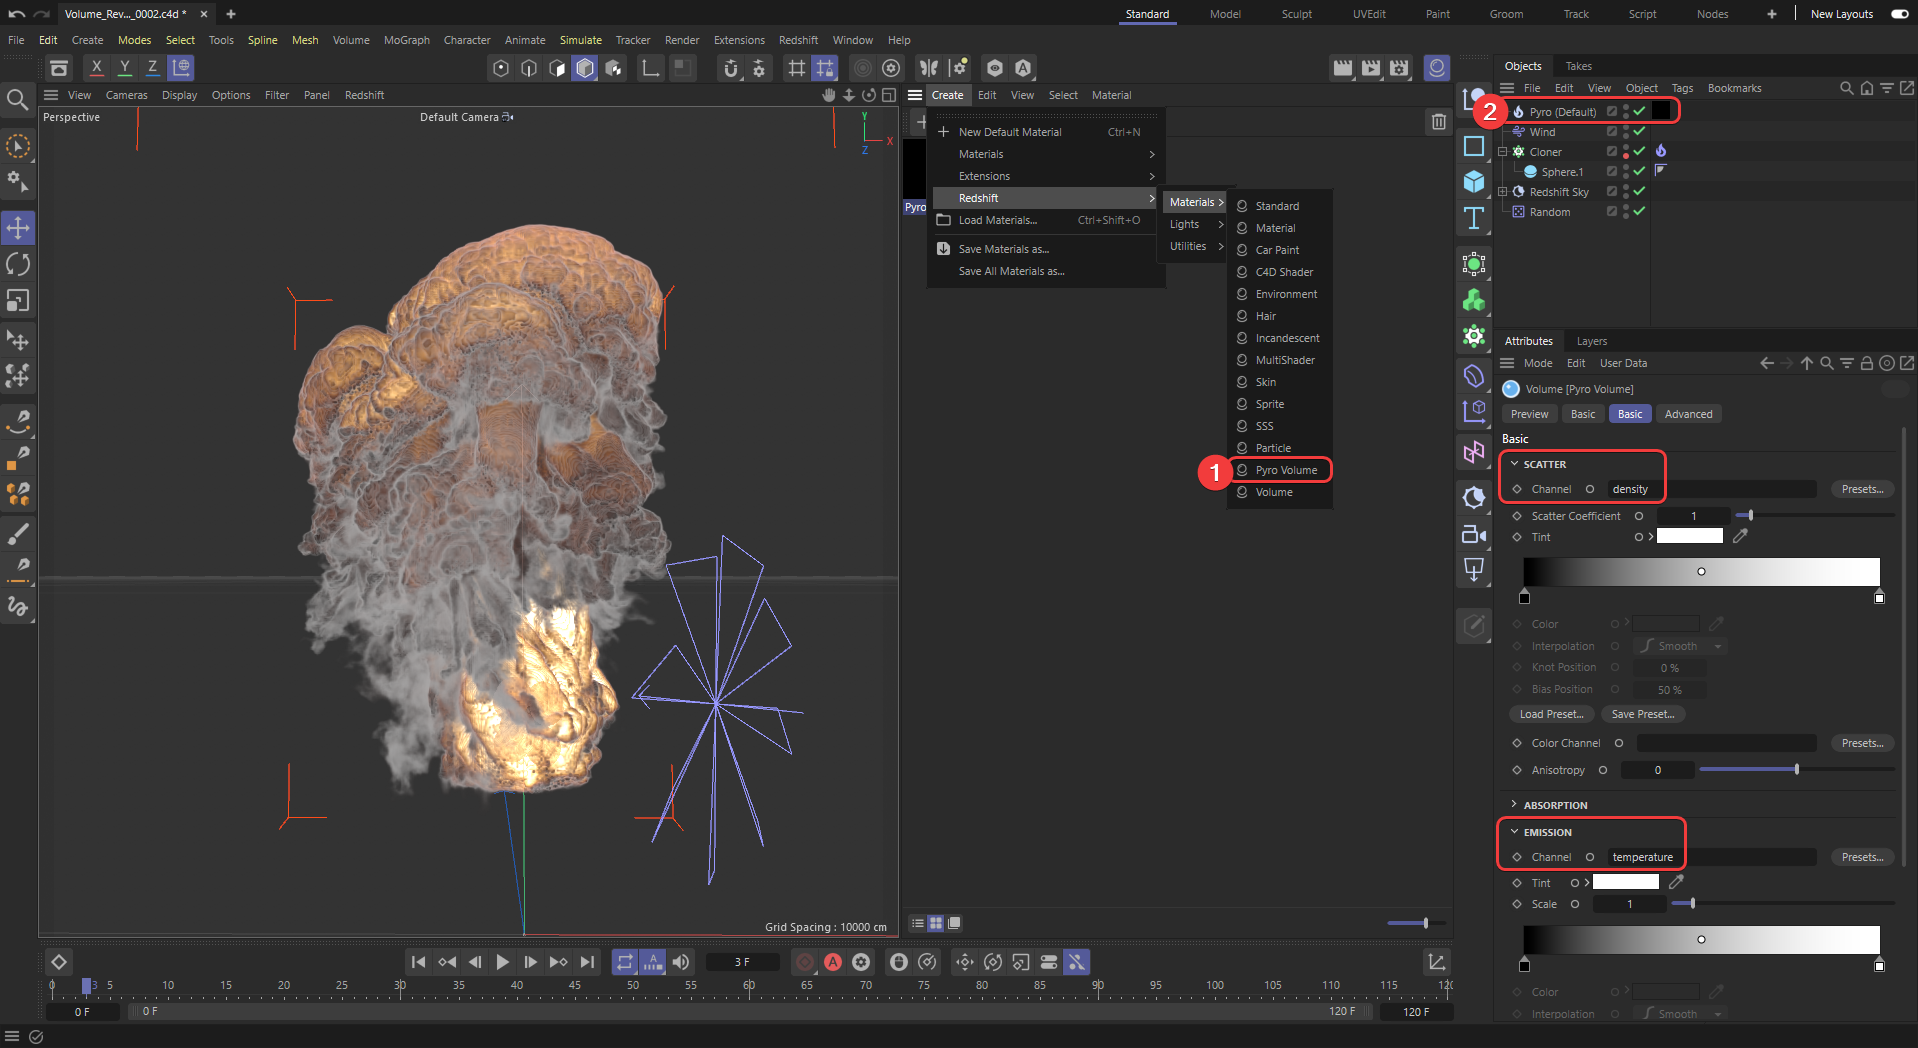
Cinema 4D 2023.1 includes a Pyro Volume material preset that creates a volume shader with the default pyro 'density' and 'temperature' grids predefined for the scatter and emissive channels. This allows you to quickly get up and rendering with Cinema 4D Pyro simulations and Redshift.
Simply create a new Redshift 'Pyro Volume' material (1) and apply it to the Pyro object in your scene (2) and it is now ready for rendering in Redshift.
|
| Assigning a Pyro Volume preset to a Cinema 4D Pyro object |
Displacement
The Standard Volume supports displacement by using the Position Offset parameter in a Volume Scalar Attribute or Volume Color Attribute node, this allows you to move existing voxels in a grid around the scene.
Volume displacement is always limited by a volume's bounding box. Volume Padding, an option found on a Redshift Volume Object, can be used to expand the volume bounding box allowing for greater volume displacement.
| Increasing Volume Padding |
Volume grids loaded into the built in Density and Emission Channel fields can mask out displaced scattering or emission voxels. It is generally recommended to leave these fields blank if you intend to displace your volume with external inputs because any empty voxel has a value of 0 and the built in channels are multiplied with the rest of the shader. Multiplying any displaced voxel with a value of 0 will return a value of 0 and therefore you will not be able to see those displaced voxels, making it appear like displacement is not working.
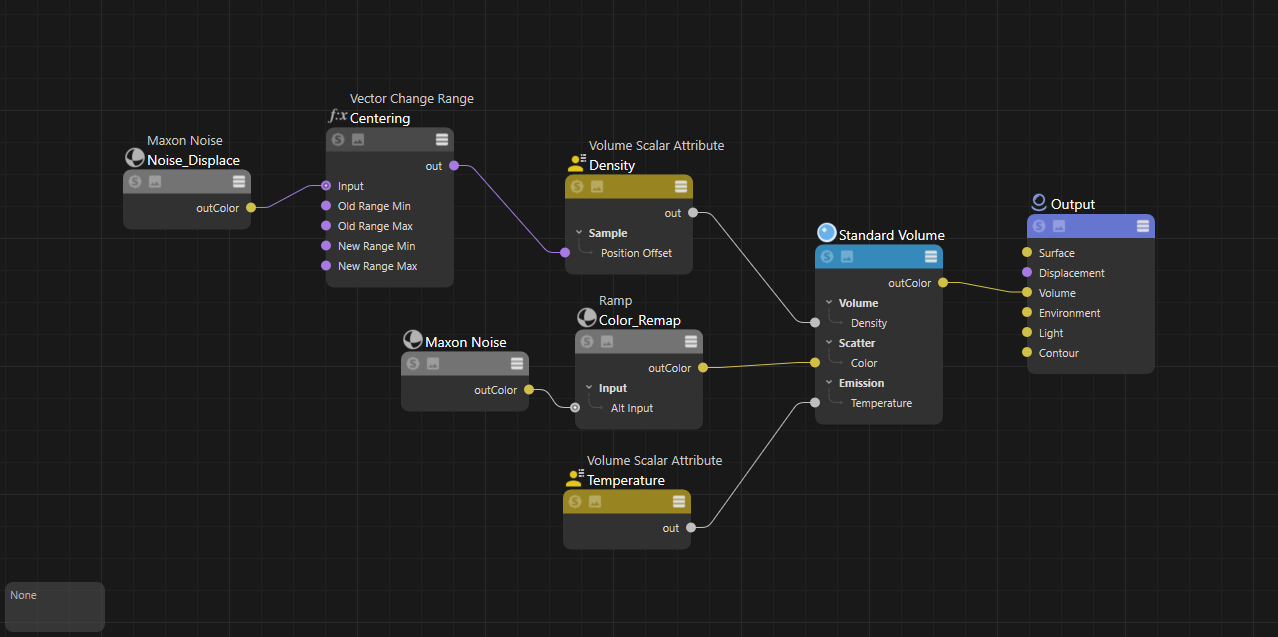
A basic example node graph depicting displacement and programmable volume shading is pictured below. It uses:
-
A Volume Scalar Attribute node to load a density channel and directly drive the Standard Volume's density input. The density node is displaced by a Maxon noise for added detail.
-
The Density Channel built into the Standard Volume is left blank so it cannot mask the displaced density voxels.
-
-
A Volume Scalar Attribute node to load a temperature channel and directly drive the Standard Volume's temperature input. The Output Max is set to 6500 to set the temperature appropriately.
-
The Emission Channel built into the Standard Volume is left blank so it cannot mask the displaced temperature voxels.
-
-
A Maxon noise remapped by a color ramp to create a colorful pattern throughout the volume.
|
Volumetric Multiple Scattering
The look and shape of a volume is heavily dependent on how it interacts with light. When a light photon enters a cloud it makes contact with the different molecules that make up its composition and then scatter around inside the medium. Clouds are mostly made up of water and ice molecules which results in a lot of scattered light, thick cumulus clouds can even reflect up to 90% of incoming light.
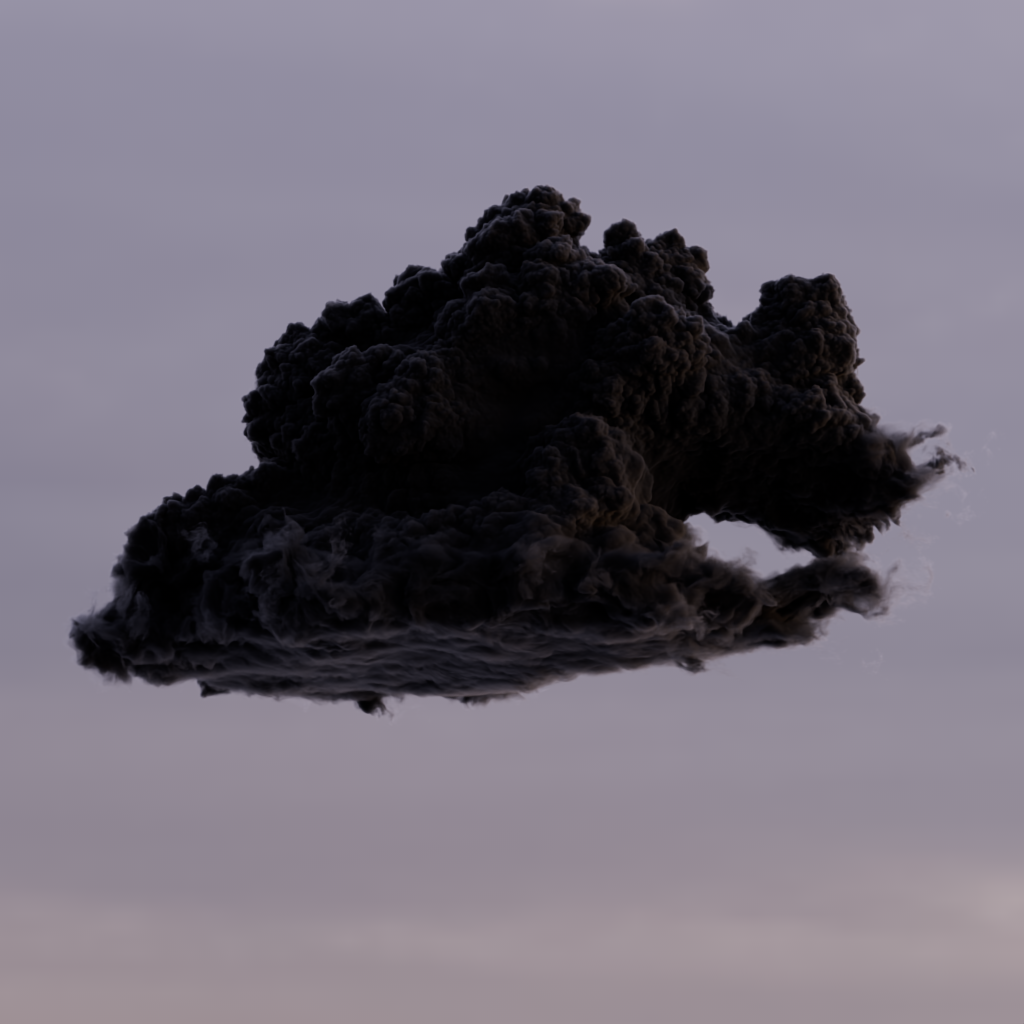
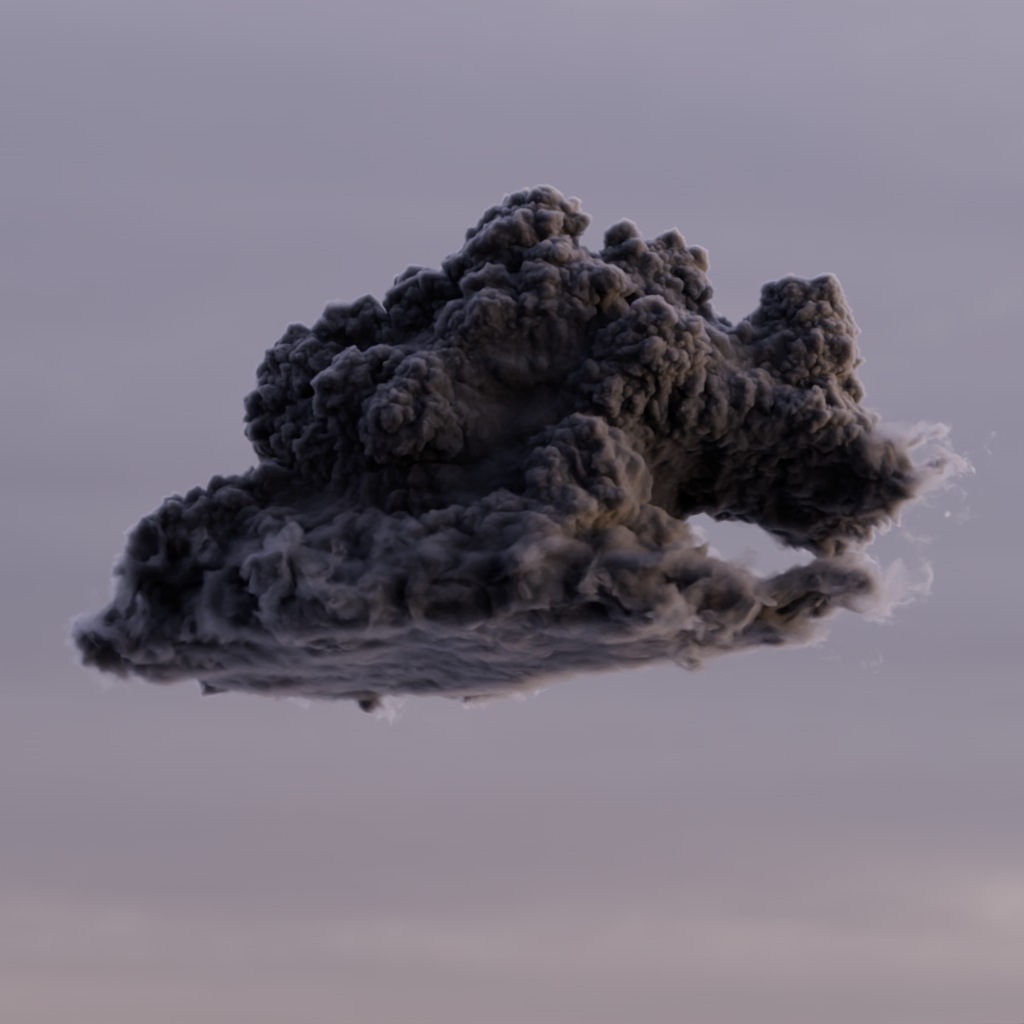
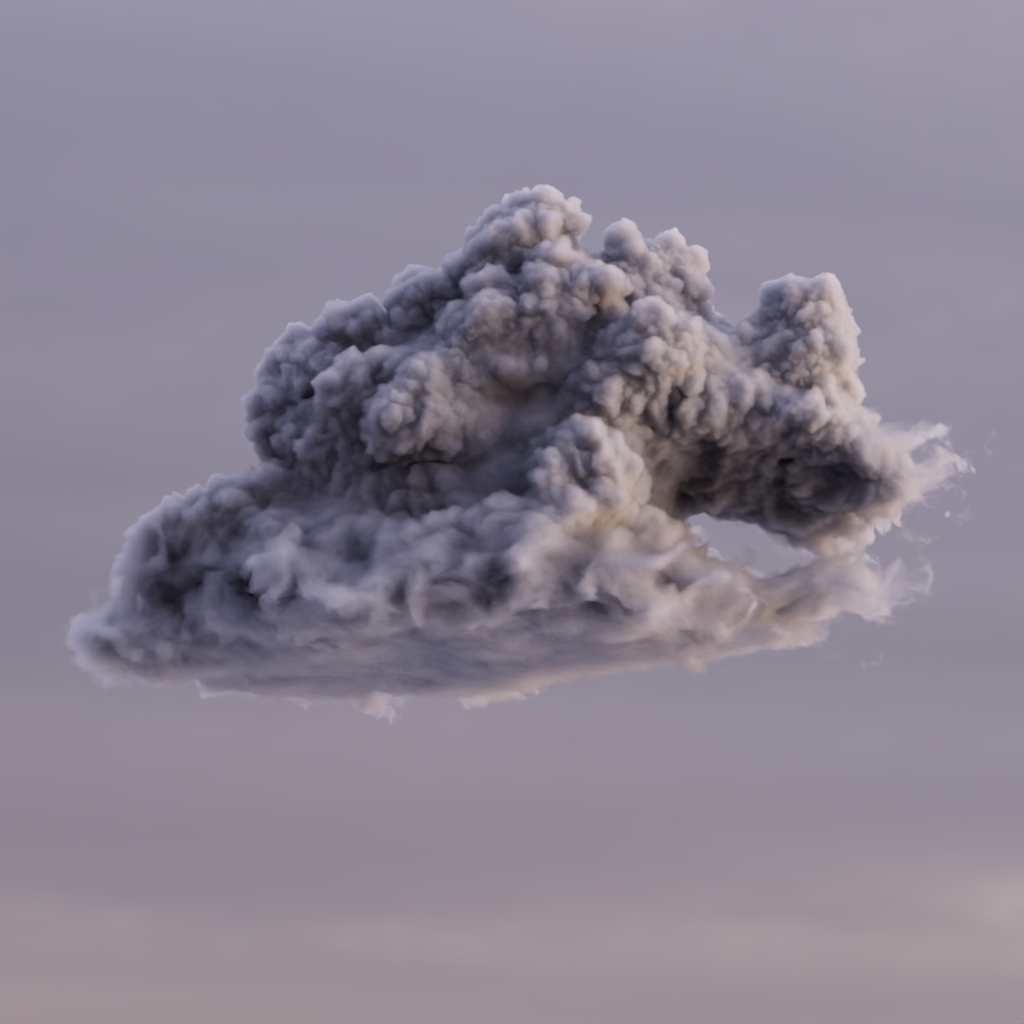
Volumetric multiple scattering simulates this phenomenon to create much more realistic volume renders. In Redshift, this is controlled by the Volume Trace Depth parameter which is found in the Render Settings. Increasing the volume trace depth allows a light ray to scatter and bounce around more often inside a volume, this leads to brighter and more realistic volume renders at the expense of longer render times. The impact multiple scattering has on the look of a volume depends on the volume shader parameters.
Volume multiple scattering is only compatible with Brute Force global illumination. If point based global illumination methods (Irradiance Cache or Irradiance Point Cloud) are used for the primary or secondary GI engine, ray traced global illumination (Brute Force) is automatically used for all volumes in the scene — the remaining objects will use the point based GI methods.
In the example images below, you can see how increasing the volume depth significantly changes the look of a cloud. Clouds have a heavily forward scattering (positive anisotropy) nature which results in more light being driven deeper into the volume rather than reflecting back out, because of this, each successive volume bounce carries more light energy than a volume that is more isotropic which scatters light more evenly in all directions.
|
|
|

|
| Volume Trace Depth: 1 | 3 | 11 | 31 |
| Asset Courtesy of Walt Disney Animation CC BY-SA 3.0 License |
|||
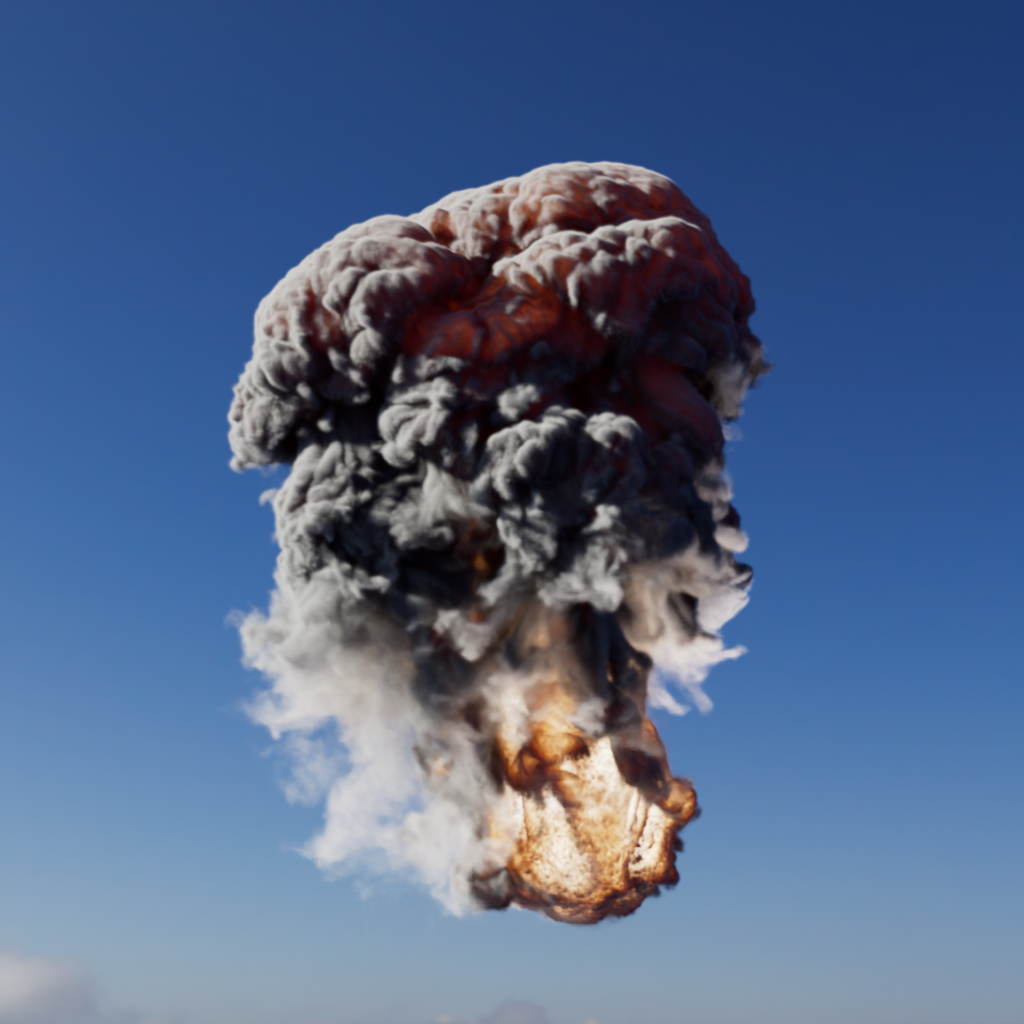
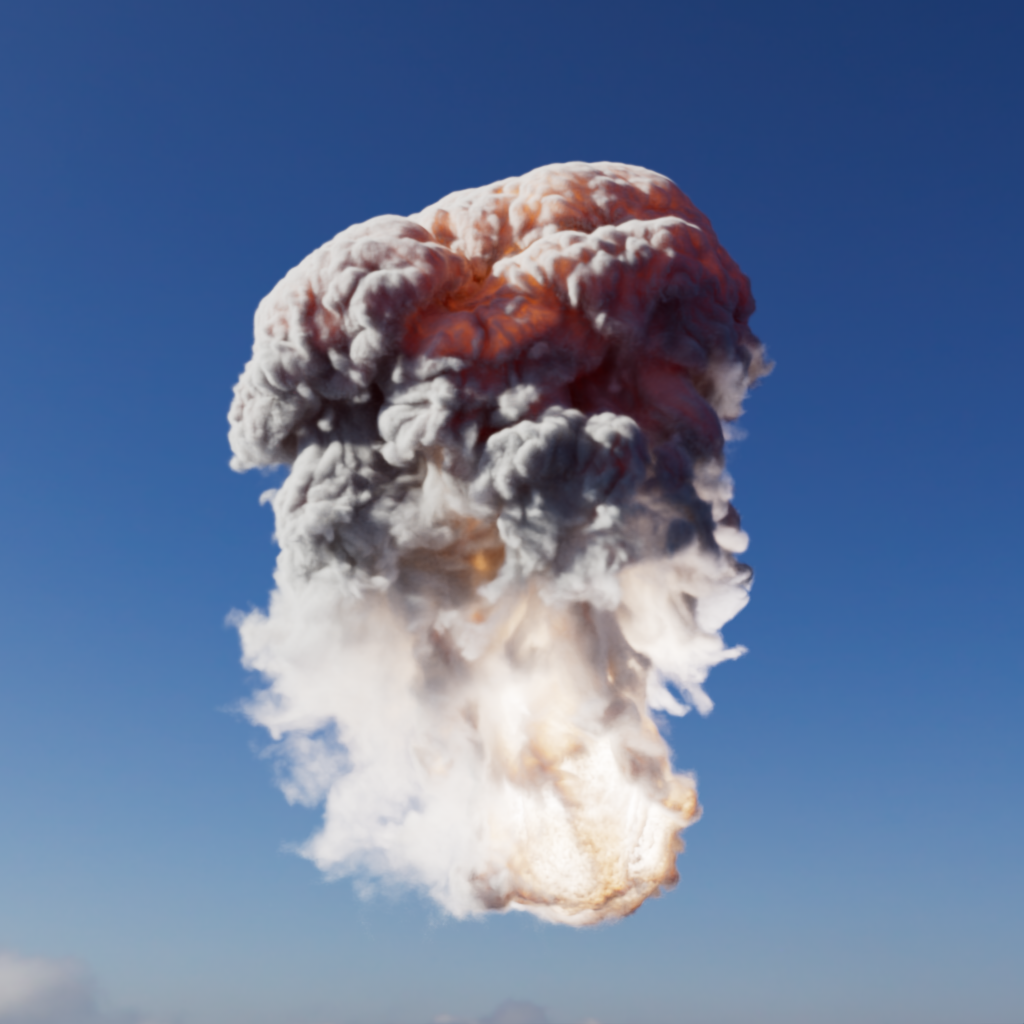
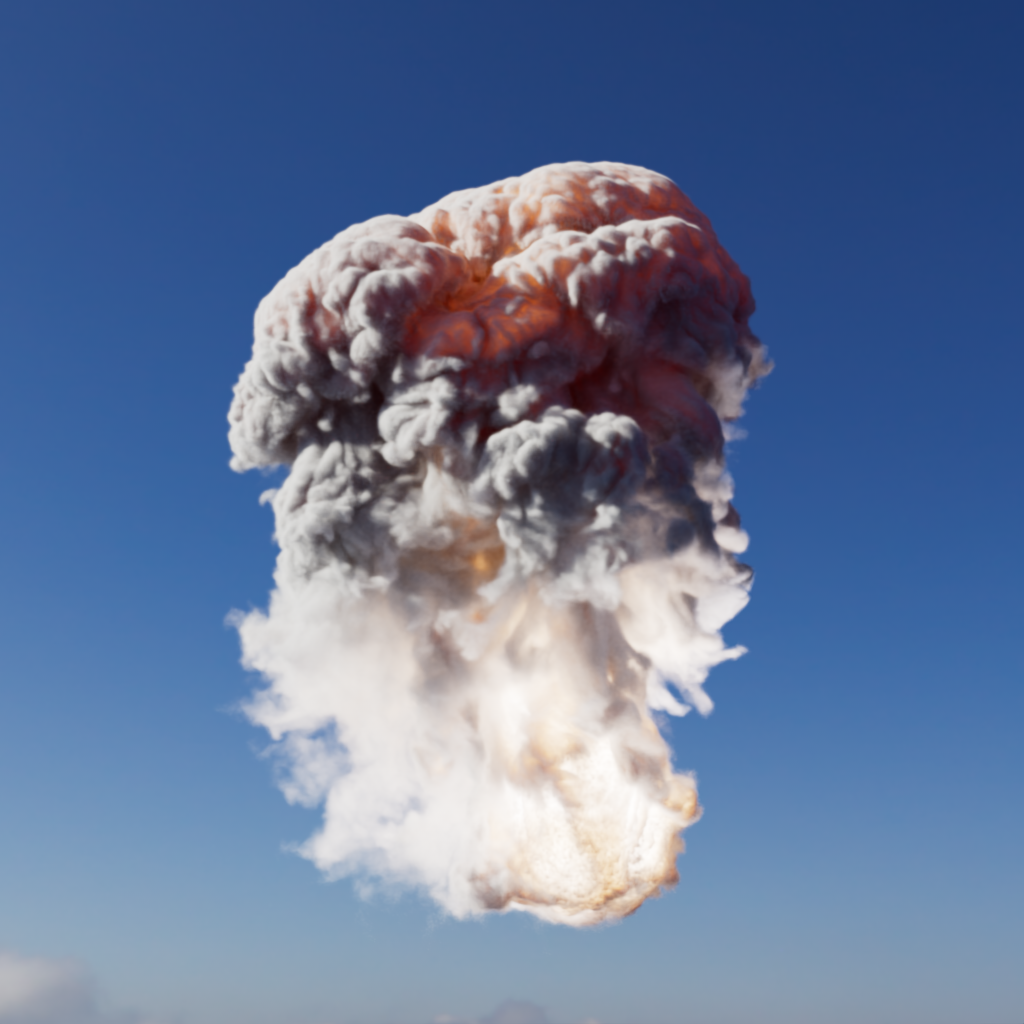
Smoke, by comparison, tends to scatter far fewer times as it is more isotropic (anisotropy closer to 0) and therefore sees diminishing returns as volume trace depth is increased. The difference between a trace depth of 11 and 31 is minimal with the demo example compared to the cloud images above.
|
|
|
| Volume Trace Depth: 1 | 11 | 31 |
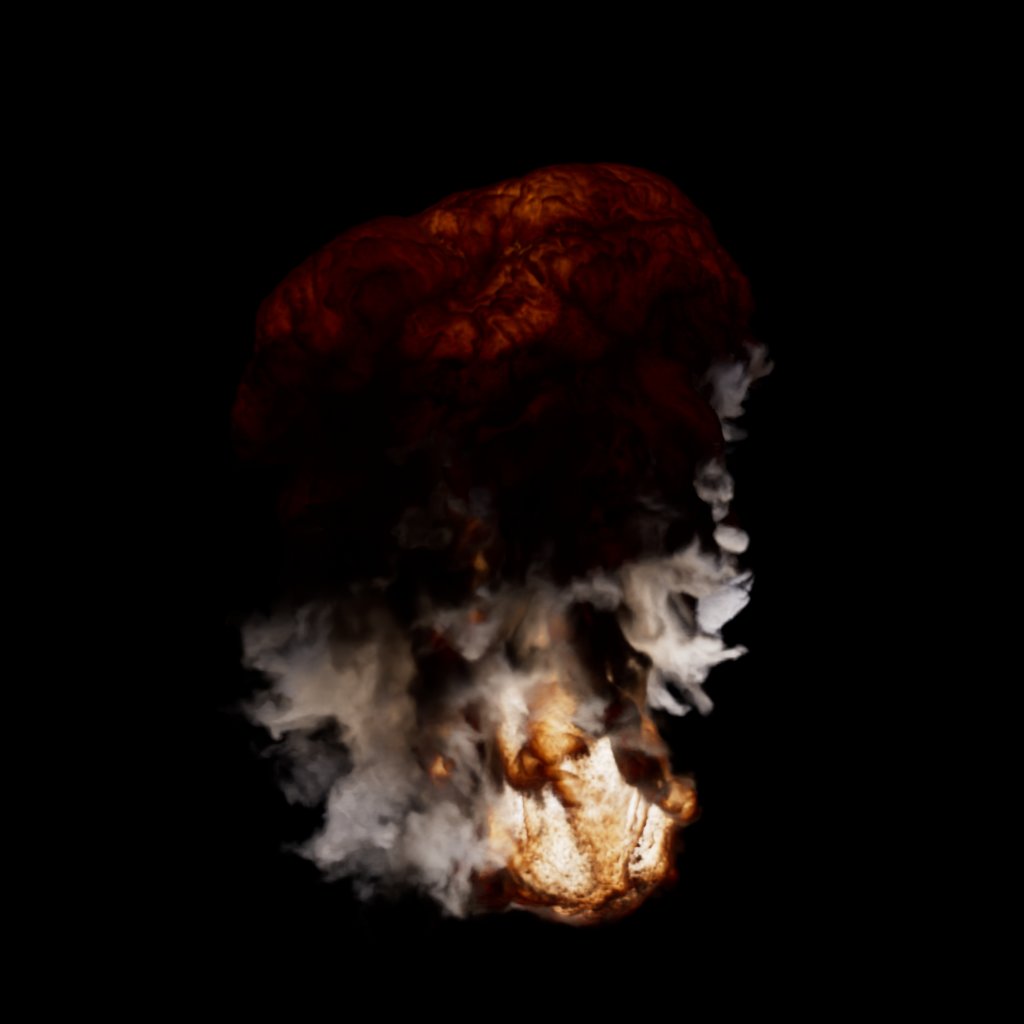
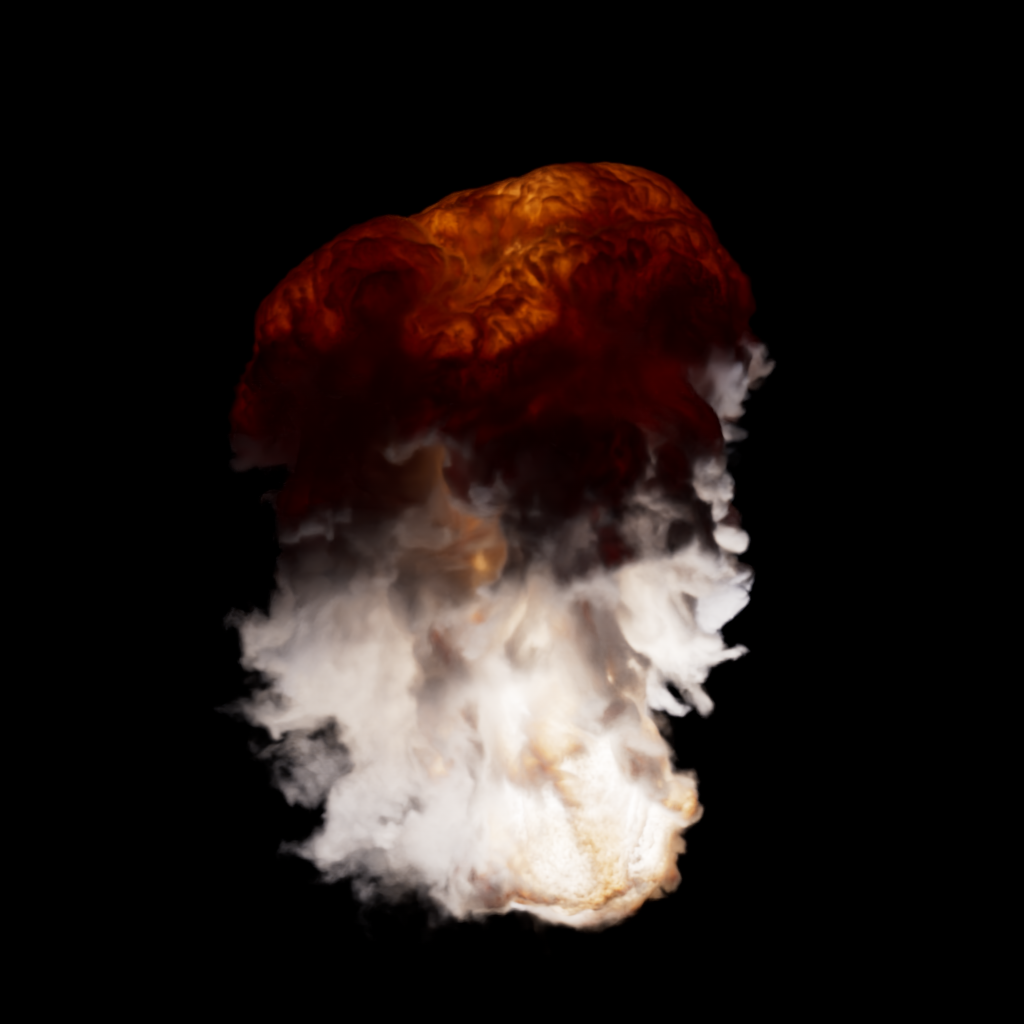
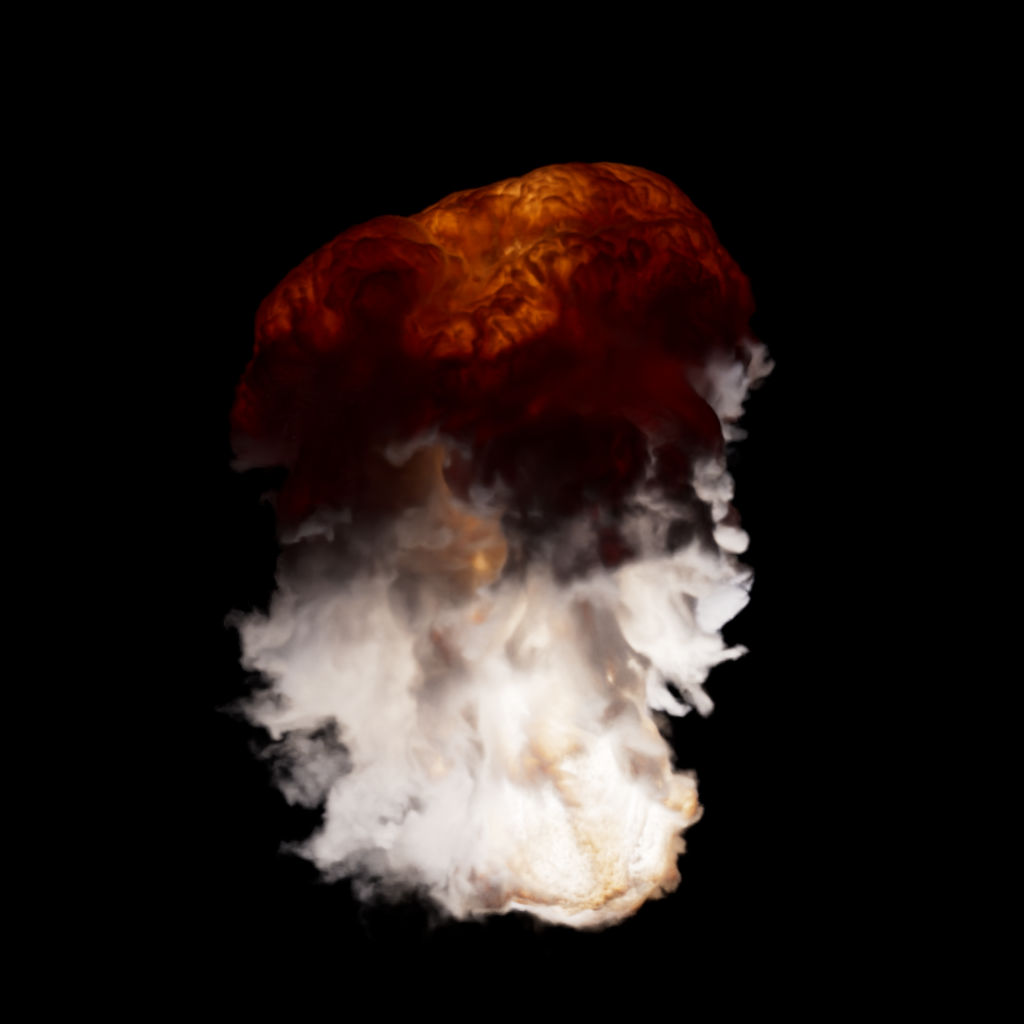
However, the emissive fire is able to travel farther and illuminate more of the smoke from the inside when comparing trace depth 1 to 11 as seen below where the only source of light is the volume's own emission.
|
|
|
| Volume Trace Depth: 1 | 11 | 31 |
It is important to balance volume trace depth with the rest of the Volume Shader parameters covered in the section below as increasing the trace depth can have an exponential impact on render times. For the most realistic results higher volume trace depths will be required, but if faster render times are more important try adjusting the scatter / absorption coefficient ratio and decreasing the shadow density scale first and then increase the volume trace depth slowly as needed.
Multiscattering Demo Scene
|
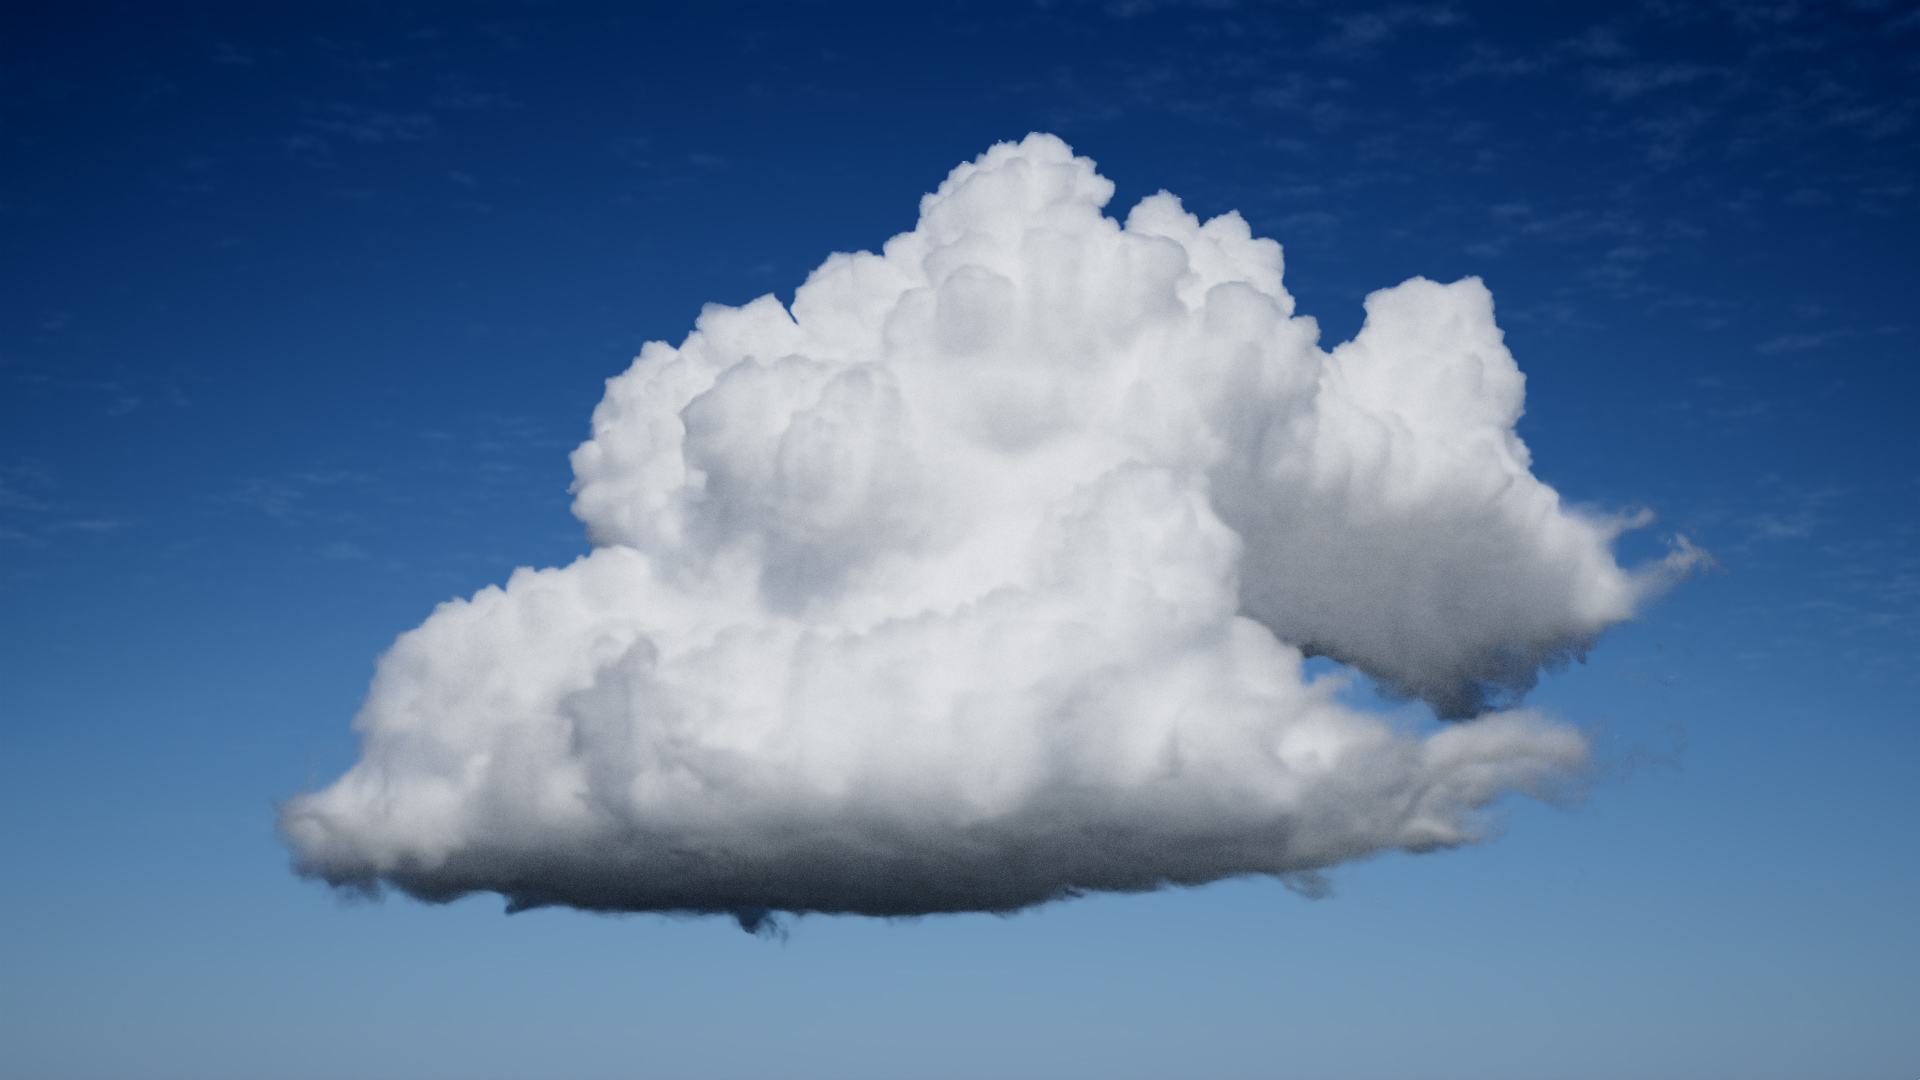
A demo scene created by Saul Espinosa that uses the Disney cloud VDB is provided below as a starting point for better understanding the effects of multiple scattering and other volume shader parameters. The final look of the scene requires the photographic exposure post effect to match the example image.
Redshift Cloud Multiscatter Demo.zip (65 MB)
Download Contents:
-
Scene files for 3ds Max, Blender, Cinema 4D, Houdini, and Maya using the Standard Volume Shader
-
Scene files for 3ds Max, Blender, Cinema 4D, Houdini, and Maya using the classic Volume Shader
-
HDRI dome light texture by Saul Espinosa
-
Example PNG renders
Cloud VDB must be downloaded separately at Walt Disney Animation - Data Sets and the "wdas_cloud_half.vdb" should be placed in the same folder as the downloaded scene files.
The Redshift demo volume VDB (242 MB) can also be added to this scene and used.