

Tool

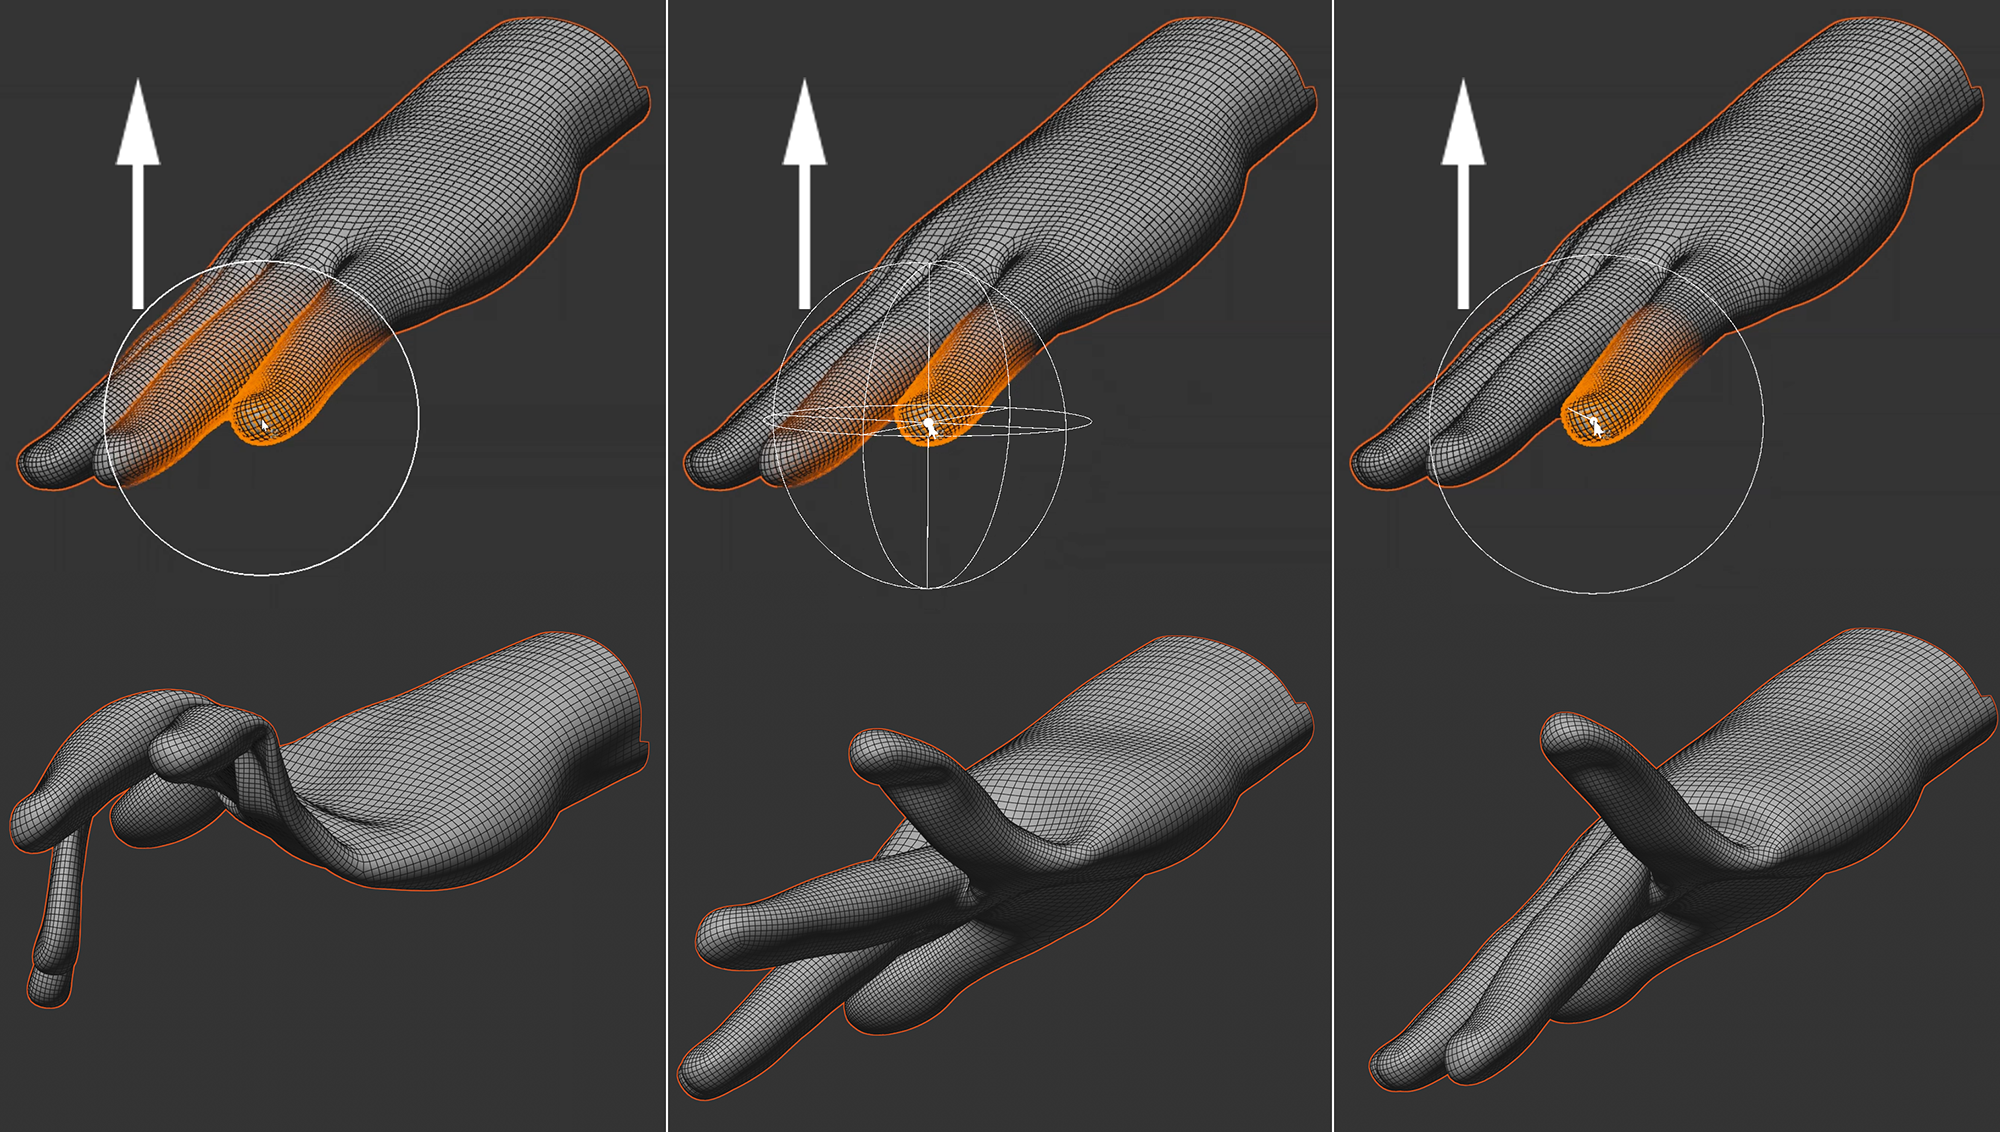 The 3 types Screen Space, Volume and Surface together with their radius preview.
Almost every tool, especially brushes, have a Radius that spatially limits the tool effect. If you want to process a tiny object area, set a small Radius; if you want to cover the entire object with folds, use a large Radius.
How this radius is actually applied to the object is set with Type:
- Screen Space: top left image; the radius is always assumed to be perpendicular to the camera and, depending on the perspective, may capture distant object areas. This can be restricted with the Visible Only option.
- Volume: Figure top center; the radius is assumed to be a sphere around the mouse pointer, all areas within the sphere preview are grabbed. Imagine the tip of the index finger of a hand; if the radius is large enough, you can also capture parts of the middle finger.
- Surface: top right image; the radius is created around the mouse pointer following the surface. This is the expected behavior and is therefore preset. Imagine the tip of the index finger of a hand, even if there are parts of the middle finger in the preview, these remain unaffected because the distance following the surface is very large.
Please note that not all points within the Radius are recorded to the same extent: a radial decrease to be defined under Falloff is also taken into account.
This option is displayed for the Screen Space Type. If it is activated, only the points visible from the current perspective are recorded. Otherwise, this also happens with points, e.g. on the back of the fabric object.
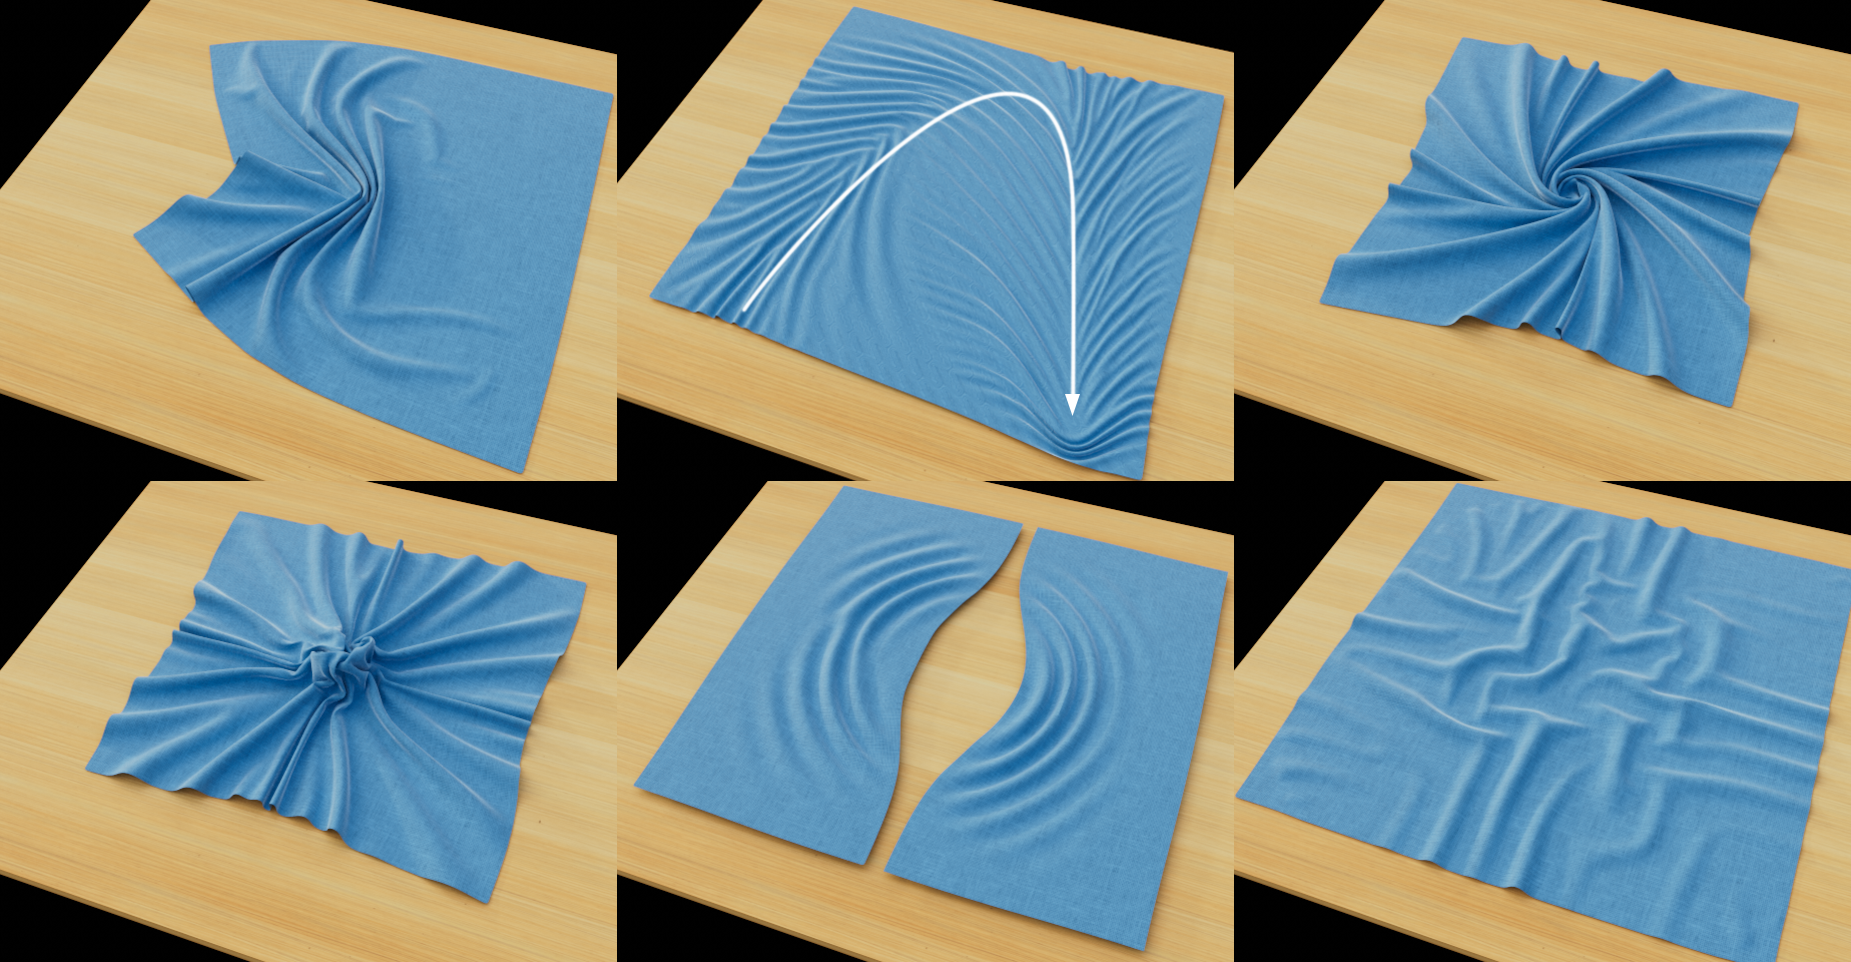
The Fabric Brush provides you with some basic brush effects. These are the following:
Drag
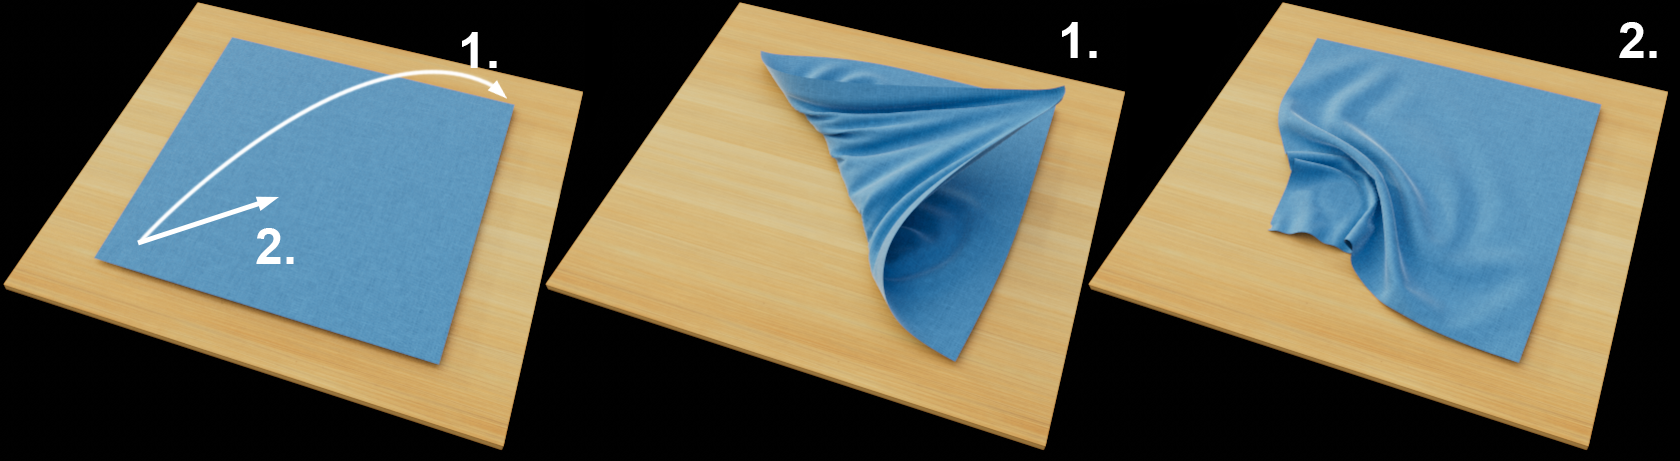 Pulling with different paths and destinations.
This is used to grab an area of fabric and drag it to another position while holding down the mouse button: the area within the radius - minus the decrease - follows the mouse pointer immediately, while the mesh outside follows according to the simulation settings.
Imagine a towel: if you want to pull one corner of the towel onto another corner, this is the appropriate mode. Dragging is also very suitable for creating folds interactively - by moving the fabric slightly here and there.
Brush
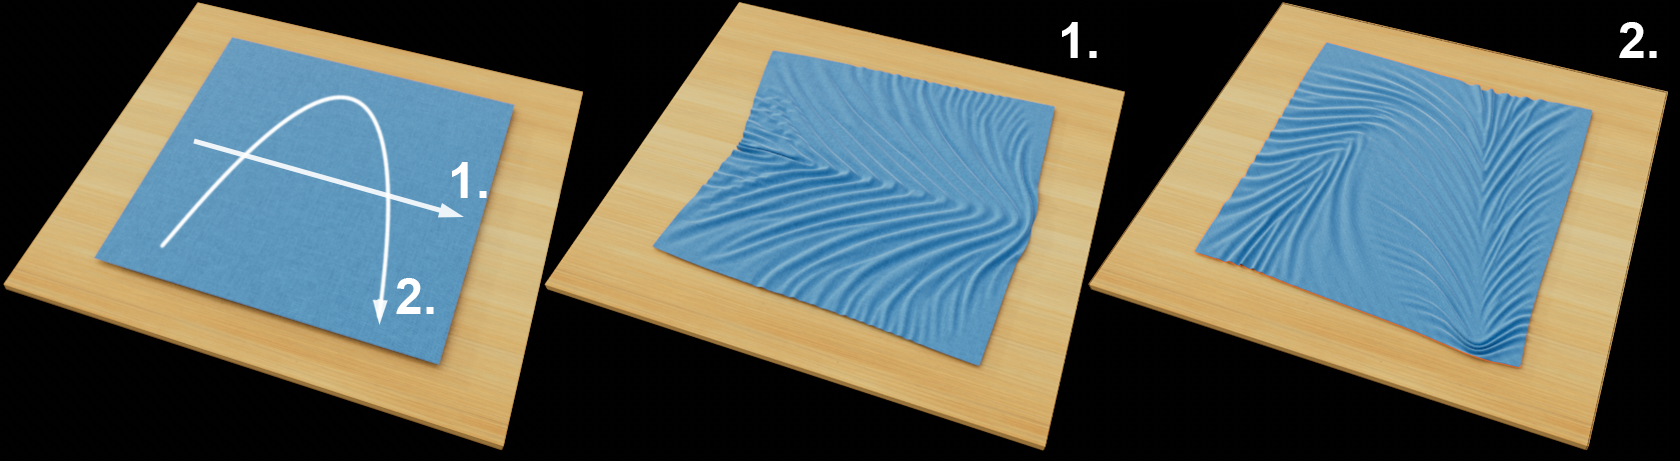 Brushes with different paths.
This mode is similar to Drag, with the difference that the brush effect is not limited to the points originally clicked on, but that the points overlaid when the mouse is dragged are also subjected to a force. This works particularly well with lower Strength values.
This is similar to the effect of running your hand over a real textile. You need to experiment a little with the Strength value here, if it is too small, nothing seems to happen, if it is too large, it is similar to the Drag mode.
Rotate
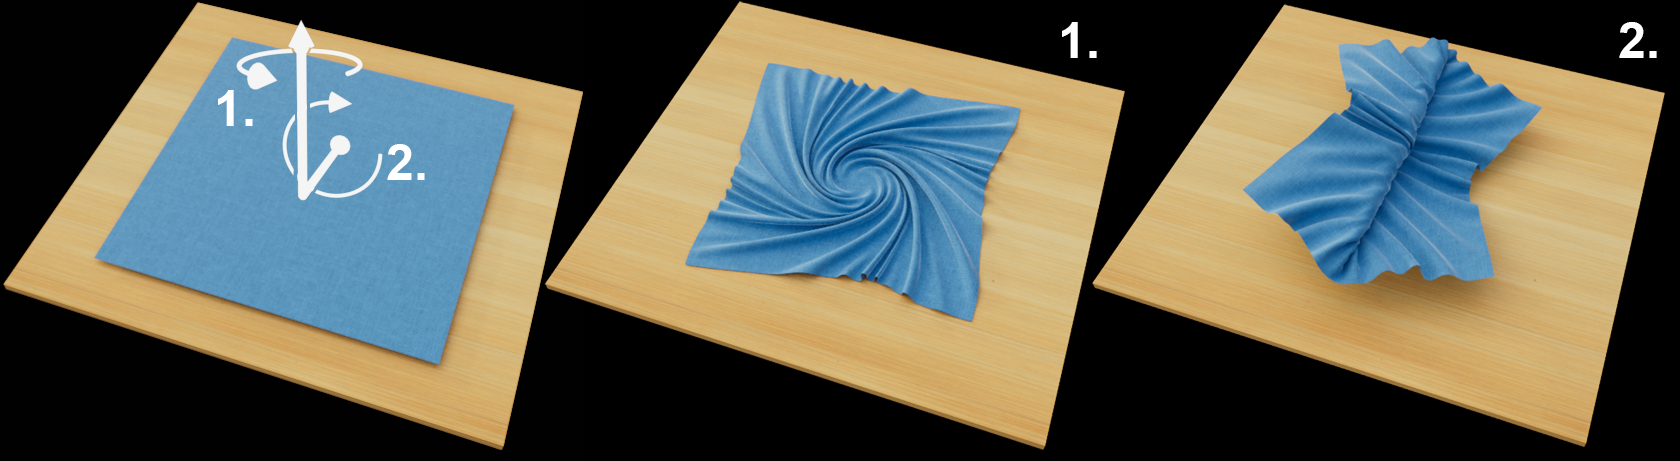 Rotation around Rotation Axis Selection Point (1.) and Global Axis Z (2.).
This mode allows you to apply a rotational force around the mouse pointer. CTRL/CMD reverses the force effect. Which axis of rotation is used is described below. This allows you to create swirl-like folds, for example.
Swirl
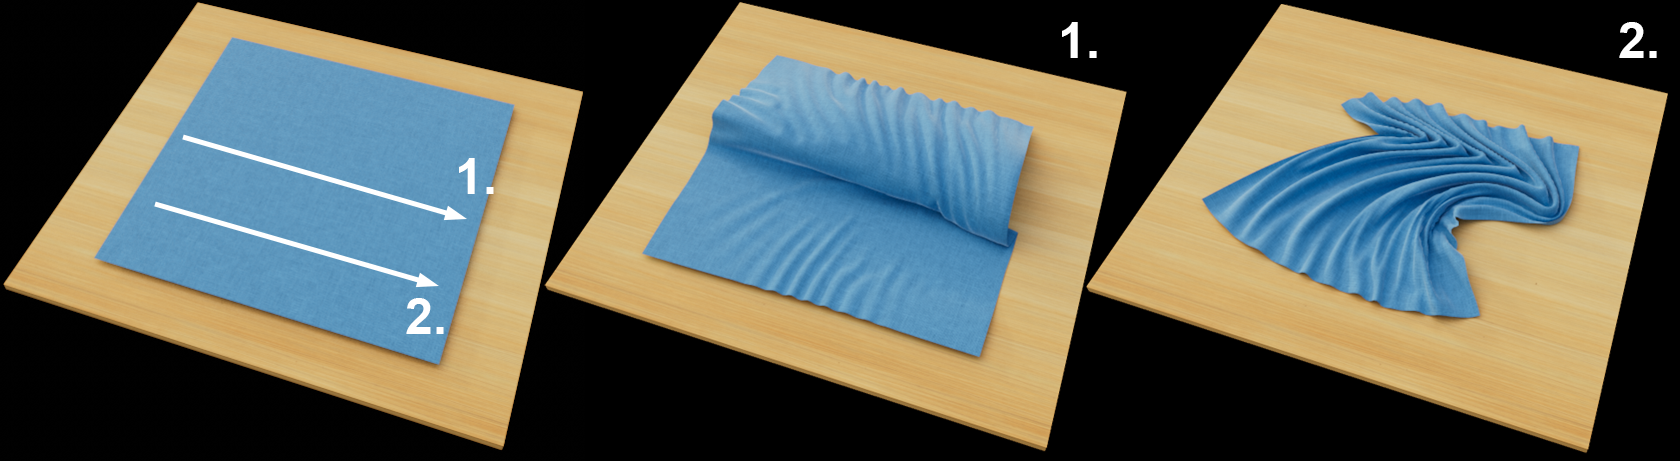 Vortex around Rotation Axis Global Axis X (1.) and Selection Point (2.).
This mode behaves similarly to Rotate as Brush do to Drag: not only the clicked mesh points are rotated, but all points over which you move with the mouse button pressed. The center of rotation is therefore variable here, whereas it is constant in the case of Rotate. CTRL/CMD reverses the direction of rotation. Which axis of rotation is used is described below.
For example, the Swirl is well suited to creating a roll-in movement at right angles to the direction of mouse movement, as shown in the center of the illustration above.
Contract/Expand
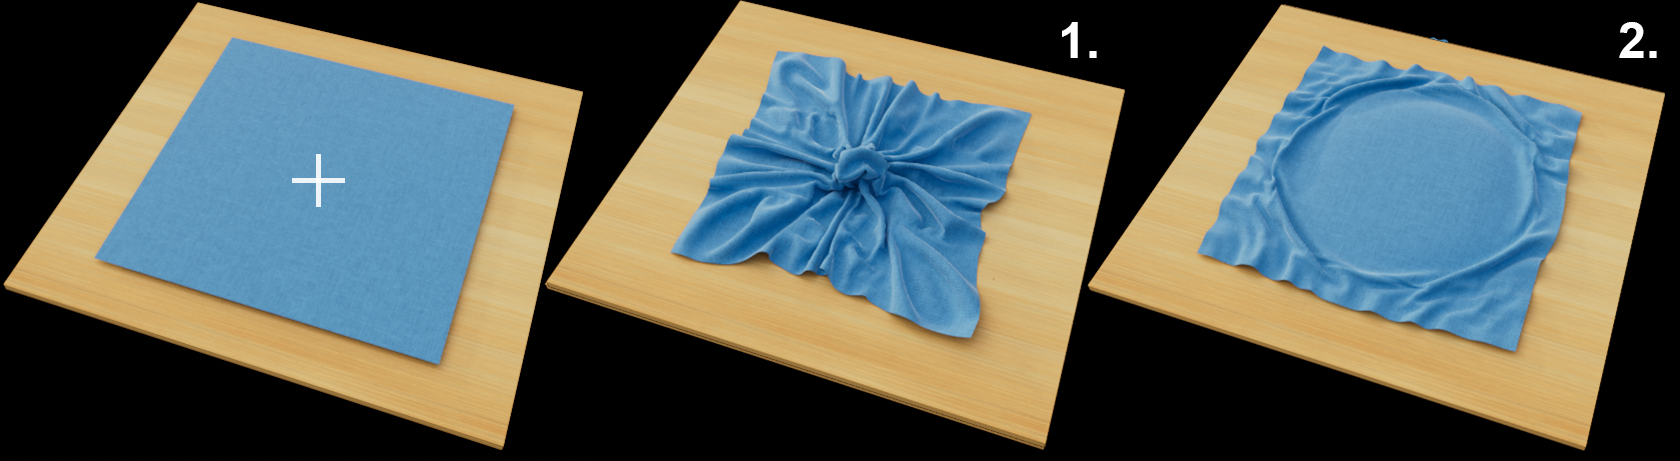 Brush action in the center of the fabric: contraction (1.), expansion(CTRL/CMD) (2.).
This mode pulls the fabric object together or pushes it apart (for the latter, press the CTRL/CMD key). This works practically by internally creating an Attractor Field at the mouse pointer position, which attracts or repels radially.
Wrinkle
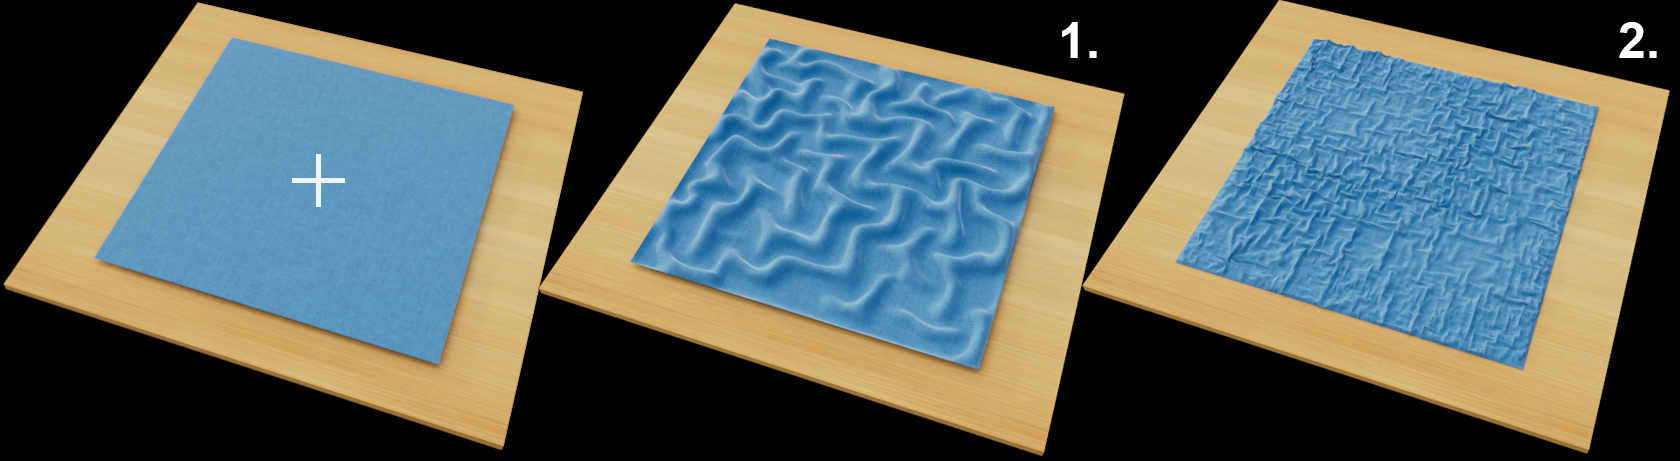 Wrinkle in the center of the fabric with small (1.) and large (2.) Bendiness.
This brush creates wrinkles by increasing internal resting lengths. This forces the points apart and increases the fabric area. This is automatically accompanied by a drape.
Use smaller Strength values here, as the mode literally overshoots the target and self-penetration can easily occur.
Wrinkle only work if the Bendiness ("Simulation" tab) is sufficiently low, i.e. if the fabric stretches too easily, it is difficult to create folds.
When the CTRL/CMD key is pressed, the rest lengths are reset so that the surface is smoothed again. However, this only works for creases that were also created using the Wrinkle Mode, otherwise you should use the Smoothing Mode.
Detangle
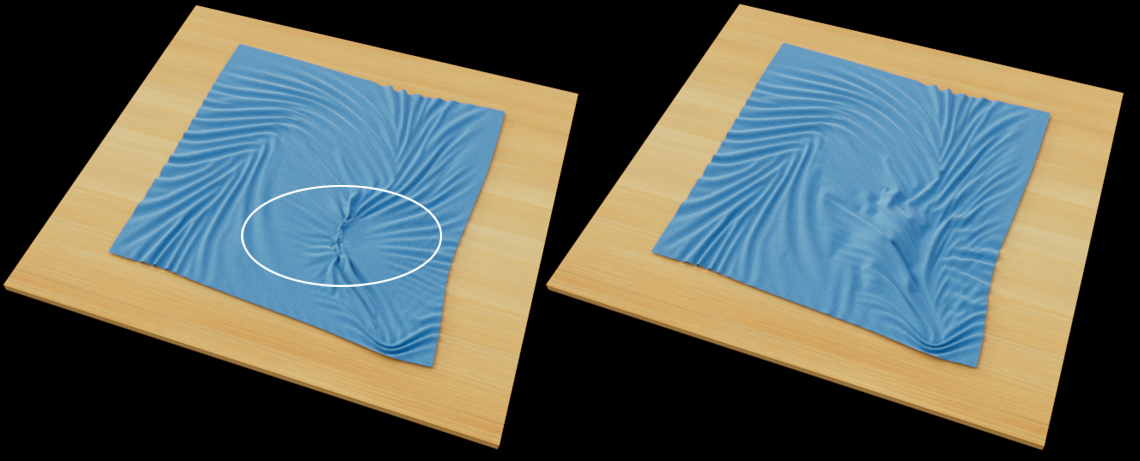 The self-penetrations shown on the left can be effectively removed in "Detangle" Mode
This mode is specially designed for untangling self-penetrations. To do this, all self-collision queries are temporarily switched off - i.e. all points are seen as Ghost Points - and fabric bends within the radius are smoothed out. The constraint conditions stored in the Initial State Tag (= idle state) are used. This means that if you click on Set Constraints BEFORE untangling, Detangle will not work!
It may well be necessary here to act several times with large strength and small decrease until the unraveling effect occurs!
Smoothing
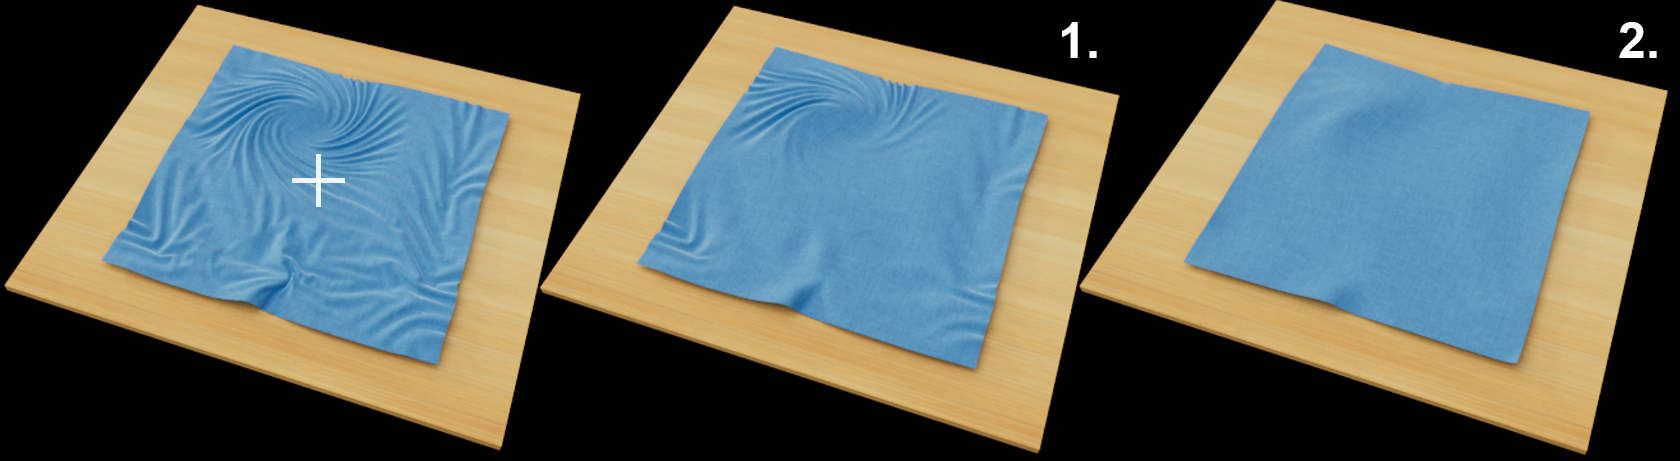 Brush effect in the center of the fabric: after a shorter (1.) and longer effect time (2.).
In this brush mode, you can apply a so-called Laplace smoothing. Laplace smoothing is characterized by the fact that it smoothes fine details but leaves the large, overall shape relatively unchanged (the mode tends to cause mesh shrinkage, however).
This brush mode is also used temporarily if you press the SHIFT key while editing in one of the other brush modes. This means you can smooth at any time without having to switch to this mode in the Attribute Manager.
The Rotate and Swirl Brushes apply a rotational force perpendicular to one of the axes defined here. You can select from the following options:
- Selection Point: this is used to rotate around the surface normal of the fabric at the center of the brush.
- Screen: here, the camera is always rotated perpendicular to the direction of view.
- Global Axis: this option rotates the mouse pointer position by a parallel to the world axis to be selected.
Select one of the 3 world coordinate axes around which you want to rotate (their origin is moved to the mouse pointer).
Each brush has a setting that regulates how intense the brush effect is. The Fabric Brush is no exception. In the special case of a simulation brush, Strength regulates the force that the brush exerts on the clicked points. Don't be surprised by the various Strength values: each mode has its own internal strength value.
Incidentally, the force is applied with a defined strength for as long as you hold down the left mouse button. This means, for example, that if you lift a towel edge with a small Strength in Drag mode, it is slowly pulled towards the mouse pointer. With great Strength, the clicked points would immediately follow the mouse pointer.

You can select from the following options:
- Needle, Linear, Gaussian: see illustration.
- Custom: Here you can adjust any curve (see also Function graphs).
In the video above, the Fabric Brush is pulled downwards. Increasing values for Damping from left to right and thus increasingly localized.
Use this setting to control the influence of the brush on the areas outside the radius. This means that the higher the value, the more localized the brush effect.
This works by removing energy from the simulation of the fabric object outside the radius - as with the Cloth Tag using the parameter of the same name. The effect is as follows: the higher the value, the "tougher" the object points behave - as with movement in air -> water -> honey. Finally, at the maximum value of 100%, all movement is suppressed and the mesh is only deformed within the radius.
If you then reduce the damping Strength again, it may be necessary to click on the "Tool" tab to Set Constraints, as editing with Damping = 1 can result in stresses in the fabric object.
Normally, the damping is switched off for gravitational effects ( G button) so that results can be seen quickly. Activate this option if the damping should also apply to gravity. This can be useful, for example, if gravitational effects lead to penetrations due to collisions that are too fast. Gravity then acts as if in slow motion, leaving more time for collision detection.
With these two commands, you can save the spatial status of the current fabric object - i.e. all point positions - internally(Set Positions) or return to the last saved position (Reset Positions).
The point positions are saved in an Initial State Tag. This happens automatically when the Fabric Brush is used for the first time.
After resetting the position, it may also be necessary to call up Set Constraints to make the fabric object tension-free (see next section).
If you use a very simplified model to imagine a fabric object as a point object in which springs are arranged between adjacent points - i.e. the springs symbolize the task of the constraints - then you can imagine the Set Constraints command as setting the current spring lengths as the rest length. The simulated fabric object, which may have previously been stretched considerably with the brush, is made tension-free, thus creating a new "initial state".
When working with the Fabric Brush, you will quickly notice that there is tension in the fabric object. You will notice this, for example, when simulation movements occur when you simply click on the fabric object.
Alternatively, you can also click in the empty space and hold down the mouse button. Whenever there is movement (e.g. the fabric object springs back into its previous shape), there is tension in the object. These voltages are set to zero by pressing Set onstraints!
For example, it may be useful to define a fabric area as idle after finishing it before moving on to another area.