
Object captures
General information about object captures
Moves by Maxon also gives you the photogrammetric functionality to create a 3D object, including texture from many photos.
These will be stored in the Asset Browser under Uncategorized with all materials and textures as a Node Material (see also Download Folder for *.obj files).
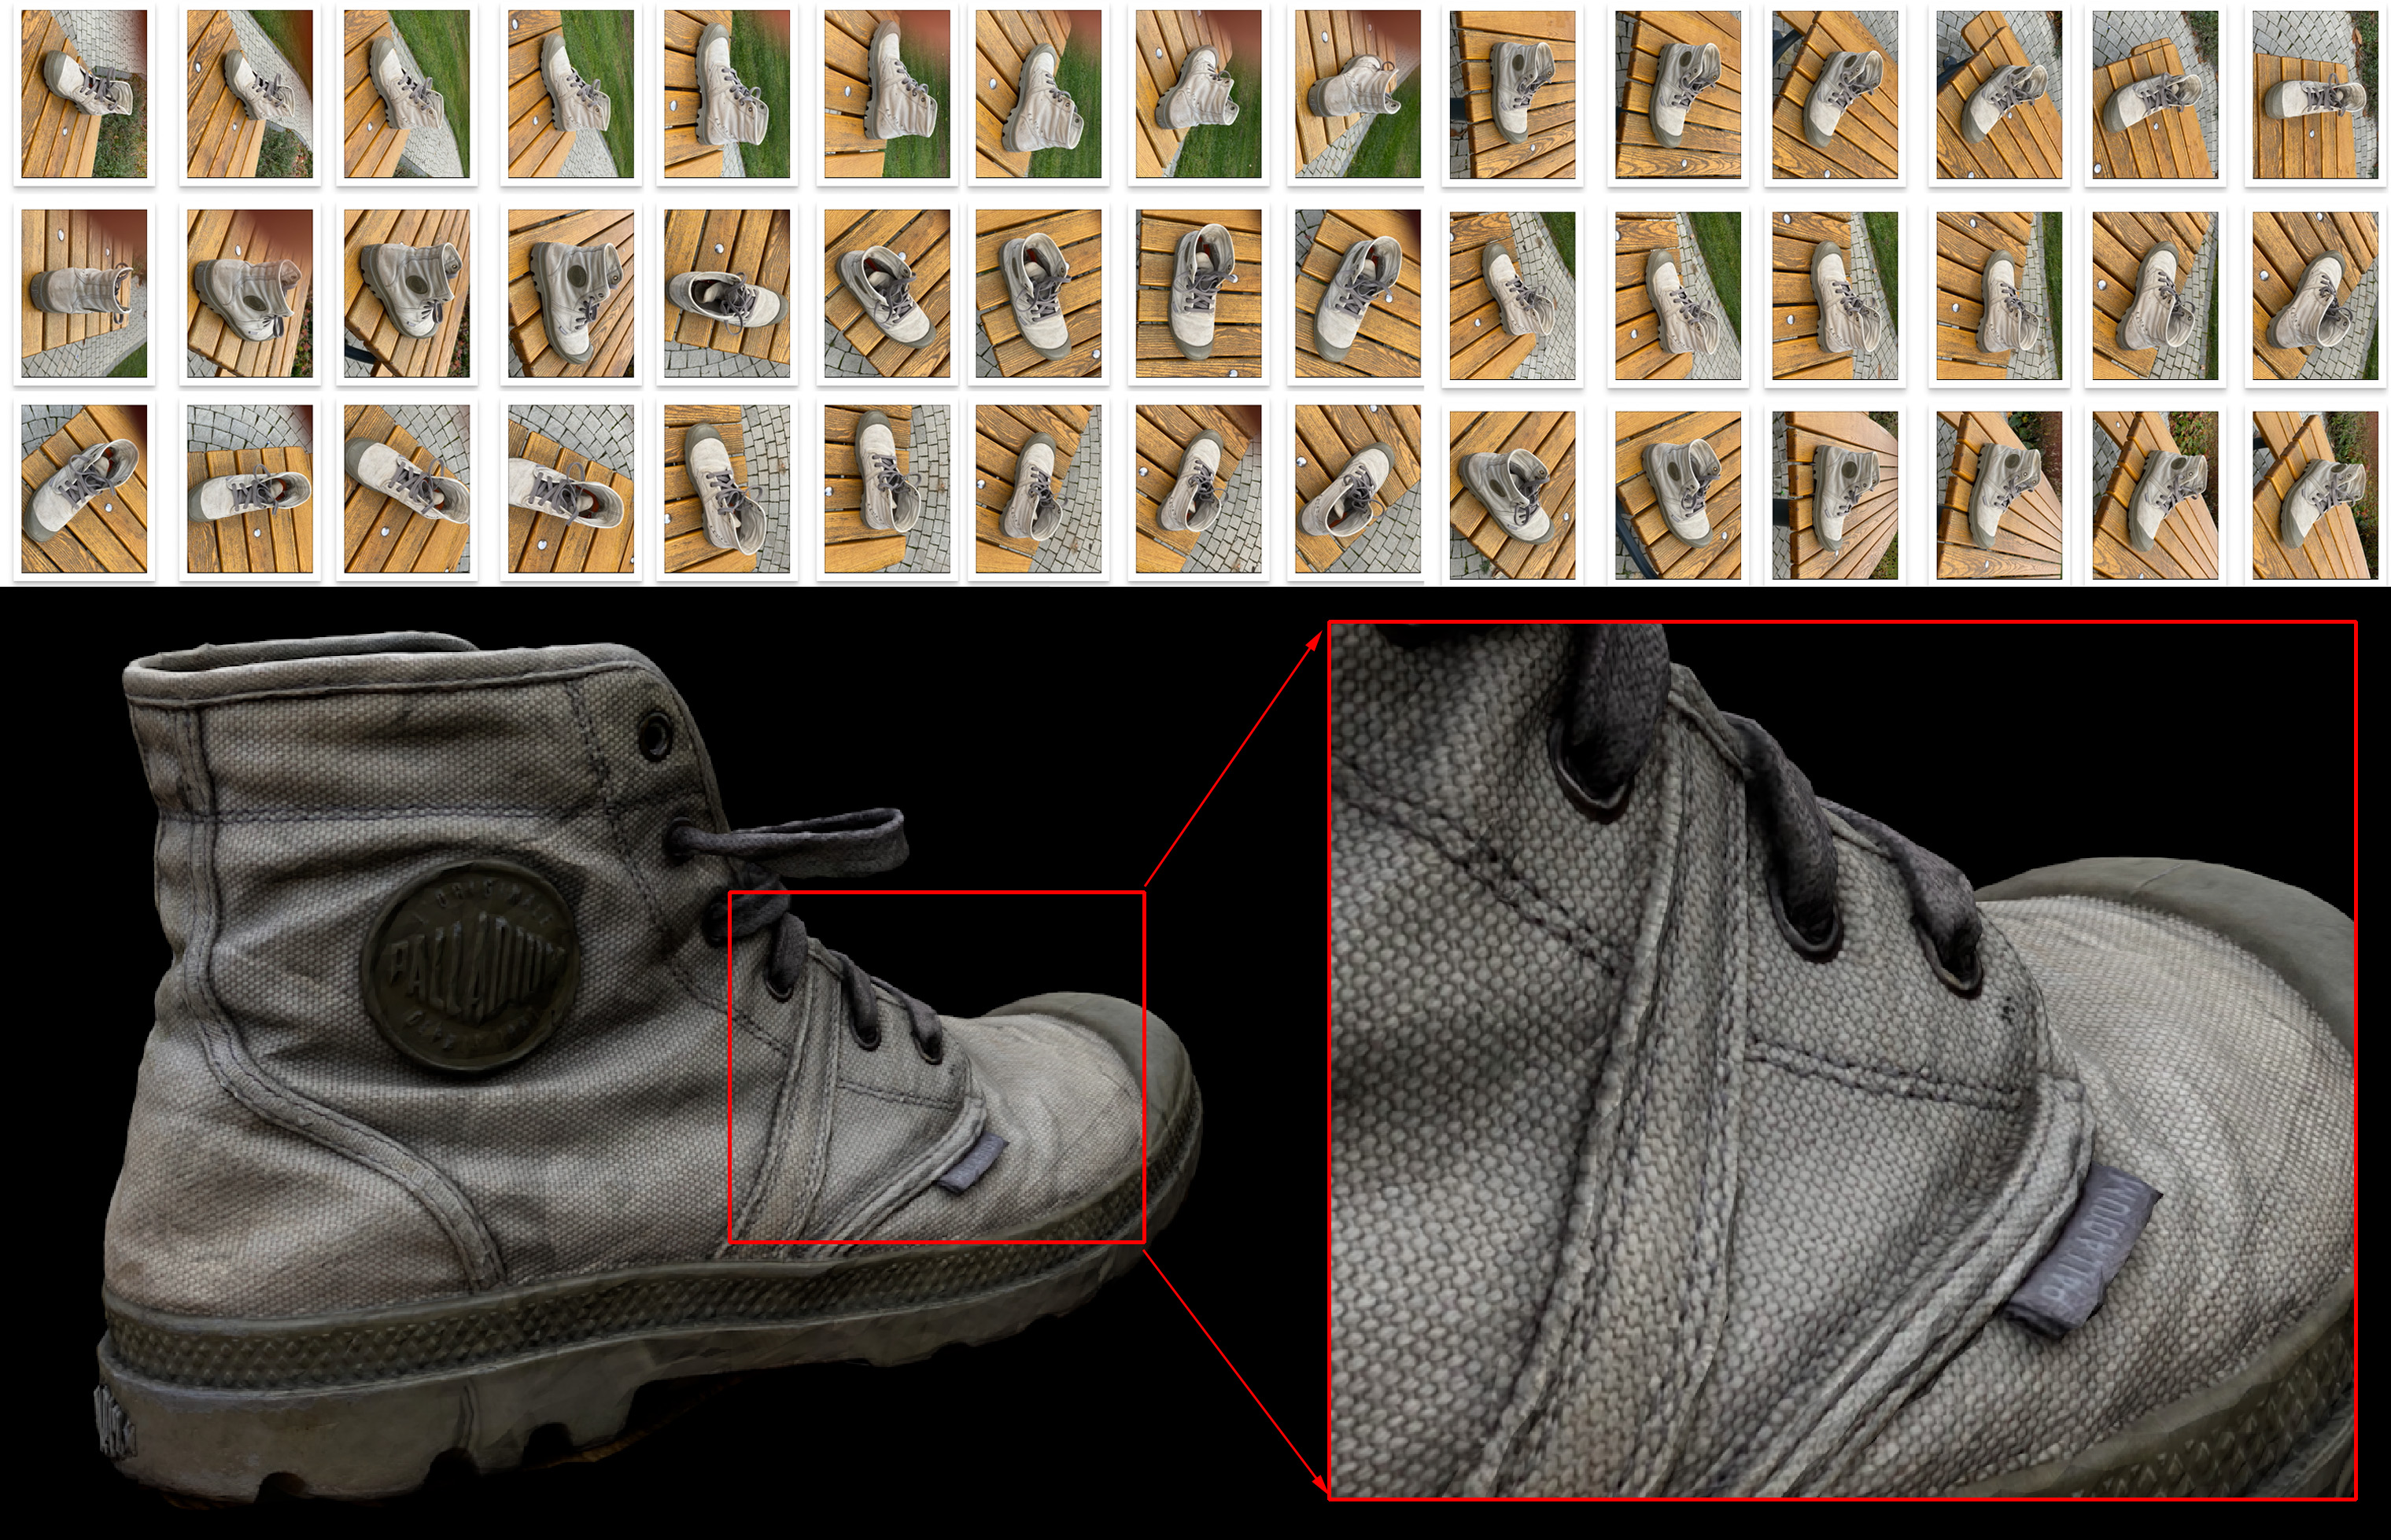 A three-dimensional show is created using the photos above (and several more).
As you can see a high texture quality is possible. All Node links will be created automatically when a material is created. You can modify the Node Material in the Node Editor at any time or simply use the finished material.
The USD tags shown in the Object Manager can be ignored.
Don't forget to select Compute Object in the Moves by Maxon dialog window after the capture data has been transferred in order to start the 3D reconstruction. The newly generated object can, for example, be placed into your scene using the  Place Tool tool.
General tips for photographing objects
There are some general rules and tips for scanning objects.
- The neighboring shots should overlap by at least 70%.
- Depending on the object, 30 to 200 photos are recommended.
- All sides of the object should be recorded using several circular, rotational movements.
- Lighting should be bright and as diffused as possible. Outside, an overcast, cloudy day (lighting situation) would be better than direct sunlight. Shadows should be consistent, i.e., a session should not be recorded in part in the morning and in part in the evening. Moving shadows are difficult for the algorithm to process.
- Camera focus, image quality and generally all camera settings should remain as consistent as possible within a recording session.
- The object should always be completely inside the Viewfinder and free-standing, so that as far as possible no uninvolved and unwanted things land on the images.
- The surface of the object to be scanned should be as matte as possible with as many details as possible; highlights will impede the 3D calculation.
- Transparent, luminous objects as well as objects with a thin and extremely fine "geometry" will cause issues to occur.
- The objects' shapes should not change, i.e., they should not bend or otherwise deform during recording.
- Assuming that the object to be recorded lies on the floor and you have photographed all sides - except for the bottom. What now? Simple: Rotate the object so that the bottom shows upwards and photograph all sides again. The algorithm must later be intelligent enough to recognize the bottom and arrange it accordingly.
- Also, rotating shots are also possible. Here the object can also be flipped to record the bottom. However, it is recommended that the object be photographed from all angles, for which the globe will give valuable tips for the distribution of photos.
The object recording interface
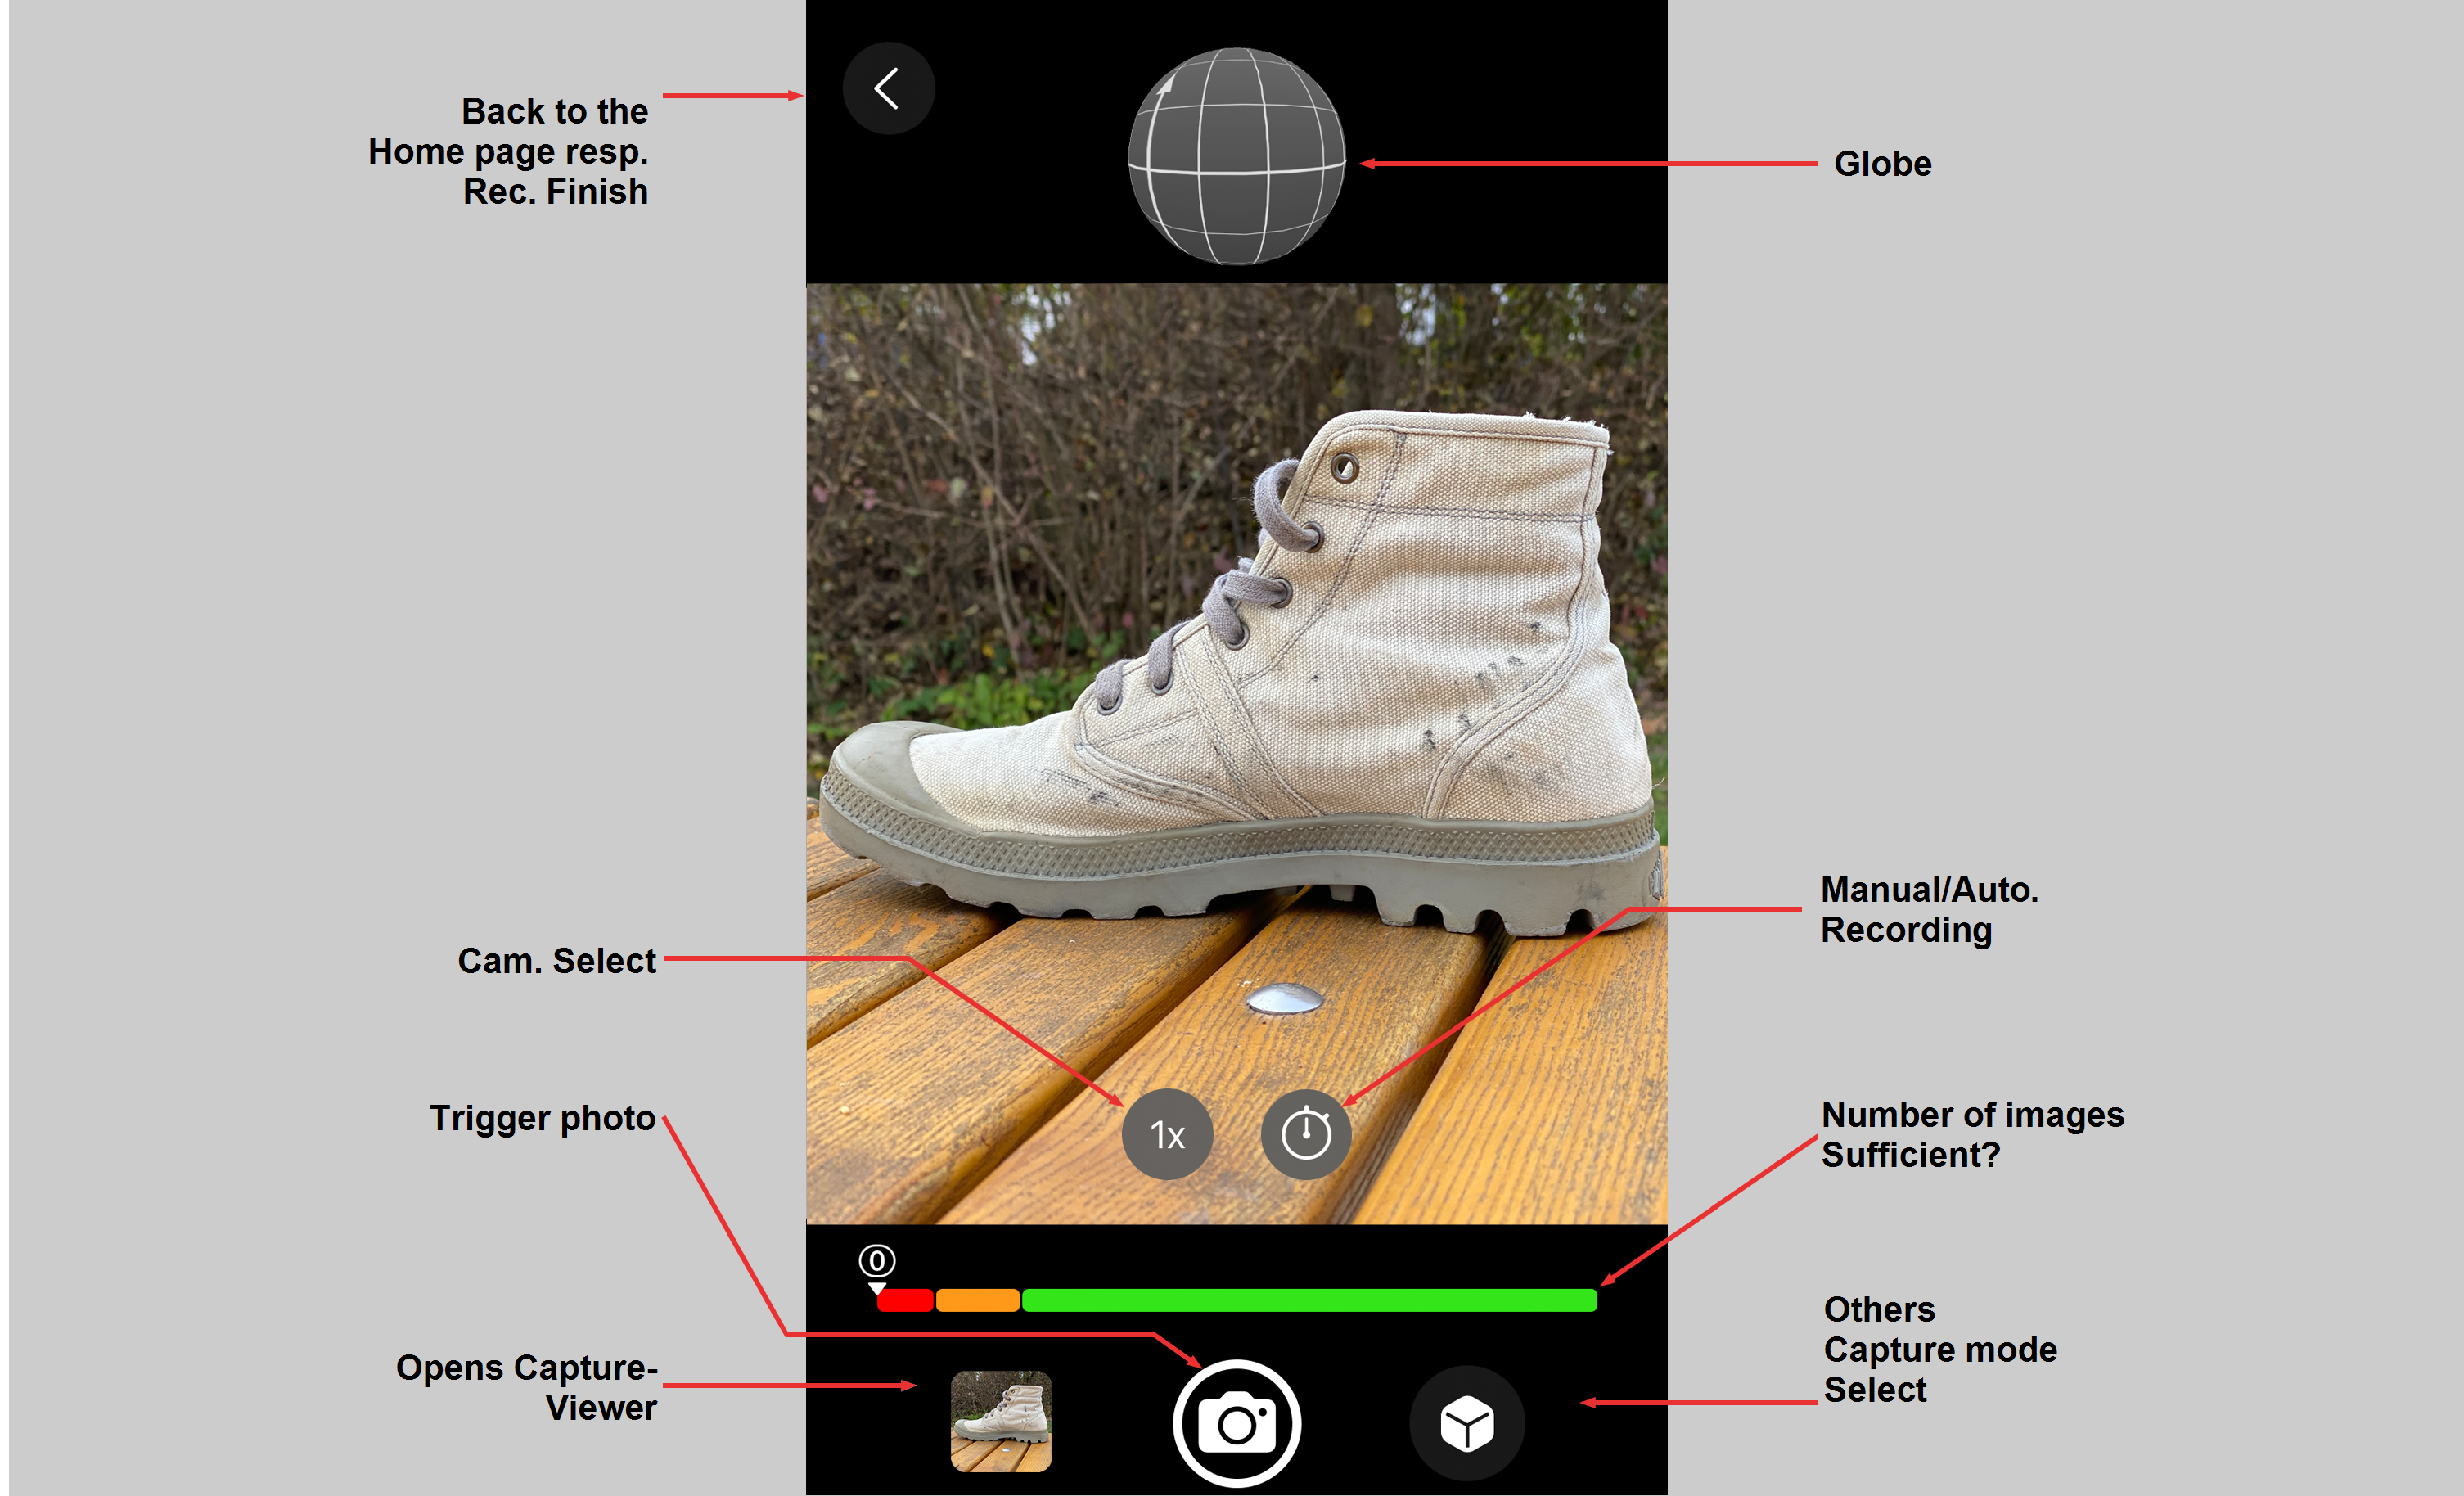
You will find these controls:
- Back to Home: This ends the photo session and returns you to the Captures home page. Note that you can resume a capture session at any time by pressing the "+" icon at the end of the capture list in the capture viewer.
- Globe: Imagine this helping item as a sphere that lies around the object to be recorded. Among other things it helps you optimize the recording positions. Your Apple device - being equipped with various sensors - marks the recording position of each photo that you've made with a small colored square. The more photos you make, the more the points' colors will change from red to green. Enough photos (approx. 30-200) should be distributed equally across the sphere. Such as here on the right:If the points are green, a meaningful result can be expected, i.e., a three-dimensional object can be calculated from the photos. You don't always have to photograph all of an object's sides. Often, it's enough if only the front of an object - i.e., photos representing the front of the globe - is available as a mesh. If the camera doesn't see the back side of the object it also doesn't need an geometry there. For a full object scan you should, however, photograph all sides.
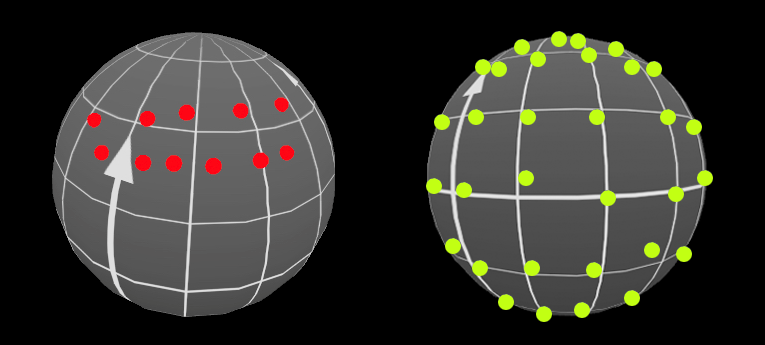 Too few photos on the left, a sufficient number on the right.
 - Select camera: At the bottom of the middle third you will find an icon for selecting the camera. If your device has more than one camera on the back, 0.5 (ultra-wide angle), 1 (standard) or 3 (telephoto) can be selected here, for example. Older devices can also offer "2", which corresponds to a smaller focal length.
- Manual / Automatic mode: Press here multiple times to switch between manual and automatic modes. For the latter, a photo will be made every 2 seconds without having to press the photo button again. You should then only make sure to hold the recording device still at the time of recording - however, this generally applies to all object captures.
- Number of images helper: The colored bar gives you an indication of a sufficient number of images in addition to the globe already mentioned above. The more photos you take, the further Image Count Indicator moves into the green one and the better the quality of the calculated three-dimensional object will be - as long as you cover all sides evenly. Note also that the green bar also ends at the right. Too many photos can also be counter-productive (e.g., very long calculation times without improvement of quality).
- Capture Viewer: Press this item if you want to see a view with all photos currently captured in the session. You can select individual photos there to display them full screen. You can also delete individual photos. Pressing on Back at the top left will take you back to the previous view where you can add photos to the current session.
- Photo button: Press here to take a photo.
- Switch capture mode: With these 3 options you can switch between the 3 capture modes at any time: face (Face), body (Body) or object (Object).
If you are recording and change the mode, the recording will be stopped and saved.