
Light Shaders
Introduction
Light shaders are able to set some of the properties of Redshift Lights. For this their Light Color Shadow Amount output has to be connected to the Light Input port of a Redshift Output node. Finally this node material has to be assigned to a matching Redshift Light object. Although it is possible to apply, for example, a Dome Light shader to any other type of Redshift Light object, only applying a Light shader to a matching type of Redshift Light guarantees that all the shader's settings can be applied to the light object.
Only the Physical Light shader can be applied to any type of Redshift Light as it only sets standard light parameters, such as the Color of the light, the Decay or the Shadow options.
All settings of the Light shaders are identical to parameters found at the Redshift Light objects. The only exception is a Gobal On option, to switch the light emission on or off directly from within shader.
The fastest way to use a matching Light Shader with an existing Redshift Light is by using the Add Graph button in the dialog of the RS Light object.
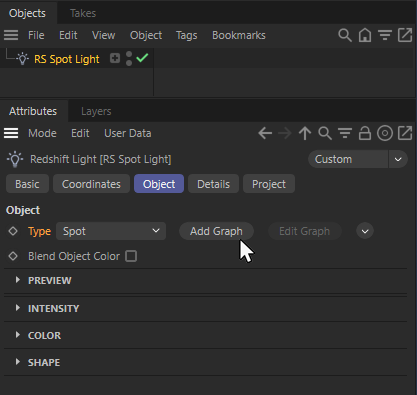
The "Add Graph" button creates a new light shader material that corresponds to the selected 'Type' of light object.
The new material is automatically applied to the light source and controls its settings from now on. Because of this, you can now edit the light parameters by double-clicking on the new RS Light Material in the Material Manager and selecting the Light Node in the Node Editor. For the common types of lights, the Physical Light Node is used.
When working with a Dome Light, IES Light, Portal Light or Sun Light, special shader nodes matching the type of the light source are used in the RS Light Material instead.
For an in depth description of the Redshift Lights and their parameters, please refer to the description of Lights in this documentation.