

Field Condition
By activating this option, the sorting of particles by this Condition can be switched on or off at any time. This can be combined with keyframes, for example, to briefly let all particles through for influencing, e.g., by subordinate Modifiers.
This setting makes it possible to combine several Conditions. This enables even more complex filtering and querying of particle properties. Let's look at this simple example:
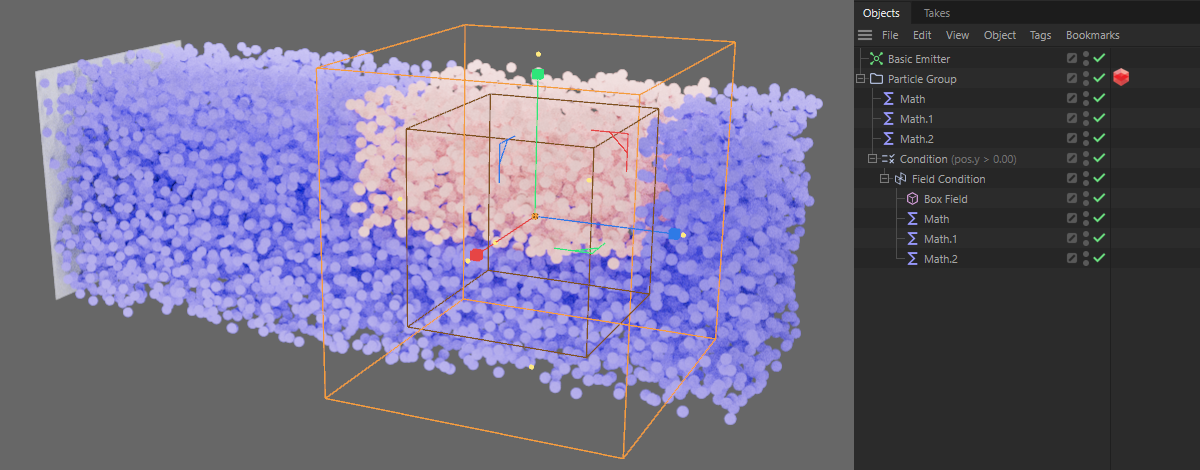 Two Conditions are combined using 'And'. The intersection of the two Conditions will be calculated.
The image above shows a Basic Emitter that emits bluish particles. In order to implement a partial recoloring of these particles, we add two Conditions under the particle group. The first Condition only allows particles through whose Y position is greater than 0. Below this, a Field Condition is used that uses a Box Field to mark a cuboid area in which a property of the particles is to change. We use Math Modifiers under the second Condition to change the particle colors. Other Math Modifiers that are above the Conditions in the group give the particles a bluish color. This means that only the particles for which the Conditions in the current animation image apply will appear in a different color. Both Conditions use the Combine mode And. As a result, only the particles that have a positive Y position AND a position within the Box Field are recolored pink (see image above).
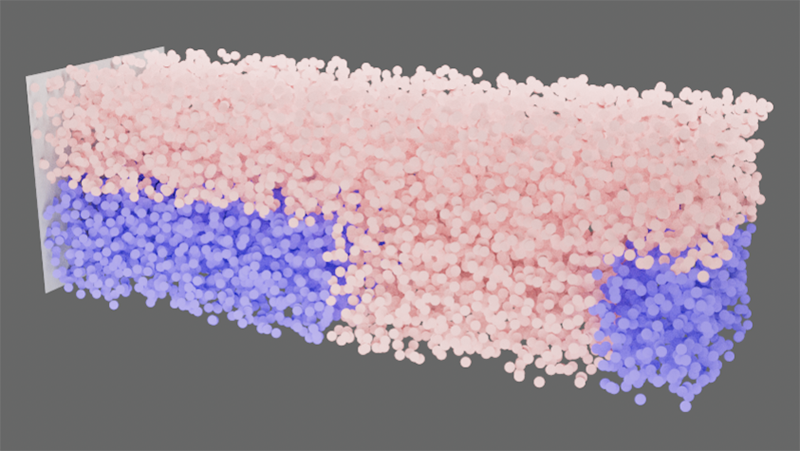 Two Conditions are combined via 'Or'.
Now we will change the second Field Condition to the Combine mode Or. As a result, all particles with a positive Y-position as well as all particles within the Box Field will be recolored pink. The image above shows this result.
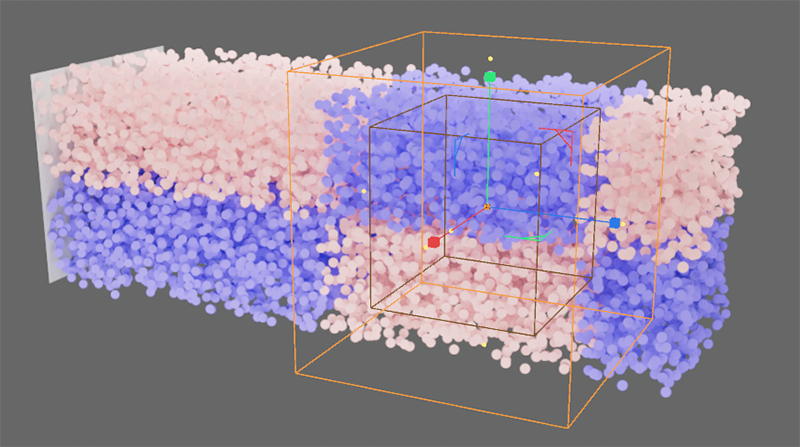 Two Conditions are combined via 'Xor'.
The third Combine Mode is called Xor, which is an abbreviation of Exclusive Or. This means that only those particles will be allowed through for which only ONE of the Conditions applies. This means that only the particles that have a positive Y-position but are not in the Box Field and the particles that are in the Box Field and have a negative Y-position will be recolored pink. The image above shows the result after the Field Condition was changed to Xor.
Many fields are characterized by the fact that they also offer soft gradients. These cannot be used directly within a Condition, because either Modifiers, for example, should be executed under the Condition or not. You therefore use this percentage value to define the value within the field used from which the Field Condition should deliver a positive result, i.e., pass on particles to subordinate Modifiers or other Conditions.
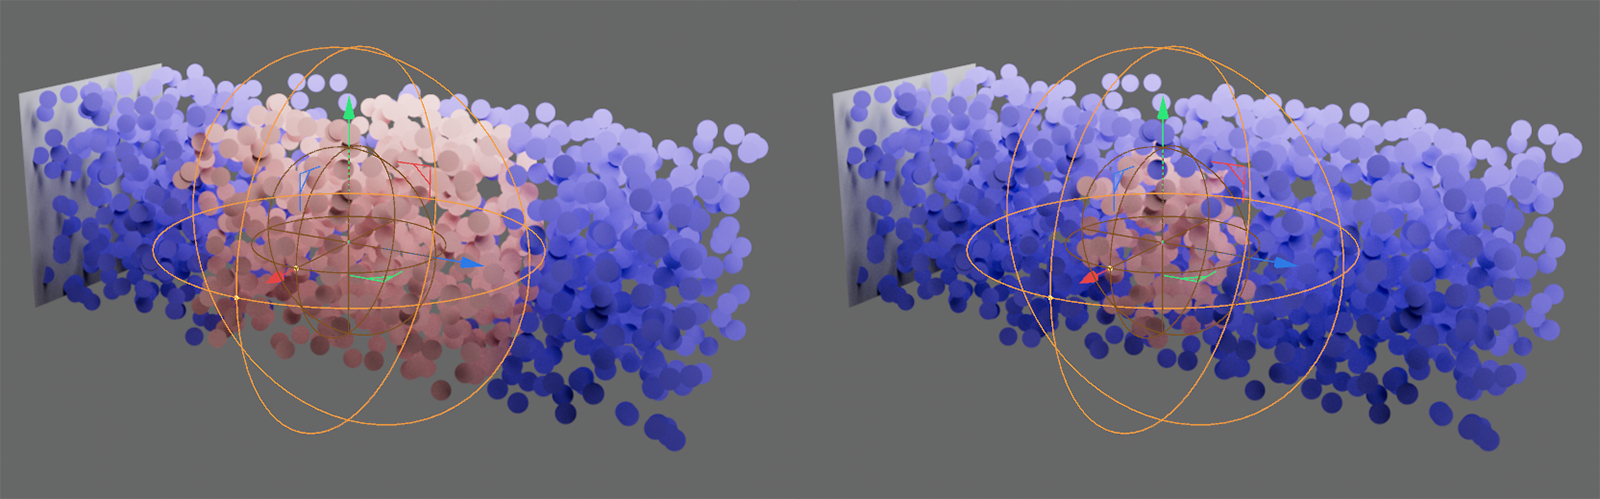 A Sphere field is used here. Left with a tolerance of 1%, right with 100%
With the shape-based fields, such as ring, cube or sphere, the 100% values are achieved in the middle and then drop to 0% at the outer edge of the shape. These value ranges are also visualized in part by differently coloured representations in the view windows and can be individually controlled via curves on the Field objects. In the example above, you can see a Spherical Field that uses a core area with a dark red border and a lighter outer border. Within the inner sphere, 100% values are calculated for the particles. In the area between the inner and outer sphere area, this value then decreases to 0% by default (this can also be affected on the field itself).
With a Tolerance of 1%, the Field Condition in our example will detect all particles that lie within the outer Spherical Field boundary. With a Tolerance of 100%, only the particles within the dark red sphere of the field will be detected (shown on the right in the image above).
In this area, you can create the desired Fields and can also control their mix if you want to combine the effect of several fields. The operation of this area and the available objects and options correspond to the identical operating elements that you can also find on the deformers, for example. Follow these links to find out everything you need to know about Fields and how to use them:
If required, you can read all about the various Field objects here.
The operation of the Field area is documented here.