

Cache
The simulation can be saved as a sequence of files (one file per simulated frame), so that it can be loaded into other scenes at any time without having to recalculate the simulation. In addition, cache files can also be rendered directly without having the components of the simulation itself in the scene.
You define which properties should be stored in the cache files by activating the options in the Object settings of the Pyro Output object. The desired properties of the simulation must be marked there with On or On Export.
When you are satisfied with the simulation, simply press the Cache button in the Cache tab. The cache files are automatically named according to your Template Filename setting and saved to a vol directory that is automatically created in your project's directory based on the default $prj token. Note that a separate cache file is created for each animation frame. The token $frame automatically inserts the sequential frame number of the simulation at the desired position of the file name.
An already saved cache file can simply be dragged from Explorer or Finder into the Cache Paths list to load this cache sequence. As soon as you turn on the Enabled option, the active simulation will be loaded automatically. This does not require an active Pyro Emitter tag or Pyro Fuel tag in the scene.
The corresponding Redshift Pyro Volume or Redshift Volume material is assigned directly to the Pyro Output object, or to the RS Volume or Volume Loader object.
For the rendering of a smoke simulation, the density and, if necessary, color properties are usually sufficient for caching. In case of fire or explosion, the temperature must also be stored. Velocity is often only needed in combination with the Upres feature or for combining with other simulations (such as Rigid Body or particles) or generators (such as the Volume Builder).
The other properties Fuel, Pressure, Divergence are usually not needed and therefore need not be included in files intended for rendering.
If a cache file has been activated for Cache paths, it will be automatically loaded to match the current time in your animation and displayed by the Pyro Output object.
Note that the Pyro Output object will not compute a simulation if the Enabled option is checked, but the Cache Paths field is empty, or a file specified there is not found.
Here you can assign cache files directly by dragging them from Explorer or Finder. It is enough to assign any file of a .vdb sequence. The fact that multiple files can be assigned here makes it very easy to switch, for example, between different versions of a cached simulation. In each case, the simulation is read whose option was switched on to the left.
In order for this simulation to actually be read and displayed, however, the Enabled option at the top of the Cache page must also be switched on.
By right-clicking on a listed cache name, a context menu can be opened, which can be used to remove that entry or all entries at once from the list. Alternatively, the Delete Selected Caches button below the Cache Paths list can be used. However, this will then not only remove the marked entry from the list, but also delete the corresponding cache files.
When saving a Pyro simulation, individual .vdb files are created for each animation frame. It therefore makes no sense to define a fixed file name, because at least a consecutive numbering is needed in the file names so that they can later be loaded again in the correct order as a sequence. This field is therefore intended for defineing the components you want to use in the file names. These components of the file names are specified by so-called Tokens. These are abbreviations for certain names or also values. For example, the $prj abbreviation can be used to use the current project name, and the $frame abbreviation can be used to add the current frame number of the animation. These tokens can be added to and exchanged at will. You will find a selection list with further Tokens after clicking on the triangle area to the right of the Template Filename field.
Instead of Tokens you can also write directly into the Template Filename field, e.g., to integrate your own term into the file path. However, the numbering by the Token $frame should always be a part of the file name, so that an unambiguous order of the files is created.
When saving a cache by clicking the Cache or Cache Scene buttons, by default it is always saved to a folder named vol, which is created in the directory of your project. However, you will be asked again if you prefer a different location before the actual save.
After selecting a location, both the Pyro simulation is saved as a cache file and all Clothing, Soft Body, Rigid Body and Rope simulations of the scene are calculated as caches. However, files are created only for the Pyro simulations. All other simulations are stored as caches within the project and their simulation tags.
After the simulation is completed and saved, the caches automatically show up activated in the Cache Paths list and will henceforth be used to play the Pyro simulations in the scene.
This calculates the Pyro simulations associated with this Pyro Output object and saves them as a sequence of individual files. Before saving, you will be asked again if you want to define an individual folder. Otherwise, the saving is done automatically to a vol named folder created in the directory of your project. The composition of the file name is done via Template Filename and should therefore be checked before using the buttons Cache Scene or Cache.
After the simulation is finished and saved, the cache automatically shows up activated in the list of Cache Paths and will be used to replay the simulation from now on.
This option deletes the file sequences enabled at Cache Paths from the storage medium. In general, it makes sense to delete .vdb cache files that are no longer needed, as they can take up a lot of disk space. Finally, caches can be saved again at any time (e.g., for rendering or processing in other programs), provided you still have the original simulation scene.
Volume Information
This category appears only if the Enabled option on this settings page has been turned on and at the same time a loaded cache file has been enabled in the Cache Paths list. In that case you can read here for a selected cache file which Pyro properties are contained there, how big the used Voxel Size is and how many Voxels are contained in total. Note that the number of Voxels changes during the simulation. This value therefore always refers to the currently displayed simulation frame of the selected cache sequence. When navigating in time, the matching simulation result is always automatically loaded from the cache sequence.

These functions can be used to convert simulations that have already been saved as a cache into an even more finely subdivided Voxel grid and then add noise structures to make them even more detailed. The advantage of this function is that you can first simulate with a relatively coarse Voxel Size. The simulation is thus even faster to calculate and changes to the behavior and appearance can be implemented even more easily. If the behavior of this simulation is pleasing, it can be saved as a cache and refined in a second step. The advantage of this is that the behavior of the simulation is preserved and can now be refined. For example, different levels of detail of a simulation can be created.
If instead the Voxel Size of the original simulation had been reduced, this would have changed the behavior of the simulation.
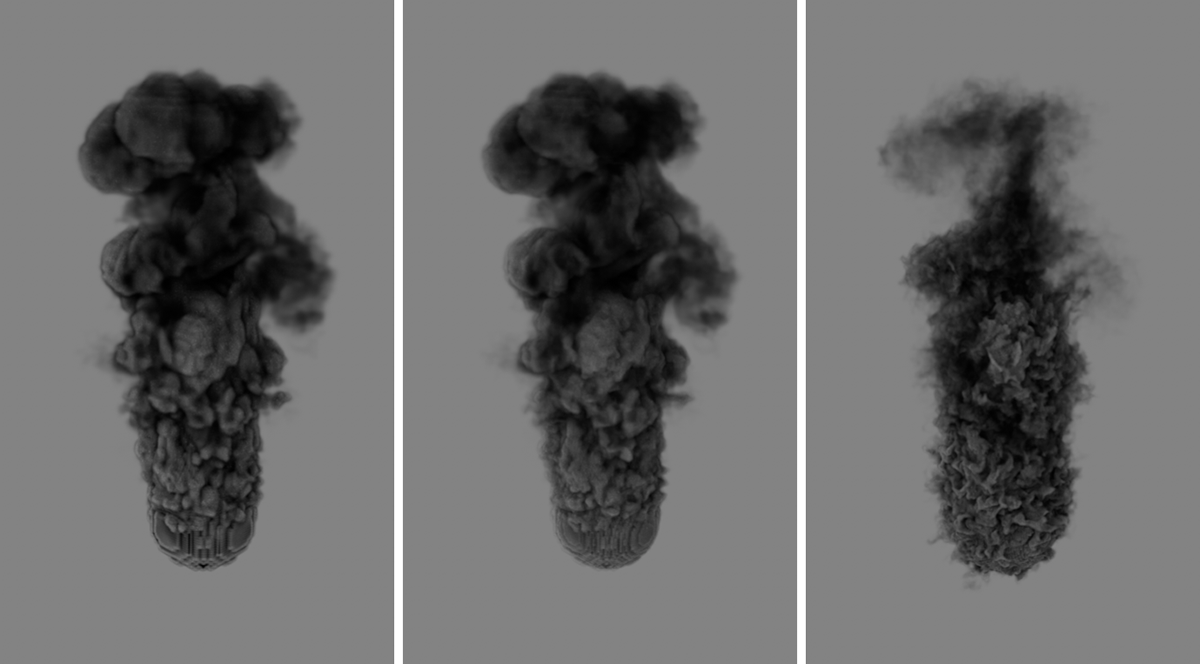 On the left is the coarse-resolution simulation created to define the desired behavior and then cached. The images to the right show two possible results after the simulation has been subdivided more finely by Upres and additionally overlaid with noise structures. Depending on the intensity used, different versions of the simulation can be created, but they are all based on the low-resolution version and therefore remain comparable in form.
This function is intended for situations where you want to have multiple Pyro simulations converted simultaneously as Upres caches. This does not require that all Pyro Output objects already have a loaded cache. The function can automatically scale up the current simulation and have it saved as a cache sequence at the end.
This subdivides the .vdb sequence marked in the Cache Paths list more finely and overlays it with additional noise structures. The result is automatically saved as a new cache sequence. In the name used for saving, the Upres Factor is automatically included in order to be able to directly recognize by how much finer the simulation was subdivided.
Note that the Upres calculation relies on the velocity component of a simulation. This should therefore be included in the selected cache. Moreover, it should be an un-masked velocity in the cache. So the Mask Velocity option in the Object tab of the Pyro Output object should remain off during the initial calculation of the cache.
This is one of the most important parameters for the Upres process, because it indirectly specifies the target size of the Voxels. The base in each case is given by the originalVoxel Size from the Pyro Scene. The Upres Factor value then leads to a subdivision of this Voxel Size. Here's an example:
Let's assume you have created a rough simulation with a Voxel Size of 5 cm and saved it as a cache. If you now use Upres Factor 2, the original Voxel Size will be halved (old Voxel Size/Upres Factor). Thus, a new Voxel tree is created where the Voxels have an edge length of only 2.5 cm. The coarse simulation is converted to the finer Voxel grid.
Accordingly, Upres Factor 4 would result in a new Voxel Size of 1.25 cm, one quarter of the original Voxel Size. Since caches that have already been created via Upres Active Cache can also be assigned with Upres Factor again, subdivisions of any scale can be created, which will then, however, also lead to increasingly larger files. It therefore makes sense to use Upres Factor for a relatively low-resolution simulation until the desired level of detail is reached.
This Octave value indicates the level of detail of the noise structures used to add additional turbulence to the subdivided simulations. The higher this value, the finer the swirls become visible. The following image illustrates this as an example.
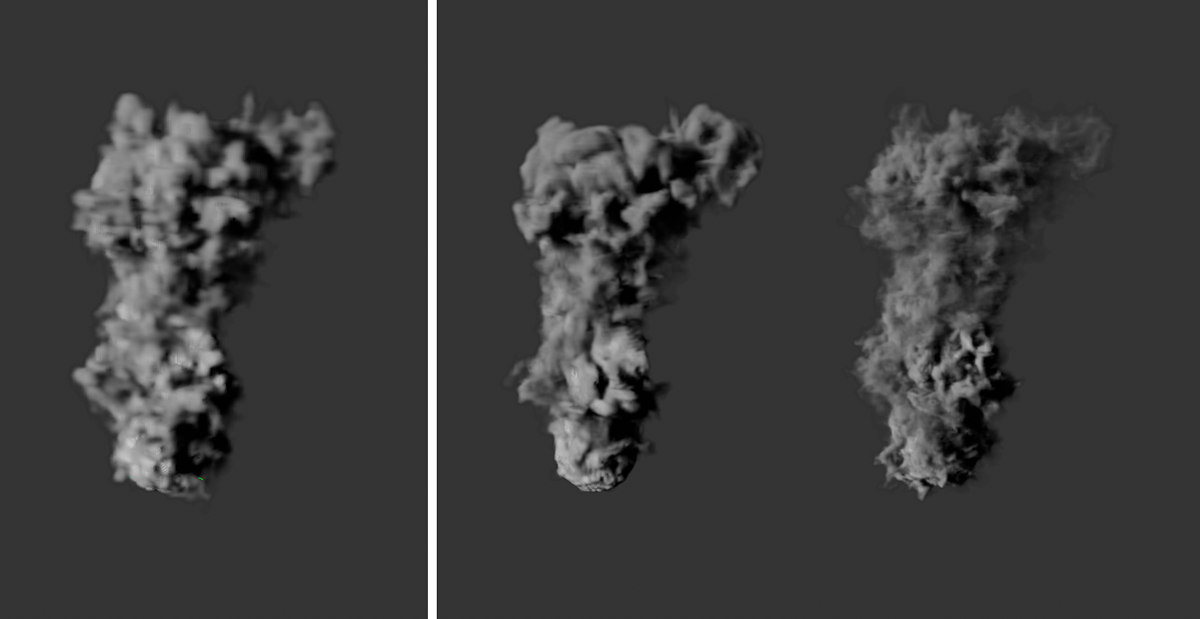 On the left is the coarse-resolution simulation used as the basis for the Upres function. To the right, you can see two possible results, each created with a Upres Factor value of 3. The only difference between these results is the change in the Additional Octave value. The left result uses the value 1, the right one uses the value 4.
As can be seen in the figure above, a higher Octave value leads to a refinement of the added noise structures, but this can then also lead to a local reduction in density. In the example used here, this is particularly visible at the upper edge of the simulated smoke column. The influence of the Octaves is controlled by the Noise Strength.
This is used to control the influence of the noise structure, which adds new, random swirls to the simulation.
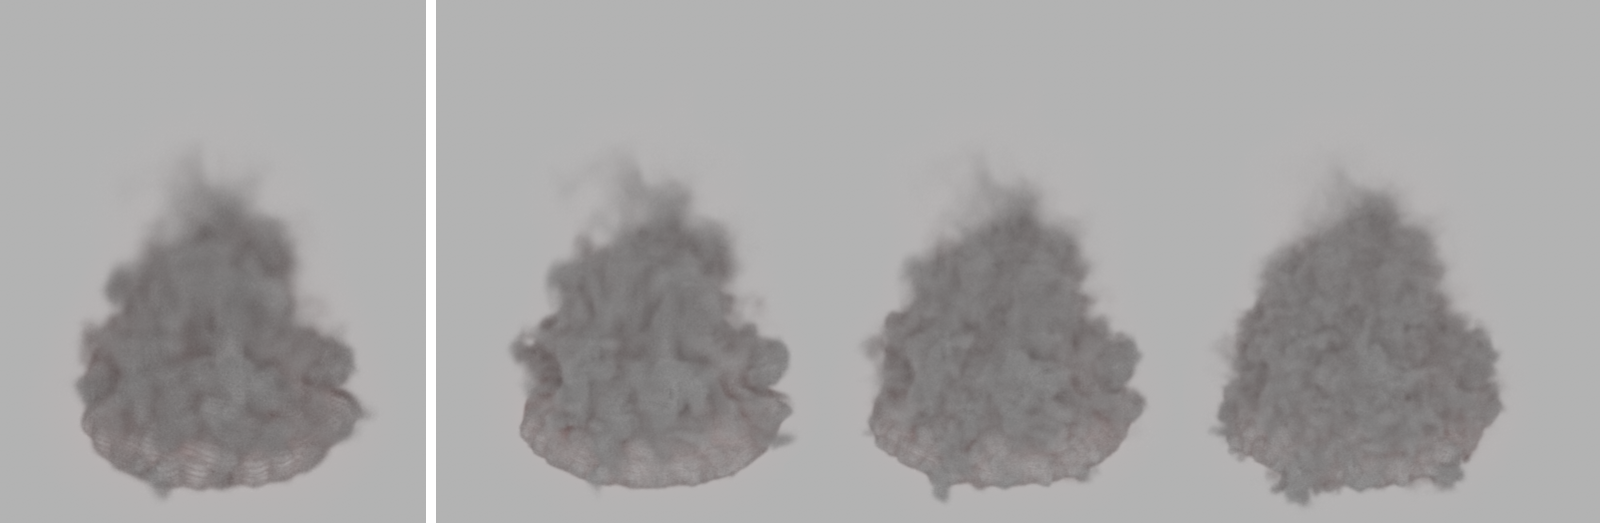 On the left you can see the original simulation. The images to the right were all calculated with a Upres Factor of 2 and two Additional Octaves, but with Noise Strength increasing from left to right (0.25, 1, 2).
Using a smaller noise structure results in more turbulence in a smaller space. A larger Noise Scale results in larger, more coherent shifts within the simulation.
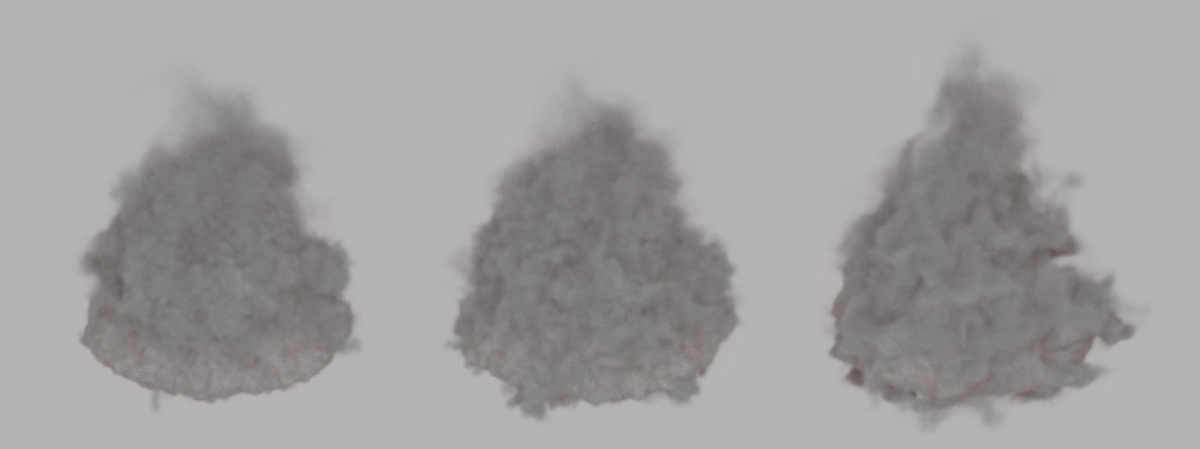 Increasing Noise Strength values from left to right (10%, 100%, 200%) with otherwise identical settings.
The noise structure is automatically varied over time. Increasing this value leads to an acceleration of these noise changes.
By default, the overlay and swirl is done by the noise structure for the entire Pyro simulation. However, if you want to finely swirl only a part of e.g., a cloud, Fields can be used here to spatially limit the influence of the noise structure. The following figure demonstrates this with a simple example using a Linear Field.
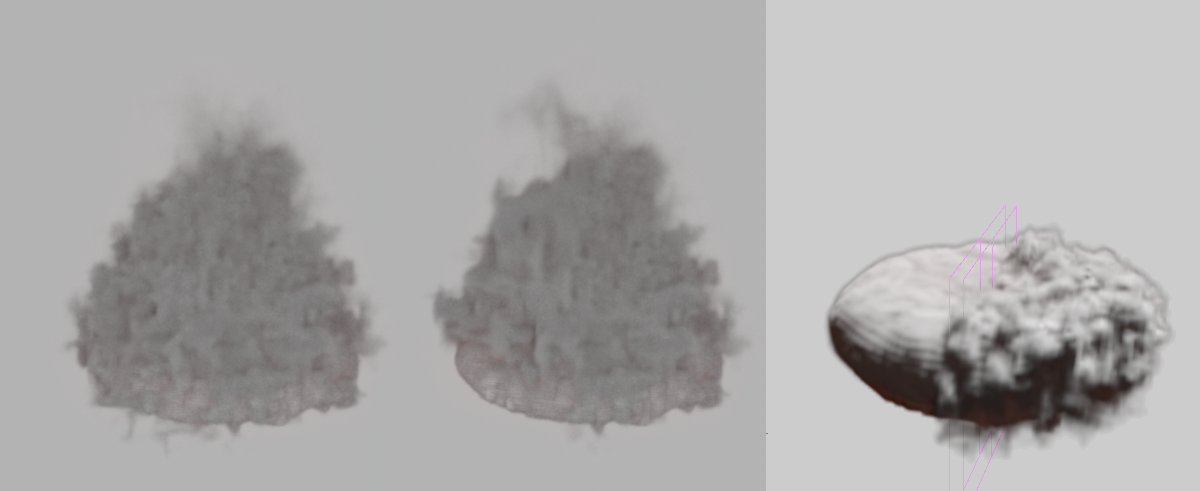 On the left, the noise was applied to the entire simulation without a Field; in the center, a Linear Field was used to apply the noise only to the right half of the smoke. The editor display on the right makes the effect and the position of the Linear Field within the simulation even clearer.