

Basic
This setting can be used to change the Node’s name. If you happen to forget what function a given Node has due to its modified name, its original name will still be shown in the Info area of the Node Editor when the Node is selected.
Each Node can be modified due to program updates or other changes. This is why the Nodes use a type of version number internally. Using this menu, the desired version can be selected or the latest version can be used to ensure that the most current version of the Node is used.
More information about versioning can be found under the Version tag.
To maintain an overview when working with complex Node setups, Nodes can be colored individually (some Node types already have a color assigned to them).
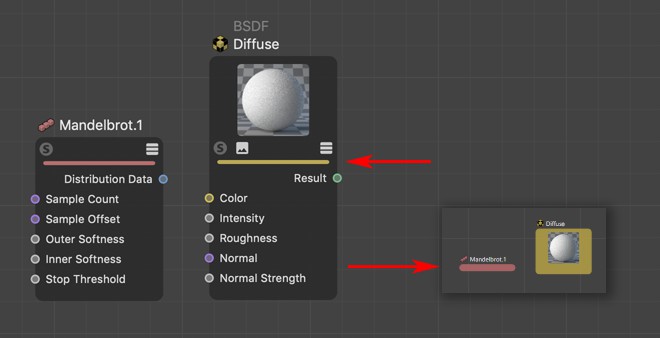 Right: Node display when zooming out.
These 3 options reflect the 3 port commands in the Node menu of the Node Editor for the respective options. Here you can essentially define if and which ports should be shown.
- Expanded/Collapsed: See Show All Ports.
- Connected: See Show Connected Ports.
Here you can define for each Node individually, if a preview - not all Nodes have one - should be displayed.
This can also be done interactively directly in the Node view by clicking on the 2nd icon from the left over the color bar.
In the Preferences menu (Node Editor tab), you can also define the preview display visibility for all new Nodes that will be created.
Here you can define if any Node comments should be displayed in the Node view under the respective Node:
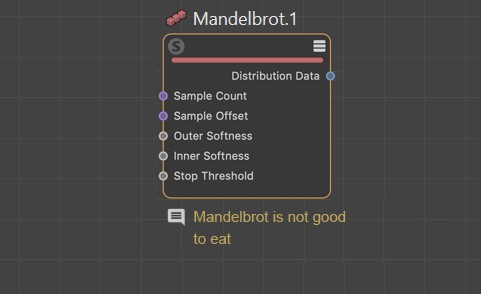
This can be done interactively in the Node view for existing comments by clicking on the Comment icon on the left under the Node.
Here you can enter your comment. Longer texts will be displayed in abbreviated form in the Node Editor.
This option relates to the display in the Scene Manager, e.g., if this Node is part of an object’s Stack. If enabled, this function will be shown as a tag symbol next to the object in the Scene Manager. This effect can be controlled directly in the Scene Manager if you click on the bookmark symbol next to the element in the stack.
Remove Input
To create groups, objects must be able to be organized hierarchically. This is possible directly at the Nodes that generate a complete object, such as the Primitive Node, the Classic Object node or the Import Geometry Node.
For this purpose, you will find a variable number of inputs for Child objects at the node, i.e., sub-objects, the number of which you can create yourself in the "Base" settings of the node using the familiar Add Input and Remove Input buttons.
The objects introduced here are automatically used as Children in the Scene Manager.
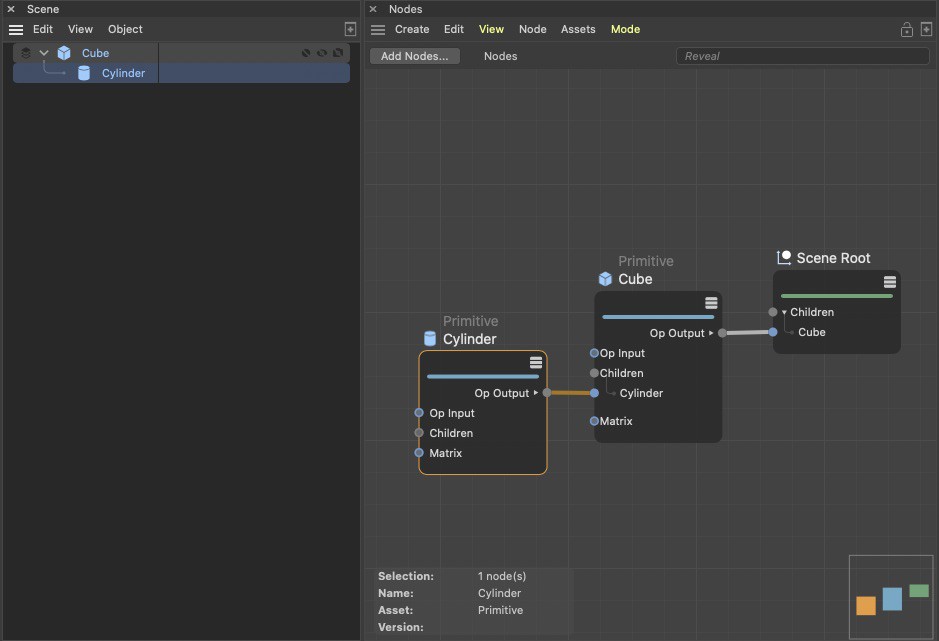 Nodes that create complete objects, such as the "primitive" node, have a variable number of inputs for objects to be grouped as child objects.
Remove Input
To create groups, objects must be able to be organized hierarchically. This is possible directly at the Nodes that generate a complete object, such as the Primitive Node, the Classic Object node or the Import Geometry Node.
For this purpose, you will find a variable number of inputs for Child objects at the node, i.e., sub-objects, the number of which you can create yourself in the "Base" settings of the node using the familiar Add Input and Remove Input buttons.
The objects introduced here are automatically used as Children in the Scene Manager.
Nodes that create complete objects, such as the "primitive" node, have a variable number of inputs for objects to be grouped as child objects.