

Cluster
The settings here work in conjunction with the Scatter object's Cluster settings rather than overriding them, as is the case with the Variation and Filter presets. This makes it possible to have certain objects appear only in specific cluster groups.
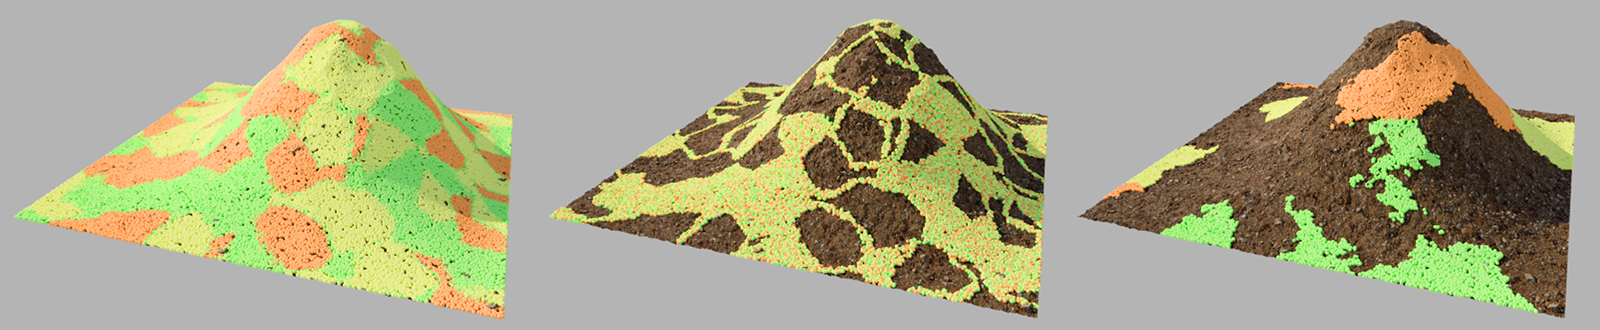
Here, you can choose whether only the Cluster settings of the Scatter object should apply (Auto) or whether the Cluster settings of the tag should be used (Override).
The figure above provides some examples of how the individual configuration of Cluster IDs can be used to modify the distribution of objects across the cluster islands. In each case, the basis is the Count setting in the Scatter object’s Clusters settings. First, select a number there that corresponds to the number of groups you want to create using the distributed objects.
If you want to distribute three objects that are to appear separately in different clusters, you must set the cluster Count on the Scatter object to at least 3 (see example on the left in the above figure). Higher values make sense if, for example, you also want some cluster cells to remain completely empty in order to preserve free space between the cluster islands (see example on the right in the figure above).
Cluster IDs can also be assigned multiple times if different objects are to appear on the same cluster cell.
This allows the noise structure for the selected Cluster ID to be scaled individually. However, since the noise cells are three-dimensional, there is not necessarily a direct correlation between this percentage and the size of an instance group.